Showing posts with label Rainbow. Show all posts

Tuesday, 2 May 2023

Rainbow Comic Chiffon Cake


Double Rainbow Cartoon Chiffon Cake, with recipe🥰. 'Too-n' cute to eat?  

Ingredients (7" angel cake pan)🌈 
1 whole egg 
27 g castor sugar 
52 g oil 
52g milk 
7g vanilla extract 
80g cake flour, sifted 

Whisk all ingredients above till smooth. Divide the batter into 6 and add respective food coloring. 

5 egg whites 
1/4 tsp cream of tartar 
65 g castor sugar 

Whip egg whites till firm peaks. Divide the meringue into 6 and fold into each color. Pipe on the rainbow stripes. Bake at 140C for 55 min for the big cake and 25 min for the small cake. Outline with chocolate ganache.💕 

Recipe video here on my IG.  

With love, 

Susanne


Read More »

Monday, 10 October 2022

Retro Chiffon Cake


*Recipe* Retro prints lemon chiffon cake!❤️💙💛

I had so much fun making this one! Who is a lemon cake lover? 🍋 Using @LorAnnGlobal’s Lemon Bakery Emulsion is the secret ingredient to adding bold, lemony, flavor to all your citrus treats.

Lemon Retro Chiffon Cake 
3 egg yolks 
4 tsp castor sugar (15g) 
2 tbsp oil (30g) 
2 tbsp water (30g) 
1 tsp LorAnn Oils (@LorAnnGlobal) Lemon Bakery Emulsion, product of the USA 
1/3 cup cake flour (45g) 

3 egg whites 
1/5 cup castor sugar (40g) 
1/4 tsp cream of tartar or lemon juice 

Video reel on the piping here on my IG

Head on to Lorann Oils website for step-by-step instructions!

With lots of love,
Susanne 


Read More »

Thursday, 18 August 2022

Double Rainbow Chiffon Cake


This is a double rainbow chiffon cake that is my newest version! It's a level up from my Rainbow chiffon cake that is on the cover of Creative baking: Chiffon Cakes.  You can refer to the recipe here, or the step-by-step recipe with pictures in the cookbook.

Here is an Reel video tutorial of how to pipe the new version from my IG (@susanne.decochiffon).

Hope you found it useful!

With lots of love,
Susanne


Read More »

Thursday, 7 July 2022

Rainbow Cheesecake Pushpops (with pattern and surprise!)


I am teaching Rainbow Cheesecake Pushpops at my church's culinary arts ministry on Sunday! I was inspired to make hearts pattern and surprise heart last week when I re-trialed the recipe. Thank God for the inspiration!  


My hubby was the one who gave the idea of eating cheesecake from push pops initially. Thank God the first experiment worked! 


This is my second experiment with the hidden hearts. It was quite fun to eat too!

I made a IG reel video of the layers here. Hope you like it!


Rainbow Cheesecake Push Pops (for CAM, Susanne)
Makes 4 push pops

7g gelatin
50g cold water
250g cream cheese
60g castor sugar
15g lemon juice (1 tbsp)
5g vanilla essence
130g heavy cream
Food colouring: Pink, blue and yellow

1. Bloom gelatin in cold water. Melt gelatin in microwave (20s). Allow the mixture to cool slightly.

2. Using an electric mixer, whisk cream cheese, sugar, lemon juice and vanilla essence until smooth.

3. Add in whipping cream and mix well.

4. Drizzle in melted gelatin and whisk till smooth.

5. Divide batter into rainbow colours (3/4 cup). Add in respective colours and mix well.

6. Fill rainbow colours in push pop. Chill for 30min-1hr in freezer before serving, or >2hrs in fridge.

With lots of love,
Susanne


Read More »

Sunday, 5 June 2022

Yuzu Vanilla Honey Rainbow Swiss Roll Class

 Someone requested Rainbow swirl cream type of cake as a Junior chef class material so I designed something that doesn't require one to have a turntable and can be baked in a short time. Presenting my yuzu vanilla honey rainbow swiss roll! This is totally dairy-free too!


This swiss roll is made of yuzu vanilla chiffon sponge, yuzu vanilla honey jelly, and vanilla whipped cream (non-dairy). I chose non-dairy whipping cream as the medium for teaching how to create rainbow swirls as it is the fastest and easiest medium for kids to handle. 

This class is full of techniques that can be applied to other bakes, such as making chiffon cakes, working with agar jellies, and cream piping techniques.

Please click on this link for more details or to register.


with love,

Phay Shing


Read More »

Wednesday, 18 May 2022

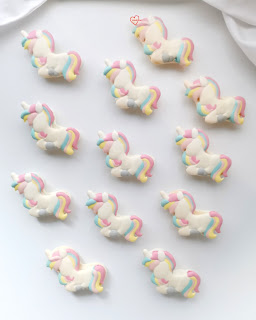
Rainbow Unicorn Macaron Carousel

 I made this rainbow unicorn macaron carousel a couple of months ago and finally posting it!


I always preferred bakes without age and name for social media posts so I used the above as the cover picture. But actually the completed bake looks like this:


I used swiss meringue method to make the macaron shells.

Sharing a collage of the piped macaron batter. Please excuse the difference in colours of the carousel frame as it was due to camera auto white balance correction. I was running low on teal coloured batter so I used a little white batter on the large base shells. If you are interested to know how to pipe the swirl macarons, you may refer to my Macaron Basics book.The video tutorial linked to the book can be found in this post.

I used black edible marker and peach coloured lustre dust to decorate the unicorns.

I filled the carousel with vanilla ganache and dark chocolate ganache.


I have made many unicorn macaron carousels over the years but I think this set is the most elegant 😊


Follow me on Instagram at phay_shing if you would like to see more up-to-date bakes from me as I may not post everything in the blog in a timely manner.


with love,

Phay Shing


Read More »

Thursday, 5 May 2022

Unicorn and Mermaid Pusheen Cookies n Cream Macarons

This is another way overdue post. I made these unicorn and mermaid Pusheens together with the choux pastry version way back in way January this year!

Trying to create a cloudy beach scene here😆

I made these macarons using the swiss meringue method and decorated the macaron shells using edible marker and a mixture of edible marker and vodka wash (for the details on the unicorn horn).
Top view look at decorated macaron shells

Checkout the awesome feet on the shells!

I filled the macarons with cookies n cream swiss meringue buttercream as requested.


with love,

Phay Shing


Read More »

Sunday, 20 March 2022

Cute Animals Bento Chiffon Cake Class


*New Class* 
Cute Animals Bento Chiffon Cakes!💕 

Join me to learn how to make these cuties in March!🥰 

You will learn how to bake these cute animals chiffon cake toppers as well as pastel bento chiffon cakes. 

Link to join is here

You can see a short video more about what you will learn here

See you! 

Love, 
Susanne 
Read More »

Sunday, 13 March 2022

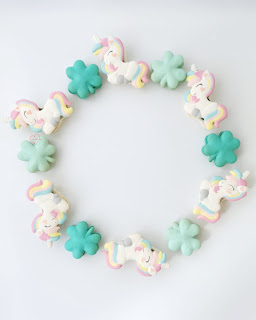
Nut-Free Rainbow Unicorn Macarons

My friend requested for some nut-free rainbow unicorn macarons. Since St Patrick's Day is just around the corner, I threw in some shamrock and rainbow cloud macarons as well for photography! 


I made nut-free macarons before using a mix of rice flour and pumpkin seed flour, as well as cake flour. This time round I needed a pure white base so I can't use pumpkin seed. Wheat-based flour is a convenient alternative.  The last attempt of wheat flour-based macarons were made using french method. This time round I use swiss method.

Cake flour based nut-free macaron recipe
Ingredients (makes about 40 - 50 macarons) :
Mass
200g cake flour (low protein wheat flour) 
200g icing sugar (mine has cornstarch added) 
80g egg whites
1 tsp white powder colouring (optional) 
Gel food colouring 

Swiss Meringue 
145g caster sugar
40g icing sugar
110g egg whites 
1 tsp egg white powder (optional) 
1/2 tsp cream of tartar (optional) 

Steps:
1. Prepare template and line baking tray with parchment paper. 

2. Prepare the mass. Sift together dry ingredients in the mass. Add egg whites to form a thick paste. Cover with cling wrap and set aside. 

3. Make swiss meringue. Whisk together egg white powder, icing sugar and caster sugar.  Add the sugar mix and cream of tartar into egg whites in standmixer bowl (or clean metal mixing bowl if using handheld mixer). Set bowl over saucepan of water. Heat the water over low heat and whisk the egg whites with sugar mix until temperature reaches about 50C. Take your time to heat up the water to ensure all sugar is dissolved. 

4. Transfer to standmixer and whip on medium speed until firm peak. The meringue peak should be fairly straight with a small curl at the end when you slowly lift the beater. 

5. Fold in about a third of the meringue into the mass and mix well thoroughly. Fold in the rest of meringue until just combined. Split into the various rainbow colours and add the respective gel colouring. Fold until the consistency is correct. The batter should fall off the spatula in a continuous manner and any peaks of batter disappear in about 15 seconds. 

6. Transfer batter into piping bag and pipe the unicorns. Let the piped batter rest until it isn't sticky to touch at all.  Duration of resting depends on humidity. It can vary from 30min to 2 hours.


Piped batter. Takes about an hour to pipe a tray! 

7. Preheat oven to 165C and set oven rack to second lowest position. Once the tray is in, reduce temperature to 140C and bake for 10-12 min. Reduce temperature to 120C and bake for another 10-12 min or until feet doesn't appear wet. Cool completely before peeling parchment paper away from macaron shell. 

Freshly baked shells! 

I decorated the shells with black edible marker and peach coloured lustre dust. A little vodka is used to make paint with black marker for the light horn lines and with lustre dust for the heart shaped inner ear and cheek. 

Pandan coconut white chocolate buttercream
Ingredients:
75g unsalted butter
90g white chocolate (finely chopped or use chips) 
12g 100% dark chocolate couverture (may replace with white chocolate and/or butter if unavailable) 
38g coconut cream powder
1/4 tsp salt 
1 and 1/4 tsp pandan paste

Steps:
1. Place all ingredients in a heatproof bowl. Set over pot of freshly boiled water without the water touching the base of the bowl. Melt the chocolate and butter and mix well. 

2. Set aside in aircon room temperature for an hour to firm up. Alternatively, refrigerated for 10 to 15 min or until toothpaste consistency. You may choose to whip the mixture until it is lighter in texture. 

3. Transfer to piping bag and fill the macaron shells. Mature the filled macarons by storing in fridge in airtight container for at least 24 h before consuming. Let the container stay at room temperature for 20 min before opening and consuming the macarons. 

Filling the unicorns! 


Follow me on Instagram @phay_shing as I post my work more frequently there and not everything I do gets posted on the blog.


With love, 

Phay Shing

Read More »

Monday, 7 March 2022

Rainbow Angel Food Cake


(Recipe) Rainbow Angel food cake using natural coloring from @suncorefoods!
My first time trying out deco-angel food cake. Very glad it worked out! Texture is light and airy.

Rainbow Angel Food Cake
1 cup cake flour (120g)
¾ cup caster sugar (150g)
½ tsp (2g) salt

10 egg whites (360g)
1/3 cup caster sugar (150g)
1.5 tsp cream of tartar 96g)
2 tsp vanilla extract (10g)

@suncorefoods cerise prickly pear, yellow safflower, blue spirulina, jade matcha, ebony carrot for the rainbow colors

Pulse cake flour with ¾ cup caster sugar and salt till fine and powdery.
In a clean mixing bowl, whisk egg whites with cream of tartar till frothy. Add in ¾ cup caster sugar gradually and whisk till firm peaks. Beat in vanilla extract till just combined.
Fold the powdery dry mixture into the meringue in 3 additions. Before the mixture is completely folded, divide the mixture into 5 and fold in the rainbow color powders (I used blue and yellow to make green).

Pipe rainbow colored batter into a 6” square tube pan, as well as heart-shaped and round baking cups to make the ‘lollipops’. Bake the tube pan at 150C for 50+min and the cupcakes for 18min. Pour leftover yellow batter into cake pop molds to bake the ‘unicorn’ (18 mins).
Assemble the rainbow angel cake using marshmallow glue. Enjoy! =)

With love,
Susanne

Read More »

Thursday, 24 February 2022

3D Rainbow Cloud Macarons (video tutorial)

Some bakes come about unplanned and this was one of them! I had leftover batter from a bake and therefore a chance to try out a technique by Melinda of missmelindasmakery (Instagram account) to create these 3D rainbow cloud macarons! 


Usually a strip of rainbow sour candy is used for the rainbow. But I created this popular treat using macarons only! 

Years ago back in 2016, I explored piping macaron batter on non-flat surfaces and tried 2 things. 1. Piping on silicone hemisphere molds. 2. Piping on rolled up parchment paper. With the first option, I have since made a variety of things like teacups, various animals including a hedgehog that appeared in my Macaron Basics book, hot-air balloon, solar system just to name a few. But I couldn't see what good I could do with the second option so I didn't develop that area. Melinda took it further by piping batter on flat parchment paper surface and molded the batter on a pre-formed contoured surface before baking. This opens up many possibilities and I was excited to try once again but didn't have the opportunity until now. 

This bake looks deceptively complex but is actually very simple and you can make do without a template like me too although it would be neater to use a template for the clouds. I made a short video of the process of making these! 


Some tips for successful 3D rainbow-making: 

1. Use an underfolded batter to pipe if you wish so the batter doesn't pool at the foot of the rainbow when you place the parchment over the rolled up foil. 

2. If you are using regular macaron batter like me, wait a few minutes or until a very thin membrane forms at the surface of the piped batter before transferring the parchment on top of the foil. Don't wait too long or the piped batter will crack when you place the parchment over foil. Don't wait for too short a time either or the batter will start pooling at the foot of the rainbow. 

3. Wait until the batter is completely dry to touch before baking. 

4. Bake as you would regular macarons in terms of temperature and time. 

5. Cool completely and remove the rainbows by  gently pressing the parchment away from the base of the rainbow. Don't rush this process or you may break the rainbows by accident. If they are really stuck, bake longer in the oven at a low temperature that doesn't brown it further, about 110-130C.

I used my regular swiss meringue method recipe for the shells and made a simple but yummy lemon white chocolate ganache for filling which I will share here. 

Lemon white chocolate ganache 
Ingredients:
60g unsalted butter
80g white chocolate, finely chopped or use chips 
1 lemon zest
20-25g lemon juice (according to taste) 
A pinch of salt

Feel free to use more butter and a little bit more lemon juice according to taste and your climate. It is very warm in Singapore so the fillings I make tend to be firmer. 

Steps:
1. Place all ingredients except zest and juice in a heatproof bowl. Melt over hot saucepan of water slowly without the bottom of yhr bowl touching the water. Do not overheat. Do not panic either if the mixture splits. Just let it cool down at room temperature and whisk everything together. It will become smooth and silky again. 

2. Add lemon zest and mix well. 

3. Add lemom juice 1 tsp at a time and mix well with each addition. Add as much or as little juice as you like according to taste, but add it in a bit at a time. You should get a smooth and silky ganache. 

4. Transfer to piping bag and fill the macaron shells. Store in airtight condition for at least 24h before consuming. 

This timeless bake is suitable for a variety of occassions like St Patrick's Day, Easter and of course birthdays and weddings if you wish! 


Follow me on Instagram at phay_shing as I am more active there and post more stuff there than on the blog and Facebook.


With love, 

Phay Shing

Read More »

Friday, 12 November 2021

Coconut Lollipop Roll Cake


Have you played cake dominoes before?
 
Sharing an easy way to make Rainbow Cake Lollipops by slicing!  

Everything is colored naturally using @suncorefood powders!
 
Lollipop Coconut Roll Cake
5 egg yolks 
30g superfine/caster sugar 
50g coconut oil 
75g coconut/full cream milk 
½ tsp vanilla extract 
70g all-purpose flour 
20g corn starch 
Pinch of salt 

5 egg whites
75g superfine/caster sugar
½ tsp lemon juice
 
@suncorefoods purple sweet potato with red beet, yellow safflower and blue spirulina for the colors

Whisk egg yolks with sugar, followed by coconut oil, milk and vanilla. Add in sifted dry ingredients and whisk till well combined. Divide the batter 3(plain): 1(purple) : 1 (blue) : 1(yellow). Add in supercolor powders and mix till desired colors.

In another clean mixing bowl, whisk egg whites with sugar till firm peaks. Divide the meringue 3: 1: 1: 1. Fold in the meringue to the above batters till well incorporated. Pour the plain batter into a 10-inch cake pan. Fill another 10-inch pan with the tricolor batter side-by-side. Bake at 160C for 16 mins.

Place the plain sheet cake on top of the tricolor sheet cake and roll up.

Slice to enjoy the cute lollipops! =)

Short video of the process here:


And here's another cute shot! =)

Sending lots of love!

Susanne

Read More »

Sunday, 18 July 2021

Arching Rainbow Chiffon Cake


A soaring rainbow on the side of the chiffon cake, topped by another chiffon cake rainbow (from first Chiffon cake cookbook). This creation was made a few months back, inspired by God's promises for us, and also was for Creme de la Creme, our Singapore baking show where I was very honored and thankful to appear as a guest judge on Episode 4. Even though the world changes due to COVID, I hope that we can remember the promise and hope from the Rainbow. 

I am thinking of sharing and teaching this cake as an item on Howtocakeit in the coming months. Apologies for the less blogging and other activity too. I have been feeling a little tired with family commitments and also busy with teaching. 

Meanwhile, you can check out my Rainbow chiffon cake online class (also a white cake recipe) and cookbooks here on Rainbow here first.

Everyone do take care and pace yourself! *hugs*

With lots of love,
Susanne

Read More »

Sunday, 20 June 2021

Cony and Brown 'XO' Chiffon Cake


Hugs & Kisses! XOXO to you! 💕😘 

How is everyone doing this week? 

Cutest XO alphabet molds from @moldyfundotcom

I baked a Rainbow chiffon cake in the alphabet molds. 

Last week of school holidays! Stay safe and take care! 

With lots of love,
Susanne
Read More »

Saturday, 15 May 2021

Popit Chiffon Cake


Which is cake and which is toy? =p 

Pop It Chiffon Cake, requested by my kids! 💓

If you have a primary kid, chances are you would have heard of this new fidget toy craze. It somewhat mimics a bubble wrap, and helps to provide sensory input and help focus for young children. Regardless of whether they need the regulation or not, kids all love bubble wrap don't they? =)  

The two above belong to my girls. And just for fun, I had a Pop It Competition with my kids over Mother's day =p. It is somewhat nice to understand my kids more and bond with them. 

Check out the video here. Watch with the sound on! The popping sound is actually quite cute and therapeutic =).

By the way, the cake is not baked from a mold but assembled from plain cake =).

Stay safe everyone hugs

With love,

Susanne


Read More »

Thursday, 22 April 2021

Galaxy Chiffon Cake Truffles Class


New Class Alert! Want to learn how to make these cute Galaxy Chiffon Cake Truffles with me on @howtocakeit? <3 

Join me on June 11th 730pm EST (June 12th 730am GMT+8) where I will be teaching live! You will also get lifetime access to the video tutorial, workbook and private FB group! Sign up here

Bundle up with my Chiffon Lollipop class and get 25% off for 2 classes! 

Here's a preview video of the Galaxy Truffles. 

It’s going to be a super cute one! =)

With love,
Susanne


Read More »

Thursday, 8 April 2021

Hidden Rainbow Chiffon Cake


Rainbows are my favourite sources of inspiration! Many of my cakes have been inspired by rainbows. I was to make this cake over Easter as we remembered God being faithful to His promises and wonderful resurrection of Jesus!

I was really nervous slicing into the cake!


This is actually not my first hidden rainbow chiffon cake but its my most successful one and the very first one I posted. The previous ones were given away so I couldn't get a nice shot myself. 

The recipes of this Hidden Rainbow chiffon cake has been shared in various recipes, namely the Chiffon Cake Rainbow in Book  1: Creative baking Chiffon Cakes, the Sky chiffon cake in Book 3: Deco Chiffon Cake Basics, and the double baked technique in all 3 Deco Chiffon Cakes books.


Hope this special creation made you smile too!

With lots of love,
Susanne

 
Read More »

Saturday, 12 September 2020

Hello Kitty and Donutella in Hot-Air Balloon Macarons

Sometimes you don't know something can be done until you try it. This is one of those experimental bakes that turned out really well and I thank God for it 😊. Presenting my version of Hello Kitty with Donutella on a hot-air balloon trip over the rainbow, all made using macarons! 

Ok the marshmellow clouds and the balloon ropes aren't made of macarons 😂. 

Two things I experimented with using macaron batter 1) as a glue for macaron structures, and 2) creating a pastel striped pattern on hemispherical macaron shells. As I needed fairly good meringue stability over many hours, I used the swiss meringue method

Just to share some pictures and tips about the process... 


Piping the panels of the hot-air balloon basket and characters. You can see I had trouble with piping Donutella's ears 🤣

I decorated the characters with black edible marker and royal icing

The panels of the basket were glued together using the same dark pink macaron batter (left in piping bag for many hours). I dried the assembled baskets at 65°C in the oven for 20 min until dry to touch, and then ramped up the temperature to 110 °C to bake for another 15-20min. This drying/baking temperature and time profile is to create a membrane on the piped batter surface as soon as possible, as well as to set the structure by baking without it developing feet. 

Ta-dah! I was so happy it worked! Are the macaron shells super hard due to extended baking? Not at all! I did a taste test. 


I bit into the trial basket and was pleasantly surprised the texture wasn't compromised at all. This is probably due to the low temperature used to bake the joints. The macaron shells are nicely full too! 

I wasn't confident the striped hemispheres would turn out pretty because of the pastel colours involved. Hemispheres generally need to be baked at a higher temperature for a longer time, especially since I used the largest silicone mould I have at home (diameter about 6cm). I added white powder food colouring and eyeballed the oven thermometer throughout baking to prevent browning from happening. Piping the stripes on a curved surface was challenging too. I had to scrape off some of the excess batter that flowed off too much and pooled at the base of the hemisphere. 

Piped batter on hemispherical silicone mould. 


Freshly baked shells! 

I filled the macaron shells with whipped raspberry strawberry white chocolate ganache. I piped a thin wall of melted white chocolate with a little vegetable shortening to provide some stability and firmness to the structure. 

Recipe for mixed berry ganache
Ingredients:
90g white chocolate couverture (I used Callebaut) 
25g unsalted butter
1/8 tsp salt
40g homemade mixed berry compote*
1 tsp freeze-dried raspberry powder
1 tsp freeze-dried strawberry powder

* I pureed equal amounts by weight of raspberry (pips sieved out) and strawberry, and added 10% by weight of sugar, a pinch of salt and a tsp of lemon juice. Cooked and reduced over low heat until about 60% of original total weight of ingredients. If you find this too troublesome, you may replace with whipping cream and double the amount of freeze-dried fruit powder or to taste. The compote can be kept in the fridge for up to a month in a sterilised glass jar. 

Steps: 
1. Place white chocolate, butter and dalt in a heatproof bowl and melt over a freshly boiled pot of water without the bowl touching the hot water. Alternatively, you may use microwave oven to melt chocolate and butter but be careful not to overheat. Chill in fridge for 5-10 min or until scoopable consistency. If the chocolate mix becomes hard, just let it sit at room temperature for a while. 

2. In the mean time, mix the compote and freeze-dried fruit powders together in a small bowl. Set aside. 

3. When the white chocolate mixture is firmed up (but not hard), whip it with a spatula until light and fluffy, like buttercream.

4. Add berry mix unto the whipped white chocolate, 1 tbs at a time, mixing until well combined before adding more. 

5. Transfer into piping bag and fill the macarons. 

Filling the rainbow

I didn't fill the hemispheres with the ganache as it would be too heavy to "float". I packed the extra filling instead for the recipient to fill when she wants to consume. I filled the balloons with marshmellows instead. 

A closer look at the hot-air balloons! 

I always make extra macarons, especially for characters, due to the high chance of breakage when handling it. The recipient plated the extras so nicely I just have to share it 😊. 

The macaron creation at the party! 


Did this creation put a smile on your face as it did to the recipient? 


With love, 

Phay Shing 

Read More »

Wednesday, 2 September 2020

Shopkins Rainbow Chiffon Cake


We all need Rainbows🌈 in these strange times of adjusting to the new normal!

Sending a huge, cheerful Rainbow, in the form of Shopkins Rainbow bite!🌈💕

You can also learn how to make the Chiffon cake Rainbow from my latest 2-in-1 LTS Rainbow online class (sign up link here).

And ending with my favorite quote: There is a Rainbow of hope🌈 at the end of every Storm!

Have a blessed week!💓💓😘

With lots of love,
Susanne

Read More »

Wednesday, 26 August 2020

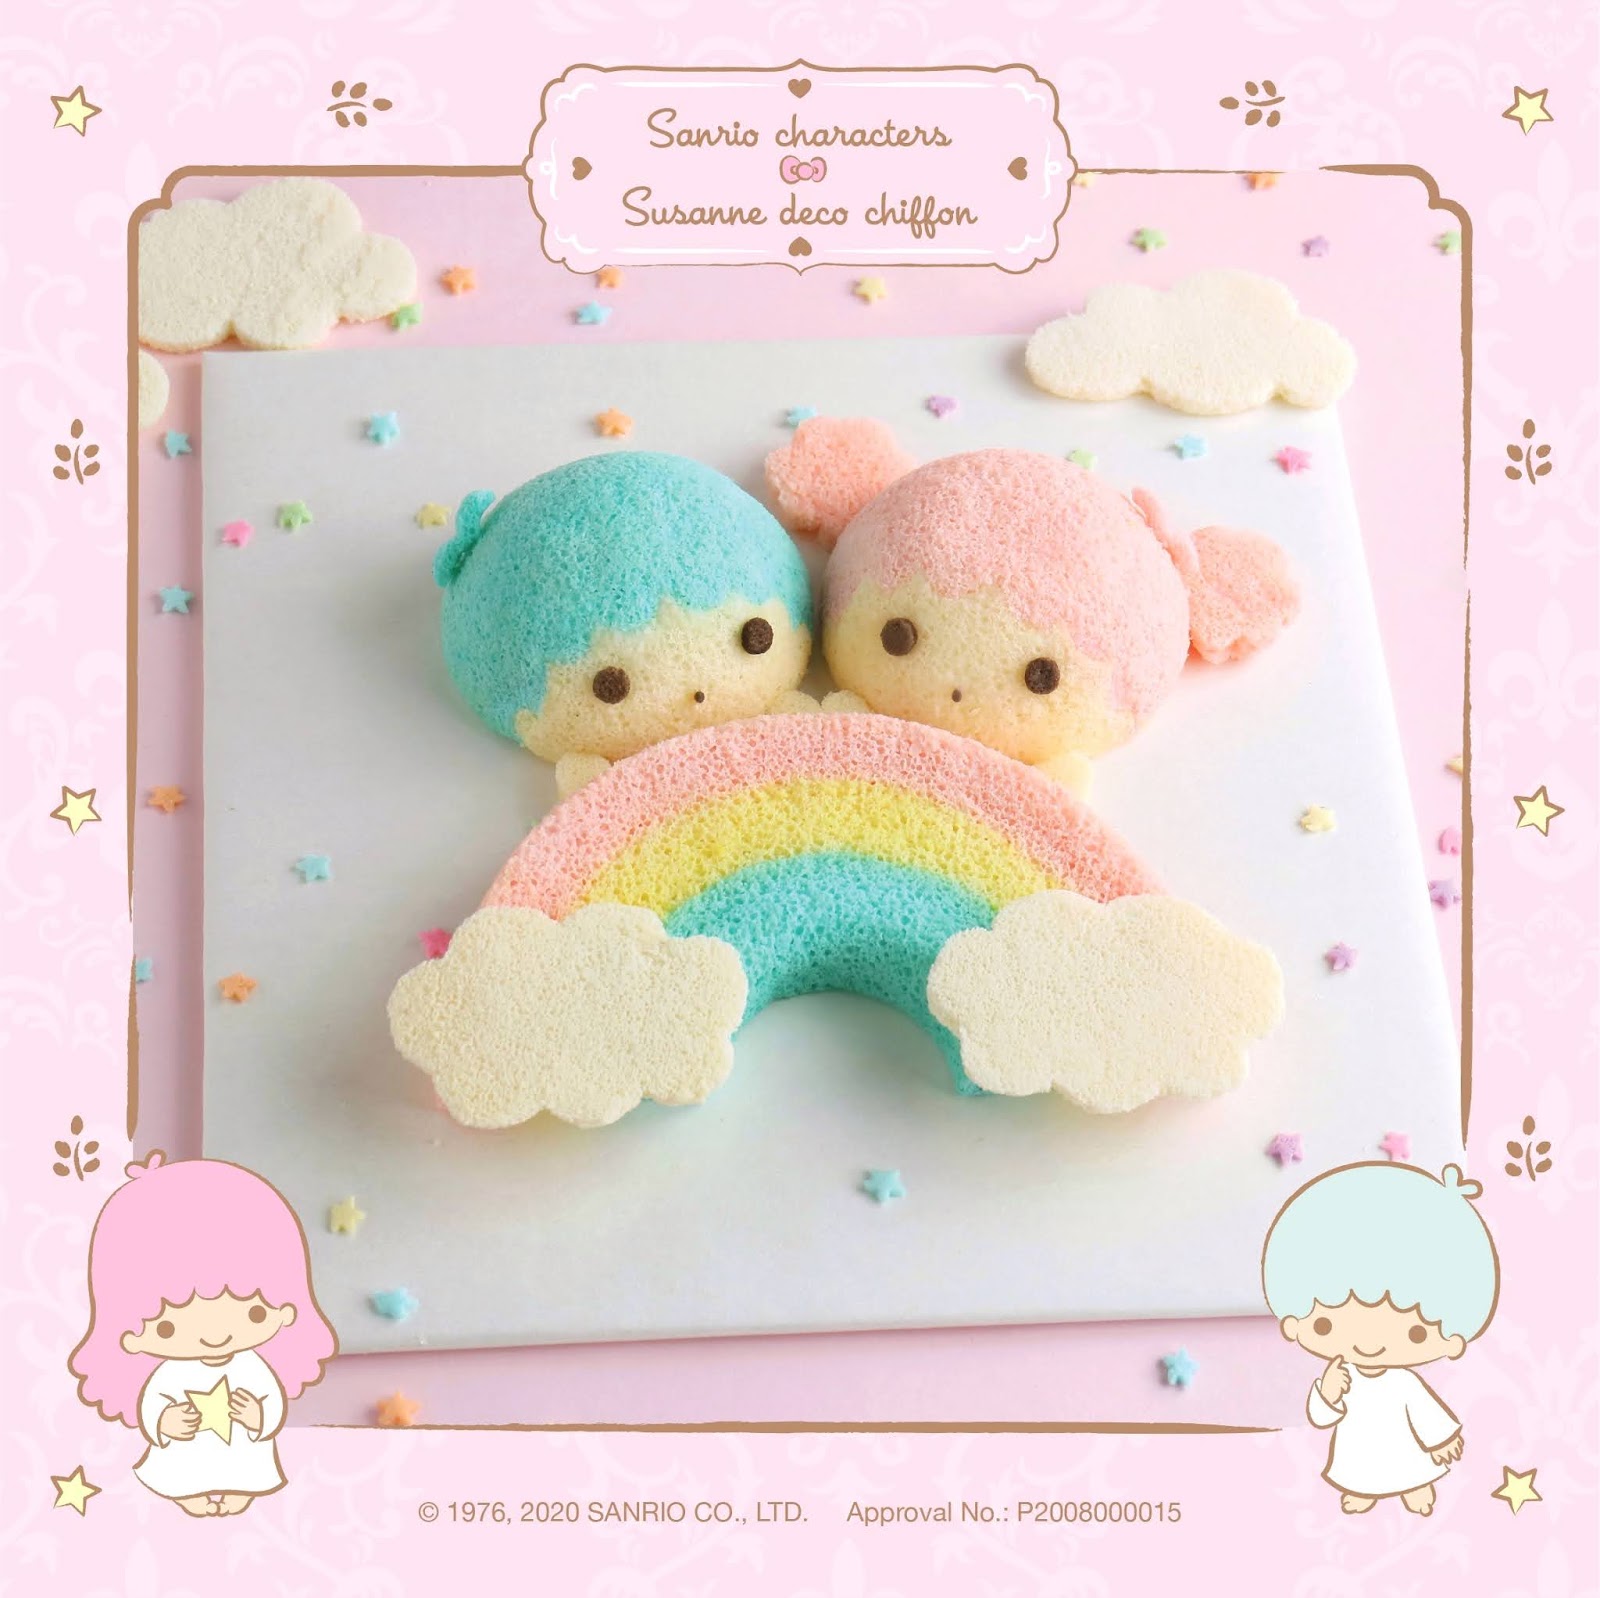
Little Twin Stars Little Rainbow Chiffon


Little Twin Stars fans alert!!⭐⭐ The official Sanrio Little Twin Stars Online Baking Class is here!

Celebrate Little Twin Stars 45th Anniversary with us! Little Twin Stars Little Rainbow Chiffon – a 2-in-1 class where you can learn how to make Little Twin Stars chiffon⭐ and Rainbow chiffon🌈 as well!💓💓

Sign up class link here.

LTS character templates and downloadable recipe are provided, as well as special tips to create perfect features. A new flavour, yummy coconut chiffon 😋 is also taught.

The online class is available to everyone, overseas as well! =)

Baking kits with molds and pans are also available for delivery to your doorstep (within Singapore region only)! 💓

Hope you will enjoy it!

With lots of love,
Susanne


Read More »