Showing posts with label Little Twin Stars. Show all posts

Monday, 21 September 2020

Around the world with Sanrio Chiffon Cake


This special creation "Around the world with Sanrio" chiffon cake is a special collaboration with Sanrio Singapore to celebrate International Peace day amidst these difficult times 💖.

Our lovable Sanrio characters, Hello Kitty, Little Twin Stars, Keroppi, My Melody, Pom pom purin, Bad batz maru, Cinamaroll, and Gudetama join forces to spread love, peace and unity during these hard times. 

The "Sanrio characters x Susanne Deco Chiffon" online classes were also borne during the difficult COVID times to spread love and family bonding during the stay-home period 💖.  We hope to encourage everyone.

Which Sanrio characters will you hope to see next in my online class? 

With lots of love,

Susanne


Read More »

Wednesday, 26 August 2020

Little Twin Stars Little Rainbow Chiffon


Little Twin Stars fans alert!!⭐⭐ The official Sanrio Little Twin Stars Online Baking Class is here!

Celebrate Little Twin Stars 45th Anniversary with us! Little Twin Stars Little Rainbow Chiffon – a 2-in-1 class where you can learn how to make Little Twin Stars chiffon⭐ and Rainbow chiffon🌈 as well!💓💓

Sign up class link here.

LTS character templates and downloadable recipe are provided, as well as special tips to create perfect features. A new flavour, yummy coconut chiffon 😋 is also taught.

The online class is available to everyone, overseas as well! =)

Baking kits with molds and pans are also available for delivery to your doorstep (within Singapore region only)! 💓

Hope you will enjoy it!

With lots of love,
Susanne


Read More »

Sunday, 10 March 2019

Little Twin Stars on a Star Chiffon Cake


Little Twin Stars! Who grew up with it? <3

It's been so many years since I revisited Little Twin Stars! Still such a joy to make, and still so much work haha! Unlike my previous two versions which involved piping of their hair and faces, I decided to try a different technique of using sheet cake to make their hair, like my Powerpuff girls. It's really a lot more work than the piping technique, though it looks nicer.

I also had the chance to try out my new Wilton aluminium stars pan. I used the chiffon recipe from here, also using the natural coloring and with steam baking. Texture is ogura-like, soft and cottony. All of cookbooks have at least one chiffon cake using a wide metal pan, to show that chiffon cakes can be baked like ogura and sponge cakes. The texture you get is slightly different, less airy, and more cottony with steam baking. The most popular has been the Airplane chiffon cake. You do not need to grease the pan, else the chiffon cake will have difficulty rising. You may like to grease just the bottom of the pan (at the middle only) if you are afraid you may have difficulty hand unmoulding it. If you have baked your chiffon cake just right (not underbaked, or overbaked), it should be a breeze to unmould it without greasing your metal tin. If you underbake the cake, the middle of the cake may tear when you try to unmould it as the cake is thick. If you overbake it, the brown skin layer tears the cake when you try to hand unmould it too. Always check with a bamboo skewer at the middle to make sure it is totally dry before you stop baking the cake.


I also had two versions of the cake, one with Chiffon Cake Rainbows, and one without. Recipe for chiffon cake rainbows has been shared in the first book Creative baking: Chiffon Cakes.


Hope this sweet creation brings a smile to your faces!

With lots of love,
Susanne


Book covers:


Read More »

Sunday, 30 August 2015

Little Twin Stars Macarons (Tsum Tsum series part 3)

This is the third in my series of Tsum Tsum macaron bake. Kiki and Lala a.k.a. Little Twin Stars!


I filled them with either melted Meiji dark chocolate or raspberry white chocolate. These macarons do not need refrigeration.

You may refer to this recipe for the basic batter and steps, and my newly made macaron video tutorial just in case you need more visuals.  Just some points to note...

Prepare batter in the ratio of 2:2:1 for pink:blue: beige.

Use a Wilton #10 tip for piping the head. Pipe the pink/blue hair for the top shell by piping a semi circle. Quickly pipe on the beige part of the face. Use a toothpick to pull out the wavy lines for the fringe.


A closer look at the wavy boundary between hair and face.

Wait for 15 minutes before piping on the ears and hands using a Wilton #5 tip.

Freshly baked!

In order to get a nice star shape, use a fondant star cutter to make imprints for the star. Use a toothpick or piping bag to paint/ pipe on the stars.


Brush some peach coloured lustre dust for rosy cheeks.  Let the icing dry before filling the shells.

Freshly decorated shells!

Au-natural raspberry white chocolate filling!

With love,
Phay Shing


Read More »

Thursday, 20 August 2015

Tsum Tsum (Sanrio) Rainbow Chiffon Cake


Sanrio plus Tsum Tsum = Cuteness overload! All the Tsum Tsum Sanrio characters here are made from soft chiffon cake. My heart melted when my friend sent me pictures of these cute fluffy Tsum Tsum Sanrio plush toys! The characters are Little Twin Stars, Tuxedo Sam, Piano, My Melody and Cinnamaroll (some of them I only learnt now LOL).

It turned out to be one of my most difficult cakes so far. I learnt a valuable lesson here that chiffon cakes are too soft to stack LOL. These are now stacked lying on the cake as they get squashed when stacked upright so I had a difficult time trying it out. All these characters are made from patterning chiffon in small bowl cakes in combination with layered chiffon cakes of various colours to cut out their features. She also requested for a rainbow cake, so the base is a pretty sweet 9-inch Rainbow chiffon cake (can't be seen clearly from here).

Thank God for really helping here. I’ve never been so happy and relieved the cake was well-received =p.

Happy birthday to sweet Megan!

With lots of love,
Susanne

Read More »

Monday, 25 May 2015

Little Twin Stars Rose and Lavendar Macarons (notes about using edible markers on macaron shells)

These rose and lavendar Little Twin Stars are a product of leftover batter from my killer heels macaron bake :).

Looking sweet :)

Please refer to the killer heels bake for the shell and filling recipe. Just to share some pictures and important note about using edible markers for macarons.

Piping out the batter

I piped out the batter using Wilton #10 tip for the boy and a combination of #8 and #10 for the girl. I used a toothpick to pull the batter for the hair sticking out.

Leave out the hair detail for bottom shells.

Freshly baked and paired

Using flesh coloured royal icing for the face. 

Dry the flesh coloured icing completely, preferably overnight before adding in the eyes and mouth using charcoal/ black gel coloured royal icing.


I made a mistake of not drying the icing overnight, and then using edible marker on the icing. While edible markers do well directly on macaron shells, they tend to run when used on icing after storing in the fridge due to condensation on the icing.

Filling with rose swiss meringue buttercream

Filling with lavendar smbc

Slightly smudged look on the boy as the marker drawings started to run after assembly and storage

The marker drawings smudged and ran even more with time (too ugly to post here :p) so please do use royal icing to add any details on iced parts!

With love,
Phay Shing


Read More »

Thursday, 12 March 2015

Rainbow 'Little Twin Stars' Vanilla Chiffon Cake


This is a Rainbow 'Little Twin Stars' Vanilla Chiffon Cake for an old friend’s lovely daughter who was turning 7! She had taught me many things when I was younger and I am so grateful for that. Anyway back to the cake, she liked my previous Little Twin Stars Rainbow Chiffon Cake but requested for more 3D chibi cute characters. So I baked the Little Twin Stars in smaller round Iwaki bowls instead of the original oval bowls (see Hatching chicks chiffon cupcakes, replace the two portions with cream and pink/blue batter instead). She also requested for a rainbow above them so instead of layering the rainbow colours like in the previous Little Twin Stars Rainbow Chiffon Cake, I piped the rainbow colours on the base of the chiffon tin and then cut the chiffon cake into two (one chiffon cake makes two big rainbows! =)). Their arms were made of tiny vanilla chiffon swissrolls and the rest of the rainbow letters/stars were cut from rainbow coloured chiffon cake baked in layer trays.

So thankful she shared it was a hit and everyone loved the cake! Made me so happy hee..

With lots of love,
Susanne

Read More »

Sunday, 2 November 2014

'Little Twin Stars' Rainbow Orange Chiffon Cake


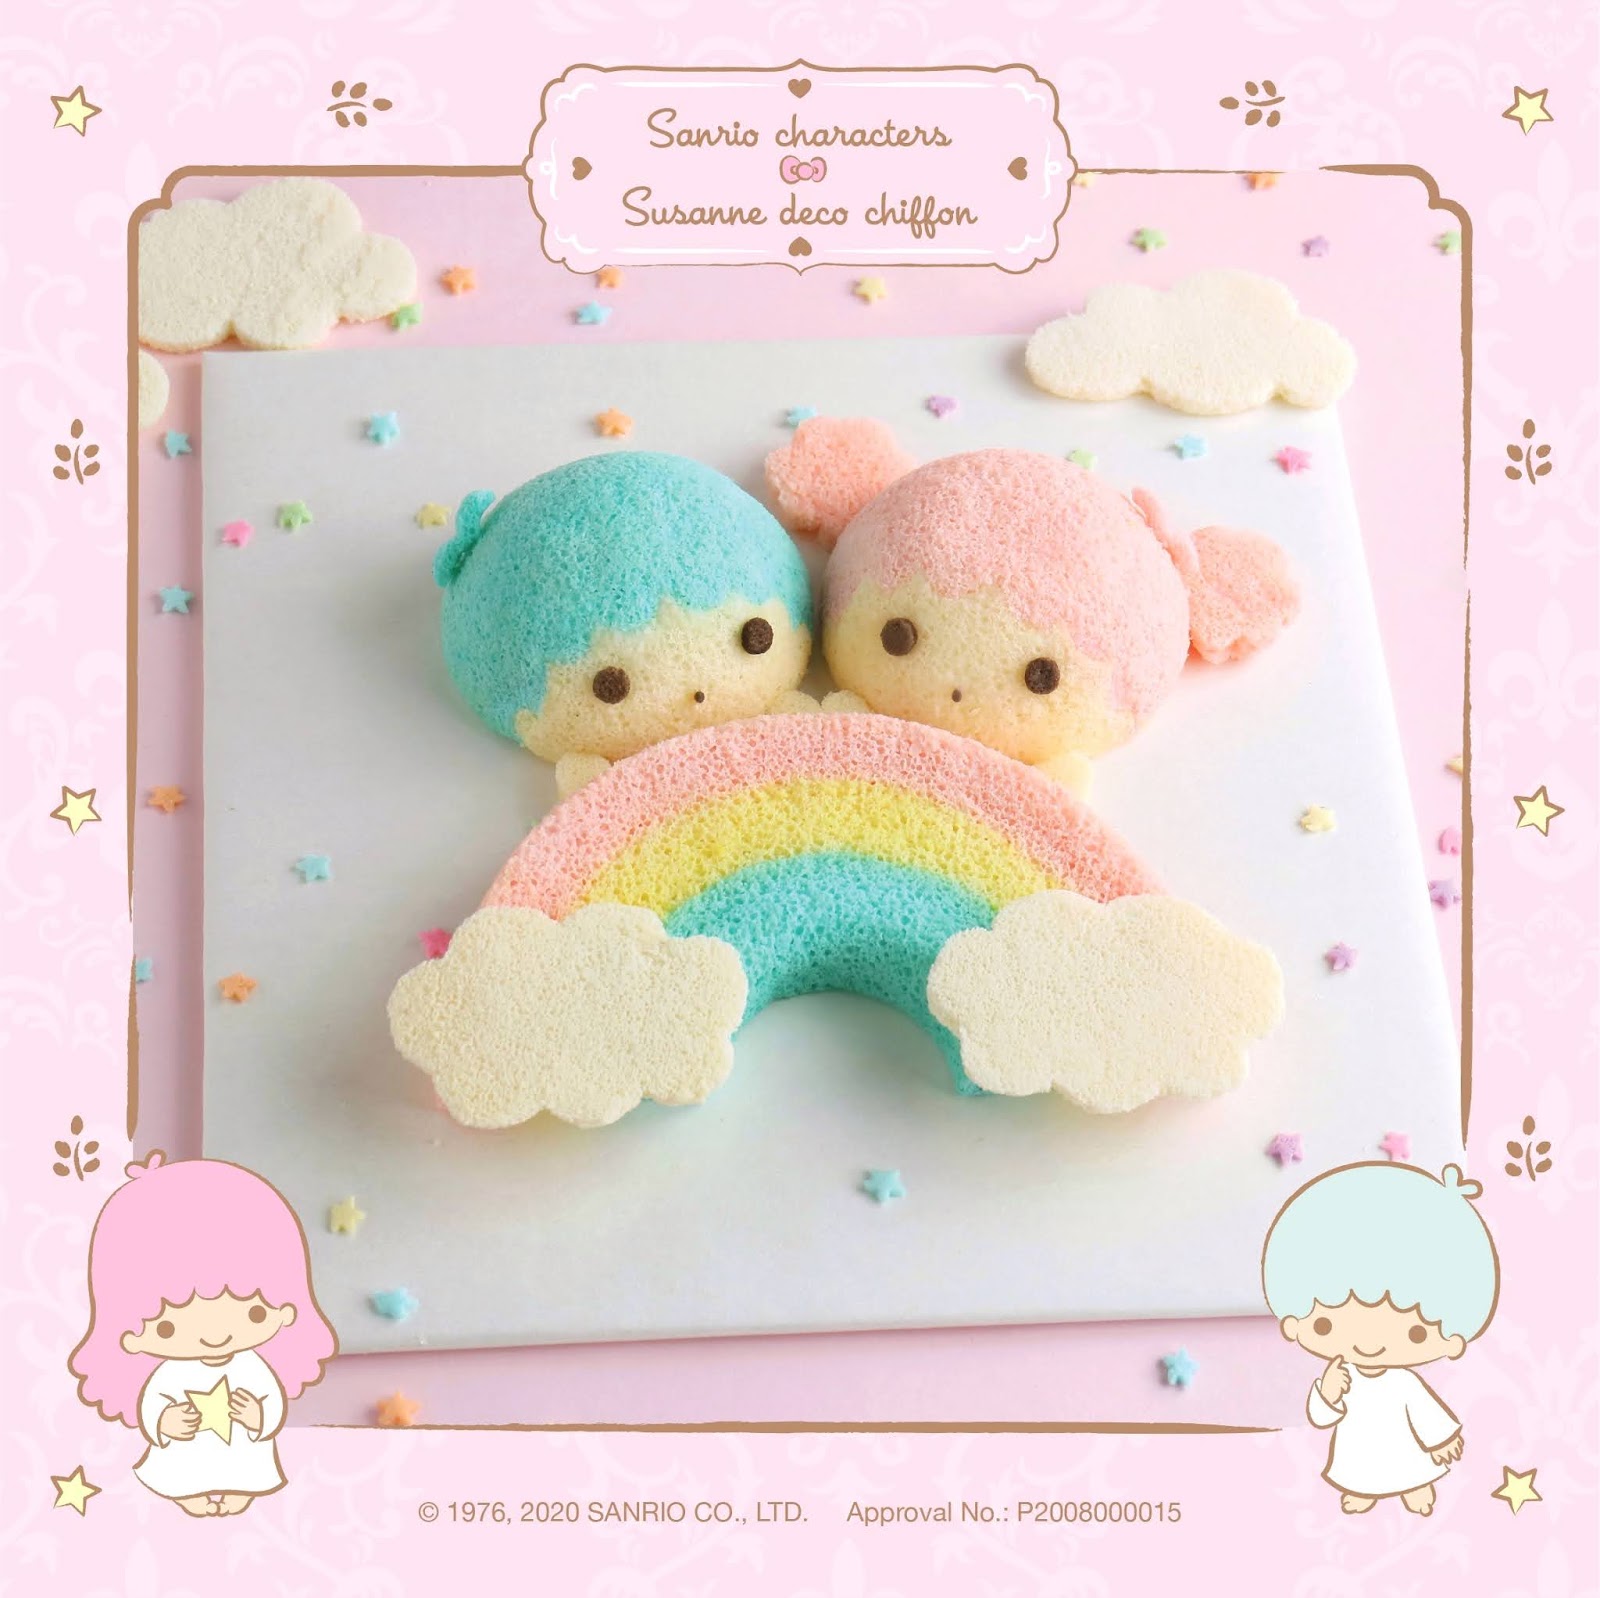
This is a 'Little Twin Stars' Rainbow Chiffon Cake for a pair of siblings celebrating their birthday together! It was such a joy to bake for them =). This is my first big 23 cm rainbow chiffon cake and that which is orange flavored! I was rather apprehensive about baking the rainbow chiffon in a big tin at one go with so many eggs, despite myself having helped many others scale it up. Thankfully it came out fine and the cake was very well-received (thank God)! So I will like to share with you the scaled up rainbow chiffon cake recipe. Hopefully it will help those who have bigger tins and would like to try the recipe (I have also added a note on how to modify recipe for vanilla flavor). The earlier Rainbow Chiffon Cake for a smaller 17 cm tin is here.

Pastel Rainbow Orange Chiffon Cake
Ingredients (for 23 cm chiffon tin)
8 egg yolks (I used Chew's medium eggs)
53g sugar
106g vegetable oil
117g orange juice (or 105g water, 12g vanilla extract)
160g cake flour
Wilton colours

11 egg whites
120g sugar
1/4 tsp cream of tartar

1. Preheat oven to 160°C. Prepare a tray of water at the bottom of the oven (I used the lowest rack to bake the cake). *You may omit steam baking; I like to use it to control my oven temperature rise.
2. Beat egg yolks with sugar with whisk till pale yellow before stirring in oil and orange juice.
3. Next add in sieved flour and whisk till no trace of flour found.
4. Divide the batter into 6 (approx 17 tsp). Mix in respective rainbow wilton colours.
5. Meringue: Beat the egg whites with ¼ tsp cream of tartar till stiff peak, mixing in caster sugar in 2 additions.
6. Divide the meringue into 6. Gently but quickly fold in the meringue into the 6 colours batter. You need to work very fast for the meringue not to deflate.
7. Scoop the pink batter evenly into the chiffon tin. Then repeat with orange, yellow, green, blue and violet respectively. Gently tap the tin on the counter top 3x to remove air bubbles.
8. Bake the chiffon cake for 15 min at 160°C and then at 150°C for 15 mins and 140°C for 30-31 min.
9. Invert the chiffon cake once removed from oven.
10. Unmould the chiffon cake by hand (watch Video tutorial 'Hand Unmoulding Chiffon Cakes for a Clean Finishing'). Gently pull the cake from the sides of the tin at each angle and push the removable base up to unmould the sides. To unmould the cake from the base, gently lift up the cake from the base using hands, repeating this at each angle before turning the base over.

*If you would like vanilla flavor, replace the orange juice with 105 ml water and 12 ml vanilla extract.

*I had been staying away from orange flavor as long baking times often leads to browning. So here I have further reduced the temperature to 140°C and it helps. I have also omitted the orange zest for prettier layers, so the orange taste will be milder compared with zest.

Freshly unmoulded orange pastel rainbow chiffon cake! =) Tall and sweet!


Picture tutorials for the Rainbow Chiffon Cake are now in Creative baking: Chiffon Cakes book.


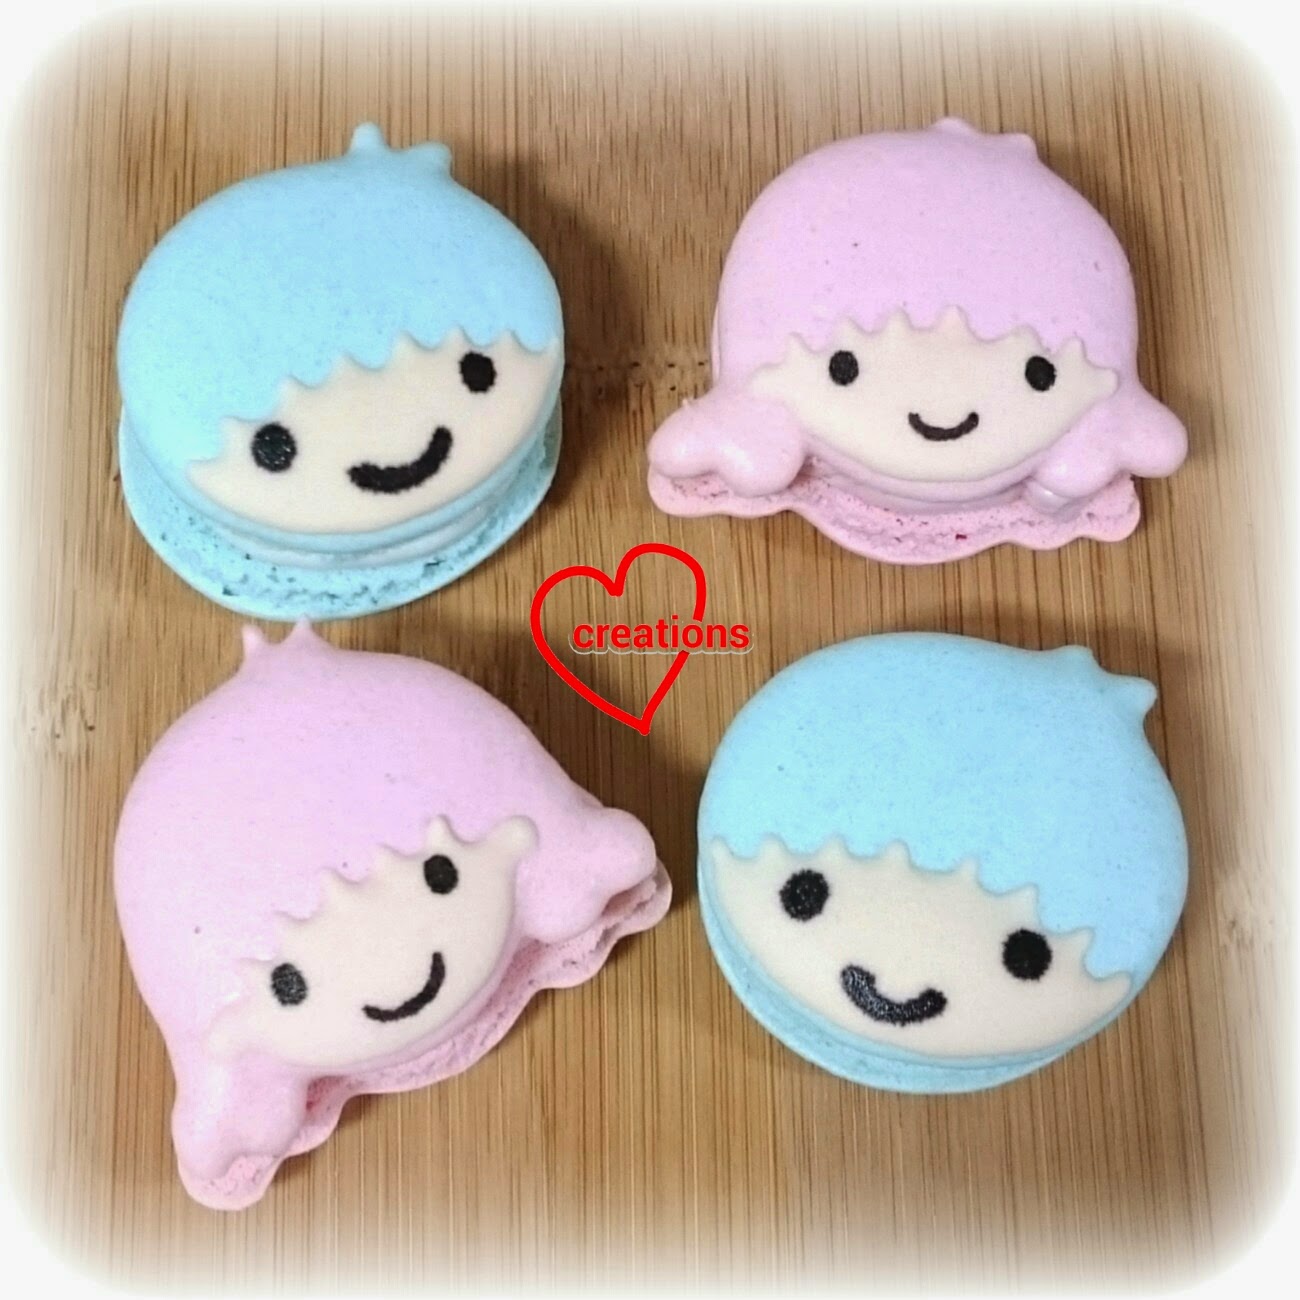
The 'Little Twin Stars' characters were all made of chiffon cake. The faces were piped on oval bowls similar to Hello Kitty chiffon cakes (replace the bow with pink or blue hair). Everything else was cut out from layer chiffon cakes and brushed on with melted marshmallows. A nice tip we learnt is to further brush the cakes on top with syrup to keep moist =).

Here's a top view of the birthday cake made with lots of heart! =)


Happy birthday to Ethan and Leona!

With lots of love,
Susanne


Read More »