Showing posts with label Easter. Show all posts

Saturday, 28 March 2026

Ultra Low Sugar Hot-Cross Bun Macarons with Hidden Heart Surprise

 Years ago, I was on a quest to determine how much sugar can you reduce before macaron shells cease to look like macarons. You can see my successful attempts here and here. That was before egg white powder became a common meringue stabilizer in macarons. I was curious if I could replicate the same sugar percentages with the addition of egg white powder and drying the piped batter in the open instead of using the oven to dry. Here's my results!


A closer peek at the cross section! I filled the ultra low sugar macaron shells with low sugar fillings: Biscoff cream cheese and strawberry edible cookie dough. I made a hidden heart surprise in the filling as Easter is about God's love for us.


Ultra low sugar macaron shell:
Swiss meringue:
40g egg whites
2g EWP
1g cream of tartar
30g icing sugar*
1 drop yellow gel colouring*
1 drop orange gel colouring*

Dry ingredients:
55g almond flour
27g icing sugar*
9g rice flour*
1g cornstarch*
1/4 tsp (0.5g) cocoa powder*

* Notes for ingredients:
- Cocoa powder & gel colouring were added for colour & not counted in the calculation of total weight of ingredients
- The icing sugar I used contains 5% cornstarch that's why the total sugar I calculated is 32.8% instead of 34.5%. This percentage will be different depending on your icing sugar source. I used icing sugar instead of caster sugar for meringue as it's easier to dissolve in egg whites (finer sugar particles) & the presence of a little cornstarch helps with a sturdier meringue 
- There's a limit to how much almond flour you can increase without the whole mix turning extremely thick so I added more bulk by using rice flour. Corn starch is added to help speed up drying & for a sturdier membrane formed during the drying process. You may replace both ingredients with icing sugar if you prefer to stick with original macaron ingredients. The resulting sugar percentage is about 40%. 

Here's the reel with the tutorial for making the macaron shells:

Here's a comparison of shells from different batches with different resting time of piped batter. When insufficiently dried, the shells tend to have very tiny or almost no feet.  Do see the pinned comments in the reel for detailed technical explanation of low sugar macaron shells.


It's full on the inside too! Pardon the low resolution photo as it's a screenshot of a video. I forgot to take still photo 😅.


LOW SUGAR FILLING 
Biscoff cream cheese:
100g cream cheese, softened
40g smooth Biscoff spread
25g heavy cream

Method: 
Combine cream cheese & Biscoff spread together with a spatula. Add heavy cream & beat briefly with an electric mixer until lightened in texture

This filling only contains about 9% sugar by weight, stays relatively soft when cold but holds the shape well at cool room temperature! Feel free to increase the amount of heavy cream for an even softer filling but not recommended if you are serving in the tropics like me. More heavy cream also results in the shells softening & maturing faster.

Strawberry edible cookie dough:
24g cream cheese, melted with honey 
20g honey 
1/16 tsp salt
2g (1/4 tsp) strawberry emulsion 
36g heat treated cake flour (Bake at 180°C for 5 min or until flour is 71-74°C. Cool before using)
4g freeze dried strawberry powder
2g icing sugar

Method:
Sift all dry ingredients together. Mix all wet ingredients together in a separate bowl before combining with dry ingredients to form the dough.

This part of the filling is optional if you only want the cream cheese filling. I included it for the hidden surprise & for an added dimension to the flavor. This edible cookie dough contains about 20% sugar, which is still moderately low compared to many other types of regular macaron fillings. It also stays relatively soft when cold & holds its shape at room temperature.

Others:
Royal icing (for the cross)
Crushed Biscoff biscuits (for coating exposed cream cheese filling)

Here's the reel for decorating and filling the macarons, including how to create the hidden heart:

https://www.instagram.com/reel/DWhye98yhJH/?igsh=MXgwcG1naWhjMHAyZQ==


with love,

Phay Shing

Read More »

Friday, 11 April 2025

Sugar-Free Passionfruit Chick Marshmallows with Prebiotics

 I am super excited about these experimental marshmallows that turned out so squishy, full of passionfruit flavour and doesn't taste too sweet at all. The best part is there's prebiotic fibres added to further lower the Glycemic Index of the treat (fruit puree contributes to the GI) and it's beneficial for gut health and cholesterol management.


I used desiccated coconut to give the chicks a furry look. Even the beak and feet are made sugar-free from peanut butter as a base!

See the reel of the process over here:

Here's a peek at a works-in-progress state!


I shared sugar-free, keto-friendly marshmallow recipes that are suitable for piping characters and florals in my book Deco Marshmallows. 


This version for the chick is made using another sugar replacement with prebiotic fibres replacing part of the sugar.  I am not ready to share the recipe yet but you may see the regular sugar version in the captions of my reel. 


with love,

Phay Shing

Read More »

Wednesday, 2 April 2025

Yuzu honey marshmallow bunnies

These bunny marshmallows are really fun! I made sure their long ears are flappy and the sitting upright ones have arms that can wave too!


See the video of the process and brief recipe in this reel:


This particular set of bunnies lying on their backs is available as an online and studio class option if you are interested as I share the technical aspects in more detail during class.


Click here for online class and here for studio class.

A closer look at the bunnies sitting upright and lying on the front...


I hope these cuties put a smile on your face as they did to me! They went on a chiffon cake and some parfaits as toppers.


with love,

Phay Shing

Read More »

Monday, 17 March 2025

Hot-Cross Choux Buns

I decided to make a choux pastry version of the classic hot-cross bun and this is what I came up with!


What's on the menu?
- Spiced choux au craquelin (cream puff pastry with crunchy butter cookie layer)
- Orange icing cross (to give an added crunch)
- Cream cheese filling that's lightened with whipped cream and peppered with juicy orange juice soaked raisins. The filling is aromatically flavoured with dark brown sugar, cinnamon, vanilla and orange zest.

My family is really thankful to have found a church community that generally tries to live out the faith by showing love and generosity towards those in need. We have been on the receiving end of such generosity for some years now, and the motivation for them to do so is because of the new life that we have found in Jesus. It's a far cry from some who have used the name of Jesus for selfish personal gain and dragged it into the mud. So as part of the church's Culinary Arts Ministry, I am happy to share what God has gifted me with! Feel free to bring along your family or friends to join you to hear the Gospel in an informal setting at this event! 

You may watch part of the process of making these choux buns in this reel:


Hot cross choux buns
(makes about 32-36 mini buns)

Craquelin
You may prepare this in advance and keep frozen until needed, up to a month ahead of time if kept in airtight condition. Place the cutouts in layers separated by parchment paper if stacking for storage.

28g unsalted butter, slightly softened
24g caster sugar
28g plain flour
1/4 tsp cinnamon
1/4 tsp allspice

1. Mix butter and sugar together briefly with a spatula for about a minute. Sugar doesn't need to dissolve in the butter.

2. Add sifted flour, cinnamon and allspice. Mix well until a dough forms.

3. Roll to about 2-3mm thick (I roll mine to 2.4mm thick using metal guides) between parchment paper. Freeze until firm, at least 20 minutes.

 4. Cut 3mm circles with cookie cutter. Place cut-outs on a lined baking tray. Put back into the freezer until needed. 

Choux pastry*
120g water
1/4 tsp salt
1 tsp sugar 
20g unsalted butter, room temperature
20g olive oil (may replace with butter)
60g plain flour, sifted
2 large eggs**, lightly beaten 

* The Instagram reel shows baking of pastry batter from frozen after piping into 3cm diameter silicone molds. If you don't have the molds, you may follow the steps described in this post. You may resize the template below provided to fit A4 paper for 2.5cm diameter circles. If baking from frozen, increase baking time by 5 minutes


**50-58g without shell on for each egg. Use more egg as necessary depending on batter consistency

1. Preheat oven to 220C/205C (fan). Line baking tray with 2.5 cm diameter circle template and place perforated mat over the template. You may use parchment paper or silicone mat if you don't have perforated mats. Perforated mats are the best for making sure the base of the pastry is flat and it helps to retain the pastry shape better.

2. Place water, sugar, salt, oil (if using) and butter in small saucepan. Bring to a rolling boil while stirring with spatula. Once it boils, remove from heat and pour the flour all in at once. Whisk quickly for the flour to absorb the liquid. Switch to spatula and knead until no flour is seen.

3. Put the dough back in stove to cook over low heat for 2-3 minutes to cook off excess water while kneading continuously with the spatula. I usually use a more precise weight measurement of an 8-10% reduction in weight of the dough after cooking instead of using time measurement. Transfer dough into a mixing bowl and let it cool to at least body temperature.

4. Add half the egg into the dough and mix well until smooth. Add half of the remaining egg and mix until smooth. Add the remaining egg a spoon at a time, mixing well after each addition, until the batter appears smooth and shiny, and is able to fall off the spatula slowly, leaving a deep "V" as it hangs off the spatula as shown in the reel.

5. Transfer batter into piping bag fitted with a large round piping tip (or just cut a 1 cm hole if you don't have piping tip). Pipe tall dollops of batter over the circle template until it reaches the circumference of the circles. The dollop of batter should be about 2.5-3cm tall.

6. Quickly place frozen craquelin circles on top of each piped batter and press down slightly. Dab a little water in the baking tray all around before putting into the oven. The steam produced by the water will help the pastries to rise although it's optional.

7. Bake for 10 min at 215C/200C (fan). Reduce temperature to 190C/ 175C (fan) and bake for 20min. Reduce temperature once again to 145C/ 130C (fan) and bake for another 15-20 min until pastry is totally crisp and dry but not browned further. Cool completely before filling or storing in airtight container. You may freeze it and fill it another day. Re-crisp the pastries in the oven by baking for 8min at 160-170C if you stored it in the freezer or for 5 min if stored at room temperature for up to a week. Do note that oven temperature and time is only a guide. Adjust according to what works for your oven. Do not open the oven door during the first 20-25 min of baking as the pastries may collapse.

Orange icing***:
50g icing sugar
4g meringue powder
10g fresh orange juice

1. Whisk together icing sugar and meringue powder. 

2. Add orange juice and whisk until icing is smooth and thickened, about a few minutes.

3. Transfer icing into piping bag fitted with a #44 ribbon piping tip or cut a side slit about 5mm long along one of the seams of the piping bag to mimic the ribbon piping tip without the actual tip. 

4. Pipe the cross on top of the pastries and tap down with a clean finger dampened with water to ensure the ribbons piped are flat against the pastry as shown in the reel.

5. Dry in 70C oven for 20 min or until hardened. Cool completely before filling.

*** If you don't want to use meringue powder for the icing, you may make royal icing the traditional way from raw egg whites. If using raw egg whites, whisk 12g egg whites with 60g icing sugar and 1/2 tsp orange juice until smooth for 6-8 minutes. Drying in the oven at 70C is necessary to cook the egg whites as well as dry the icing thoroughly. It will take about 1h or more. Feel free to use melted white chocolate for decorating the cross if you prefer something faster and find the extra crunch optional.

Hot-cross bun flavoured cream cheese filling:
300g cream cheese, softened
120g whip topping
180g whipping cream (at least 35% fat)
80g dark brown sugar
2-2.5 tbs orange zest
1/2 tsp cinnamon powder
120g raisins 
1-2 tsp vanilla extract (optional)
60g (4 tbs) orange juice (for soaking raisins)

1. Soak raisins in orange juice overnight in the fridge or for at least an hour. Drain the excess juice from raisins. Set aside.

2. Mix softened cream cheese, sugar and cinnamon together until smooth with a spatula. Add vanilla if you wish.

3. Whip cold whipping creams until firm peak with an electric mixer.

4. Fold whipped cream into cream cheese mixture in a few additions. 

5. Add orange zest and drained raisins. Mix well. 
Transfer into piping bag. Fill the pastries as shown in the reel. 


with love,
Phay Shing
Read More »

Sunday, 19 February 2023

Hot Cross S'mores

 Here's my marshmallowy twist to the classic hot-cross buns--- hot-cross S'mores!


I am in charge of coming up with the item for April's Culinary Arts event with the church and since it is scheduled near Good Friday and Easter, a theme that relates to Jesus' death and resurrection is appropriate. 

S'mores was the reason I fell in love with marshmallows when I don't have a sweet tooth. The complementary flavours and textures of the components are so delightful! Although Graham crackers are the classic cookie base for S'mores, I am using digestive biscuits for convenience because they come in rounds and the size is just nice. You could also make the Graham crackers from scratch but I am trying to keep things simple for the event and keep the marshmallow bit as the only technical part.


Hot-cross S'mores recipe
(Makes about 15-16)
Ingredients:
15-16 digestive biscuits*

Piping chocolate*
80g chocolate couverture (percentage of cocoa up to personal preference)
4g vegetable shortening

Marshmallow (to set in 15-16 44x35mm cupcake cases)
8g (3/4 tbs) gelatin powder (I used bovine 170bloom)
40g ice cold water
2 tsp vanilla extract
150g sugar
1/8 tsp salt 
60g light corn syrup
1/16-1/8 tsp cinnamon powder
40g water
canola oil spray
Cornstarch or tapioca starch for dusting

* If you want to simplify it further, use chocolate coated digestive biscuits and omit the extra step of melting and piping chocolate. You may also use Nutella but note that it is sweeter than dark chocolate but has that hazelnut flavour added.

Steps:
1. Bloom gelatin by scattering gelatin over cold water and whisk until well combined in large mixing bowl. Add vanilla over the gelatin bloom. Add cinnamon powder if you wish. Set aside.


2. Heat sugar, salt, water, corn syrup in saucepan till 115C without stirring. Gently swirl the saucepan. Use medium-low heat.

Monitoring syrup temperature with a candy thermometer.

3. Pour onto bloomed gelatin and stir with spatula until gelatin is melted.

4. Beat with electric mixer for 5-7 min, starting with low speed and gradually increase to high speed. Volume of mixture should increase by about 3x.

Marshmallow mixture should become fluffier and thicker as you whip.

5. Transfer into piping bag and pipe into greased cupcake cases until about 1 inch high or 15g. Tap down any peaks with damp finger. (Tip: Easiest way to quickly and effectively grease the cupcake cases is to spray with an oil spray from pressurized can but you may also wipe with paper towel dipped in oil or melted butter).


6. Leave to set overnight at cool room temperature or in the fridge for 30min. Note that gelatin in the marshmallow will continue to set with time for up to 24 hours.

7. Unmold the marshmallow onto a bed of cornstarch. Coat with cornstarch or tapioca starch and remove excess by tossing it around in a sieve. 

Put a teaspoon of corn/tapioca starch on top. Open up the sides of the cupcake case.

Invert the cupcake case and deposit the marshmallow on corn/tapioca starch. Coat it well.

Tossing coated marshmallows.

8. Let the marshmallows dry out in the open or loosely covered (preferably aircon environment as Singapore is very humid) for 2-4 days before using it as toasted marshmallows. Marshmallows will melt into a puddle easily if they are too moist when toasted.

9. Melt chocolate with shortening and pipe onto biscuits. You may pipe the chocolate decoratively if you wish!

10. Place dried out marshmallow on top and toast. Enjoy the S'mores freshly toasted! See the notes below on how to create the foil cross and how to toast.

Storage
Freshly made marshmallows may be stored in airtight container and kept at cool room temperature for two weeks if you are not toasting or consuming immediately. For longer storage, keep in the freezer.

Flavour variations
Although marshmallows can be easily bought from supermarkets, homemade ones taste better and are less sweet. You can also customize it with your own favourite flavour by replacing water with juices or purees (except highly acidic juices or juices that contain enzymes that break down gelatin), tea and coffee, or use different types of flavouring extracts. Just make sure you avoid using fresh fruits containing enzymes that will break down gelatin like kiwi, mango and pineapple. You may use them if you simmer for 20minutes before using as the prolonged heat will destroy the enzymes. Make sure all liquids used for blooming gelatin are chilled in the fridge before using.

You may replace light corn syrup with honey, glucose syrup or dark corn syrup if you wish.

You may also replace white sugar with brown sugar but keep in mind that the syrup will boil higher so you may have to use a taller saucepan or stir occassionally to prevent the syrup from boiling over. Stirring won't cause recrystallization of sugar if you have added an invert sugar like light corn syrup/honey/glucose syrup/dark corn syrup.

Aluminium Foil Cross 
In order to create the cross shaped marking on top of the marshmallows, you will need to make a mask.

1. I used a 5mm wide and 11cm long wooden stirrer available from SKP in Singapore to help with folding the foil. You may work without it if you wish. Just fold the foil with the help of a ruler and your fingers. Create a rectangular piece out of foil around 5mm x 8-9cm.


2. Repeat step 1 to make another rectangular piece.


3. Place the two foil pieces perpendicular to each other. Cut a slit that is as long as the width of the foil pieces (around 5mm) as shown in the picture below. Carefully slide one end of the perpendicular piece into the slit and pull it through. Flatten the pieces to form the cross.


Notes for toasting:
- Lightly coat the foil cross with a little oil before placing on top of marshmallow
- Make sure marshmallow is not too moist or it won't retain the shape well. Dry out for 2-4 days in aircon room.
This is what happens if you toast your marshmallows while they are too moist😆

- Place the digestive cookie with marshmallow close to top heating element, about 4-5 cm away. Avoid placing too close to bottom heat or the whole marshmallow will melt instead.
- Toast for 30 sec-2 min or until browned at the tops. Check every 30 sec in the beginning and every 10 seconds once it shows signs of browning to avoid burning.
- Carefully remove foil with tweezers or chopsticks.

Remember to eat the S'mores when they are freshly toasted as that's when it tastes the best!

Update:
Here's a lovely photo taken by someone at the event. I couldn't have taken a better photo!


with love,
Phay Shing

Read More »

Tuesday, 23 February 2021

Bunny in Strawberry and Passionfruit Macaron Teacup

This is the third time I am conducting class for this design but because there is a change in flavour, I decided to match the design to the flavour! Presenting my bunnies in macaron teacups! 


The bunnies are sitting in strawberry swiss meringue buttercream instead of osmanthus oolong ganache. This bunny theme might come in handy if you are thinking of something to do for Easter. The macaron teacup and saucer set is passionfruit flavoured so it pairs well with strawberry. These two different tart fruits complement the sweetness of macarons very well. 

In this class, I teach the swiss meringue method, piping and decorating simple characters like the bunnies, making hemispherical macaron shells, assembling the whole structure and making the filling. 

A little tip I can share here is the teeny strawberries that the bunnies are holding or wearing. You can make them out of red heart sprinkles. You may have some of this leftover from Valentine's day so might as well transform them into tiny strawberry sprinkles! Simply add on the seeds and leaves using royal icing and voila! You have strawberries! 

Even broken sprinkles can be decorated and used! Waste not! 

I made 4 different expressions on 4 bunnies but like hubby said, trying to fit all of them in a single picture isn't as stunning so I took another one to feature another expression. 


Have a berry good week ahead! 


With love,

Phay Shing


Read More »

Sunday, 29 March 2020

Hot-Cross Bun Salted Caramel Macarons (Low-sugar macaron shell recipe with video tutorial!)

Easter is coming in less than 2 weeks time so I thought it would be good to make hot-cross bun macarons again but this time round, I filled them with salted caramel cream cheese and salted caramel!


A few things why I am sharing a detailed blog post along with video tutorials of real-time macaron making process. Firstly, due to the Covid-19 situation, I thought many people would have time on their hands to learn something and work with their hands at home. So a detailed tutorial would be very helpful. The techniques in the tutorials here are applicable for other non low-sugar recipes too. Secondly, I have always wanted to revisit my super low-sugar macaron recipe that I developed after many failed attempts. I shared the blog post for it last year over here. Lastly, I was curious to know if Swiss meringue method can be done using icing sugar with cornflour already added, instead of the traditional caster sugar.

If you manage to try this successfully and share on social media, do acknowledge that it is from me as it has taken me lots of time and drawing from my experience to come up with this. Do check out both of my macaron books Creative Baking: Macarons and Creative Baking: Macaron Basics for a more systematic presentation of all you need to know about making decorative macarons, from basics all the way to more challenging projects, for more ideas and templates for different designs.

As mentioned in my previous low-sugar post, sugar serves very important structural functions in macarons. Without it, you won't be able to have the characteristic feet and it would be a serious challenge to make a stable enough meringue. Yes you may use sugar replacements but the results would still taste as sweet as regular sugar. My previous low sugar recipe contains about 35% sugar by weight (weight of sugar/total weight of ingredients x 100%). This new recipe has slightly less sugar than my previous one with only about 32% sugar! I made slight tweaks to my previous recipe by using a bit more egg whites, replacing caster sugar with icing sugar and overall using slightly less sugar in the meringue.

I did something in the bake that I used for the videos here which I don't recommend, that is to replace 10g of almond flour with pumpkin seed flour. The resulting piped batter took 2 hours of oven drying before I could bake it 🤣. In case you are wondering why are there darker specks in my batter, it is from the pumpkin seed flour. So just stick to the recipe I type here. If you would like a higher chance of success for a first attempt, do add 5g of icing sugar to the meringue portion. It comes up about 35% sugar, still way lower than regular macaron recipes which contain 50% or more sugar by weight. As a comparison, my almost fail proof recipe that I use for junior chef classes has about 51.7% sugar and my other reduced sugar recipes and those developed by others have about 40+% sugar. Working with significantly less sugar in the batter makes it more technically challenging so don't despair if you fail. Try my suggestion of increasing icing sugar by 5g in the meringue and follow the videos closely.

Why did I choose to use icing sugar instead of caster sugar? Because it is just white sugar that is even finer, and with cornflour added. Cornflour can act as a meringue stabilizer and helps piped batter to dry faster (plus point for low sugar recipe!) and finer sugar means it dissolves more easily in the egg whites (another plus point to produce good quality meringue!). But I was afraid to do this experiment on my paid work as I have no idea what will happen if you cook the egg whites with cornflour added. I was afraid it would thicken the batter too much. Now that I tried, it certainly rocks for low sugar meringues!

As mentioned in my previous post, I chose Swiss meringue as you can produce a more stable meringue than french meringue using less sugar. Italian method also produces stable meringue but isn't suitable for small quantity so I am not going there. Semi-cooking the egg whites is the key to improvement in meringue stability.

Recipe for low-sugar macaron shells
Ingredients (makes about 12 macarons, 24 shells) :
Dry ingredients
55g superfine almond flour (don't oven dry it or the batter will turn out too dry. Use straight from package that has been properly stored in cool pantry or in fridge)
8g rice flour
2g (1tsp) cornflour
30g icing sugar (with cornflour already added)
1/8-1/4 tsp cocoa powder (for colour, omit for plain shells)

Swiss meringue
40g egg whites (don't need to age)
22g icing sugar (with cornflour already added)
1/8 tsp cream of tartar (to stabilize meringue)
1 drop orange gel colouring
1 drop yellow gel colouring

I know this adds up to be about 32.7% sugar but icing sugar contains cornflour so actual amount of sugar could be closer to 32%

Steps:
1. Preheat oven to 60-70°C, rack on middle shelf. Line baking tray with template of 4cm circles and parchment paper.

2. Place all dry ingredients in mixing bowl and whisk together. Sift into another mixing bowl. Set aside. Do not mash the dry ingredients against the sieve just to get it through. Just scrape with a spatula. You don't want to release more oils from the almond than necessary.

3. Place all swiss meringue ingredients (except colouring) in heatproof mixing bowl over a saucepan with water. Make sure the water doesn't touch base of the bowl. Heat the saucepan with medium-low heat from room temperature water, while whisking the egg whites with a clean handwhisk. Monitor the egg white temperature with candy thermometer. Keep whisking until temperature reads 50°C. This step may take several minutes. It is important to heat the egg whites slowly to ensure all sugar is dissolved. Any undissolved sugar will cause the meringue not to whip up properly.

4. Immediately remove mixing bowl from heat and beat with electric mixer until stiff peak, adding gel food colouring towards the end of beating the meringue. As the amount of sugar is low, the meringue will be less stable and less stiff than regular recipes, and the meringue is also more easily overbeaten. Please watch the video tutorial below for how you should beat such a meringue. I didn't speed up the video so this is the actual speed of the process.


5. Transfer the meringue into a wide mixing bowl for easier macaronage. Do note that low sugar macaron batter is thicker than regular batter so we don't follow the traditional lava-like consistency rule. This method of testing batter consistency also applies for tricky macaron batter like chocolate or matcha batter that tends to be thicker than regular batter. Please watch the follow video to find out how you should do the macaronage and test the consistency. Use a table to hit the bottom of mixing bowl if you aren't comfortable using your hand as shown in the video. I didn't speed up this video too so this is the actual speed of the macaronage.


6.Transfer batter into piping bag fitted with wilton #12 tip. Pipe the batter as you normally would with regular batter, with the tip perpendicular to tray surface. The difference is, you bang the tray really hard for many more times to flatten the peaks because the batter is thicker.


7. Pop the tray straight into the oven for 10 min. Use your finger to gently check if the surface of piped batter is dry. If it still feels sticky, dry for another 5 to 10 min and check again. Repeat as necessary. This can take 30 min to even 1h, depending on how wet or dry your almond flour is. Higher sugar content recipes dry much faster. Use an oven thermometer to monitor the oven temperature accurately. This is highly recommended as oven temperatures tend to be off by 10 to 20°C. So how dry is dry? You should be able to run a finger across the surface without feeling any bit of stickiness. When you apply slight pressure to the membrane formed, it should be able to resist a little, but not so firm that it feels like a fully baked shell. Be patient with this drying step. If you don't dry it sufficiently, your shells will crack during baking as reduced sugar means the membrane formed is less sturdy. So you want to make sure that membrane formed is really strong and dry enough to withstand the expansion of the batter during baking.

8. When the shells are sufficiently dried, ramp the temperature up to 130-140°C without removing the tray from the oven. Bake for 18-23min or until feet doesn't appear wet.

Just to show you the awesome shells! Not as pretty as regular recipes but nicely full on the inside!


The texture is also a little different from regular macarons due to the low sugar content. It is denser and less crisp.

I used royal icing to decorate the baked shells.

I filled the shells with whatever I have on hand at home, so I chose to fill it with a ring of salted caramel cream cheese and salted caramel in the middle, both were leftovers from my junior chef class last weekend. If you want something tasting more authentically like hot-cross buns, please follow the recipe in this post.


I developed this low-sugar recipe partly as a personal challenge, partly because I know people out there want to know if there is a much less sweet macaron recipe. I would say, it is possible to reduce sugar significantly but not without its challenges. For my regular fanciful macarons, I would stick with my regular reduced-sugar recipes which are easier to work with if I have to reduce sugar. Have fun with this challenge!

Blessed Easter in advance! Stay safe! I am just thankful that God is still in control in the midst of all this madness.

With lots of love,
Phay Shing


Read More »

Sunday, 21 April 2019

'Lamb' Coconut Chiffon Cake


Blessed Easter!!💕 This Chiffon cake is a Lamb called Love!💖

The lamb is made from Coconut chiffon cake coated with Desiccated/ shredded coconut! Was rather experimental! 😛 Did I get the texture of the sheep fur correct? 🙈

For those interested in a yummy and whiter Vanilla Coconut Chiffon Cake, recipe has been shared here before.

The cake was very well-received in terms of its taste and texture! =)

This cake is especially meaningful to me during Easter as for Christians, Jesus is our sacrificial Lamb who died and rose again to take our sins away, out of his great Love for us =).
Blessed Easter to all!

With lots of love,
Susanne


Read More »

Tuesday, 26 March 2019

Hidden Heart Hot Cross Bun Macarons (New Recipe for Low Sugar Macaron!)

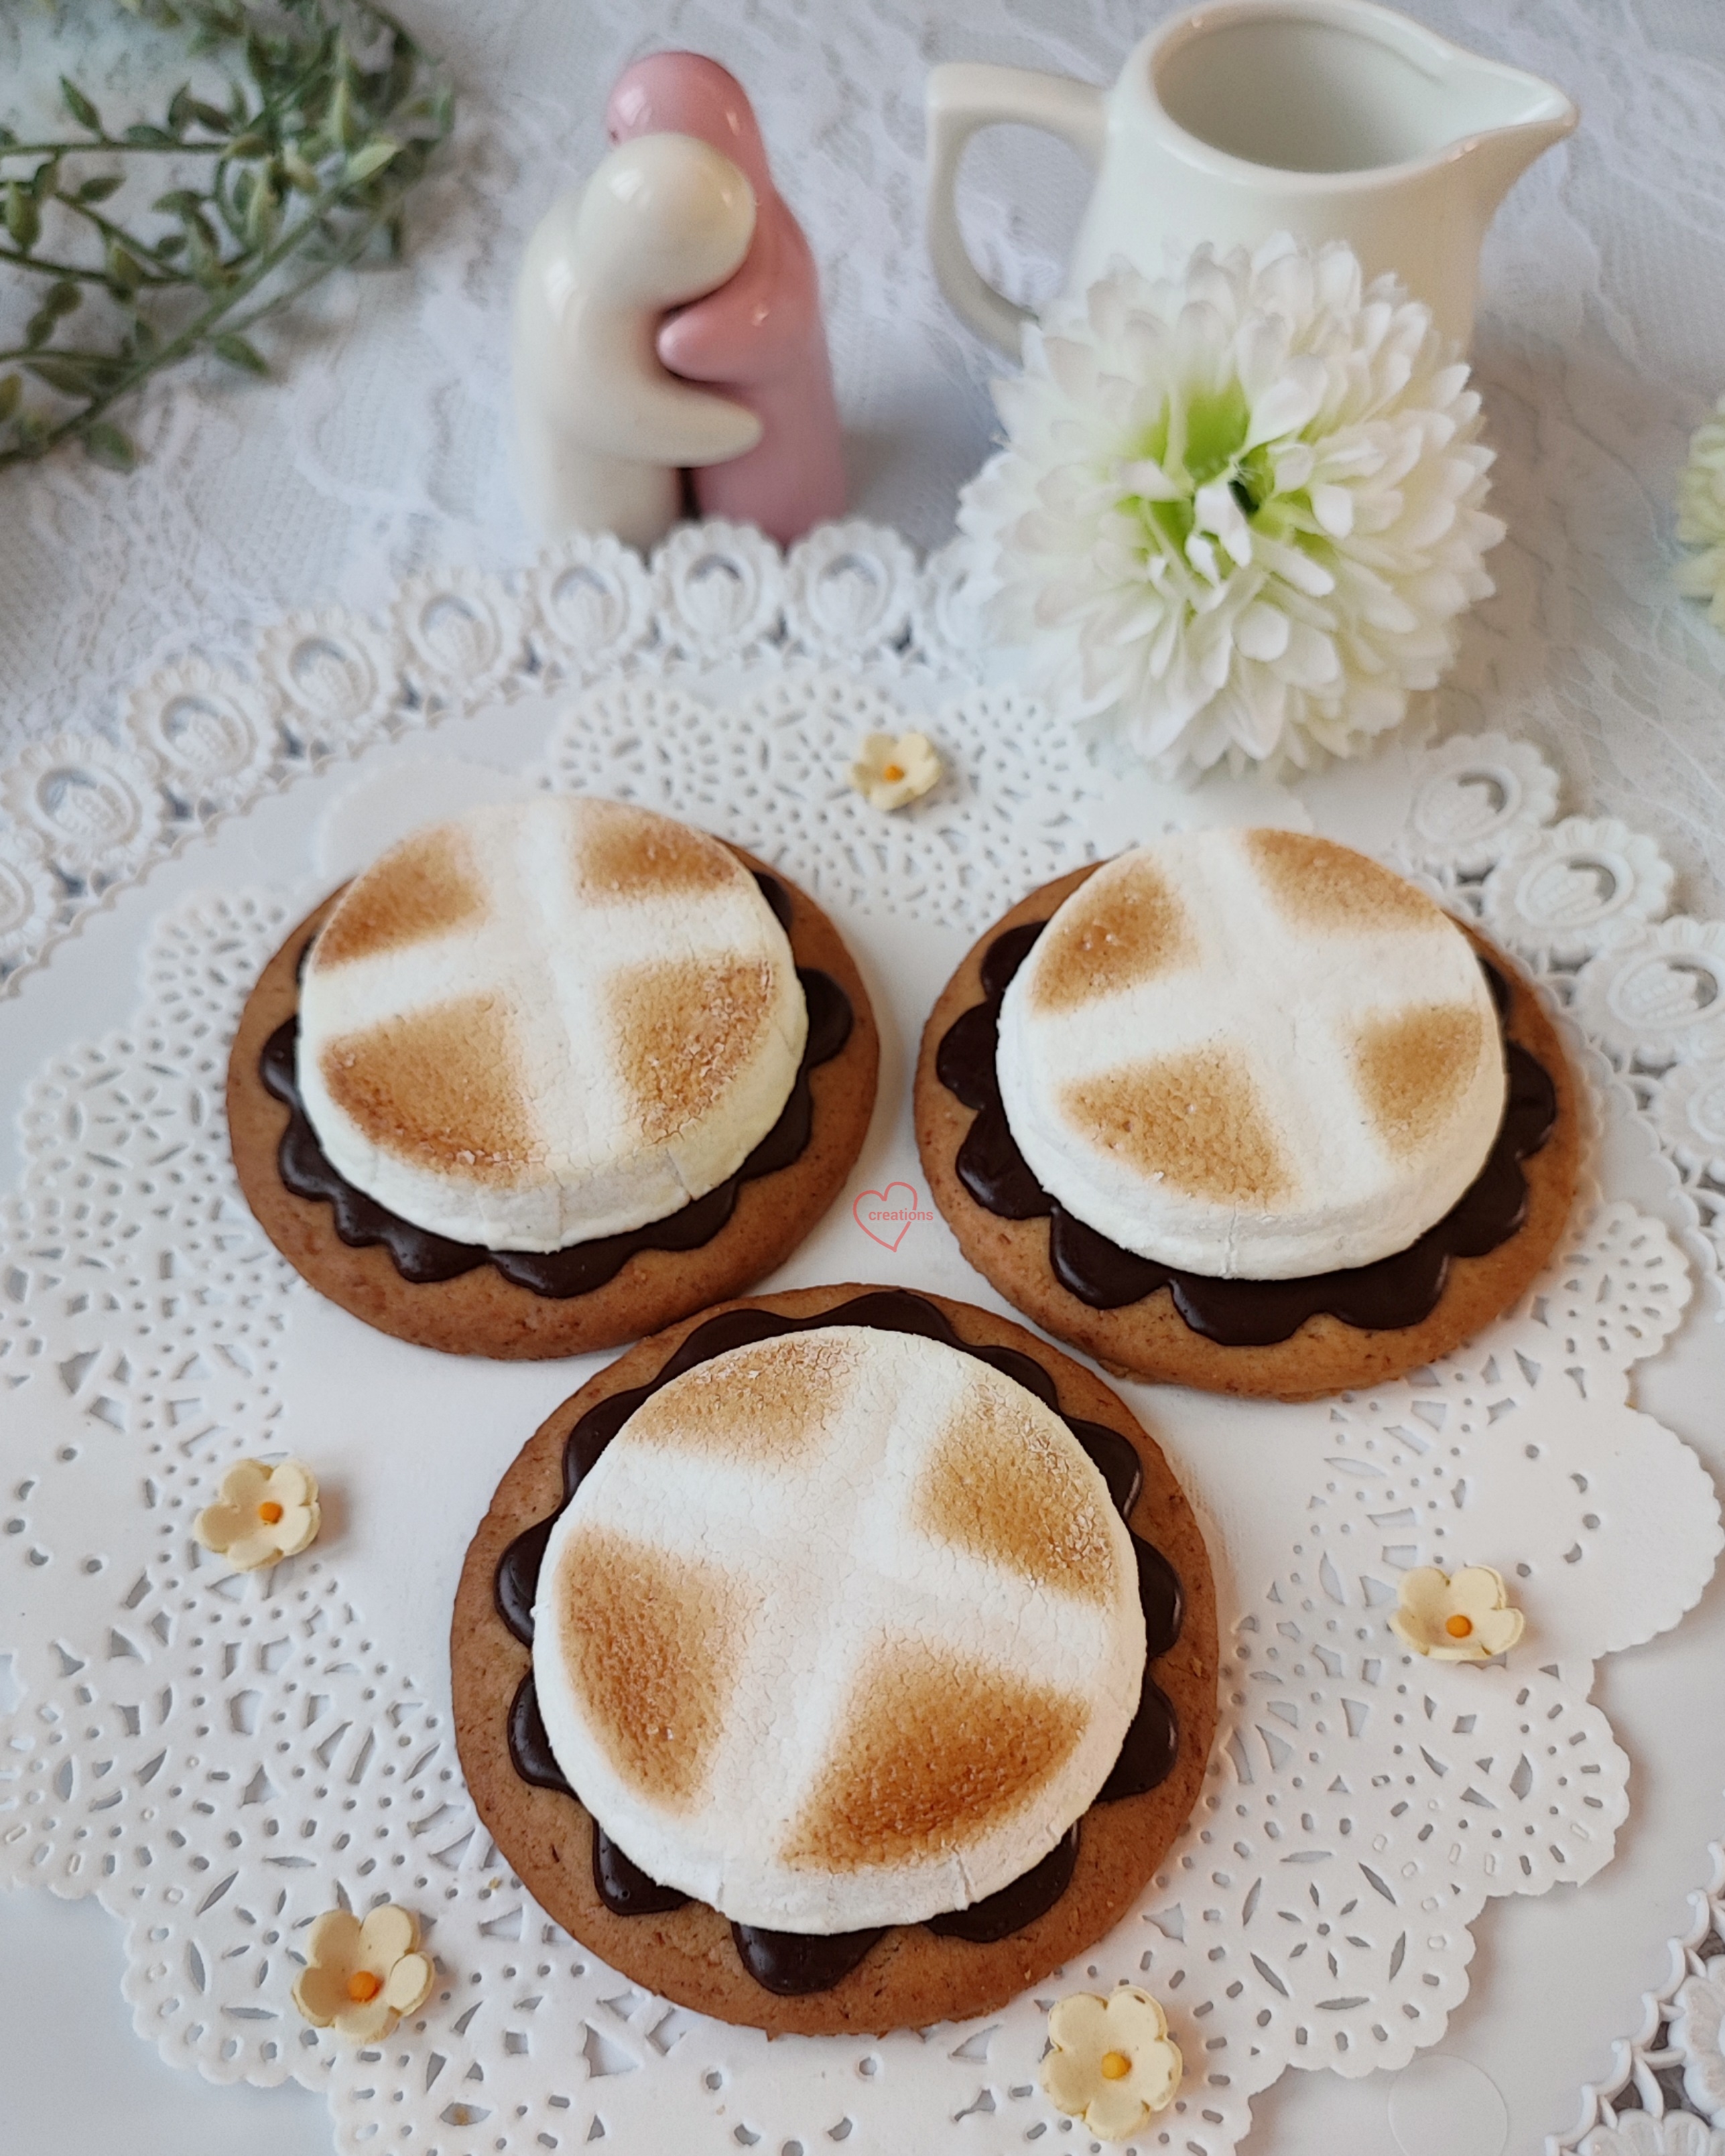
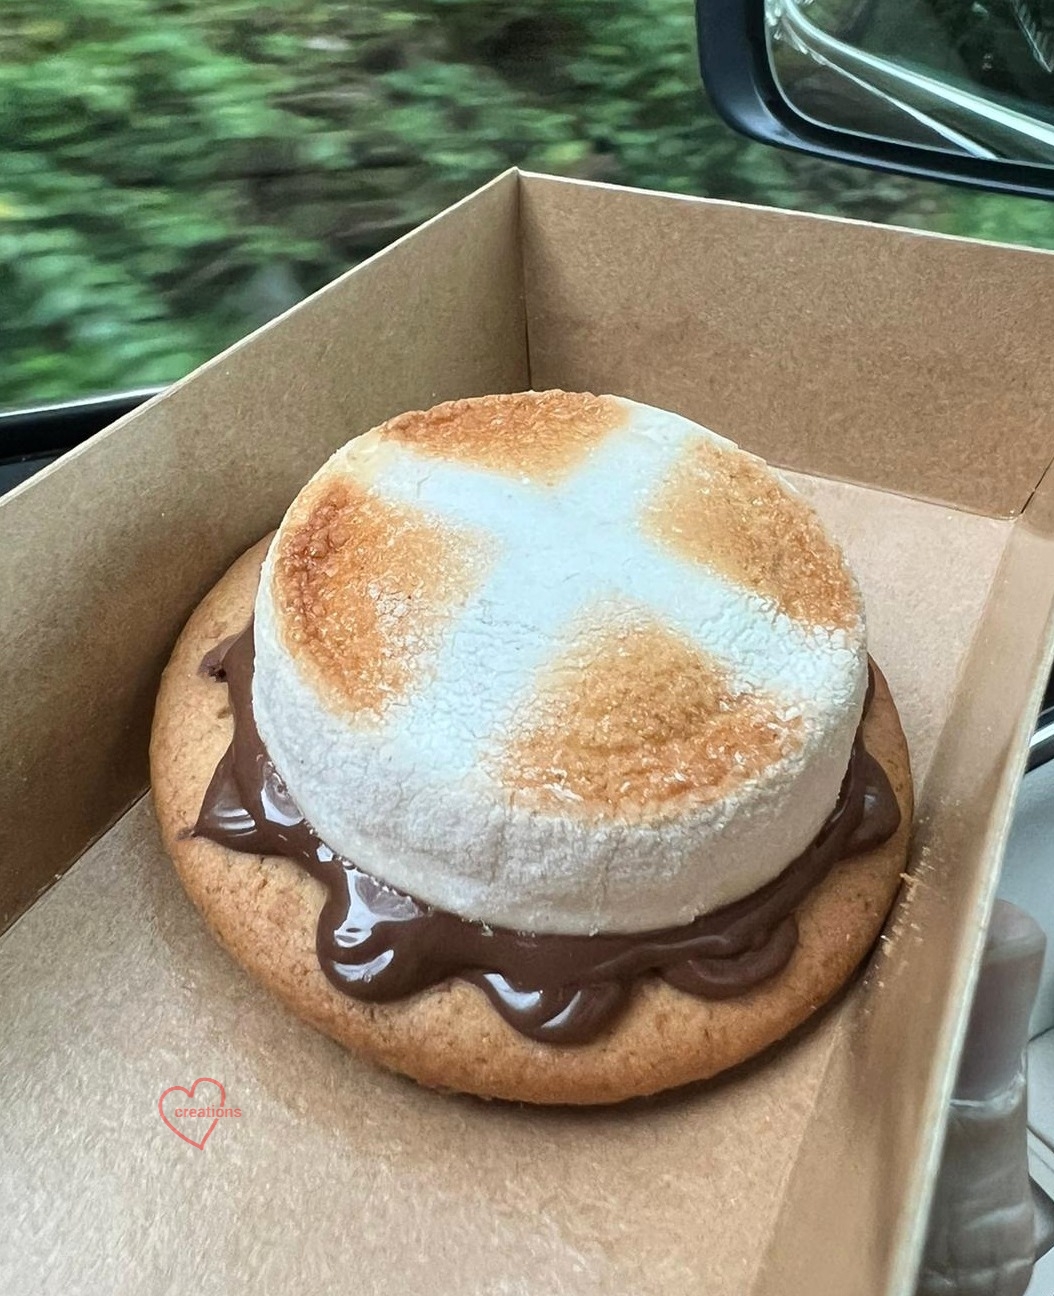
Many of you may not know that I have been experimenting with super low sugar macarons for the past two to three years. I have tried a variety of substitutions and have always met with failures. Many have tried sugar substitutes but 100% of the verdict is it's bad tasting so don't bother trying. Those of you who have attempted cutting out sugar will also come to a conclusion that while zero sugar is not possible, low sugar is, but how low can you go?...That is the question which I think I have found an answer to. Presenting my version of hot cross bun macarons, with hidden heart candied cherry!


Before I delve into the topic of low sugar macarons, let me explain why I hid a heart in there. It's my personal preference to make something Christian themed for Easter. I thought of making simple spiced macarons hot cross buns style as a reminder of what Good Friday/Easter is all about -- God’s love for fallen mankind shown through the death of Jesus on the cross. And what better way to have both heart and cross in each macaron than what I did 😊. I filled the macarons with a spiced cream cheese based filling and used a delicious low GI sugar, so overall the whole macaron is not too sweet but oh so fragrant and flavourful!

Let me explain why sugar is necessary in macarons. Macarons are meringue based cookies and meringues need sugar for stability. Take sugar out and the meringue collapses easily. You may add an acid like cream of tartar, or semi cook the egg whites (Swiss and Italian meringues) to improve the stability of the meringue, but some sugar is still necessary.

You may ask then is icing sugar necessary as part of the dry ingredients? Answer is yes! I have made a couple of attempts with totally no sugar in the powdered ingredients and they fail miserably. If your meringue does not contain high amounts of sugar, your powdered ingredients portion needs the icing sugar to help the piped batter to form a membrane at the surface that is resistant to expansion during baking. This is necessary for feet formation. If the icing sugar proportion is too low, you will also end up with no feet, no matter how long or short you rest the piped batter before baking...

My attempt at hot cross bun macarons just before the successful ones

This is just a cookie, not macaron 😆

Icing sugar also gives macarons the melt-in-your mouth texture. The higher the icing sugar content, the more delicate the texture will be. As I reduce both icing sugar and caster sugar in my low sugar recipe, you can expect that the resulting texture will be less delicate but that's a small price to pay when the overall sugar content by weight is 35%! Most recipes have sugar taking up about 50% of total weight of ingredients. Some recipes have percentages that are even higher.

I have chosen the Swiss meringue method for creating low sugar macarons as it is more stable than French, and therefore requires less sugar in the meringue to be stable, but less complicated than Italian.

My older reduced sugar recipes for French, Italian and Swiss methods involve substituting part of icing sugar with rice flour and cornflour, which I adapted from for this low sugar recipe. How does this recipe differ from my older ones then you may ask. I substituted very safe amounts of icing sugar with rice and cornflour, while keeping the caster sugar amount relatively constant for my older recipes. In this recipe, my starting point is from my failed attempts, gradually increasing the amount of sugar until what comes out of the oven resembles a proper macaron with full shells.

Without further ado, let me share the low sugar macaron recipe, and a yummy low GI macaron filling! Feel free to upsize the recipe for macaron shells once you have adjusted the baking process to suit your environment and oven.

Disclaimer and important note: if you fail, it's not because the recipe doesn't work but instead, you need to tweak factors like drying time and oven temperature because my method here is very much oven dependent. Please also acknowledge me if you do publicise your work and people ask for the recipe because it has taken me a long time and countless failures to get here. Tag me on Facebook or Instagram with your results 😊

Hot cross bun macaron shell recipe
Ingredients (makes ten 4cm macarons, 20 shells):
Dry ingredients
55g almond flour
30g icing sugar (preferably with cornstarch already added)
8g rice flour
2g (1 tsp) cornflour
1/2 tsp cinnamon*
1/4 tsp allspice*
1/8-1/4 tsp cocoa powder*

Swiss meringue
36g + 1g (1/4 tsp) egg whites
24g caster sugar
1/8 tsp cream of tartar
1 drop orange gel food colouring*
1 drop yellow gel food colouring*

* Omit these items if making plain macaron shells.

Steps:
1. Line baking tray with template and parchment paper. Stick parchment paper down with some batter later on when you have made it. Preheat oven to 60-70℃. Set oven to second lowest rack. I use top and bottom heat only.

2. Sift together all powdered ingredients. Set aside.

3. Make the Swiss meringue. Place 36g egg whites, caster sugar and cream of tartar in a clean metal or glass bowl. Set the bowl over a saucepan filled with some water. Make sure the water doesn't touch base of the bowl. Heat the water in saucepan using low or medium-low heat while whisking the egg whites. Use a candy thermometer or infrared thermometer to monitor the temperature of egg whites. I must stress that you should heat the egg whites slowly to make sure that all sugar is dissolved or your meringue won't turn out right. Heat the egg whites to 50℃. This should take about 5-8 min of continuous whisking over the stove. Remove from heat and beat the meringue with electric mixer on medium-low speed until stiff peaks form. Add gel food colouring and beat until evenly coloured. I don't use high speed to beat as a meringue that is built up slowly is more stable and has less large air bubbles in it. In fact for this attempt, I alternated between hand whisking (with the balloon whisk of my electric mixer) and beating with electric mixer to make sure that the meringue is always smooth and air bubbles are tiny.

This is how you test for stiff peak. The meringue should be upright at all points where you test, not just in the middle of the mixing bowl. Meringue should appear smooth and glossy, and the meringue should be able to form a foamy lump that keeps its shape when you use a spatula to gather it in the middle of the bowl.

4. Transfer the meringue into a bowl with wide base for an easier macaronage process. Scatter a third of powdered ingredients over the meringue. Fold gently until incorporated. Repeat for the other two-thirds in two batches.

Folding in sifted ingredients.

5. Once the dry ingredients are incorporated, add 1g of egg whites and mix well. Those of you who have made macarons before will notice that the batter is thicker than your regular one. This is because there is a significantly lower percentage of sugar in the batter. Adding a little egg whites at the end will help to loosen up the batter a little. Continue by pressing the batter against the side of the mixing bowl to deflate the batter. You may refer to this video tutorial for the macaronage technique. Be careful not to overdo the deflating as the meringue doesn't contain a lot of sugar. Check the consistency after each round of pressing the batter against the bowl. Instead of your usual lava consistency that you look for in regular macaron batter, you check the consistency by creating peaks in the bowl of batter and tapping the bottom of the bowl. If the peaks melt back into the batter, you are good to go.

6. Transfer to piping bag fitted with a Wilton #10 or #12 tip. Pipe rounds. Rap the tray on table to flatten peaks. Use toothpick to pop any stubborn air bubbles.


7. Dry in the warm oven until a membrane forms that does not feel sticky when you run a finger across the surface. This can take 10-25 min. Check every 5 minutes after the 10 minute mark. You may ask if it is all right to dry in air-con room or out in the open (if you live in a low humidity area). It should be ok although I haven't tried it because it's really humid here even with air conditioning so it would take too long to dry for my liking for a macaron batter that does not have much sugar to stabilize the meringue. I try to keep drying time as short as possible for this batter to prevent hollows too.

8. Once a nonsticky membrane is formed, increase temperature to 130-140℃ and bake for another 18-23 minutes or until feet do not appear wet. This membrane should be able to provide some resistance when you press it gently but not hard like baked shells. Cool completely on baking tray before peeling parchment paper away from the shells. If you dried your shells in the open/air-con room, bake in preheated oven at 150℃ for 12 min and reduce temperature to 130℃ and bake for another 5-10 min or until feet no longer appear wet.

I was jumping for joy at this beautiful batch! Nice even feet, relatively smooth tops and full shells!!

With significantly lower sugar in the macaron shells, I wasn't about to spoil it by using a super sweet filling (definitely no American buttercreams for me! Way too sweet!). I chose a cream cheese base as it is able to hold its shape quite well in Singapore's hot weather, and its tartness compliments the sweet shells. I used relatively low amounts of sugar in the filling and chose a low GI source.

Spiced brown sugar cream cheese filling recipe (adapted from here)
Ingredients:
115g cream cheese, room temperature
55g unsalted butter, cut into small pieces
40-45g Masarang Arenga forest sugar**
1/8 tsp salt
15g icing sugar, sifted
1 tsp vanilla bean paste
1/2 tsp cinnamon
1/8 tsp allspice
Zest of an orange

** Replace with brown sugar if unavailable.

This is the sugar I used that is lower in GI but tastes great! It is similar to coconut palm sugar with a caramel flavour.

Steps:
1. Beat cream cheese with electric mixer until creamy, smooth and soft. Set aside.

2. Beat butter and brown sugar until fluffy and well combined. (I don't soften the butter much before beating as Singapore is really warm)

3. Add icing sugar, spices, zest, vanilla and salt and beat until well combined.

4. Gradually add whipped cream cheese and beat until just combined. Refrigerate for an hour or overnight before using. You may need to stir the mixture to make it creamy again after resting in the fridge.

I decorated the macaron shells with firm royal icing (somewhere in between flooding and stiff consistency).


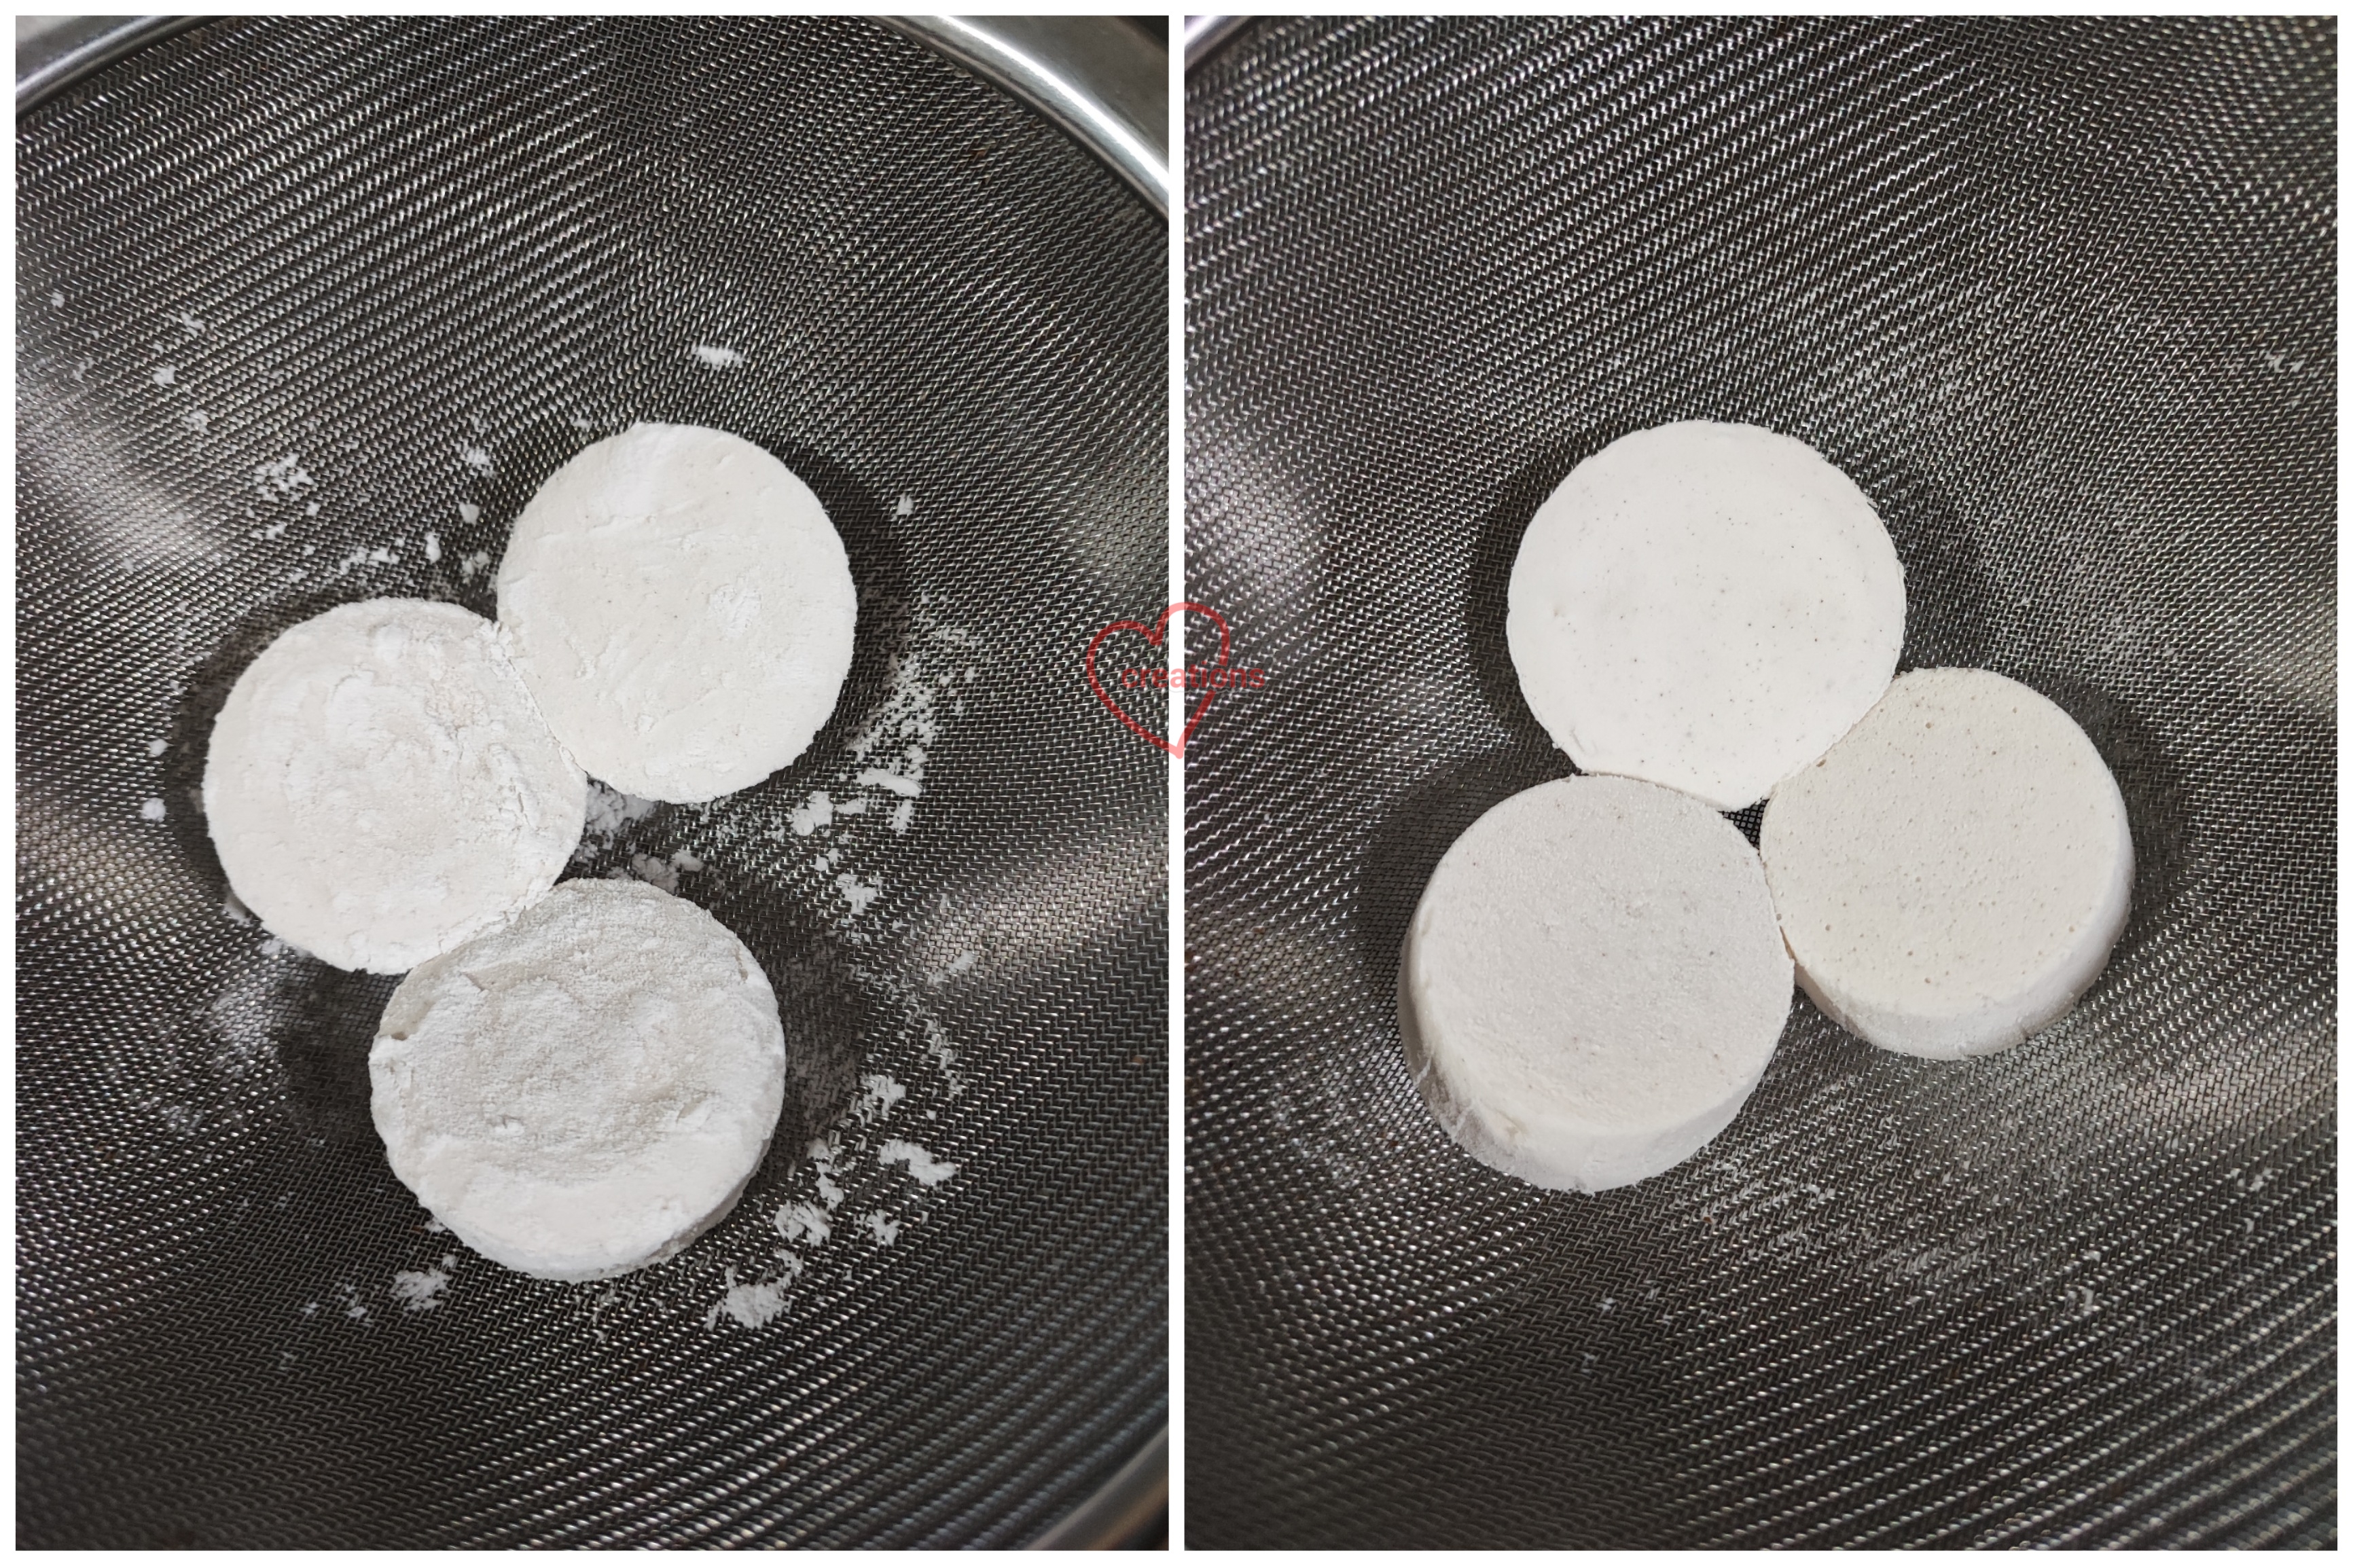
Some people may find that hot cross buns are incomplete without sultanas in them so feel free to add some finely chopped sultanas to the cream cheese filling. In my case, I added a simple twist to it by inserting a piece of candied cherry in the middle. I halved the cherries and tried my best to cut it into a shape that will present a heart shape when you slice open a macaron.

A halved candied cherry with conical bottom. I carefully reshaped the top as well to make it a little more rounded. Use only the bottom half of the cherry for this.

Fill the shells!

Store filled macarons in the fridge in airtight condition for at least 24h. Let the macarons sit room temperature for 10 min before consuming to allow the filling time to soften a little.

I am happy to say that reducing sugar by this much didn't change the texture too drastically! It's definitely less delicate than higher icing sugar content ones but not any chewier than some of my regular attempts. Longer maturing time with filling will make the texture more delicate so do wait for a few days before eating if you prefer it that way.

With love,
Phay Shing

Read More »

Friday, 23 March 2018

Earl Grey Custard Cross-Shaped Eclairs

Although as Christians we remember Jesus' death and resurrection daily, it's a more stark but yet wonderful reminder as Good Friday and Easter approaches. I made some cross shaped Éclairs as a simple reminder of what this Easter weekend is about :). The Éclairs are plain and chocolate Choux pastry cases, with Earl grey custard filling and topped with dark chocolate and Earl grey white chocolate.


Here's a close up view of the smooth Earl grey custard filling. Milk tea lovers, you will love this!
Crisp choux pastry case with smooth, rich and creamy Earl grey custard. Yums!

Instead of hot cross buns, why not make these treats to remind each other about how God loves us so much that He gave His only Son to pay the price of our rebellion ;)

Recipe for Earl Grey Custard
Ingredients:
200g milk
35g sugar
18g cornflour
2 egg yolks
2.25 tsp (5g) Earl Grey tea powder*
10g unsalted butter
1 tsp vanilla extract

* If you are unable to get Earl Grey tea powder, heat up 250g of milk until it starts to bubble. Remove from heat and steep 3-5 Earl Grey tea bags (adjust number of bags according to how strong you want the tea flavour) for 5 min. Squeeze the tea bags to extract as much tea flavour out. Weigh out 200g of milk tea for making custard.

Steps:
1. Sift together cornflour and Earl grey tea powder (if using) into a bowl. Add sugar and whisk together. Add egg yolks and whisk until a paste is formed. Set aside.

2. Heat milk with vanilla extract until it starts to bubble. Remove from heat and slowly pour into egg yolk mixture while stirring all the time.

3. Pour the mixture back into saucepan. Heat on medium low heat while whisking all the time. Keep an eye on the mixture as it will suddenly thicken. Once it thickens, remove from heat and continue whisking. This is to prevent the custard from becoming lumpy. Return to heat while whisking until desired consistency, like curd. Remove from heat now and then to whisk if necessary.

4. Add butter and mix well. Sieve the custard into a bowl. Press a cling wrap over the custard surface. Refrigerate until ready to fill the pastry. You may make this up to a few days ahead of time.

I made chocolate and Earl Grey custard at the same time actually. Stay tuned for another creative choux pastry in the future!

I have more or less settled down with a Choux pastry case recipe that I like. One that remains crisp for a long time and is puffy.

Choux pastry case recipe
Ingredients (makes about 18-20 crosses):
50g water
50g milk
50g unsalted butter
3/4 tsp salt
3/4 tsp sugar
60g bread flour
6g plain flour*
1 tsp cocoa powder, sifted
2 eggs (100g), one egg in each bowl lightly beaten**

* You may use all bread flour or replace more bread flour with plain flour depending on your preference. Plain flour gives it a more tender bite while bread flour helps the case to be crispier and structurally stronger

** Place both eggs in one bowl if you are making plain pastry case without cocoa powder.

Steps:
1. Sift together plain and bread flour into a bowl. Preheat oven to 180℃ and set oven rack to middle position

2. Place water, milk, sugar, salt and butter into a saucepan. Bring to a boil while stirring. Remove from heat and pour the flour in all at once. Mix well to make sure all the flour absorb the liquid.

3. Divide the dough into two equal portions (omit if you aren't using cocoa powder to colour half the cases dark brown). Add sifted cocoa powder to one portion and mix well with spatula.

4. Return each portion of the dough to cook over medium low heat for about 2 minutes. Remove from heat and continue to knead the dough with a spatula in a bowl to let it cool for a couple of minutes. This also helps gluten to form.

5. For each colour of batter, gradually add beaten egg and mix well after each addition. The batter is ready when it appears shiny and yet leaves a trough that doesn't collapse when you run a finger across the batter surface.

6. Transfer into piping bag fitted with a Wilton #12 (or larger) tip, preferably 2cm in diameter. Pipe the crosses by piping a long straight line, and then two dollops at each side of the line. Tap down any peaks with a wet finger to prevent it from burning in the oven.

Piped crosses

7. You may sprinkle a little water on the baking mat around the piped pastry. This is to help the pastry rise more in the oven with the steam that it creates.

8. Bake for 30-40 min or until baked through. Turn off the oven and let it cool inside for 10 minutes before removing from oven. Pierce the sides with a toothpick to release any steam while the pastry cases are still warm. Cool completely on cooling rack.

Freshly baked shells

You may fill the shells by poking a couple of holes to insert a piping tip for filling with cream or slicing into half. I chose to slice the cases in half so the filling is like a sandwich. If you are not slicing the pastry case into half, please coat the cases with chocolate before filling with pastry cream.

I coated the shells with two types of chocolate --- dark chocolate and Earl Grey white chocolate. Do choose good quality chocolate for better taste. You may just coat with one type if you prefer.

I melted the chocolate with a little vegetable shortening to help it to flow more easily (especially white chocolate). Ratio is 50g of chocolate and 5g of shortening. I added about 1/2 tsp Earl Grey tea powder to melted white chocolate. Pipe the melted chocolate on and let it set.

Pipe the pastry cream onto the bottom half of the case as you like. Sandwich with the top pastry case.

Refrigerate until ready to serve but it's most delicious when the crisp cases are freshly filled with smooth, cold cream.

Feedback from my friend who shared it with her Bible study group was these were really very delicious. Do give it a try :)


With love,
Phay Shing

Read More »