Showing posts with label Log cake. Show all posts

Friday, 5 December 2025

Hojicha Matcha Christmas Log Cabin Cake

 I decided earlier this year to make a matcha sponge based log cake with fresh berries and cream for my extended family this Christmas because it looks so Christmasy. But I saw the log cabin cake that joyfulhomecooking (Instagram account) made and fell in love with it! I stayed true to the flavour profile I originally planned into the cabin cake and this is what I came up with!


The insides still looks Christmasy!

Composition:
- Matcha honey chiffon sponge cake layers
- Stabilized fresh cream between matcha sponge layers and on the roof
- Fresh strawberries between matcha sponge layers and on the roof, and blueberries on the roof as well
- Hojicha Swiss meringue buttercream to coat the layered sponge assembly
- Iced brown sugar cookies for external decorations 
- Lady's finger sponges for the roof. You may make your own from scratch but I bought mine from a baking supplies store.

I made one cake earlier for my immediate family just so I could destroy the cake and share the content and recipe earlier for those of you who want to make this.

It's really yums!

The cake is light and refreshing, and the Hojicha buttercream tastes like Hojicha latte with a secret ingredient added! 

The whole project may seem like a massive undertaking but the good news is, the components can be broken down into manageable blocks of time for those of us with busy schedules. I will share the components in the order you should be making.

See the process of making the cake in this reel:

1. Brown Sugar Cookie Decorations
The iced brown sugar cookie recipe can be found here. You may choose to omit the cinnamon or replace with a gingerbread spice mix if you wish.

Iced cookies!

The cookies have an excellent shelf life of 1 month at cool room temperature storage so you may make this first. The dimensions of the windows and doors are:
Windows: 3 cm x 5cm
Doors: 3.5cm x 6cm
Use the smallest cookie cutters you have for other decorations. Feel free to adjust dimensions according to your preference.

2. Matcha Honey Chiffon Sponge
(12x16" tray)
5 large eggs, separated
10g matcha 
55g hot water
16g honey 
1.5 tsp vanilla
64g oil
87g cake flour 
1/8 tsp salt
1/4 tsp cream of tartar
75g caster sugar

1. Make egg yolk batter. In a small bowl, whisk together matcha powder & hot water. Add honey & whisk until smooth. Sieve into large mixing bowl. 
2. Add oil, salt & vanilla. Mix well
3. Sift in flour & whisk until combined
4. Add egg yolks & whisk until smooth. Set aside
5. Make the meringue. Beat egg whites with cream of tartar until firm peaks, adding sugar gradually once egg whites are foamy.
6. Fold meringue into yolk batter in 3 additions. Pour into baking tray lined with Teflon sheet or parchment paper. Feel free to use alternative baking tray sizes because the sponges will be cut into pieces anyway.
7. Bake in preheated oven at 160C fan/170C 12-15 min or till done
8. Immediately flip onto a fresh sheet of parchment paper to cool completely. Cut into pieces for assemby Wrap in double layer of cling film to freeze if not assembling yet. 
Dimensions:
- 11cm x 21cm 3 pieces of sponge
- 7cm x 21cm 1 piece of sponge
- 4cm x 21cm 1 piece of sponge 
- 2.5cm x 21cm 1 piece of sponge

3. Hojicha Swiss meringue buttercream 
145-155g egg whites (about 4)
1/8 tsp salt
130g sugar 
280g unsalted butter, slightly softened
16g Hojicha powder
4g dark cocoa powder (optional, for darker brown & added richness)
16-20g milk powder*

* You may toast the milk powder for a caramel flavour as well! To toast, bake in a thin layer in the oven at 140C, stirring every 8-10 min until golden brown but not too dark. Total duration depends on whether you are toasting in bulk or small amounts. Milk powder adds stability to the buttercream too.

1. Double boil egg whites with salt & sugar, whisking constantly until mixture reaches 71.1C. 
2. Whip till stiff, glossy peak. 
3. Add butter 1tbs at a time. Continue beating 8-10 min on med-high speed until light & fluffy. 
4. Add hojicha, cocoa & milk powder during the last min of beating until incorporated. 
5. Use immersion blender for a shiny & smoother buttercream to finish off. You may use immediately with 8mm piping tip or freeze in airtight condition until use if making ahead of time. Mix again with immersion blender after defrosting. If making it ahead by a day, you may refrigerate the buttercream. Let it soften slightly at room temperature before using an immersion blender to mix until smooth & creamy.

4. Fresh Berries
Slices of strawberries should be prepared just before assembly and before whipping the fresh cream. I sliced the strawberries to a thickness of about 1cm. Place cut surface on paper towels to absorb excess moisture. You may prepare this up to several hours in advance, keeping the cut fruits in the fridge until assembly.

5. Stabilized whipped cream
220g + 30g heavy cream*
200g non-dairy cream*
1 tsp vanilla extract 
8g gelatin bloomed in 32g ice water

* You may use all dairy, non-dairy or your own preferred ratio of creams. If using only dairy, add a little icing sugar to taste. The non-dairy whipping cream I use is pre-sweetened. I use a mix for better stability in hot Singapore but still tastes good.

1. Place 220g of heavy cream, non-dairy cream & vanilla extract in a cold mixing bowl. Whip cream until soft peaks.
2. Melt bloomed gelatin using microwave or by immersing in another bowl of hot water.
3. Add 30g of cream into melted gelatin & mix well
4. Pour 3. into 1 in a thin stream while whisking the whipped cream by hand. Continue whipping until firm peaks. 
5. Transfer into piping bag & use immediately. If storing overnight or for 1h or more in the fridge, you will need to stir the whipped cream with a spatula again to smoothen it out before transferring into piping bag. Pipe the cream onto the cake using 1cm diameter piping tip

6. Assembly
Assembly can be spread over two days as well to make it manageable.
1. Layer the matcha sponge, fresh cream and strawberries as shown in the reel. Refrigerate overnight or freeze for 2 hours.
2. Pipe hojicha buttercream over the assembly and smoothen it out with a spatula. Melting small amounts of the cream to smear it horizontally along walls of the log cabin will create a natural subtle wood grain effect.
3. Add cookie decorations
4. Add lady's finger sponges for the roof
5. Pipe fresh cream on the roof
6. Add fresh berries on the rooftop
Refrigerate the cake for at least a few hours before serving. You may store the cake in the fridge for up to 3-5 days.

I made the flavour profile not too strongly of matcha so that kids can enjoy this cake as well. If you prefer a stronger matcha flavour, brush the matcha sponge with matcha syrup during assembly before layering the fresh cream and fruits. Alternatively, add matcha powder to the fresh cream.


Wishing you a blessed Christmas in advance!


with lots of love,
Phay Shing
Read More »

Friday, 13 December 2024

Dubai Chocolate (Kunafa Chocolate) Inspired Log Cake

 Here's my take of the Dubai chocolate in the form of log cake!


Composition:
🌲 Chocolate chiffon sponge brushed with strawberry jam syrup
🌲 Crunchy pistachio kunafa
🌲 Pistachio diplomat cream
🌲 Dark chocolate ganache
🌲 Dubai chocolate Christmas tree decorations (see previous blog post for the recipe)
🌲 Penguin orange chocolate hazelnut macaron

Here's the video of the process:


Chocolate chiffon sponge (12x12")*:
3 yolks
15g Dutch cocoa powder
32g boiling water
35g cake flour
1/8 tsp baking soda
27g oil
1 tsp vanilla
Pinches of salt

3 egg whites
50g caster sugar
1/4 tsp cream of tartar

1. Line 12x12" tray with teflon sheet/parchment. Preheat oven to 160C fan/170C
2. Make chocolate paste. Dissolve cocoa powder in hot water to make a paste. Add vanilla and salt. Mix well
3. Make egg yolk batter. Whish together egg yolks, oil and chocolate paste. Gradually add sifted flour and baking soda, whisk until no trace of flour is seen.
4. Make meringue. Beat egg whites with cream of tartar until firm peaks, gradually adding sugar once egg whites are foamy. 
5. Quickly but gently fold meringue into egg yolk batter in 3 additions. Pour into prepared tray.
6. Bake for 10-12 min or until done. Immediately flip the sponge out of the tray and roll it up to cool completely.

Crunchy pistachio kunafa
80g kataifi pastry
16g melted butter
75g white chocolate couverture, melted
85g pistachio paste*, warmed

1. Coat finely chopped kataifi pastry with melted butter. 
2. Fry pastry over low heat until browned and crisp
3. Add melted chocolate and warm pistachio paste. Mix well. You may fry the pastry ahead of time and add the chocolate and paste when you are about to assemble.

Pistachio diplomat cream
2 egg yolks
15g cornstarch
25g caster sugar
1/8 tsp salt
220g milk
15g unsalted butter, softened
45g pistachio paste*
1 tsp vanilla extract 
3g gelatin bloomed in 10g ice water 
100g whipping cream of choice*

1. Heat milk until hot but not boiling. In the meantime, whisk together egg yolks, sugar, salt and cornstarch in a heavy heatproof bowl/jug. 
2. When milk is hot, pour in a thin stream while whisking the egg mixture continuously. Pour everything back into saucepan
3. Whisk egg mixture while cooking over medium-low heat until it thickens. Remove from heat and whisk until smooth. Put it back on heat and keep whisking until it starts to bubble/boil. Continue whisking for an additional minute.
4. Remove from heat. Add butter, pistachio paste, vanilla and bloomed gelatin. Whisk until smooth. Press cling wrap onto surface of pastry cream and refrigerate overnight.
5. When you are ready to assemble, whip your whipping cream of choice until firm peaks. Loosen the pastry cream by whipping it briefly. Fold whipped cream into pastry cream in a few additions. Transfer into piping bag and keep refrigerated until ready to pipe.

Dark chocolate ganache
120g 55% dark chocolate couverture 
50g heavy cream/water
5g honey 
15g butter, softened

1. Melt chocolate. Add heated cream and honey, mix well 
2. Add softened butter and mix well. Press cling wrap onto surface of ganache and let it sit at cool room temperature for 2h. If it is too warm, refrigerate for 15-20 min before spreading on log cake.

*Notes:
- Please refer to my previous blog post for the pistachio paste recipe
- You may choose to use non dairy cream, heavy cream (35-38% fat) or double cream (45-50% fat) depending on preference and climate. You may add a little powdered sugar when whipping the cream if you wish.
- I made a really thin sponge on purpose to enjoy the log cake like an ice-cream cake when frozen. If you prefer to have more sponge to cream ratio and enjoy it chilled instead of frozen, upsize the recipe to 4 eggs and layer with less cream.


Assembly

1. Unroll chocolate sponge. Brush surface with strawberry jam syrup (I just diluted strawberry jam that was previously reduced for the Christmas cookies).

2. Layer a thin layer of crunchy pistachio kunafa 


3. Pipe a layer of diplomat cream and spread it evenly with spatula.


4. Roll it up tightly and freeze for 2h. Slice off both ends for the branches.

5. Attach the branches to main trunk with some ganache. Cover the surface of the sponge with ganache. Use the spatula to create bark patterns. You may use a fork instead if you wish.


6. Dust some snow powder and decorate as you wish

This was before I dusted with snow powder.

I hope to bless my family and friends with this creation! I will be making two more of these but thought of sharing it earlier in case you want to give it a try!

Update 3/1/2025:

This comes a little late but better than never. All who tasted my cakes said they are really tasty, including my relatives who came down to visit from the US after their last visit back in 2017! My elder kid who did a blind taste test at one of the parties that ended up having two log cakes said mine tasted better! With such positive feedback, I highly recommend you to try it out!


with love,

Phay Shing

Read More »

Wednesday, 20 December 2023

Orange Chocolate Hazelnut Log Cake

 I have a large unopened bottle of chocolate hazelnut spread, Hazella, from Redman. It's nowhere near expiry but it's not the habit of my family to consume bread with sweet spreads for breakfast and I only use it for bakes. This is the reason why this year's log cakes for my family and friends are orange chocolate hazelnut flavoured. 

 
Here's a closer look at the larger log cake at the back.


The log cakes consist of:
- Orange chocolate hazelnut chiffon sponge, brushed with orange syrup
- Milk chocolate hazelnut feuilletine crunch
- Orange chocolate hazelnut whipped cream
- Dark chocolate hazelnut ganache
- Candied orange mushroom decorations with vanilla Swiss meringue buttercream (SMBC) as the stems

I have to say that I used SMBC because I happened to be making it for another bake. Otherwise I would have made the mushroom stems out of marshmallows when I made the characters but I forgot to do it. It may seem like a complicated bake but it's actually quite simple when you use ready-made chocolate hazelnut spreads, chopped toasted hazelnuts and feuilletine flakes. You may omit the edible decorations and use plastic ones sold at baking supplies stores if you wish to simplify the bake even further. The most common chocolate hazelnut spread is Nutella but you may use any brand you like. My hubby and I tasted both Hazella and Nutella and find that Hazella is a richer version of Nutella. Stronger chocolate and hazelnut flavour.

Since my motive was to use up as much Hazella as I could, I included the chocolate hazelnut spread in every element of the log cake while trying to maintain a good balance of flavours. You may increase or reduce the proportion of the spread in the whipped cream, ganache and feuilettine crunch according to your preference.

Candied Orange Slices
A few small tangerines, thinly sliced
300g sugar
360g water
A dash of lemon juice (optional)
Some granulated sugar

Note: This makes a lot more than you need to use. Keep the rest for snacking!

Reference recipe is taken from here.

Steps:
1. Place sugar, water and lemon juice (if using) in frying pan. Stir while bringing it to a boil.

2. Once it starts boiling, reduce to a simmer. Add orange slices in a single layer.

I included a few pieces of peel for fun

3. Simmer for about 45-60 min or until translucent.

4. Shake off excess syrup from each slice and place on parchment paper.

5. Dry in 90C oven for 1-2 hours or until no longer wet to touch but still a little tacky, turning the slices every 30 min. I placed half-dried slices on hemispherical silicone molds for the mushroom caps so that the orange slices are cup shaped when dried.

6. Cool completely. Roll the slices in granulated sugar. Store in airtight container until needed.

Remember to reserve the syrup from cooking the tangerine slices! It can be diluted with orange juice and used to brush the sponge.


Orange Chocolate Hazelnut Chiffon Sponge
(makes one 10x12" sheet sponge)
Egg yolk batter
3 egg yolks
45g orange juice with zest (I used 41g juice and 4g zest which is about 1 orange)
90g chocolate hazelnut spread (Nutella, Hazella or other brands)
1/2 tsp vanilla extract
48g cake flour
1/4 tsp baking soda

Meringue
3 egg whites
1/8 tsp cream of tartar
60g caster sugar

Steps: 
1. Line baking tray with Teflon sheet/parchment paper. Preheat oven to 170C. You may use a slightly bigger or smaller pan. The sponge will just be a little thinner or thicker.

2. Make egg yolk batter. Whisk egg yolks until pale and thick. Add chocolate hazelnut spread and whisk until smooth. Add juice, zest and vanilla. Whisk until combined. Gradually sift in flour and baking soda. Whisk until no trace of flour is seen.

3. Make meringue. In a clean metal bowl, beat egg whites with cream of tartar until firm or just reach stiff peaks, gradually adding sugar once the egg whites are foamy. Make sure your meringue is stable but not over whipped as the high fat content of this egg yolk batter tends to deflate the meringue more quickly than other batters.

4. Quickly but gently fold meringue into egg yolk batter in 3 additions. Pour into prepared tray.

5. Bake for 15-16 min or until done. Immediately flip the cake out onto fresh sheet of parchment paper. Roll it up to cool completely.

I used a larger tray and upsized the recipe to 4 egg portion for the larger log cake. Simply divide everything by 3 and then multiply by 4 to scale it up.

Milk Chocolate Hazelnut Feuilletine Crunch
25g finely chopped toasted hazelnuts 
25g feuilletine flakes
50g chocolate hazelnut spread
50g milk chocolate

Note: Scale up the portion accordingly if making more log cakes.

Steps:
1. Whisk together feuilletine flakes and chopped hazelnuts. Set aside.

2. Melt milk chocolate with chocolate hazelnut spread. Stir until smooth.

3. Add feuilletine nut mix and fold until the flakes and nuts are coated completely. Set aside in warm place.


Orange Chocolate Hazelnut Whipped Cream
140g whipping cream of choice* 
50g chocolate hazelnut spread
4g orange zest (about 1 orange)

Note: Scale up the portion accordingly if making more log cakes.

*I used 105g Whip Topping (pre-sweetened non-dairy whipping cream) and 35g heavy cream. If using only dairy cream, you may need to sweeten with some sugar and stabilize with gelatin especially if you are in a hot climate.

Steps:
1. Whip whipping cream of choice until firm peaks. Be careful not to overwhip if using full dairy cream. 

2. Add orange zest and fold in.


3. Add chocolate hazelnut spread and fold in. You may add more spread if you prefer a richer flavour. I kept the chocolate and hazelnut light here because these elements are heavier in the crunch and ganache layers. You may omit the spread if you wish.


Dark Chocolate Hazelnut Ganache
100g dark chocolate
75g heavy cream
25g chocolate hazelnut spread
15g hot water
Pinches of salt

Note: Scale up the recipe if making more log cakes 

Steps:
1. In a small saucepan, dissolve chocolate hazelnut spread in hot water. Add heavy cream and salt. Stir to mix. Heat until just starts to bubble at the edges.

2. In the meantime, melt dark chocolate.

3. Pour hot cream mix over melted dark chocolate. Let it sit for 1min. 

4. Gently stir in one direction until smooth. 

Assembly
1. Unroll cooled chiffon sponge. Brush surface with orange syrup. I didn't measure the dilution ratio but it is approximately 1:1 fresh orange juice : reserved tangerine cooking syrup.

2. Spread a thin layer of feuilletine nut crunch.

3. Spread a layer of whipped cream over the crunch layer.

4. Roll up the sponge into as tight a roll as you can. Freeze for 2h or overnight if you wish.

5. Cut the ends of the log cake. You may arrange the branches any way you like as shown in my two log cakes.

6. Apply some ganache on the cake board. Carefully place the main log on the board. Apply some ganache where you want the branches to be and then glue them on.

7. Coat the whole surface with ganache. Let it set briefly in air-conditioned room or in the fridge for about 10 min. 

Halfway through coating the surface with ganache

8. Use a fork to mark out the bark patterns on the ganache.

9. Add any decorations you wish. Dust with sifted snow powder if you wish. Keep refrigerated until ready to serve. You may freeze the cake if storing longer than 5 days in the fridge. Defrost in the fridge overnight before serving.

Watch my reel to see how the cake is assembled over here:


Have a blessed Christmas everyone!

with lots of love,
Phay Shing
Read More »

Friday, 23 December 2022

Christmas Tree Surprise 'Log' Cake


Posting some of my backlogs as I was away in Dec. Here is a Christmas "log" cake with a Christmas tree surprise! Piping tutorial here.

With love,

Susanne

Read More »

Tuesday, 20 December 2022

Chocolate Hazelnut Praline Log Cake

 I am very excited to have my first partnership with Ninja Kitchen Singapore to introduce their Ninja Foodi Power Blender Ultimate System! It is really timely to be receiving their system near Christmas as I intend to make chocolate hazelnut praline log cakes for my family and friends!  


Bear with me as this will be a long post because the log cake consist of four different components, excluding my sugar-free snowman marshmallow decorations.

The four components of the log cake: chocolate hazelnut chiffon cake, hazelnut feuilletine crunch, hazelnut praline diplomat cream and dark chocolate ganache 

I used the blender system to make three items essential for the bake: hazelnut flour, finely chopped hazelnut and hazelnut praline paste. Toasted hazelnuts are used for all hazelnut related items in the cake as it is more aromatic.

Finely chopped hazelnut, hazelnut flour and hazelnut praline paste 

I love the fact that the blender is easy to use and clean! You may use my promo code: PSCB402 to enjoy $150 off original price of $499! Visit Ninja Kitchen Singapore's website if you would like to make the purchase.

Some items in the log cake can be prepared in advance to make the bake easier. Make sure you plan ahead of time the sequence of making the components as you want to make sure everything is ready when you assemble. I will be sharing the recipes in the order that you should be preparing. The portions suggested in this post is enough for two log cakes so scale ingredient portions accordingly.

The source of my inspiration and reference recipes for some components of the log cake are taken from here and here.


HAZELNUT FLOUR & FINELY CHOPPED HAZELNUT 

Ingredients:
150g blanched whole hazelnuts*

* Toast a total of 330-350g hazelnuts for the whole bake but you will only use a portion of it as flour and chopped nuts.

Steps:
1. Preheat oven to 160C fan/175C top and bottom heat only. Line large baking tray with parchment paper/Teflon sheet/silicone mat.

2. Bake hazelnuts in a single layer for 10 min or until lightly browned and aromatic. Adjust temperature and time accordingly as each oven is different.

3. Cool completely before using coffee grinder or blender to pulse the toasted nuts (about 120-150g) a few times until you have a good mix of finely chopped pieces and flour. Do not run the blender for too long or it may become a paste. Split the batch of hazelnuts into two if your blender/grinder is small. I used the Coffee & Spice Grinder of the Ninja Foodi Power Blender Ultimate System for this.

4. Use a sieve to sift the flour from the chopped pieces. I didn't use my superfine sieve for this as I want my chopped nuts portion to contain only chopped bits without the flour. The flour portion may not be superfine here but it is OK as an addition in the log cake. You may use a fine sieve to sift the coarse flour if you want superfine flour.

Prepare the flour and chopped nuts ahead of time. Store airtight in cool dry place if using within a week. Store in fridge or freezer for longer storage.


HAZELNUT PRALINE PASTE

Ingredients:
180g toasted hazelnuts (see above for toasting)
120g sugar
25g water
1/4 tsp salt
1 tbs (12g) oil of choice (I used peanut)

Steps:
1. Make caramel by heating sugar and water in a light coloured, heavy bottomed saucepan. Do not stir the syrup. Gently swirl the saucepan to mix evenly if need be. The darker the caramel colour, the deeper the flavour but be careful not to burn it! Once you have achieved a deep amber colour, remove from heat and pour the caramel onto baking tray lined with Teflon sheet/silicone mat.

2. Let the caramel cool completely before breaking it up into shards. You may use your hands or use a knife to chop it up. 

3. Put the caramel shards, toasted hazelnuts, salt and oil into blender. Blend until you get a paste. I used the Power Smoothie Bowl to make the paste. It is up to your personal preference to blend until it is completely smooth or still retains some coarse bits. I prefer my praline paste to have a little bite so I didn't blend until it is completely smooth.

Hazelnut praline is typically made by stirring the caramel and toasted nuts together before pouring it out onto the tray. I skipped this step to simplify the process as it is not necessary here. You only need to coat the hazelnuts with caramel if you are making praline shards.

Prepare the praline paste ahead of time. Store the praline paste in an airtight container at a cool and dry place until use if you are using it within the next couple of days. Store in the fridge for two-three weeks or in the freezer for longer storage.


You may refer to my Instagram reel to see how I made the hazelnut flour, chopped hazelnut and hazelnut praline paste:


HAZELNUT PRALINE DIPLOMAT CREAM

Ingredients:
2 large egg yolks (62-65g eggs with shells on)
15-18g cornstarch/cornflour (use more if you prefer a thicker cream)
20g sugar*
Pinches of salt
240g milk
10g unsalted butter, softened
40g hazelnut praline paste 
1/2-1 tsp vanilla bean paste/extract
100g double cream/heavy cream/ non-dairy whipping cream (I used a combination of 25g double cream and 75g non-dairy whipping cream)**

* I used Allulose, a sugar replacement, so that the bake is slightly more diabetic friendly. You may use regular sugar and also adjust according to taste. I made the cream less sweet to suit the taste buds of my recipients.

** You may use your preferred choice of whipping cream. I used a combination to get the stability of non-dairy whipping cream in tropical climate like Singapore, and great milky taste of double cream. Be careful not to over whip dairy creams. You may want to add some sugar and stabilize with gelatin if using dairy cream only. I loosened cold double cream with a hand whisk before folding in non-dairy cream what was whipped until stiff. Non-dairy creams are pre-sweetened so I didn't add any sugar.

Steps:
1. Make the pastry cream. Heat milk in a saucepan until steaming hot but not boiling. In the meantime, whisk together egg yolks, sugar, salt and cornstarch in a heavy bowl until smooth.

2. Once milk is hot, pour in a thin stream into egg yolk mixture while whisking the egg yolk mix continuously. Pour everything back into saucepan and cook over medium-low heat while whisking continuously.  Pay attention to the custard as it will start to thicken suddenly. If it thickens up too fast, just remove from heat and keep whisking until smooth before putting it back on the stove. Continue cooking and whisking until mixture just starts to bubble. Cook for another 1 min while whisking continuously. 

3. Remove from heat. Add vanilla, praline paste and butter, one item at a time, whisking after each addition. 

4. Pour into a tray/bowl. Press cling wrap onto surface of pastry cream. Refrigerate for at least 2 hours or overnight. You may prepare the pastry cream a day in advance.

5. When it is time to assemble the log cake before you make the hazelnut feuilletine crunch, make the diplomat cream. To do so, take the pastry cream from fridge and loosen it by briefly whisking until smooth. Prepare whipped cream of choice. Fold into loosened pastry cream in three additions. Keep bowl of diplomat cream covered and refrigerated while you make the hazelnut feuilletine crunch.


DARK CHOCOLATE GANACHE

Ingredients:
125g heavy/double cream (I used a combination)
150g 54% dark chocolate couverture
15g unsalted butter, room temperature and softened
Pinches of salt
10g light corn syrup (optional)

Steps:
1. Heat dark chocolate using double boiling or microwave oven until slightly softened (not necessarily melted). Set aside.

2. Heat cream, corn syrup and salt in a saucepan until it just starts to bubble. Pour over chocolate and let it sit for a minute. Gently stir in one direction with spatula until chocolate is melted and smooth.

3. Add butter and stir until well mixed. Set aside to firm up at cool room temperature. 

You may prepare this a day in advance or while waiting for the Swiss roll to firm up in the freezer. I prefer to make this a day in advance to avoid having too many things to do on the day of baking and assembling the log cake. It is safe to store the ganache overnight at cool room temperature in airtight condition. Store the ganache in fridge if you need longer storage but it has to come to room temperature and have a toothpaste consistency before you can use it to coat the log cake.


CHOCOLATE HAZELNUT CHIFFON SPONGE 

This sponge is mild flavoured as the rest of the components are rich and strong flavoured. The hazelnut flour addition serves more to affect the texture rather than taste so you won't taste much of it, much like how a little almond flour is used to replace wheat flour in many cakes in traditional pastry making. Some hazelnut flour is generated in the process of getting finely chopped nuts out of the blender system so we might as well put it into good use!

Ingredients (makes two 10x12" sheet cakes):
Egg yolk batter
6 egg yolks (62-65g eggs with shells on)
20g Dutch processed cocoa powder *
64g boiling water
64g cake flour
1/4 tsp baking soda
16g hazelnut flour (replace with cake flour for regular cakes)
54 oil (I used canola)
1 tsp vanilla extract
1 tsp Kahlua coffee liqueur (may replace with vanilla)
Pinches of salt

Meringue**
6 egg whites
90g sugar***
1/2 tsp cream of tartar

* You may use regular cocoa powder. If so, increase baking soda to 1/2 tsp. Note that the chocolate flavour is mild for this cake as I did not want the chocolate (especially from the ganache) to overpower the hazelnut flavour. If you prefer it more chocolatey you may coat the sponge with a thin layer of dark chocolate ganache before layering on the hazelnut feuilletine crunch and diplomat cream.

** If your oven cannot fit two trays, divide the ingredients into two. Make the egg yolk batter for two trays worth but make the meringue for one tray portion only when you are about to bake it.

*** I used a combination of 10g caster sugar and 35g Allulose to make it a bit more diabetic friendly.

Steps:
1. Preheat oven to 165C fan/180C top and bottom heat only. Set oven rack to middle position. Line baking trays with parchment paper or Teflon sheet. 

2. Dissolve cocoa powder in boiling water to form a thin paste. Once cooled, add extract/coffee liqueur and salt. Mix well. Set aside.

3. Prepare egg yolk batter. Whisk egg yolks until pale and thick. Add oil and whisk until smooth. Add chocolate paste and whisk until combined. 

4. In a small bowl, sift cake flour and baking soda together with a fine sieve. Add hazelnut flour and whisk together. Sift flour mix into egg yolk batter using a coarse sieve and whisk until well combined. 

5. Make meringue. In a clean metal bowl, beat egg whites with cream of tartar until firm peaks or just reach stiff peaks, gradually adding in sugar once egg whites are foamy.

6. Quickly but gently fold meringue into egg yolk batter in three additions. Pour batter into prepared trays and smooth the batter using a bench scraper or spatula.

7. Bake for 12-14 min or until skewer comes out clean. Immediately flip the cake out onto fresh sheet of parchment paper/Teflon sheet and roll up to cool completely. You may use Teflon sheet if you prefer the sponge not to have wrinkle lines. The wrinkles won't be visible anyway because it is going to be covered by the ganache.

Prepare the hazelnut feuilletine crunch while waiting for the sponge to cool.


HAZELNUT FEUILLETINE CRUNCH

Ingredients:
75g double cream/heavy cream (I used a combination)
150g white chocolate couverture
150g hazelnut praline paste
60g feuilletine
60g finely chopped toasted hazelnuts

Steps:
Make sure you have the chocolate hazelnut sponge and hazelnut praline diplomat cream ready before you make the feuilletine crunch.

1. Melt white chocolate and cream over double boiler. Stir until smooth. Be careful not to overheat! Using a thick glass bowl over hot (not boiling) water helps to control the heat a little. Do not let the water touch the bottom of the bowl.

2. Warm up the hazelnut praline paste in microwave oven for 10 seconds at medium to medium-high powder. Add to melted chocolate. Stir until smooth.

3. Add feuilletine and chopped nuts. Stir until well mixed. If the mixture firms up too much at this point, reheat gently over double-boiler to spreadable consistency.


ASSEMBLY
Items to prepare:
6 x 9" cakeboards
Cake decorations/ornaments
Snow powder (optional)
Chocolate hazelnut chiffon sponges
Hazelnut feuilletine crunch
Hazelnut praline diplomat cream
Dark chocolate ganache

1. Unroll sponge. Spread a thin layer of dark chocolate ganache (optional and only if you prefer it more chocolatey. I didn't add this layer). Spread a thin layer of hazelnut feuilletine crunch, leaving about half an inch border around uncovered.


2. Spread a layer of hazelnut praline diplomat cream over the feuilletine crunch. Make sure the cream is thinner around the edges of the sponge.


3. Roll it up into a tight roll, using a bench scraper or long metal ruler to help you tighten the roll (see reel below). Freeze for 1 hour. You may prepare the dark chocolate ganache at this point if you haven't done so.

4. Remove Swiss roll from freezer and cut the ends off with a serrated knife. Reserve the cut-off pieces. 

5. Apply a small amount of ganache on a 6 x 9" cakeboard. I added a little diplomat cream as well but it's optional. Carefully place the Swiss roll on the cakeboard. Coat the Swiss roll surface with dark chocolate ganache using a small spatula.


6. Attach the cut-off pieces of Swiss roll onto the main roll cake and coat with ganache. Use the small spatula to make bark lines on the surface. You may use a fork if you wish, just like I did in the previous years.


7. Add any plastic cake ornaments, or in my case, snowman marshmallows as well. Finish off with a light dusting of snow powder if you wish. Store the cake in fridge for up to a week, in the freezer for longer storage. 


You may refer to this second reel to see the process of making the log cake out of the hazelnut items.

https://www.instagram.com/reel/CmY49RsArbF/?igshid=NTdlMDg3MTY=

Any leftover cream, ganache, praline and chopped nuts can be mixed together and frozen to make a delicious hazelnut praline chocolate ice-cream! But if you want this to happen, make sure you make double portion of diplomat cream! Add a little melted bloomed gelatin as well to keep it less icy in texture.

I made double portion of diplomat cream!


with lots of love,

Phay Shing

Read More »

Monday, 28 November 2022

Snowman Yule Log Chiffon Cake Class


*New Class* Do you want to build a SNOWMAN with me?⛄️🥰 
Make a log cake with a cute twist this year!😃 


Techniques you will learn:  
White cake recipe 
Patterning chiffon cake into Snowman 
Chiffon swiss roll 
2 fillings: Cream cheese & non-dairy Chantilly cream filling 
Fruits filling and assembling Snowman with cute winter hat 

Sign up here

Happening on Dec 10th, 9-11am GMT+8 (Dec 9th, 8-10pm EST), with unlimited streaming after the class, workbook and private FB group! =) 

With lots of love, 
Susanne  

Read More »

Wednesday, 15 December 2021

Chocolate Milo Coffee Log Cake

I am gearing up for log cake marathon bake in a few days time for my extended family and a friend who have been very kind to support our family all these years. But hubby made some Milo kosong with freshly brewed drip coffee and let me have a sip of it. It is a beverage you have to engage your sense of taste and smell and take your time to let the different layers of flavours and aroma to wash over you. The malt, coffee, cocoa flavour in a creamy tasting base is such a delightful experience! So delightful that I decided to make this the flavour of the log cakes instead of the originally planned chocolate flavour alone. 

Since this is a new flavour, I had to experiment so I made one log cake in advance. It is a little tricky not to let any one of the elements overpower the others so it is a careful balance. I used decaffeinated instant coffee granules instead of drip coffee so that it is a cake kids can eat too. It is also a little more diabetic friendly as I let the malt in Milo impart some sweetness and use some maltitol to replace caster sugar for making the sponge. There isn't any added sugar on my part for the cake filling and chocolate ganache. 

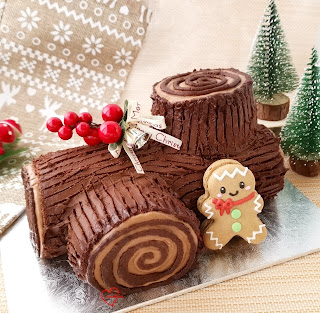
Presenting my chocolate milo coffee log cake! 

The gingerbread man macaron deco is from my macaron class prep! 

I immediately thought of using diplomat cream as the cake filling as I can bloom the cocoa in the milo and dissolve the coffee granules sufficiently in a custard base. It is more stable than dairy whipped cream in hot Singapore and lighter than buttercream. 

Milo coffee diplomat cream
Ingredients :
4tbs (28g) Milo Kosong powder(you may use regular Milo powder (not the 3-in-1 types), but it is sweeter than the kosong version which has no sugar added) 
2 egg yolks
200g + 25g milk
1 satchet (2g) instant coffee granules (I use decaffeinated coffee) 
20g cornflour 
A pinch of salt 
1 tsp vanilla extract 
15g unsalted butter
60g non-dairy whipping cream (this is already pre-sweetened. You may use dairy cream but do add sugar according to taste. Feel free to use more cream if you prefer it lighter and creamier. Adjust coffee and milo amount upwards if need be to compensate. )

Steps:
1. Heat 200g milk in a small saucepan until steaming hot but not boiling. 

2. In the meantime, in a heavy bowl or glass jug, whisk together egg yolks, coffee granules, Milo kosong powder, cornflour, salt and 25g of milk. Once the milk is hot, remove from heat and pour in a thin stream into the egg yolk mixture while whisking the egg yolk mixture continuously. Pour everything back into the saucepan. 

3. Place saucepan back on medium-low heat while whisking continuously. Once mixture thickens, remove from heat and continue whisking until smooth. Place back on heat and continue to cook until custard is able to hold a soft peak. 

4. Remove from heat and add vanilla and butter and whisk until smooth. 

5. Immediately press clingwrap on surface of pastry cream and refrigerate until firm, at least 1h or overnight. 

6. When sponge is baked and ready to assemble, whip the whipping cream until stiff peaks (be careful not to over whip if using dairy cream. I use non dairy for better stability in this bake as we are distributing to various households.) 

7. Take pastry cream out of fridge and briefly whip it to loosen texture. Fold in whipped cream to make diplomat cream. 

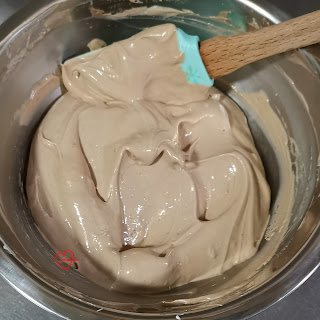
Smooth and creamy diplomat cream! 

Chocolate chiffon sponge
You may prepare this while the pastry cream is in the fridge to set. Do note that the chocolate flavour isn't very intense as I didn't want the chocolate flavour to overpower the malt in Milo. The cake is going to be coated with chocolate ganache anyway. 

Ingredients (makes one 10x12" sheet cake) :
Egg yolk batter
3 egg yolks
10g dutch processed cocoa powder
32g boiling hot water
35g cake flour
28g canola or vegetable oil
5g maltitol or caster sugar
1/2 tsp vanilla extract 
1/2 tsp kahlua coffee liqueur 
A pinch of salt
1/8 tsp baking soda

Meringue
3 egg whites
1/4 tsp cream of tartar 
40g caster sugar or maltitol (I used 30g maltitol and 10g caster sugar for better stability than just pure maltitol) 

Steps :
1. Preheat oven to 170C top and bottom heat or 160C with fan. Line baking tray with parchment paper or teflon sheet. 

2. Bloom cocoa powder by adding hot water to cocoa powder. Whisk together until cocoa is dissolved. Set aside to cool to room temperature. There is no need to cover the bowl to prevent evaporation. 

3. Prepare egg yolk batter. Whisk egg yolks and sugar together. Add oil and whisk until well combined. Add cocoa powder and water mixture and whisk until well combined. Add vanilla and coffee liqueur. Sift in cake flour, salt and baking soda. Whisk until no trace of flour is seen. 

4. Prepare meringue. In a clean metal bowl, beat egg whites with cream of tartar until firm peaks or just reach stiff peak while gradually adding in sugar once the egg whites are foamy. 

5. Quickly but gently fold meringue into egg yolk batter in 3 batches. Pour batter into prepared tray. Gently tap tray on table to release trapped air bubbles. 

6. Bake for 12-14 min or until skewer comes out clean. Immediately invert on fresh sheet of parchment and roll up to cool. Cooling the sponge in rolled up position prevents it from cracking when rolling later on. 

Dark chocolate ganache
Feel free to use more cream if you live in a cold climate. It is very warm here in Singapore so I make firmer ganaches in general. 

Ingredients:
120g dark chocolate couverture (I use 73.5% but it has sugar added so it does not taste bitter)
50g dairy whipping cream
15g unsalted butter
A pinch of salt
30g Milo coffee diplomat cream (optional) 
 
Steps:
1. Place all ingredients except diplomat cream in a heatproof bowl. Gently heat and stir over a pot of hot water without the water touching the base of the bowl. 

2. Set aside the ganache to firm up. About 30min to 1h in aircon room. Or several minutes in fridge. Whip it briefly to loosen texture. 

3. Fold in diplomat cream to the whipped ganache.

Assembly

Components/ tools:
9x6"cakeboard
Serrated knife 
Chocolate sponge
Dark chocolate ganache
Milo coffee diplomat cream
Any cake decorations
Small spatula
Fork
Piping bag (optional) 

Steps:
1. Unroll the cooled sponge cake. Spread a layer of diplomat cream. 

2. Carefully roll it up like a swiss roll. Refrigerate overnight or freeze for 1-2 hours. 

3. Slice the ends of the swiss roll off with serrated knife. Stick the central log onto cakeboard with a little ganache. Coat the whole log with ganache using a small spatula. Attach the cut off pieces on the top and side of the central log. Coat the pieces with more ganache. You don't have to be super neat about this! 

4. You may pipe more diplomat cream and ganache on the cut surfaces of the cake if you wish. Use a fork to carve out the bark pattern on the log. 


5. Attach any decorations as you wish! 


This cake can be kept refrigerated for a week or longer in the freezer. If freezing, thaw it a day or two earlier in the fridge before serving.


Update:

You may assemble the log cake as a stump cake if you don't have a rectangular cakeboard. Glad to have finished all in time! 


The rest are all in log form... 


With love, 

Phay Shing

Read More »

Monday, 21 December 2020

Gingerbread Spice Logcake

I wanted to create a different flavour for logcakes this year when my mum requested for them for our extended family. I was rather clueless about what to do until I made the gingerbread spice reindeer macarons last week. Presenting my version of gingerbread spice logcake! 


I made 3 of these actually, decorated with gingerbread man macarons made with leftover macaron batter from making the reindeer

Let me explain what goes into the logcake to tantalise you with the aroma and flavours

Sponge: dairy-free chocolate chiffon 
Filling : muscovado sugar and spice pastry cream lightened with whipping cream (A. K. A. Diplomat cream), and roasted walnuts
Outer frosting : whipped white chocolate ganache that is lightly spiced and lightly flavoured with passionfruit to give the cake a mild fruity tang to complement the warm spices, muscovado sugar and chocolate. 


You may refer to this post for the gingerbread spice macarons. Just to share a couple of pictures for the macarons... 

Piping the macaron shells. This was rather impromptu so I used gingerbread man cookie cutters to trace the template but used a round cookie cutter to give it a bigger head for a more chibi effect. 

The macaron shells were decorated with royal icing. 

Recipe for chocolate chiffon sponge
I have made chocolate chiffons for a few years for log cakes and each one has a slight variation. This time round I decided not to generate any excess egg yolks. At the same time I want to bring out the chocolate flavour in the cocoa powder so I chose to bloom the cocoa powder first in boiling water instead of sifting with cake flour. 

Ingredients (makes one 10 x 12" sheet cake) :
Egg yolk batter
3 egg yolks
5g caster sugar
28g vegetable or canola oil
13g valrhona or other Dutch processed cocoa powder
30g boiling water
1/2 tsp vanilla extract 
1 tsp kahlua coffee liqueur (optional) 
26g cake flour 
1/6 tsp baking powder
A pinch of salt

Meringue
3 egg whites
1/5 tsp cream of tartar
40g caster sugar 

Steps: 
1. Preheat oven to 170C. Set oven rack to middle position. Line baking tray with teflon sheet or parchment paper. 

2. Make egg yolk batter. Dissolve cocoa powder in boiling water. Add salt and dissolve. Set aside to cool with cling wrap covering bowl. 

3. Whisk egg yolks and sugar in a mixing bowl until pale and thick. 

4. Add oil and whisk until combined. Add dissolved cocoa with water and whisk until combined. Add vanilla and kahlua coffee liqueur. Whisk until well combined. 

5. Add sifted cake flour with baking powder and whisk until no trace of flour is seen.  

6. Make meringue. Beat egg whites with cream of tartar using electric mixer until foamy. Gradually add sugar and continue beating until firm peaks or just reach stiff peaks. 

7. Gently but quickly fold the meringue into egg yolk batter in 3 batches. Pour into lined baking tray. Bake for 13 minutes or until skewer comes out clean. Immediately flip it out onto a clean sheet of parchment paper. Roll it up to cool completely. 


Freshly baked chocolate chiffon sponge. 

Muscovado sugar and spice diplomat cream
Ingredients:
2 egg yolks
20g cornflour 
24g muscovado sugar (more if you have sweet tooth) 
200g milk
1 tsp vanilla bean paste
3/4-1 tsp cinammon powder*
1/4-1/2 tsp ginger powder*
1/8-1/4 tsp allspice powder*
A pinch of salt
15g unsalted butter
80g whipping cream (I used non-dairy for better stability in hot Singapore) 

* adjust quantity according to how spicy you like

Steps: 
1. Heat milk, spices, salt and vanilla in saucepan until steaming hot but not boiling. In the mean time, whisk together egg yolks, cornflour and muscovado sugar. 

2. Once milk is hot, pour in a thin stream into egg yolk mixture while whisking the egg yolk mixture continuously. Pour back into saucepan. 

3. Heat mixture over stove while whisking continuously using low heat. Once mixture thickens, remove from heat and continue whisking until smooth. Return to heat and whisk and cook until thickened until preferred consistency. I personally prefer it thicker. 

4. Transfer the custard into a bowl and add butter and whisk until melted. Press cling wrap on surface of the pastry cream. Refrigerate for at least 30 min or overnight. 

5. When ready to assemble, whip the whipping cream until firm peaks. Briefly whip the chilled pastry cream with spatula until loosened. Fold in whipped cream. 


Muscovado sugar and spice diplomat cream


Passionfruit and spice whipped white chocolate ganache
Ingredients:
1 gelatin sheet bloomed in ice water
125g heavy cream 
60g white chocolate couverture (I used Callebaut) 
1/2 tsp vanilla extract 
1/8 tsp cinammon powder**
1/8 tsp ginger powder**
1 tsp freeze-dried passionfruit powder **
70g whip topping (this is a non-dairy whipping cream that is pre-sweetened. You may replace with dairy cream but add 1/2-1 tbs of icing sugar when whipping it) 

**optional or adjust according to taste. The quantities I used are deliberately small as the filling is already strong flavoured and I wanted something milder and more refreshing to complement it. 

Steps:
1. Heat cream with spices and vanilla until just bubble. 

2. Add gelatin and whisk until dissolved. 

3. Pour 1/3 hot cream over white chocolate and wait 30 sec. Stir until melted. Add rest of cream and stir until smooth. Press cling wrap on surface and refrigerate overnight.

4. When ready to assemble, beat on high speed with mixer. Fold in whip topping. 

I had some leftover diplomat cream so I folded it into the whipped ganache. 

Assembly
1. Unroll cooled chiffon sponge. Spread some diplomat cream on surface. Add some halved walnuts. 


2. Roll it up with parchment paper wrapping around the roll. Freeze for at least 2h or overnight. 

3. Use a serrated knife to slice off both ends. 

4. Apply some diplomat cream on cakeboard and place the main roll on cakeboard. Apply some diplomat cream to glue on the cut off pieces to the main log. 


5. Coat the outer surface of the logcake with whipped ganache. Don't worry sbout being neat as you don't have to be! 


6. Use a fork to draw the bark pattern on the logcake. 


Add decorations as you wish. I just decorated with a gingerbread man macaron and plastic holly logcake decoration. 


Keep refrigerated until ready to serve. If you wish to enjoy it like an ice-cream cake, you may keep the logcake frozen but thaw it at room temperature for 30 min or a few hours in the fridge before slicing to serve. Excess diplomat cream mixed with the whipped ganache can be frozen and served as ice-cream on its own or with chocolate sauce and chopped walnuts. 


Blessed Christmas to all! 


With love, 

Phay Shing

Read More »

Saturday, 21 December 2019

Strawberries n Cream Logcake

My last Christmas bake from home for the year, strawberries n cream log cake!

I decorated with a couple of reindeer I made from my masterclass! 

I have been really busy with classes/test bakes and dealing with some admin stuff for my kids for the next academic year but managed to squeeze in this bake that took me only a couple of hours to put together, including chilling in the freezer (if you don't count the premade reindeer macarons and strawberry jam filling I used). If you want it to be done really quickly, omit the homemade strawberry jam and just use whipped cream as the filling. Korean strawberries are in season now so why not take the chance to include this in your Christmas bake?

The recipe for the vanilla chiffon sponge can be found here but divide all ingredients by two if you are making only one logcake like me. I baked this sheet sponge in a 10 x 12" pan lined with teflon sheet (you may use parchment paper). Bake in preheated oven at 170°C for 12-13min and flip it onto a fresh sheet of parchment paper immediately and roll up to cool.

While cake is cooling, prepare the strawberries and filling. If you intend to use homemade strawberry jam, this should be done earlier before sponge is baked.

Strawberry jam
Ingredients:
300g whole strawberries
25g sugar (or to taste)
Pinch of salt
1 tsp cornflour dissolved in 30g water
1tsp lemon juice
1/2 tsp strawberry emulco/paste
1 tsp gelatin powder
1 tbs water

Steps:
1. Blend strawberries with lemon juice and sieve the mixture into a small saucepan.

2. Add salt and sugar and cook over low heat, stirring frequently for about 15 to 20 min or reduced to the consistency of your liking.

3. Towards end of cooking time, add the cornflour dissolved in water and continue to cook for another few minutes until the jam is thickened further.

4. Add strawberry paste and mix well. You may store this in the fridge overnight or up to a few days before assembling with cake.

5. When you are ready to assemble the cake while the baked sponge is cooling, bloom the gelatin by scattering the gelatin powder over the water in a small microwaveable bowl. Let it sit for 10 min. Melt the bloomed gelatin over medium low power in microwave oven and stir until gelatin is dissolved. Repeat heating if necessary. Stir the melted gelatin into the jam. Reserve about 1-2 tbs of jam (if you are making the pink swirls on the log cake) and transfer the rest into piping bag.

Whipped cream
You may use any of your preferred whipped cream recipe. It can simply be whipped topping which is a non-dairy whipping cream that is very stable in Singapore's hot climate, or stabilized dairy whipped cream. But I will share what I used. I used part double cream and part heavy cream. Double cream contains 45% fat whereas heavy cream contains 35% fat. Double cream is more stable at room temperature than heavy cream due to the higher fat content so it doesn't melt into a puddle that easily. Dairy cream tastes better than non-dairy cream in my opinion, but it is trickier to work with.

Ingredients:
180g double cream
120g heavy cream
2 tsp vanilla extract
20g icing sugar

Notes: you may add some melted bloomed gelatin into the dairy whipped cream if you want to stabilize it some more. Just use 1tsp of gelatin powder to 1tbs of water as the ratio to use.

Steps:
1. Chill bowl and beaters in freezer for 10 min before whipping.

2. Place all ingredients in chilled mixing bowl and beat until firm peaks. If you are adding gelatin, add in at this point. Gently whisk until stiff peaks to make sure the cream is beaten evenly. Do not overwhip.

Your cream should look like this

3. Portion out about 130g and transfer into piping bag.

Assembly
1. Cut some strawberries and pat dry cut surfaces with paper towels. It is up to you how you want to cut them. I cut the leaves and the pointy end of strawberry.

2. Unroll the cooled sponge. Pipe alternating lines of strawberry jam and whipped cream. If you are using only whipped cream, just use a spatula to apply the cream on the sponge.

3. Place the cut strawberries on top.

This was how I did it. 

4. Carefully roll the cake and freeze it for 1h. In the mean time, chill the unused whipped cream in the fridge.

5. When 1 hour is almost up, make the pink whipped cream. Mix 1-2tbs of jam with 80g of whipped cream. Add 1/4 tsp of strawberry emulco too. Transfer into piping bag fitted with a wilton #10 tip or any tip of your choice.

6. Spread a little cream on the cakeboard. Carefully slice off the ends of the swiss roll with a heated knife.

7. Place the main log on the cakeboard and cover with cream. Attach the cut off pieces, one on top and another at the side. Cover with cream. Pipe the pink swirls on the exposed cut ends.

This is what it looks like. 

8. Use a fork to create the bark patterns on the log. Add a nicely cut strawberry slice in the middle of the cut surfaces if you wish. I chose to cut heart shape because Christmas is really about God's love for us by sending us the greatest present we can have, Jesus!

Store in fridge until you are ready to serve.

Unadorned logcake! 

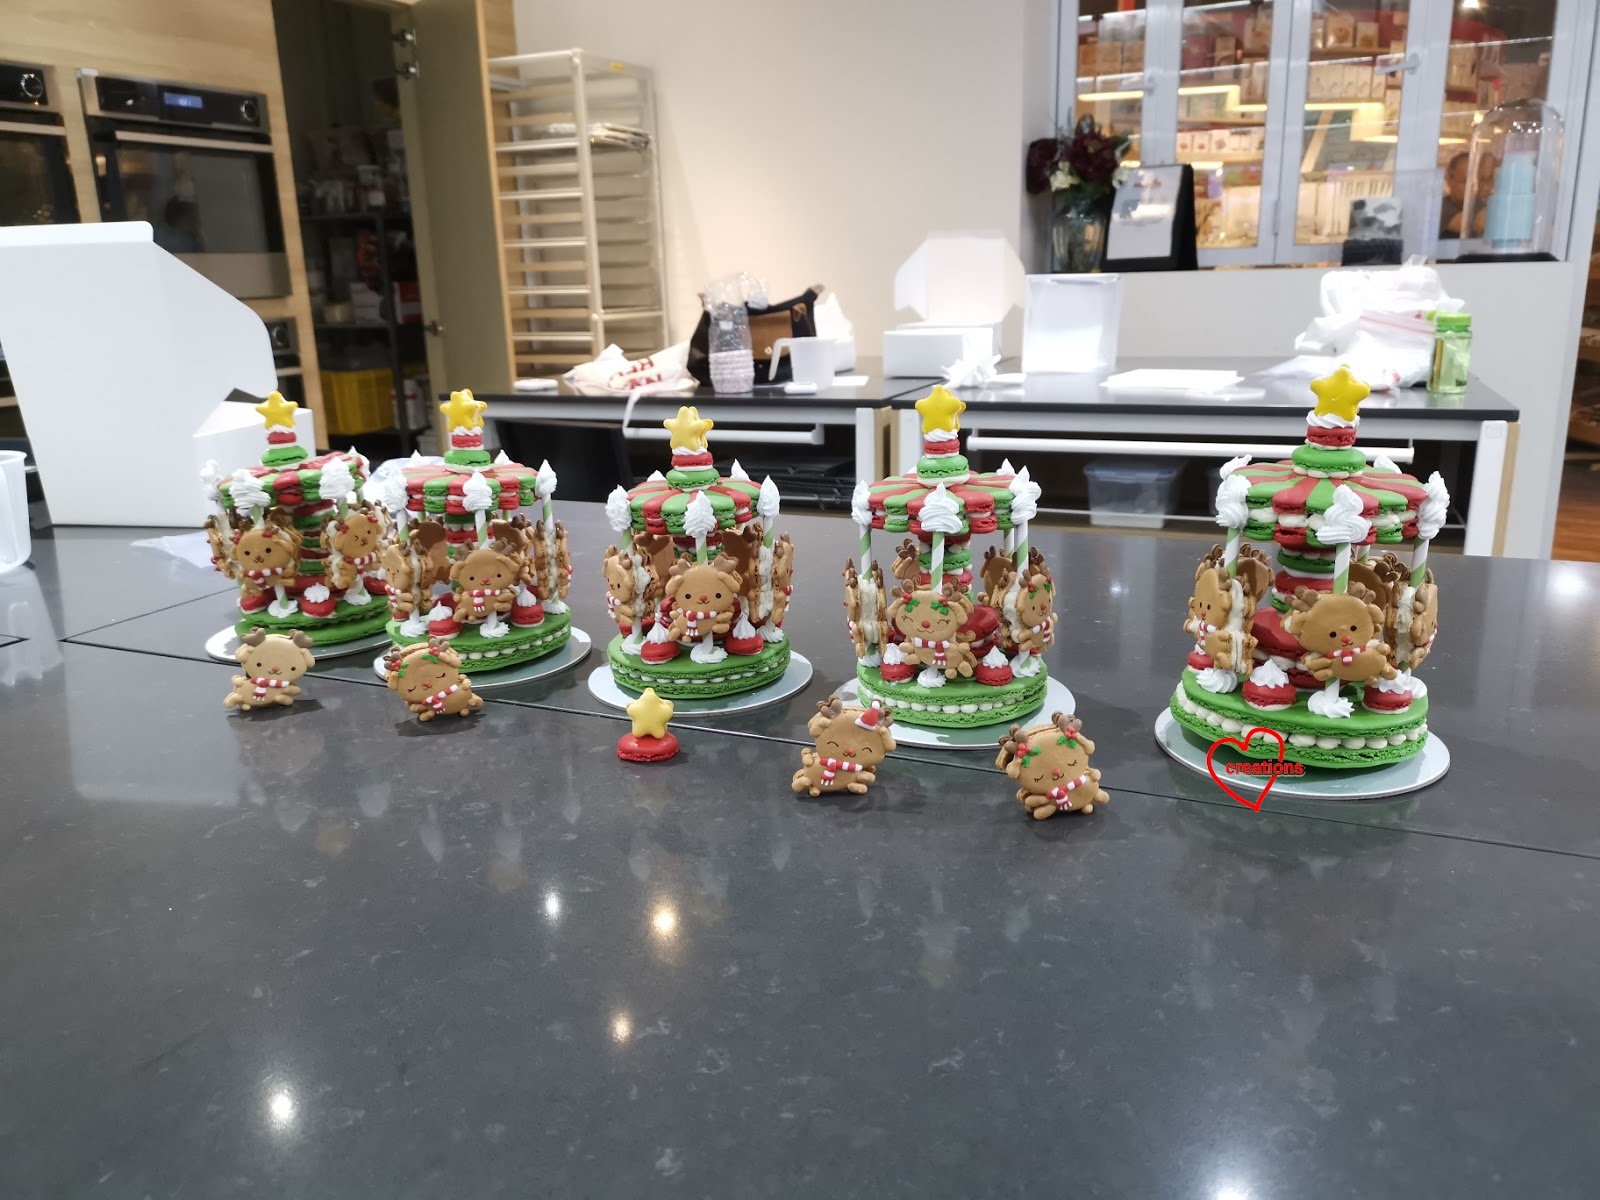
I decorated the cake with some extra loose pieces of reindeer macarons from my first macaron carousel masterclass!

Here is a peek at what we did over 2 intensive days! 

Have a blessed Christmas everyone!

With love,
Phay Shing


Read More »