Tuesday 30 August 2022

'Penguin Family Christmas Carnival' Macaron Masterclass

 Someone asked if I was going to teach the macaron ferris wheel some time back. I was reluctant because of the level of technical difficulty and precision needed. But since the request is made again, we decided to go ahead with it. A lot of thought and time has gone into making this class manageable and yet cover much content that bakers will find helpful.

I have included character macarons, static macaron structure (gingerbread house) and moving macaron structure (ferris wheel) in the class content. For more details about what will be covered and the itinerary for this intensive two-day course, please click on this link for studio class and this link for online class. Early bird special ends on 10 November for both. Studio class participants have full access to online class materials at no extra charge! Studio participants can also choose to sign up as a pair to share the ingredients to make one set of the macaron scene at a lower price per pax.


The gingerbread house macaron shells smell and taste so good you can eat it on its own without filling!


Here's a video of the ferris wheel in action! See how smooth and fast it can spin, and all the carriages are facing the right way up all the time.


with love,

Phay Shing

Read More »

Friday 26 August 2022

Bubble Tea Chiffon Cake


Bubble Tea Patterned Chiffon Cake with brown sugar cream and crunch inside! You can literally drink up the filling from the straw! =p 

Watch a short video of the making of the cake here. Hope this Bubble Tea Chiffon Cake made you smile! 

Search Bubble tea tags for my other bubble tea creations like roll cake here =).

With lots of love,
Susanne


Read More »

Tuesday 23 August 2022

'Field of Daisies' Matcha Azuki Bean Yuzu Swiss Roll

 My mum didn't get to eat the lychee rose strawberry cake I made for her birthday in late May due to Covid (she got to eat the strawberries and basket though) so we had another date when we planned a family get-together and nice meal at a Japanese buffet. Since I had forgotten to put the chiffon cake daises I made the last time on the cake, I decided to make a daisy themed cake with Japanese flavours this time round!


Matcha swiss roll with homemade sugar-free azuki bean paste, matcha diplomat cream, agar-based vanilla panna cotta and yuzu curd jelly!

I was afraid that adding the yuzu element to the traditional matcha-azuki bean combo would be risky but it paid off as a refreshing sour citrus touch to otherwise earthy flavours! Hubby my best food critic said the flavours were well-balanced so I was really happy about that. I only realised I had a smaller flower cookie cutter after I made the cake. Otherwise I would have preferred a smaller flower in the middle of the roll cake for an easier time of rolling. Mum is diabetic so I made this cake with that in mind, replacing caster sugar with sugar-free options where it doesn't compromise taste or structure too much.

This post may be long for a seemingly simple looking roll cake due to the many elements in here. I think each slice of cake can qualify as an entremet 😆. 


Sugar-free red bean paste

This portion is more than you need. Extras can be portioned into 50g portions (if you wish) and frozen for longer storage.

Ingredients:
250g small dried azuki beans
170g erythritol (replace with caster sugar if you wish)
1/2 tsp salt

Steps:
I followed Namiko Chen's instructions over here. You may realise that my version is very much reduced in sugar because erythritol tastes much sweeter than caster sugar in my opinion. Don't worry about the sweetness of the red bean paste as other elements in this bake will balance it out.
I made this ahead of time and froze it, defrost only when I was ready to make the red bean jelly to assemble with the sponge.

Freshly made red bean paste!

Sugar-free red bean jelly

You may not use all depending on how thick a layer you spread on the sheet cake. Prepare this when you are ready to assemble with the sponge. I prefer making a jelly layer rather than using the paste directly as it sticks to the sponge and cream instead of crumbles when you slice the cake.

Ingredients:
150g homemade azuki bean paste
2 gelatin sheets (or 4g powdered gelatin)
Ice cold water for blooming gelatin (Use 15g if using powdered gelatin)

Steps:
1. If you have frozen the bean paste, reheat until warm in microwave oven or stove top.

2. Bloom gelatin in ice water by soaking for 10min. Squeeze out excess water and gently melt in microwave oven using medium power for 10 seconds or double-boiler.

3. Stir gelatin into warm azuki bean paste until well combined before use.

Vanilla panna cotta flowers

Panna cotta is usually made with gelatin but I needed it to be firm enough to cut into shapes so I used agar instead. I used a lot less sugar as the azuki bean paste is sweet. Heavy cream also has a natural sweet milky taste even without sugar added. I used a 7 inch round silicone pan to set my panna cotta but you may use any mould. This is also more than you may need. Enjoy the extras as milk pudding on its own!

Ingredients:
300g water
10g agar powder
600g heavy cream
20g erythritol (may replace with caster sugar)
10g caster sugar
1 tsp vanilla extract

Steps:
1. Bloom agar powder by mixing with cold or room temperature water in a saucepan for 10min.

2. Add sugar(s) and bring to a boil while whisking frequently. Simmer while whisking for another minute.

3. Remove from heat. Whisk in heavy cream and vanilla. 

4. Pour into mould and set in fridge for at least 2 hours before cutting out shapes with flower cookie cutter (preferably 3-3.5cm) and jumbo straw/ regular straw (in the middle of flower). Store the jelly cutouts in airtight container until you are ready with the yuzu curd jelly.

Yuzu curd jelly

Again this is more than you need but reducing the portion makes it harder to work with. You may store extra curd in freezer for longer storage, or in the fridge for up to a week. Note that curds can be frozen and defrosted without change in texture but addition of gelatin may affect it. Yuzu curd recipe is adapted from here.

Ingredients:
100g 100% yuzu juice concentrate
3 egg yolks
50g caster sugar
50g erythritol (may replace with caster sugar)
100g unsalted butter, softened at room temperature and cut into small cubes
2 gelatin sheets, bloomed (see azuki bean jelly on how to use gelatin)

Steps: 
1. Whisk together egg yolks and sugar in heatproof bowl until smooth. Add yuzu juice snd whisk together.

2. Set bowl over saucepan of simmering water without base of bowl touching water. Whisk and cook the mixture until it reaches 80C. Be careful not to heat too fast or too hot or it will start to scramble.

3. Add in butter a cube at a time, mixing well with spatula after each addition. 

4. Melt bloomed gelatin in microwave if the curd has cooled down a lot by now. If not you may simply add the bloomed gelatin into the warm curd and mix well. 

5. Transfer yuzu curd jelly into piping bag with a small hole cut. Remove panna cotta flower cutouts from fridge and fill the cavities with yuzu curd jelly.

Freshly filled flowers! If you have excess, these are great to enjoy on its own as well!

6. Refrigerate the flowers until ready to assemble with sponge.

Matcha diplomat cream

I used whip topping, a non dairy cream which is pre-sweetened so I reduced the amount of sugar in the pastry cream portion. Feel free to use more sugar according to taste preference or if you are using full dairy whipping cream. I didn't use only dairy whipping cream because Singapore is really warm and I didn't want the cream to melt too fast. I used a combination of non dairy and double cream (45% fat dairy cream) to achieve a balance of good stability and taste.

Ingredients:
1 egg yolk
10g caster sugar
A pinch of salt
10g cornstarch
5g matcha powder (or according to taste)
105g milk
1/2 tsp vanilla extract
8g unsalted butter, softened
50g cold Whip topping
20g cold double cream

Steps:
1. Sift together cornstarch and matcha powder. 

2. Whisk together egg yolk, sugar, salt, cornstarch and matcha powder until smooth in a heatproof bowl. Set aside.

3. Heat milk and vanilla extract in saucepan until steaming hot but not boiling. Pour in a thin stream into egg yolk mixture while whisking egg yolk mix continuously. Pour everything back into saucepan.

4. Cook custard over medium-low heat while whisking continuously. Once it starts to thicken, remove from heat and whisk until smooth. Put back on heat and continue whisking and cooking until it thickens further for another 2min. 

5. Remove from heat and whisk in butter. Transfer into a tray or bowl and press cling film on surface of pastry cream. Refrigerate for at least 1h or overnight. 

6. When ready to assemble with sponge, whip cold whip topping until stiff peaks form. Fold in cold double cream. There is no need to whip up the double cream as its consistency is like softened butter. Remove matcha pastry cream from fridge and use spatula to loosen it up by briefly beating it. Fold in whipped cream in three additions until smooth and homogeneous. Transfer into large piping bag with a hole cut to use.

Matcha chiffon sponge cake

Ingredients (makes one 10 x 12" sheet cake):
Egg yolk batter
3 egg yolks
38g vegetable oil
9g matcha powder
33g hot water
9g milk
1 tsp vanilla extract
Pinch of salt
54g cake flour

Meringue
3 egg whites
1/4 tsp cream of tartar
36g caster sugar
18g erythritol (may replace with caster sugar or omit if you like the cake slightly bitter)

Steps: 
1. Preheat oven to 170C. Line baking tray with teflon sheet or parchment paper.

2. Prepare matcha paste. Dissolve matcha powder in hot water and sieve through fine sieve. Add milk and mix well. Check that overall weight is 42g. Add or remove liquid as necessary.

3. Make egg yolk batter. Whisk together egg yolks until pale. Add oil and salt and whisk until smooth. Gradually sift in half of flour and whisk until smooth. Add matcha paste and vanilla and whisk until smooth. Gradually sift in remaining half of flour and whisk until no trace of flour is seen.

4. Make meringue. In a clean metal bowl, whip egg whites with cream of tartar until firm peaks or just reach stiff peaks, gradually adding in sugar once egg whites are foamy. Use medium speed to whip up the meringue slowly for smaller air bubbles and finer cake texture.

5. Gently but quickly fold meringue into egg yolk batter in three additions. Pour into prepared tray and smooth out the top with a spatula or bench scraper.

6. Bake for 12-15 min or until skewer comes out clean. Immediately flip the cake onto fresh sheet of parchment paper. Roll the sponge to cool completely. While cake is cooling, get ready all the elements in the filling.

Freshly baked matcha chiffon sponge

Assembly

1. Unroll matcha sponge cake and spread a thin (or thick if you like!) layer of azuki bean jelly with spatula.

2. Pipe a layer of matcha diplomat cream in the middle.

3. Place the flower jellies in a row on top of the diplomat cream. My flower jellies were a little large and heavy so it sank to the azuki bean layer when placed on top of the diplomat cream 😅. So cut smaller flowers (like 3-3.5cm) if you can.

4. Pipe diplomat cream to cover the jellies. Use small spatula to smooth out the cream.


5. With the help of parchment paper, roll the cake up. Refrigerate for at least 4hours before slicing the ends off.


Chiffon cake daisies

Ingredients (makes one 10x12" and one 7x7" thin sheet cakes):

Egg yolk batter
2 egg yolks
20g vegetable oil
30g water
38g cake flour
white and yellow gel food colouring

Meringue
2 egg whites
1/4 tsp cream of tartar
20g caster sugar
14g erythritol (may replace with caster sugar)

Steps:
Follow matcha sponge method but divide the egg yolk batter and meringue into ratio of 5:2 by weight for white: yellow. Bake yellow cake in smaller pan. Spread as thin a layer of batter as possible and bake for only 8-9 min or until done. Adjust baking conditions according to your oven. Cut out the daisies with fondant cutters for the white part and straw/ piping tip for the yellow circles. Glue the daisies on with melted bloomed gelatin or cake glue. Do note that surfaces of chiffon cakes may dry out with storage in fridge so you may wish to brush with syrup (dissolve 5g sugar in 20g hot water) before storing.


My mum wanted an edible number for her age on the cake so I baked some sables last minute since I had some frozen dough in store.


This was another labour of love. Hope you can give it a try if you love matcha!


with lots of love,

Phay Shing

Read More »

Thursday 18 August 2022

Double Rainbow Chiffon Cake


This is a double rainbow chiffon cake that is my newest version! It's a level up from my Rainbow chiffon cake that is on the cover of Creative baking: Chiffon Cakes.  You can refer to the recipe here, or the step-by-step recipe with pictures in the cookbook.

Here is an Reel video tutorial of how to pipe the new version from my IG (@susanne.decochiffon).

Hope you found it useful!

With lots of love,
Susanne


Read More »

Wednesday 17 August 2022

Cute Halloween Choux Pastry Special (Class)

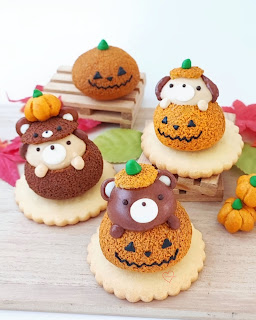
 If you would like to learn how to make these cute pumpkin choux pastries, come and join me for this class happening in October!


The mini pumpkins are made of choux pastry too!

Each piece sits on a buttery sable!

The filling is not just one type but a total of four different complementary components put together to create a treat that is cute on the outside but tasty on the inside!


There's peanut butter diplomat cream, chocolate peanut butter diplomat cream, strawberry compote and vanilla whipped cream.

Here's a short video of cutting a pastry, revealing the insides!


I will cover the basics of choux au craquelin as well as how to create simple cute characters out of the fillings. As the design is simple but cute and interesting, this class is suitable for beginners. Please click on this link for more details or to register.


with love,

Phay Shing

Read More »

Sunday 14 August 2022

Stable vs Unstable Meringue Macaron Recipe

 This blog post is a compilation of content from a 4-part series that I posted on Instagram (my IG is @phay_shing) about stable vs unstable meringue macaron recipes. I compiled the reels into a single video available on YouTube for ease of reference for those of you who don't have Instagram. Colour-coded bullet points within each part are used to explain the same point or make comparisons of specific features from both types of batter. Just in case you are wondering why I have so many rainbow coloured hearts in my post!


PART 1: Experiment explained

I've been making & teaching macarons for a number of years & a FAQ I get is:

What is THE BEST macaron recipe?

Answer:

Any recipe that gives you a STABLE & COMPACT Meringue!

You may have heard that macarons is more about technique than recipe. This is true except for one type of recipe.

As a newbie years ago, I struggled with a type of recipe that seemed temperamental & left no margin for error. Many older macaron recipes follow this tricky ingredient ratio & I want to save you the agony if you're still figuring it out.

As shown in my coffee bear experiment, quality of meringue is a huge factor in success of macarons. Although other factors such as ingredient quality, oven, humidity & baker competency come into play, if your meringue isn't good, chances are macawrongs will happen.

For this reason, I prefer Swiss or Italian meringue methods as the cooked egg whites add stability, although I prefer French if batch size is tiny & design is simple as it's fuss-free.

Swiss & Italian method recipes are generally ok so for the purpose of illustrating how important ingredient ratio is for French method recipes, I compare two types of recipes found in internet/recipe books with the same total amount of sugar BUT distributed between dry ingredients & meringue very differently. Sufficient sugar in meringue is needed for stability as you will see.

To make this a fair experiment, I

◾Bake batters on same tray for same drying & baking conditions 

◾Use exact same amount of colouring 

◾Overfold gently by same number of folds


Types of French Method Recipes:

Case 1: Stable Meringue

✴️Egg whites 1 part

✴️Sugar in meringue 1 part (0.8-1)*

✴️Almond flour 1.2 parts (1.1-1.3)*

✴️Powdered sugar 1.2 parts (1.1-1.3)*


Case 2: Unstable meringue

✴️Egg whites 1 part

✴️Sugar in meringue 0.3 parts (0.3-0.6)*

✴️Almond flour 1.2 parts (0.9-1.2)*

✴️Powdered sugar 1.9 parts (1.6-2.2)*


*Typical range 


PART 2: Comparison of Meringue & Batter

Case 1: Stable Meringue Recipe

💜 Meringue is compact, firm & stable, has smaller air bubbles 

💙 Same amount of colouring results in lighter meringue & batter

💚 Batter is thicker/ flows more slowly 

💛 Takes more folds to get the batter overfolded

🧡 Piped batter spreads less 

❤️ Piped batter dries faster


Case 2: Unstable Meringue Recipe

💜 Meringue is loose, soft & unstable (breaks down faster), has larger air bubbles

💙 Same amount of colouring results in darker meringue & batter

💚 Batter is runnier 

💛 Batter is easily overfolded

🧡 Piped batter spreads more especially when overfolded 

❤️ Batter dries slowly especially when overfolded


Explanation:

Understanding the role of sugar in meringue will help us see why it's necessary to have enough of it for stability. Meringues are foams made of dispersion of gas (air) in liquid (water), with a network of proteins separating the two. 

However, the protein network is weak on its own & will collapse with time, resulting in the two separate phases merging with their respective parts (water merging with water, air merging with air). 

Adding sugar increases the viscosity of the water phase, making it harder for the air bubbles to merge together & escape while leaving behind a pool of water. So the higher the sugar concentration in egg whites, the more stable the meringue. It's harder to knock air out of stable meringues so you see the features 💜💙💚💛🧡❤️ for case 1 which has over 3x more sugar in meringue than case 2! 

Having said that, there is a limit to how much sugar you can add. More is not always better. If the sugar doesn't dissolve fully in the water in egg whites, it will contribute to instability.


PART 3: Comparison of Baked Shells 

Case 1: Stable Meringue Recipe

💜 Bakes fast. Comes off parchment easily. Overfolded batter needs to bake longer to prevent sticking to parchment.

💙 Freshly baked shells are slightly patchy when overfolded.* No patchiness for correct consistency.

💚 Smooth tops even when overfolded.

💛 Straight feet when batter consistency is right but have protruding feet when overfolded. 

🧡 Full shells


Case 2: Unstable Meringue Recipe

💜 Stuck to parchment unless baked longer. Overfolding significantly increases the need for longer baking time.

💙 Freshly baked shells appear patchy*. Overfolding causes more patchiness.

💚 Smooth tops from correct consistency batter. Overfolded batter causes wrinkled tops with cracks.

💛 Protruding feet

🧡 Slight hollows from correct consistency batter. Full shells from overfolded batter. 

*Patchiness is reduced/eliminated after drying baked shells in a cooling down oven that's switched off.


Explanation:

You can tell the strength of meringue by looking at the appearance of baked shells.

Continuing from part 2 about foam structure of meringues, both unstable meringue & overfolding cause collapse of/weak foam structure, although a stable meringue can withstand overfolding better.

💜💙 A weak/collapsed foam structure results in runnier & wetter batter. As a result, the baked shells stick to parchment & appear patchy due to excess moisture.

💛A weak/weakened foam structure results in protruding feet as there's less resistance to expansion of batter sideways at base of shells during baking.

💚A severely weakened foam structure like the case of overfolded batter of unstable meringue recipe may cause surface of shell to appear wrinkled & cracked as surface layer & internal foam structure can't hold up & collapse during baking.

🧡 No hollows except for a slight hollow for unstable meringue batter with correct consistency, as surface layer is somewhat strong enough to hold up but internal foam structure starts breaking down during drying or baking.


PART 4: Summary & Conclusion

(This may be a repetition from parts 2 and 3 but some of you may find it helpful to see everything at a glance)


Case 1: Stable Meringue Recipe

💜 Meringue is compact, firm & stable, has smaller air bubbles, lighter coloured 

💙 Batter is thicker & takes more folds to get overfolded

💚 Piped batter spreads less & dries faster

💛 Bakes fast & comes off parchment paper/mat easily. Overfolded batter needs to bake longer to prevent sticking to mat.

🧡 Freshly baked shells are slightly patchy when overfolded. No patchiness for correct consistency.

❤️ Shells have smooth tops even when overfolded.

🤍 Shells have straight feet with right batter consistency but have protruding feet when overfolded. 

🤎 Full shells


Case 2: Unstable Meringue Recipe

💜 Meringue is loose, soft & unstable, has larger air bubbles, darker colour 

💙 Batter is runnier & easily overfolded

💚 Piped batter spreads more & dries slowly especially when overfolded 

💛 Stuck to mat unless baked longer. Overfolding significantly increases the need for longer baking time.

🧡 Freshly baked shells appear patchy. Overfolding causes more patchiness.

❤️ Smooth tops from correct consistency batter. Overfolding batter causes wrinkled tops with cracks.

🤍 Protruding feet

🤎 Slight hollows from correct consistency batter. Full shells from overfolded batter. 


Conclusion:

✅ Choose Swiss or Italian method recipes if possible, especially in humid climates like mine.

✅ If you must use French method due to small batch size, equipment limitations or personal preference, make sure SUGAR CONTENT IN MERINGUE IS AT LEAST 80% OF EGG WHITES BY WEIGHT for a stable meringue & batter that isn't too easily overfolded. I usually use 90%.

✅ Technique is still more important although the right recipe helps!


with love,

Phay Shing

Read More »

Coffee and Donut Chiffon Cake characters


My new baking class is up! I am going to teach these adorable Coffee and Donut Chiffon Cake characters with a surprise in the mug! Sign up link is here

Recipes you will learn: 
Frosted cereal chiffon cake 
Coffee chocolate mousse 
Dark chocolate mousse 
Frosted cereal crunch  

Too cute to eat? =) 

With lots of love,

Susanne


Read More »

Wednesday 10 August 2022

Minions Roll Cake


Do these cute roll cakes make you smile? I made these Minions Roll Cakes for my daughter's birthday as desserts.

Thank God they were well-received! 

Here is a video reel on the making of these roll cakes with surprise. Hope you like them! 

With lots of love,
 Susanne                                                                                                                                                                       

Read More »

Saturday 6 August 2022

Betty Boop Avocado Gula Melaka Pecan Chiffon Cake

Finally making the actual cake for this unique flavour request! Betty Boop avocado cake!

Reference from fanart drawing by Christina Kulzer

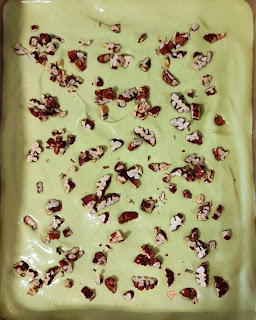
Take a peek at the layers!


I decided to include the element of gula melaka and toasted pecans in this cake as avocado alone is rather bland in taste. A little yuzu juice (or you may use lemon juice) was added to prevent oxidation of the avocado puree so it as a slight tang as well. This is a rather healthy cake as it doesn't use oil or butter but instead, avocadoes and plain yoghurt as fat sources! Very much more moist than typical chiffons!

The recipe for the cake and cream is shared in this post but I have made certain tweaks for it to be suitable for a large layered cake instead of a mini swiss roll so that it is easier to handle during assembly instead of breaking apart. I also increased the proportion of avocado in the filling.

I made two plain avocado sheet cakes and one patterned sheet cake.

Avocado chiffon cake recipe
Ingredients (makes one 25 x 30cm sheet cake):
Egg yolk batter
4 yolks
100g avocado puree*
1 tsp vanilla
1/8 tsp salt
8g gula melaka, finely chopped
1 tiny drop of pandan paste (optional)
80g cake flour

Meringue
4 whites
1/2 tsp cream of tartar
70g caster sugar

*Avocado puree
200g avocado puree
10g yuzu juice concentrate (or lemon juice)
150g plain yoghurt (I use Meiji's Bulgaria yoghurt)

Note: I made enough avocado puree for almost three portions of the sheet cake so please scale it down if need be.

Steps:
Please follow this post, except that baking time should change due to increase in volume.

Preheat oven to 180C bake 10min. Reduce to 160C bake for another 20 min.

Cool the cakes to room temperature. Cut to size you want (Mine is cut to 19x24cm). Cling wrap and freeze cakes. This will help with ease of handling during assembly. They are still super moist and soft despite reducing the liquid to flour ratio from my test bake!

Freshly baked sheet cake!

For the patterning, I used the method by Keem (see keempossible_2 Instagram account). I am not able to share recipe and method as I bought her video tutorial and you may contact her for it too 😊.

Remember to make a mirror image of the original when making patterns!

The pattern is subsequently covered with avocado cake batter but scaled down to 3 egg yolk portion

I used black edible marker to do the outlines as I find it has better control than painting. But this is just a personal preference. Betty's lips were added on post-baking with extra cake made from extra coloured batter. I always pipe out the excess coloured batter to bake for colour testing of paint during outlining/adding in of details post-baking so I just cut out the lips and white highlight and stick it onto the main cake with a little cake glue (you may use melted marshmallow too). 

Avocado mousse
Ingredients:
150g whip topping (may replace with heavy cream but add sugar or increase amount of gula melaka)
180g whipping cream/ heavy cream (at least 35% fat)
5-6 gelatin sheets (about 10-12g), bloomed
120g chopped gula melaka/ coconut palm sugar (or to taste)
1//4 tsp kosher salt (1/8 tsp regular table salt)
2 small drops of pandan paste (optional)
100g plain yoghurt
300g avocado puree
15g 100% yuzu juice concentrate (or lemon juice)

Note: Prepare this only when you are ready to assemble with the cut sheet cakes, toasted chopped pecans, cakeboard and the assembly mould ready.

Steps:
1. Melt gula melaka and salt in heavy cream. Cool to room temperature, cling wrap and refrigerate overnight or at least 4 hours.

2. Prepare avocado puree by blending avocado with yuzu juice concentrate. Add yoghurt and blend briefly. Pass through fine sieve.

3. Bloom gelatin sheets in ice water. Squeeze put excess water. Melt bloomed gelatin using microwave or double-boiler. Set aside.

4. Whip cold gula melaka cream with whip topping (if using) until soft peaks form and you can start to see well defined lines in the cream as you whisk. 

5. Add avocado puree (room temperature)  to melted gelatin a little at a time and whisk together. 

6. Add pandan paste to avocado puree gelatin mix. 

7. Fold in avocado mix to whipped gula melaka cream in a few additions. 

Assembly
1. Set rectangle mould frame over cakeboard. (I set the adjustable metal frame to be about 19x24cm) Line the insides of the frame with teflon sheet. Use a little oil to attach the teflon sheet to the frame but don't use coconut oil as it is a relatively high freezing point.

2. Place a frozen avocado sheet cake at the base of the frame.

3. Scoop some avocado mousse over the sponge cake and smoothen it out with a spatula or back of spoon. 

4. Scatter some toasted chopped pecans. I didn't measure so up to personal preference. Omit if you don't like nuts. 


5. Spoon a little mousse over the nuts and smoothen it out again.

6. Carefully place another frozen sheet cake over and press it in. Repeat steps 3-6.

After assembling the top patterned sponge

7. Chill in fridge for at least 3 hours or overnight for mousse to set. Carefully release the frame and peel off the teflon sheet.

8. Carefully slice off the four sides a little to reveal neat layers. Use a long serrated knife for this and it is important to make sure the mousse is completely set before you attempt to do this.

Just a little short video I made for fun of the process!


with love,

Phay Shing

Read More »

Monday 1 August 2022

Minions Dizzy Chiffon Cake


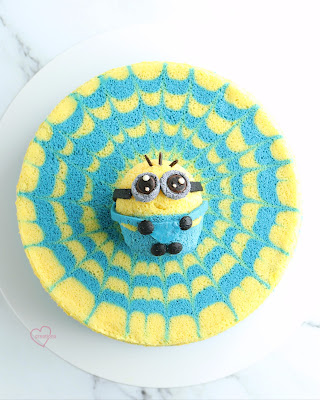
My daughter's birthday is here and she's a Minions fan after watching Minions: The Rise of Gru, so I designed some Minions cakes for her celebration. I watched the show myself and thought it was really funny and cute! 

Here is a video reel where I shared how to pipe and make the spiderweb design for the dizzy chiffon cake. It's actually inspired by the movie poster with the dizzy background! I used a turntable for this so it was really quite easy to make the design though it looks complicated. I was really thankful to collaborate with Tastemade to post this as well! 

Video reel here

I also put banana surprise fillings into the mini Minions as well! 

Watch another video reel here on the insides! 

Hope you are keeping well! I've been very busy with the kids, so posting less. Do take care too! 

With lots of love, 

Susanne 


Read More »