Showing posts with label Princess. Show all posts

Friday, 29 January 2021

Snow White's Colour Changing Skirt Chiffon Cake

 Do you like Snow white's colour changing glitter skirt? 💛💖


Watch the video here to see the transformation!


Inspired by Tik tok foodie.beats's sprinkles video, this is my full chiffon cake version!🥰

I personally like the pink skirt more!💕 How about you?😀

Hope this cake made you smile! =)

With lots of love, Susanne


Read More »

Saturday, 5 September 2020

Princess Crown and Shoes Raspberry and Earl Grey Macarons

I had a request for princess themed macarons. Since the stereotypical princess wears fancy shoes and tiaras, I made these macarons 😊

Looks a little like a shop selling princessy paraphernalia 🤣

I had to decide whether to go for easier time before baking or post-baking. I chose the latter to avoid using royal icing (which is added sugar) on the baked shells. So this is what the piped batter looks like...

Intricate details were done using macaron batter too

The glass slipper 

I used the Swiss meringue method for making the macaron shells and you may refer to the detailed recipe in this post.

I used edible marker to decorate the baked shells to make the features on the tiaras and shoes more well defined. I painted on some white stars to give the glass slipper a "bling bling" look by using paint made with white gel colouring dissolved in vodka.

Raspberry and earl grey flavours were requested. You may refer to this post for raspbery white chocolate ganache and this post for the Earl Grey ganache.

Filling with raspberry ganache

Filling with Earl Grey ganache. 

Did these princessy accessories charm you 😊? 


With love,
Phay Shing
Read More »

Tuesday, 2 June 2020

Disney Princess Strawberry Macaron Carousel

This creation is something many little girls would love to have but not something I would like to do often 🤣. Presenting my princess macaron carousel! One view just doesn't do it justice so I have to split it up into multiple views and include a video of it!

Ariel and Belle

Mulan

Cinderella

Rapunzel

See it all! 

I split the bake into 2 separate days for the shells. One day for the princesses and another for the carousel frame. The reason why this bake is super tedious isn't because of the designs but the fact that I had to prepare a total of 11 colours of batter and 10 colours of royal icing. Each colour requires mixing bowl, spatula and time to get the right shade of colour. Imagine the washing up after that and the number of piping bags I used!

I used the Swiss meringue method for this bake. Just to share some pictures of the process...

Piping the batter. I ran out of yellow batter 😅.  I prepare 2 sets in case of damage. 

Freshly baked shells! I chose to do minimal details using the batter as there are so many colours! 

Adding in the details post baking was just as tedious as the piping of batter for the base shells. I used royal icing, edible marker and lustre dust to add on the facial features and other details.

Check out the feet on the shells! 

 I was actually decorating another set of macarons at the same time so it was a total of 12 colours of royal icing at one go.

Tedious but great sense of accomplishment! I took 2 days to finish decorating this tray of macaron shells. One day for edible marker and lustre dust work, another day for royal icing work. 

I filled the macarons with strawberry white chocolate ganache in the middle and a stiffer strawberry white chocolate filling on the outer ring. You may refer to this post for the recipe for both types of fillings. To ensure the macarons do not slide down the pole, I glued the bottom shell to the paper straw pole using royal icing before filling the shells.

Filling the princesses

Looking pretty! 

I filled the carousel structure with these 2 fillings as well.

Filling the roof 

 I am glad the carousel and loose macarons brought some cheer to the birthday girl who had to celebrate it at home during this circuit breaker period!

I laughed when I saw this because Ariel looks so funny lying on her side 🤣. My friend took this picture of the carousel and extra loose pieces. 

I hope the sight of this carousel brings some cheer to all of you who are Disney princess fans!

With love,
Phay Shing


Read More »

Friday, 18 October 2019

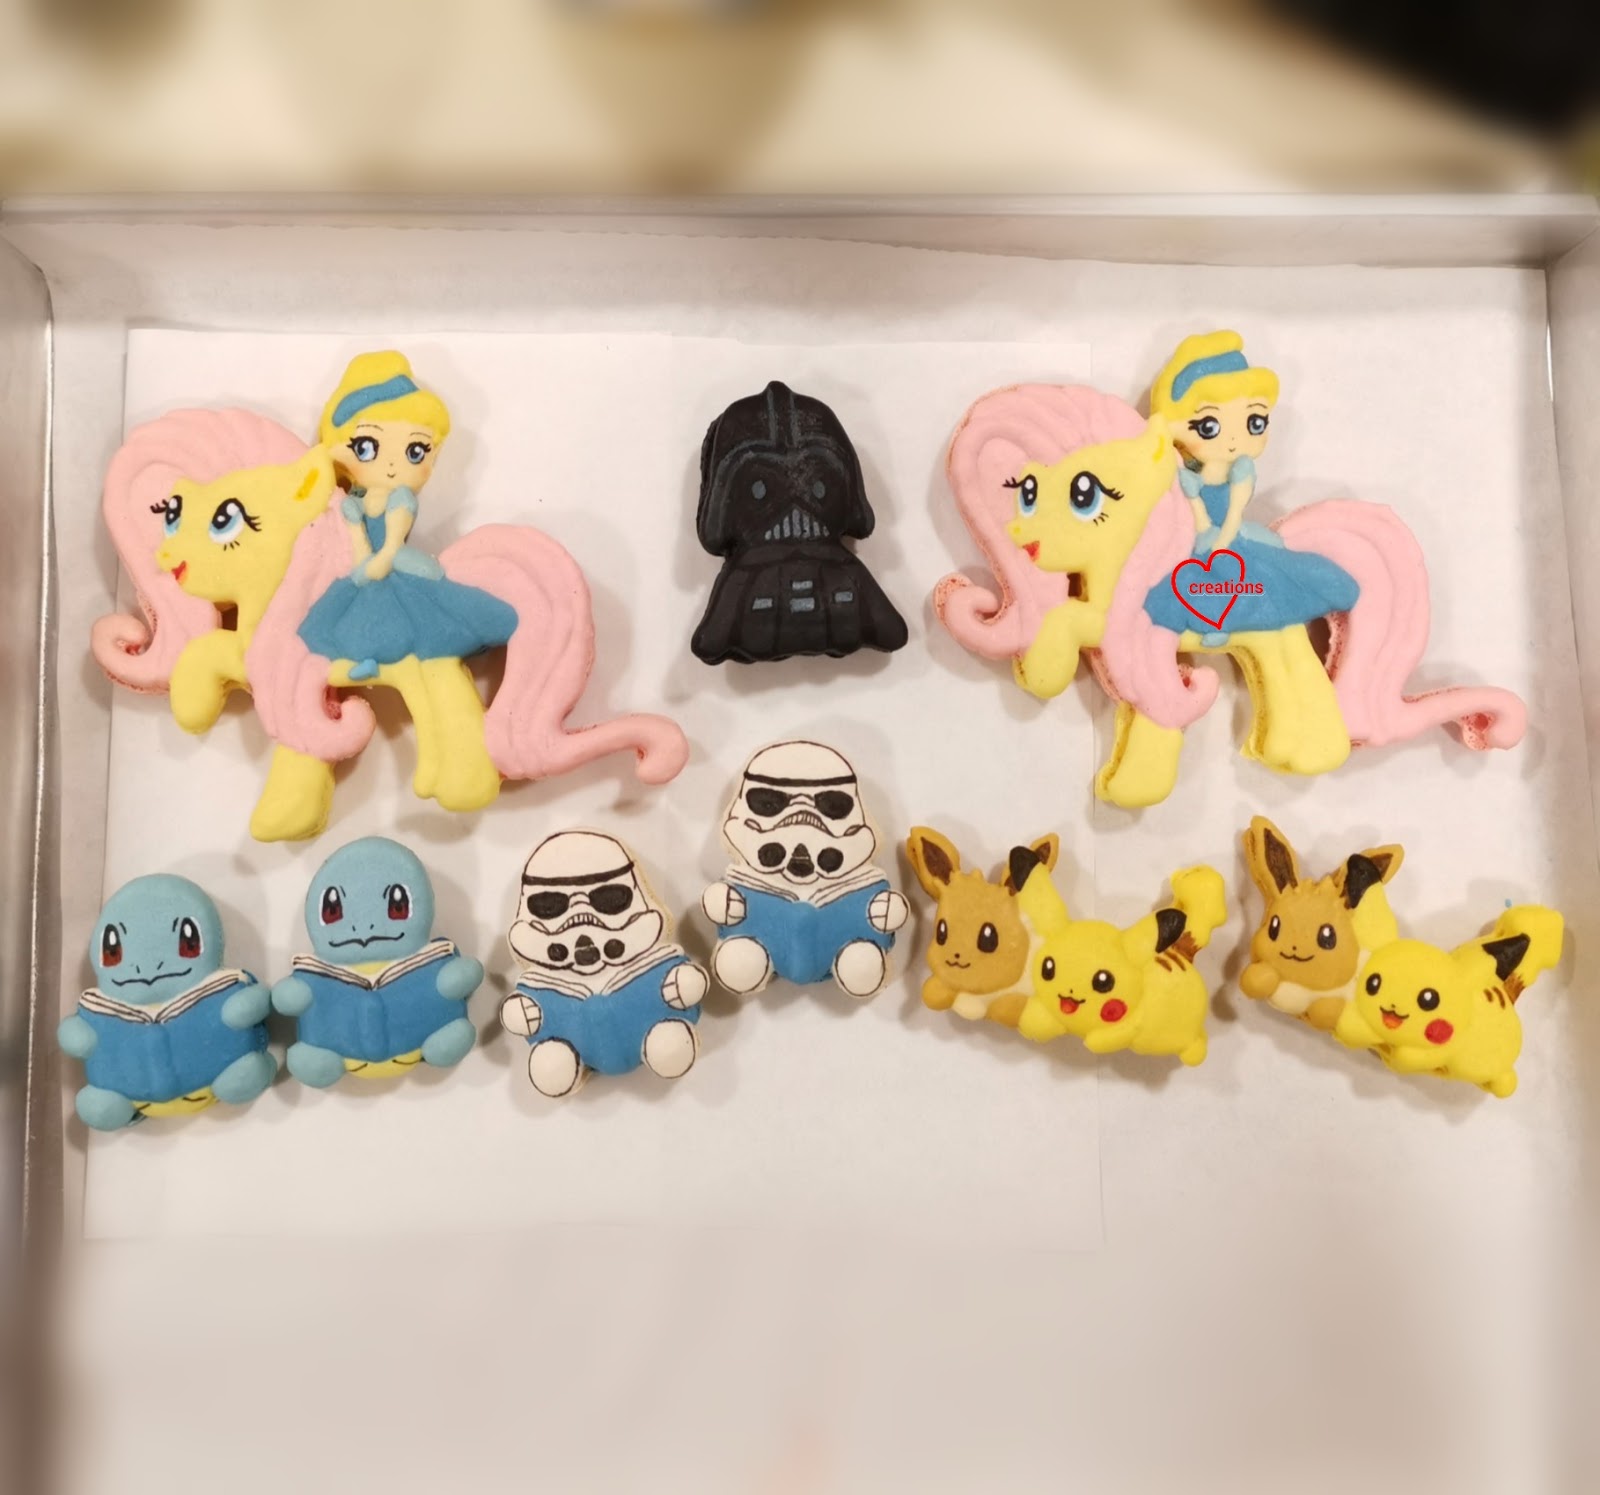
Cinderella on Fluttershy Chocolate Drip Cake

This was made for a little girl who is a fan of both Cinderella and My Little Pony!

Cinderella riding Fluttershy on top of a dark chocolate drip cake! 

I had to come up with my own template for this creation as you can't find this from the Internet. Only one giant cake topper was needed for the cake but for complex characters such as this, I usually make at least one extra in case of damage due to butter fingers. I used the Swiss method recipe to make this as I was working on another bake concurrently. Swiss and Italian methods are great when you have to work with many colours and complex shapes as the meringue takes. Longer time to break down. I just haven't revisited the Italian method for some time because I am lazy to make the syrup 🤣.

Piped batter

Decorating the shells with a mix of  Royal icing and edible markers. You can see the rest of the characters I was working on as well. 

Since the giant macaron is a cake topper for a chocolate cake, I filled it with dark chocolate ganache.


I used this recipe to make the chocolate cake here but did things slightly differently. I cut the sponge into 6" diameter and used a 1:1  ratio of dark chocolate : cream for the drip. I added a little charcoal powder to deepen the drip colour a little and added about 1-2 tsp of light corn syrup as well to give the drip a higher shine. I frosted the sides with whipped dark chocolate ganache and omitted the whipped salted caramel ganache.

I love the look of this cake! *bling bling*

Just some tip about macaron cake topper on such a cake. Do use a long wooden skewer to make holes in the cake where the cakepop sticks on the cake topper are supposed to go. Carefully insert the cake topper by handling the cakepop sticks. DO NOT press on the macaron itself to insert the topper as you may accidentally damage it. I pack the cake topper and cake separately as moisture released from the cake may turn the macarons soggy.

With love,
Phay Shing

Read More »

Monday, 25 February 2019

Snow White Princess Chiffon Cake


Can you guess which Disney princess is this? 💕 My daughter requested for this Disney princess for her birthday.

It is made entirely from chiffon cake, and naturally colored using the natural range from Magic colours. I got this from Bake King. I am very thankful the design and idea for the Snow white panned out, as I didn't have a model to follow. 

The little Snow White also looks a little like my daughter hehe.. I kind of modelled after her =p.

The skirt is baked in a bundt pain, similar to my Pineapple tart cake from Deco Chiffon Cakes. I have also shared a Mandarin orange chiffon bundt recipe here before. Very thankful it was very well-received in terms of taste/texture too! The cake was gone in no time! =) I combined the bundt cake with 2 bowl cakes for the body and head, and chiffon cake pops for the other body parts.

Happy blessed 5th birthday my little princess!! May the joy of the Lord be her strength!!

With lots of love,
Susanne


Here's the book cover of Deco Chiffon Cakes mentioned above, it's my 2nd book in the Deco Chiffon Cake series.

And lastly the fun part! Fireworks on her cake! =)


It was really really really tall! =))


Read More »

Friday, 11 January 2019

Tsum Tsum Elsa and Anna Brown Sugar Cookies

I just realised I have quite a few cookie posts that have been in cold storage as drafts because there are more exciting posts to share. I am finally posting this...After several months 😅. My friend requested for these Elsa and Anna cookies for her daughter who was recovering from surgery and needed cheering up.


I have made this Elsa design in macaron form a few years ago, along with Olaf and you can see it in this post.

I have not changed my brown sugar cookie and royal icing recipe over the years because they have always been well received. People who tried using my recipe loved it too. You may refer to this post for both brown sugar cookie and royal icing recipe. I also make my own cookie templates from cheap, easily available materials. You may refer to this post on how to make and use your own templates.

Thank God that the little girl loved it!

With love,
Phay Shing

Read More »

Monday, 10 September 2018

Macaron Ice Castle on Lavender Vanilla Honey Lemon Cream Cheese Chiffon Cake

I was excited as well as apprehensive about embarking on this bake as it's my first time making a castle cake out of macarons! Presenting my version of ice castle macaron cake on top of a lavender vanilla honey lemon cream cheese chiffon cake!


I often get requests for character bakes which are essentially illegal since I don't have the license to bake them. So I turn down those requests (unless they are from my family or friends). But there is a leeway where bakers can exercise their creativity to create a scenario where it is entirely out of their imagination. And it won't be considered copyright infringement anymore. That's why I have a case of Pororo and Petty meet Elsa and Anna, along with a couple of penguins at a castle that is designed entirely from my adaptation of what is feasible for macarons 😆.

It was a challenge to make these macarons as there are 12-13 different colours involved! I had to use the Italian method for an undertaking like this. You may use your favourite macaron recipe or any recipe in our blog. You may refer to my macaron books Creative Baking: Macarons and the upcoming Creative Baking: Macaron Basics for a more systematic review of the basics and piping techniques. I used the reduced sugar Italian method recipe for this batch but scaled down to 220g of almond flour.

Freshly baked shells!

Shells decorated with royal icing and edible markers. I made these along with some doughnut and seashell macarons.

I filled the shells and macaron cake base with vanilla honey lemon cream cheese filling. Recipe can be found here.

The assembly of castle macaron cake begins with layering four layers of large round macaron shells and three layers of cream cheese filling.

It takes some planning and calculations to decide how big to make each piece in the castle structure. Some Math involved which can be an interesting mental challenge 😉.

Assembled castle. I used royal icing to add on some snowflake designs.

Looking really adorable with the inhabitants!

I baked some plain vanilla chiffon sheet cakes for the name and top layer of the chiffon cake.

I love the look of the soft colours and smooth, velvety surface!

What I really want to share in this blog post is the recipe for the chiffon sponge cake and the cake frosting. The various ingredients I used here work harmoniously together to bring about a delicious flavour. It's a mouthful to read out aloud but each ingredient is crucial -- lavender, vanilla, honey, lemon and cream cheese.

Reduced egg yolk lavender milk cream cheese chiffon cake
Ingredients (makes two 9.5" cakes):
Egg yolk batter
2 egg yolks
20g caster sugar
84g canola oil/ vegetable oil
100g lavender milk*
50g cream cheese
1tbs vanilla extract
120g cake flour
1/4 tsp salt
A pinch of lemon zest

Meringue
8 egg whites
1/3 tsp cream of tartar
110g caster sugar

*Boil 150g of milk. Pour hot milk into a bowl with 2tbs of dried lavender flowers. Steep for 10 min. Strain out the lavender flowers and measure out 100g of lavender milk.

Steps:
1. Melt softened cream cheese in hot lavender milk. Heat over low heat if necessary. Set aside to cool.

2. Line bottom of cake tins with parchment paper. Set oven rack to lowest or second lowest position. Place a tray of water at bottom of oven (optional). Preheat oven to 160℃.

3. Prepare egg yolk batter. Whisk egg yolks with caster sugar until pale and thick. Add oil and whisk until well combined. Add cream cheese lavender milk, vanilla and salt and mix until well combined. Gradually add in sifted cake flour and whisk until no trace of flour is seen. Add lemon zest and mix well.

4. Make the meringue. In a clean metal bowl, beat egg whites with cream of tartar until firm peaks form, gradually adding in caster sugar once the egg whites are foamy.

5. Quickly but gently fold the meringue into egg yolk batter in three batches. Divide the batter among the two baking trays. Use a chopstick to swirl the batter gently to pop any trapped air bubbles.

6. Bake for 5 min then reduce temperature to 140℃ and bake for another 25 min. Reduce temperature to 130℃ and bake for another 10min. The lower temperature used here is to prevent browning of the cake as the requester prefers have it as pale as possible.

The cake frosting recipe is just the macaron filling with stabilized whipped cream added in order to give it a lighter taste and texture to match the chiffon cake.

Vanilla honey lemon cream cheese frosting recipe
Ingredients:
150g vanilla honey lemon cream cheese filling
125g whipping cream, poured into mixing bowl and chilled in bowl
1 tbs icing sugar
1 tsp gelatin powder
1 tbs water
1/2 tsp vanilla extract

Steps:
1. Make the stabilized whipped cream. Sprinkle gelatin over water in a small microwave safe bowl. Let it bloom for a few minutes. Microwave on medium power for 10-20 seconds. Stir until gelatin is dissolved. Set aside to cool for a few minutes.

2. Add icing sugar and vanilla extract to chilled whipping cream. Beat on low speed using electric mixer until it starts to thicken. Gradually add gelatin and whisk the cream by hand. Continue whisking until the cream is able to hold a firm peak. Be careful not to over whip or the cream will separate.

3. Fold the whipped cream into the cream cheese filling in a few additions.


Transfer the frosting into piping bag and fill the bottom layer of cake with frosting.

I drizzled a little more honey on top of the frosting.

Assembled cake!

I inserted 6 jumbo straws into the chiffon cake to act as dowels to support the heavy macaron cake on top.

The requester is kind enough to send me a few photos of the party in school.

Here's a picture of the cake at the party venue

Thank God that it was very well received in terms of looks and taste!

With love,
Phay Shing


Read More »

Thursday, 22 February 2018

Princess Carriage Macaron Carousel

I had a request for carriage themed macaron carousel for a wedding. Here's my attempt at making something more elegant and less cutesy :)

Loose pieces of unicorns and carriages were also requested.

I used the reduced sugar recipe for the macaron shells here. Both regular and reduced sugar recipes can be found here. You may refer to my Creative Baking: Macarons book for a systematic presentation of the basics and complex shaped macarons. You may refer to my video tutorials for macaron basics and piping of complex shapes on the blog too.

I decorated the macaron shells using royal icing.

Dark and white chocolate filling was requested so I filled the middle with dark chocolate ganache and the outer layer with white chocolate. In my earlier days of making macaron carousels, I was very concerned about structural stability in Singapore's hot weather so I didn't dare to use regular ganache for the filling, but instead use chocolate with vegetable shortening as the filling. Now that I have more experience, I use two types of fillings for carousels. A yummier, softer filling for the middle, and a more aesthetic looking and firmer filling for the outer ring. Not sure why it took me so long to figure it out from an engineering standpoint 😅. The white chocolate filling doesn't contain heavy cream but instead uses vegetable shortening as the base. I added a little lemon juice to make the white chocolate taste less sweet.

Here's the recipe for the white chocolate filling.

White chocolate filling
Ingredients:
100g white compound chocolate
25g vegetable shortening
1/4 tsp salt
1 tsp vanilla extract/ bean paste
1 tsp lemon juice

Steps:
1. Place white chocolate and vegetable shortening in a microwave safe bowl. Heat for 10-20 sec at medium power. Stir to mix well. Repeat until melted and smooth.

2. Add salt and mix well. Add vanilla gradually and mix well. Add lemon juice gradually and mix well. Don't add the liquids all at once or the chocolate mixture may seize.

3. Let the mixture sit at room temperature to firm up a little until toothpaste consistency. Transfer to piping bag to fill the shells.

This is how I fill the central pillar of the macaron carousel. Center filled with dark chocolate ganache and outer ring with white chocolate 

I am finally investing in some pretty boxes for macaron carousels. Many thanks to a friend for helping me to order some!


With love,
Phay Shing

Read More »

Sunday, 22 October 2017

Hello Kitty Princess Chiffon Cake


I made this Hello Kitty Princess Chiffon Cake for my dear friend's little princess!

I first experimented with Hello Kitty chiffon cake many years back at the start of the creative chiffon journey for my daughter who loved Hello Kitty. Have not made it for many years (partly due to copyright concerns, so I don't make this for orders, only for own consumption or very close friends). For those who are interested on how I made it, hop on to my old post here =).

Thank God it was well-received and made the little princess very happy!

With lots of love,
Susanne


*Updates
My new book Deco Chiffon Cake Basics (a step-by-step picture guide) is now available in Singapore, Malaysia, Indonesia and Thailand! Updated availability including e-book version can be found here. I added in some reviews/encouraging comments I had! So thankful for them!


Wishing you all a blessed week!

Read More »

Sunday, 17 September 2017

Disney Princess Tier Chiffon Cake


3 tier Princess tier Chiffon Cake fit for a princess! 

I made this for a close friend's daughter. She's in the mummies group which started me on my baking journey and I'm forever so grateful for them!! <3  

The party theme was Disney princess fairytales so the top tier was inspired by Cinderella (see my previous work on Cinderella carriage chiffon cake), middle by Aurora. As for the bottom tier, do you find it familiar?

Yes it's Beauty and the Beast-themed =). With different colours, I got to make different flavours so that there's a flavour for everyone! The top is vanilla, middle is strawberry-vanilla, and bottom is lemon chiffon, made with lemon zest and juice =).And coloured naturally as well! 

For this cake, I am using the awesome Magic colours Natural coloring range that was generously gifted. This type of coloring is also stocked by Bake king in Singapore. Do take note that different colours have varying intensities so different amounts are required, but their yellow, as seen on the cake above, is truly outstanding and red, lovely as well. I have yet to test out all their new colours =). 


I also got to try out the bead-imprint design for the Aurora tier finally. I've done cuts and beads previously actually, but never had the guts to do it for the entire cake! It was quite a lot of work but thank God it worked out well.

This is one of the few times I'm at the actual celebration of the cake I make =). So I actually get to take a picture of a cut slice! This is the half eaten slice from my son's plate, pardon the messy slice as I didn't stop him fast enough =p. 

Thank God cake was very well-received and the party was wonderful. And there was lots of love!! That is what really encourages me to continue to make these loving creations! 


Have a blessed week ahead!

With lots of love,
Susanne


Read More »

Wednesday, 28 June 2017

Princess Charity Brown Sugar Cookies (2 ways to create gradual shades)

My friend requested for brown sugar cookies for her little girl who loves Princess Charity from The Princess Parables series. Here are the four cookies that I made for her!


I have written a very detailed step by step recipe for the brown sugar cookie base and royal icing decoration in this post so I shall not repeat it here. I will instead highlight how I created gradual tones or shades in two ways: using royal icing and using edible marker. People often remark how life-like my iced cookies are. Besides paying attention to details like adding highlights to the eyes of the characters, using gradual shades of a colour (instead of a single solid colour) helps to liven up the character.

Let me just reiterate that I have been using the same recipe for a few years because I always get rave reviews for these cookies in terms of taste. They have excellent shelf life of about 1.5 months at tropical room temperature when sealed so you can make these way ahead of time.

Just to share some photos of the process...

Cutting out cookie dough using homemade template. You may find out how to make and use your own templates over here.

Tracing outline of Charity using edible marker.

It is advisable at this point to let the cookies rest for a day between baking sheets to absorb excess oil from the cookie surface before icing.

I have unorthodox way of icing cookies. I create 3D noses by first letting a layer of icing harden where the nose is before flooding another layer of icing over it 

Day 1 of icing! I could have continued but I needed to do other stuff 

Creating gradual shade using royal icing
1. Prepare the lightest and darkest shade of royal icing that you need. Consistency should be of flooding consistency whereby any peaks should disappear within 3 seconds. Add more icing sugar to stiffen the icing. Add more water to make the icing more runny.

2. Pipe the two shades one after another immediately. I am using the right sleeve as an example here.


3. Use a toothpick to make little swirls to merge the two shades. Add the required shade a drop at a time before swirling with toothpick again in areas where you need a little more of a particular shade. Work quickly before the icing starts to harden.


Creating gradual shade using edible marker
1. Ice the subject with the lightest shade of the colour that you need. Make sure the icing is completely dry before using edible marker on it. Preferably do this one day after letting the icing harden.

2. Draw or colour the area where you want the darkest shade to be using an edible marker.

3. Use a small, soft brush dipped in vodka or any other colourless, odourless alcohol to spread the ink.


4. Wash the brush in alcohol and repeat spreading of the ink away from the coloured portion.

See the difference between hair with and without shading 

I hope these tips have been helpful! I know not everyone has the patience to work on brown sugar cookies like I do but you may be curious about the techniques I use ;).


With love,
Phay Shing


Read More »