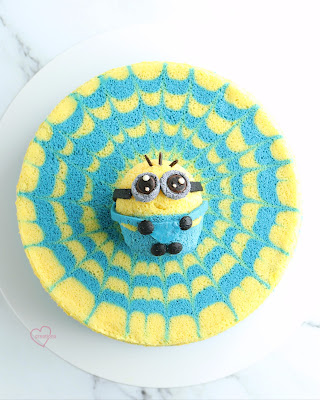
Presenting my simple but yummy blackberry banana 爸爸 bear Swiss rolls for a Father's Day bake!
Monday, 9 June 2025
Blackberry Banana 爸爸 Bear Swiss Rolls
Monday, 1 August 2022
Minions Dizzy Chiffon Cake

Here is a video reel where I shared how to pipe and make the spiderweb design for the dizzy chiffon cake. It's actually inspired by the movie poster with the dizzy background! I used a turntable for this so it was really quite easy to make the design though it looks complicated. I was really thankful to collaborate with Tastemade to post this as well!
Video reel here.
I also put banana surprise fillings into the mini Minions as well!
Watch another video reel here on the insides!
Hope you are keeping well! I've been very busy with the kids, so posting less. Do take care too!
With lots of love,
Susanne
Wednesday, 11 May 2022
Chocolate Milo Banana Ondeh-ondeh Bear Swiss Roll
After making three patterned swiss rolls based on Keem Ooi's method and recipe for the sponge, I decided to have another go at it based on another one of my creations. Macaron bear in Ondeh-ondeh choux pastry!
The outlines were painted on using gel food colouring diluted with water. The desiccated coconut was glued onto the cake with a little light corn syrup, which also helps to moisten the cake a little.
If you spent a long time painting the cake, you may want to moisten it by lightly brushing with simple syrup of sugar and water in ratio of 1:1. Store in fridge in airtight condition. Best consumed within 3-5 days.
Please follow me on Instagram at phay_shing if you would like to see more up to date stuff of my bakes as the blog doesn't necessarily have my latest work and some bakes are not going to be posted in the blog.
with love,
Phay Shing
Saturday, 12 February 2022
Caramelized Banana Cat Eclairs
Besides the sausage dog eclairs, you can also make eclair cats!
It may not show up in the picture but this is really super delicious! The aroma and taste of caramelized banana in cold and creamy diplomat cream, eaten along with crunchy choux pastry... Mmmm-mmm!!! 😍😍😍 Words fail me when I need to describe this!
Come and join me for this class with Artz Baking and Culinary Studio in April. Click on this link for more details and to register.
Do note that I focus on techniques of basic choux and especially how you should apply it to eclairs as eclairs have some things you should be more careful about than making regular choux buns. And of course I will cover how you can decorate and how you should store or serve such that you can enjoy it crisp on the outside, cold and creamy on the inside.
With love,
Phay Shing
Tuesday, 18 February 2020
'Rainbow Bunny In Pink Castle' Macarons on Chocolate Banana Cake
A macaron structure like this really needed time for planning and execution. I used the swiss meringue method but tweaked the recipe for a reduced sugar version without needing to use rice flour to replace some icing sugar in the dry ingredients portion like I always did. In order to maintain stability of the meringue while reducing sugar content, I replaced some of the caster sugar with icing sugar that has cornflour added, and cook the egg whites to a slightly higher temperature. I am still in the process of finding the optimal higher temperature to heat the egg whites to so I won't be sharing the detailed updated reduced-sugar swiss method recipe yet. You may refer to this post for the original swiss method recipe, and this post for the reduced-sugar swiss method recipe using rice flour and cornflour substitution for icing sugar.
Just to share some pictures of the process...
Just to show the heartbreak I get sometimes when working...
The rainbow is a huge macaron that extends quite tall vertically so I had to take pains to make sure that it is securely anchored. I didn't want to risk it toppling over during transport. Here is a sneak peek of how I did it.
My ultimate chocolate cake has always received rave reviews and this time round, I decided to add bananas to complement the rich chocolate. I baked the banana slices briefly in the oven at 200°C, with some slices sprinkled with sugar on top so that it caramelizes. You may refer to this blog post for the detailed recipe.
Here was how I assembled...
You may choose to leave the cake in a semi-naked style or cover it with more dark chocolate ganache. I ran 3 wooden skewers through the whole height of the cake to prevent the cake layers from sliding.
Thank God the cake was really well received and people were amazed that you can actually construct a castle out of macarons!
Phay Shing
Monday, 20 August 2018
Banana Chocolate Chiffon Cake with Dark Chocolate Drip
I took the liberty of including salted caramel white chocolate stripes along the sides of the cake, on the inside ring of the chiffon cake and also for the name. The requester saw my first banana chiffon drip cake and wanted something similar for her son. She actually requested for not just one, but two such cakes for separate celebrations with different number of pax!
I will provide the recipe for baking the banana chocolate chiffon cake for these two chiffon tin sizes. Please use the baking temperature and time as references since each oven behaves differently. Always use an oven thermometer. The chiffon cake itself is more banana-y than chocolatey as the cake was supposed to be covered with dark chocolate ganache. So I decided to go easy on the cocoa powder in the sponge recipe. You may choose to replace 5-10g of cake flour with more cocoa powder to increase the chocolate flavour if that's your preference. Make sure you use overripe bananas for that extra banana-y flavour! I used the cooked dough method here, adapting the recipe from my previous banana chiffon drip cake.
Banana chocolate chiffon using 15cm chiffon tin
Ingredients:
110g banana puree (about 1-1.5 large bananas)
28g canola oil
15g fresh milk
1/4 tsp vanilla extract
1/4 tsp caramel flavouring (optional)
1/4 tsp Kahlua coffee liqueur (optional)
1/8 tsp salt
45g cake flour
10g Dutch processed cocoa powder
1/4 tsp baking soda
2 egg yolks
3 egg whites
1/5 tsp cream of tartar
45g caster sugar
Steps:
1. Preheat oven to 150℃. Set oven rack to lowest or second lowest position. Place a tray of water at base of oven (optional). I place the water at the base to create steam.
2. Prepare egg yolk batter. Sift together cake flour, baking soda and cocoa powder in a large enough mixing bowl. You will be preparing the batter in this bowl. In another bowl, combine mashed bananas, milk, salt and flavourings.
3. Heat oil in a small saucepan until temperature reaches 90℃ (I am using a higher temperature here than previously to bring out the chocolate flavour from the cocoa powder more strongly). If you don't have an instant read thermometer, heat until you are able to see swirl lines in the oil. Pour all the oil at once into the flour mixture. Whisk until well combined. Let the mixture sit for 5 minutes. This allows the cocoa powder to bloom.
4. Gradually add the banana mixture and whisk until well combined. The mixture will become very thick but just continue. Add the egg yolks one at a time and whisk until well combined. The mixture should smoothen out in consistency and become less thick.
5. Prepare the meringue. In a clean metal bowl, beat egg whites with cream of tartar until foamy. Gradually add sugar and beat until firm peaks form but you are able to turn the bowl upside down without meringue slipping out.
6. Quickly but gently fold the meringue into the egg yolk batter in three batches until no trace of meringue is seen.
7. Pour batter into chiffon tin. Gently run a chopstick through the batter to pop any trapped air bubbles. Place chiffon tin in oven and reduce temperature to 140℃. Bake for 30 minutes. Reduce temperature to 120℃ and bake for another 20 minutes. Some people may prefer to bake at higher temperature but I find that for my oven it makes the cake rise too fast, causing it to have huge cracks and dries the cake out more. So just use a baking temperature and time that works for you.
Banana chocolate chiffon using 17cm chiffon tin
Ingredients:
165g banana puree (about 2-3 large bananas)
42g canola oil
22g fresh milk
1/2 tsp vanilla extract
1/2 tsp caramel flavouring (optional)
1/2 tsp Kahlua coffee liqueur (optional)
1/4 tsp salt
67g cake flour
15g Dutch processed cocoa powder
3/8 tsp baking soda
3 egg yolks
4 egg whites
1/4 tsp cream of tartar
60g caster sugar
Steps:
Same as above but bake for 30 minutes at 120℃ after the first 30 minutes at 140℃.
I used a firmer dark chocolate drip by using ratio of about 1.4:1 for dark chocolate: whipping cream. You may use a ratio of 1:1 if you wish but it's better to chill the cake thoroughly before frosting with the drip if you are going for 1:1 ratio.
I whipped the salted caramel white chocolate ganache to give it a more spreadable, creamy texture so that it can frost the sides of the cake well. Caramel flavour compliments banana and chocolate very well so do add this to the cake if you have the bandwidth! I added more white chocolate to the caramel frosting to improve the colour contrast (lighter brown) so the caramel flavour isn't as intense.
Dark chocolate drip
Note that amount suggested here is enough to cover both cakes.
Ingredients:
140g dark chocolate couverture
100g whipping cream
Steps:
1. Heat cream until it just starts to bubble.
2. Pour hot cream over a bowl of chocolate couverture. Wait for a mitnue before stirring in one direction until chocolate is melted and smooth. Alternatively, you may just double boil the cream with chocolate until smooth and melted, or use the microwave.
Resulting chocolate ganache should have a thick gravy consistency before you start covering the cake with it. It will be a thinner gravy consistency if you use a ratio of 1:1.
White chocolate salted caramel frosting
Ingredients:
60g salted caramel chips
30g white chocolate chips
30g whipping cream
Steps:
1. Same as for dark chocolate drip for creating the frosting for piping the name on the cake. The ganache should be a thick gravy consistency.
2. In order to make a frosting for the sides of the cake, chill the ganache in fridge for a few minutes and beat it with a spatula or electric mixer until smooth. Repeat chilling and beating until mixture is smooth and creamy.
Transfer the ganaches into piping bags and create the desired frosting.
You may wish to decorate with some bright red coloured fresh fruits to make the cake more attractive in appearance. I filled the holes in the chiffon cake with strawberries. I can assure you that this cake is definitely yummy! I had great feedback for both cakes!
With love,
Phay Shing
Friday, 29 June 2018
Cooked Dough Banana Chiffon Cake with Dark and White Chocolate
Ingredients (makes one 15cm chiffon cake):
110g banana puree (one large ripe banana)
28g canola oil
15g fresh milk
1/4 tsp vanilla extract
1/4 tsp caramel flavouring (optional)
A few drops banana essence (optional)
1/8 tsp salt
45g top flour or cake flour (increase to 50-55g if you want a more structurally stable but slightly drier cake)
1/5 tsp baking soda
2 yolks
3 egg whites
1/5 tsp cream of tartar
40g caster sugar
Steps:
1. Preheat oven to 140℃ and set the rack to lowest position. Place a tray of water at the bottom of the oven (optional especially if you prefer your chiffon cakes with browned sides as the browned cake crust is more flavourful. Bake at 160℃ of you prefer cake with crust.)
2. Sift together flour, salt and baking soda into mixing bowl. Set aside. Heat oil in a small saucepan until it reaches 70℃ or you are able to see swirl lines in the oil. Pour the oil all at once into the flour and whisk until well combined.
3. Gradually add banana puree, milk with vanilla, caramel flavouring and banana essence (if using) and whisk until well combined with each addition. Add one egg yolk at a time and whisk until well combined with each addition.
4. Prepare the meringue. In a clean metal bowl, beat egg whites with cream of tartar until firm peaks form or stiff peak is just reached, gradually adding in the sugar once the egg whites turn foamy.
5. Quickly but gently fold the meringue into the egg yolk batter in three additions. Slowly pour the batter into chiffon tin.
6. Bake for for 60-70 min or until skewer comes out clean. Invert immediately to cool completely before unmoulding by using a combination of hand and straight edged metal spatula. Bear in mind that this cake is very soft so unmould carefully.
This cake is yummy on its own but if you want to add a bit of chocolate, you may use the simple recipe I used. Simply melt some dark chocolate with whipping cream using the ratio of dark chocolate:cream = 3:2. Leave the ganache to firm up at the countertop until toothpaste consistency. Frost the hole of the cake and refrigerate until firm. You may add some stripes at the side of the cake like what I did. Simply pipe random horizontal lines of ganache and then smooth them out horizontally with a spatula.
For the white chocolate drip, I used a ratio of white chocolate:cream = 3:1. Melt the white chocolate and cream togther. Transfer the white chocolate ganache into piping bag and then pipe in rings on the top surface of the cake. Pipe the drips around the sides of the cake. Refrigerate the cake in an airtight container.
Thank God that I received feedback that the cake tasted great! The requester loved the cake I baked so much that she didn't hesitate to order another flavour of cake from me again.
With love,
Phay Shing
Wednesday, 18 November 2015
Banana Steamed Cupcakes
A peek at the texture and banana filled cupcakes...
I have a short downtime before the madness of icing/decorating over 200 macarons and filling about 250 macarons begin for the creative macaron book so I took the chance to make the steamed banana cakes for photography and taste test. I made steamed banana cupcake earlier on but with cat and bear designs. This design is simpler :). There is not much change in recipe except for the change in type of cupcake cases I used. As mentioned in my previous steamed cake post, I have chosen to use a method that involves beating whole eggs with sugar instead of just mixing wet and dry ingredients together with a hand whisk or spatula. The resulting texture is lighter and fluffier.
Ingredients (makes six 50x50mm cupcakes):
2 large eggs (at least 60g)
80g brown or white sugar (use more if you prefer sweeter cake. Mine is a lower sugar version.)
80g vegetable oil or melted butter (I used extra light olive oil but do use butter if you prefer the buttery fragrance)
140-150g mashed overripe banana (about 2 large bananas. Choose really really ripe ones for a more banana-y flavour)
1 tsp vanilla extract
140g cake flour*
2 tsp baking powder*
1/8 tsp salt*
1/4 tsp baking soda
Decoration:
Fresh small bananas
Lemon juice
Nutella
Red MnMs (optional)
Edible black marker (optional)
* You may replace with self-raising flour.
Steps:
1. Beat egg and sugar in a mixing bowl with electric mixer on high speed for at least 10-12 minutes, scraping down the sides of the bowl every 3-4 minutes with a spatula. Mixture should more than double in volume. When you drop the mixture from the beaters forming a letter "O", it should be able to hold the shape for several seconds before fading back into the bowl of mixture.
2. Drizzle oil onto the mixture and gently fold in a little at a time with a spatula. Be really gentle to avoid deflating the beaten egg mixture.
3. Add in mashed banana with vanilla extract a little at a time and gently fold in.
4. Add sifted flour, baking powder, baking soda and salt gradually and gently fold in.
5. Fill cupcake cases until almost full with batter. You may choose to add 1/2-1 tsp of nutella when the cases are about 2/3 full and fill the cupcake cases with more batter until almost full. Tap the cases on the table a few times to release trapped air bubbles. Do not use cupcake cases that have overlapping folded sides or it will open up during steaming. If you are using cases with folded sides, place the cupcake cases in a heatproof container that are slightly bigger than the cases like the smaller cupcake example below.
6. Steam for 20 minutes or until a toothpick comes out clean.
You may decorate the cupcakes with some banana slices and nutella.
Dip the banana slices in freshly squeezed lemon juice for about a minute before patting dry on paper towels. This will prevent the slices from browning quickly.
Slice off the dome of the cupcake if you have trouble balancing the banana slices on top of the cake. Add a bit of Nutella in the middle, place the banana slices on top and top up the middle with more nutella. You may use a piping bag like I did or simply use regular plastic food bags or ziplock bags.
I added some ladybugs for photography. These little critters are actually red MnMs with patterns drawn using black edible marker.
Please place them on the nutella patch instead of the banana slices if you do use MnMs for decoration. The red colouring will bleed onto the banana slices within a few minutes!
I hope you can try this simple "bake" at home :). I managed to make this for my kids within a busy morning with other things to do. Both kids gave this a thumbs up as they had it for dessert after lunch :). My parents had some the next day and they were still good and even better after re-steaming!
With lots of love,
Phay Shing
Thursday, 24 September 2015
Cat and Bear Banana Steamed Cake
Presenting my humble cat and bear steamed banana cupcakes! These by the way, make very good Children's Day party items too but perhaps made in smaller cupcake cases than the ones shown in this post. This is also healthier than my pinata cookies :p.
Here's a close-up view of the texture...
I have opted for a method that involves more than just combining wet and dry ingredients together with a hand whisk because I find that the texture of the resulting cake is less fluffy and more "kueh-like". Even for the fluffy ones, they tend to be dry when cooled as they rely on low liquid and high flour content to be fluffy. Upon cooling and storage, the cake has to be re-steamed for it to taste good again and has to be eaten freshly steamed while hot.
The recipe here is mainly adapted from Miss B. I have tweaked the recipe a bit and added a fun twist to the humble steamed banana cake. Using the technique for creating patterns and pop-up ears from various sources, I have transformed the plain looking banana cake to something a little cuter ;). I have already reduced the amount of sugar from the original recipe so there is no need to reduce it further. The resulting cake is not too sweet.
Ingredients (makes about three 50x39mm cupcakes**):
1 large egg
40g caster sugar (or brown sugar)
40g vegetable oil or melted butter (or combination of both. I used extra light olive oil )
70-75g over ripe banana without skin, mashed (about 1 large banana)
1/2 tsp vanilla extract
70g cake flour*
1 tsp baking powder*
1/8 tsp baking soda*
1/16 tsp salt*
3 heaping tsp Nutella (optional)
1 tsp cocoa powder (optional)
* You may replace all these with 70g of self-raising flour. I chose cake flour for a softer texture.
** You may use smaller cupcake cases as I used pretty large ones. Reduce steaming time of you are using smaller cases. Feel free to upsize the recipe too to make more cupcakes.
Steps:
1. Beat egg and sugar with an electric mixer at high speed for at least 10 minutes until mixture is pale and thick.
2. Be really, really gentle with the next few steps as you want to avoid deflating the air trapped in the beaten egg. It's the key to soft and fluffy cake. Gently fold in the oil using a spatula. Drizzle the oil in (don't pour all in at one shot) and fold in a bit at a time to avoid deflating the beaten egg.
3. Add mashed bananas and vanilla a teaspoonful at a time and gently fold into the mixture.
4. Sift together flour, baking powder, baking soda and salt. Gradually add the flour mixture to the batter, folding in gently with each addition with a spatula.
5. Scoop the batter into paper cupcake liners and fill until almost full. You may add a heaping teaspoon worth of Nutella into each cupcake after filling the cupcake liners till it's about 1/3-1/2 full. This helps to moisten the cakes even more and compliments the banana flavour well.
6. If you are steaming the cakes without fancy designs, you may steam at this point after tapping the cupcake cases on the table to release trapped air. Steam for about 20-25 minutes or until toothpick comes out clean/ with a few moist crumbs. If you are making the patterned cupcakes, scoop out about 1-2 tsp of the batter and colour it with cocoa powder until you have the desired shade of brown that you want. Transfer the coloured batter into piping bags and pipe the facial features on.
7. To create pop-up ears, pipe a bit of the batter onto the parchment paper (I used paper cupcake cases). Pipe triangle for the cat and circle for the bear ears. Steam this together with the cupcakes.
8. Carefully peel the ears off the parchment paper and stuff it into the cupcake cases where the ears are supposed to be.
Enjoy!
With love,
Phay Shing
Thursday, 10 July 2014
Banana Chocolate Giraffe Chiffon Cake
If you would like to attempt the banana chocolate giraffe chiffon cake from scratch, you can pre-bake a chocolate chiffon cake using the chocolate chiffon recipe from Vanilla Chocolate Bus Pinata Chiffon Cake but scale it down to 2 egg yolks (divide everything by 3 times 2) and bake the batter in a 15 cm chiffon tin with slightly shorter baking time. After the cake is cool, unmould the cake and proceed to slice it up and cut out random brown patches for the giraffe body patterns, as well as mouth patch (semicircle) and eyes (small circles). Arrange the chocolate cake patches at the base of the glass bowls to be used for baking the banana chiffon cake later.
Following this, bake the banana chiffon cake in the glass bowls using the recipe below. For each giraffe, you will need 2 oval bowls for the head and body. and 2 round bowls for the 4 limbs. I bought the round glass bowls from robinsons (Iwaki, 11 mm OD) and got the oval glass bowls as gifts from my parents. The recipe for the banana chiffon cake is adapted from Christine's recipes. You can also use this recipe to bake a round banana chiffon cake in a 17 cm chiffon tin.
Banana chiffon cake (makes two giraffe cakes or one 17 cm chiffon cake)
3 egg yolks
20g sugar
40g vegetable oil
40 ml milk
80g cake flour
2 ripe bananas
1/8 tsp salt
4 egg whites
40g sugar
1/4 tsp cream of tartar
1. Mash 2 ripe bananas into puree (top left pic in collage).
2. Preheat oven to 160°C. Prepare the lowest rack for baking the cakes.
3. Beat egg yolks with sugar with whisk till pale yellow before stirring in oil, milk and banana puree.
4. Next add in sieved flour and whisk till no trace of flour is found (top row, middle pic).
5. Meringue: Beat the egg whites with ¼ tsp cream of tartar till stiff peak, mixing in caster sugar in 2 additions.
6. Fold in the meringue gently into batter in 3 additions (top row, right pic).
7. Gently tap the tin on table 3x to remove air bubbles.
8. Bake the cake for 15 min at 160°C then 15 min at 150°C.
9. Cool the cakes on a cooling rack once out of the oven (bottom row, left and middle pics show the cakes cooling on the racks).
10. Unmould after the cakes are cool using hand to gently peel away from the bowls (bottom row, right pic).
After this comes the fun part of preparing the different parts of the giraffes! I used a hearts cutter to cut out the ears from the chocolate chiffon cake. Cut out a heart and slice it into halves (top left pic in collage below). Make some cocoa paste by adding a spoonful of cocoa powder in a teaspoon of water (top right pic) and draw on the giraffe's nose using the cocoa paste with a fine brush (bottom left pic). Lastly, cut out the limbs from the round cakes, first by using a round cutter to cut a donut and then slicing the donut into halves (bottom right pic).
Assembling the giraffe chiffon cakes is somewhat like an engineering problem of making sure the cakes are placed structurally in the correct place :p. I used the limbs to support the body by wrapping around the body (imagine a photo frame with 4 limb supports). I used melted chocolate to fix the cakes in place. Then I used the choco-banana pocky to attach the head to the body, using more melted chocolate to fix them in place. The pocky also serves as the giraffes ossicones or "antennas". Do note that the pocky will become soft after absorbing moisture from the cakes after a while, so do place them right before serving if you don't want the head to slope off. If you are afraid the structure may fall, you can use one quarter of the chiffon tube cake to support from behind but it is not essential. The resting position is much easier in terms of engineering support. I broke the pocky sticks shorter just for the giraffe's ossicones, using just the limbs to support both the body and the head.
I'm linking this post to Bake Along for this week's theme of Chiffon Cakes jointly hosted by Joyce of Kitchen Flavours, Zoe of Bake for Happy Kids and Lena of Frozen Wings.
With love,


