Showing posts with label Salted egg. Show all posts

Tuesday, 3 September 2019

Mooncarons (Swiss Method)

I began my quest of making macarons that look and taste like mooncakes two years ago so this is the third year I am giving it a go again and this time round, I can say that I am presenting mooncarons!

I have to thank my friend for exclaiming that these are "mooncarons" when she saw them. These are proper mooncarons, not just some mooncakes stuffed with a macaron in the middle 

Just some background to my experiment making these. Two years ago I made a few attempts, trying out different ways of making the mooncake pattern. The experiment included imprinting the surface of partially dried piped batter using mooncake moulds and indenting the surface of partially dried shells with toothpick. Both do not work so don't try 😂. Unless you happen to have liquid nitrogen and a custom made metal mould for imprinting piped batter. You can read all about my first attempt over here. Last year I focused on getting the taste of the filling right and you can read about it here. This year, I thought of experimenting yet again to add some height to the "mooncake" and change the process of making the shells by tweaking the recipe and process, such that the shells don't end up being too fragile and soft due to the use of gula melaka (coconut palm sugar) for meringue but still tastes great.

As always, begin by making your template. I used the mooncake mould imprinted part to trace out the outlines. This can only be done if you use the plunger type of mooncake mould because you can't do that with traditional wooden moulds.


This is the first time I am trying out using granulated gula melaka and icing sugar to make the Swiss meringue and am rather pleased with it. The resulting macaron shells aren't as fragile and still has that wonderful aroma and taste that is similar to traditional baked mooncake "skin". The macaron shells have the added advantage of having a lower GI because of the replacement of white caster sugar with coconut palm sugar. I usually split the egg whites into two batches for Swiss method now but in this case, I use all of it for the meringue to ensure that all the sugar is dissolved in it. This is also the first time I am trying out using the stand mixer to do most of the macaronage process.

Ingredients (makes about sixteen to eighteen 5cm mooncarons):
Dry ingredients
85g superfine almond flour
85g icing sugar
1/2 tsp cocoa powder (use 1/4 tsp if you prefer lighter brown)
1/4 tsp cornflour (optional)

Swiss Meringue
75g egg whites
60g granulated gula melaka (coconut palm sugar)
20g icing sugar (with cornflour/cornstarch already added)
A pinch of salt (optional)
1/8 tsp cream of tartar (optional)

Steps:
1. Prepare template and line baking tray with parchment paper. Set oven rack to lowest or second lowest position. Sift dry ingredients together and set aside.

2. Prepare the Swiss meringue. Place all the ingredients in mixing bowl of stand mixer if using a stand mixer for meringue. If not any regular clean metal or glass bowl will do if using handheld mixer.  Place mixing bowl over a saucepan filled with a bit of water. Make sure the water in saucepan doesn't touch the base of mixing bowl. Turn the heat on to medium low heat while whisking the contents in the bowl continuously. Monitor the temperature of egg whites using a candy thermometer. Heat until temperature reaches 48-50°C. This process may take up to several minutes so prepare for a workout 🤣. The reason why you should heat slowly is because all the sugar had to be dissolved before you whip it up using electric mixer. If the temperature rise is too fast, some sugar may be undissolved and the meringue won't turn out well. Remove bowl from saucepan once temperature is reached. Use electric mixer or stand mixer to continue beating the meringue at medium speed until stiff peak. Note that the meringue shouldn't be beaten until it is so stiff and dry that it balls up inside the whisk (applicable for French method only).

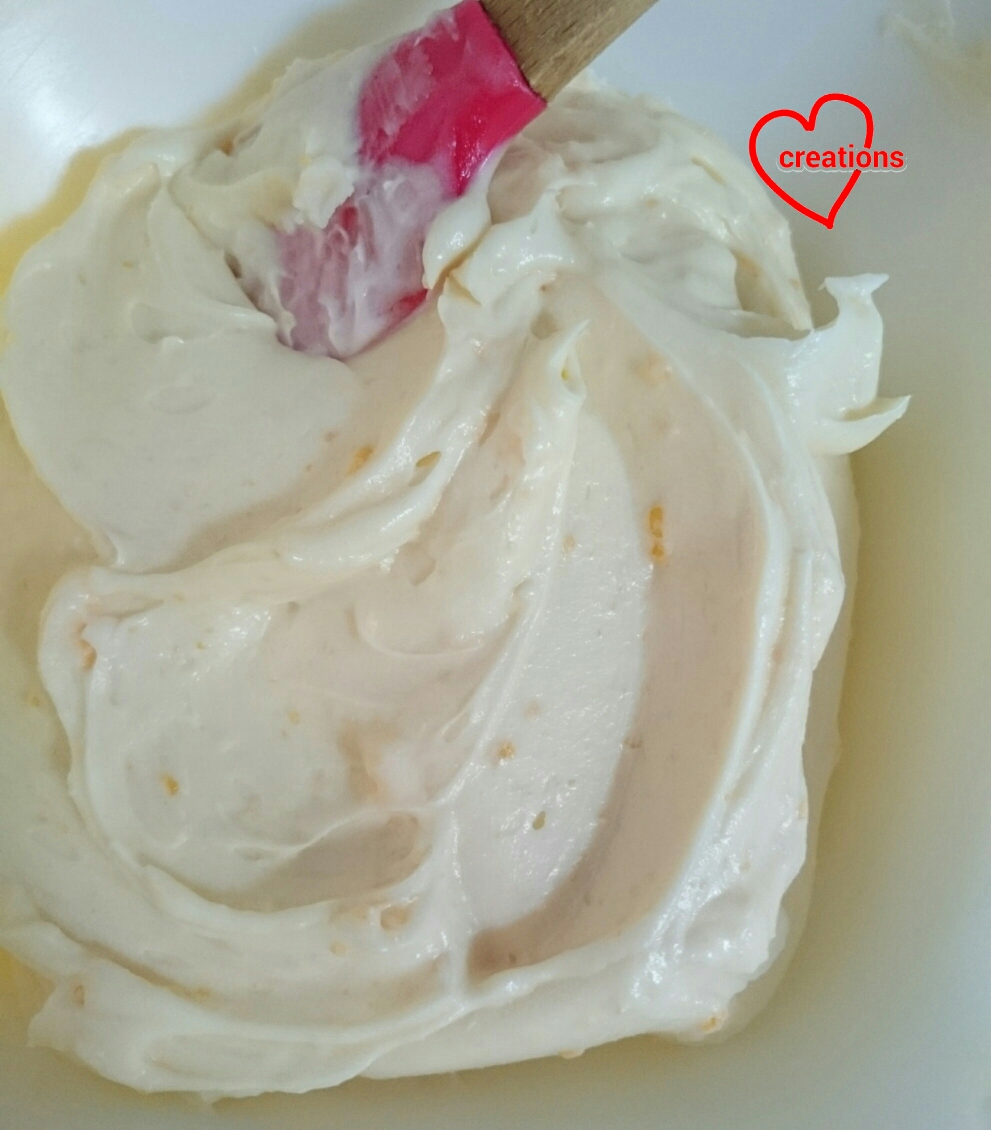
Swiss meringue using gula melaka and icing sugar 

3. Scatter dry sifted ingredients into meringue in 3 batches. After each addition, turn mixer on to medium high speed for a couple of seconds just to incorporate the dry ingredients. After all the dry ingredients are added, use a spatula to gently fold the batter to ensure that everything is incorporated well. Test the consistency of the batter. If it falls off the spatula in a continuous or almost continuous ribbon, it is ready. If not, continue folding and check again. You may refer to the video tutorial here for the right consistency.

4. Transfer batter into piping bag fitted with a wilton #5 or 6 tip. Pipe the base of the shells. I use three shells for each macaron, with the middle shell as a ring. Let the top shell dry until a sticky membrane is formed before switching to wilton 1s tip to pipe the patterns. Unclog the tip if necessary as you pipe. Remember to bang the tray after piping to flatten any peaks and pop any bubbles trapped.

Top shell

Middle shell

Bottom shell

Dry in aircon room until dry to touch before baking.

5. When about to bake, preheat the oven to 170°C. Place baking tray in oven. Immediately turn temperature down to 140°C. Bake for 20-25 min or until feet doesn't appear wet for top and bottom shells. The ring should take about 15 min to bake. Let the shells cool on the tray completely before carefully peeling the parchment paper away from the macaron shells. If the shells are stuck, bake for another few minutes before checking again. You want to bake the shells until biscuit-like as the filling will soften the shells. Do note that baking temperature and time is just a guidine as each oven is different. Because coconut sugar is used, I bake them longer than if I use regular white sugar as it is more hygroscopic (tends to retain moisture).

Freshly baked shells! 

As with my previous attempts, I use gel food colouring dissolved in vodka to create a paint to give the shells an egg washed look that traditional mooncakes have. Use a mix of electric yellow and teeny bit of chocolate brown. You may want to oven dry the shells at 70°C before filling if the paint has turned your shells soft.

Please refer to this post for detailed recipe for the mung bean filling and salted egg yolk filling. You may Google for a lotus paste recipe if you prefer lotus paste instead of mung bean paste. Just thin it out with whipping cream as I mentioned in the post for the filling. The assembly sequence is shown below from left column to right.

1. Coat bottom shell with mung bean filling. 2. Place ring on top of bottom shell. 3. Fill cavity with a ring of mung bean filling and salted egg yolk filling in middle. 4. Coat top shell with a layer of mung bean filling. 5. Sandwich top shell on middle shell. 

Refrigerate for a day in airtight container before serving. Let the macarons sit in airtight container at room temperature for 15 min before opening and serving to prevent condensation from atmosphere onto the shells.

I love the view of the cross section! 

As you can see a lot of time and effort has been taken to come up with this so please acknowledge my hard work of you ever replicate this. Thank you and hope this will help you bless your loved ones at Mid-Autumn Festival this year!


With love,
Phay Shing


Read More »

Monday, 27 August 2018

'Baked Mooncake' Macarons with Mung Bean Paste and Salted Egg Yolk

I challenged myself to create mooncake lookalikes last year for both snowskin and baked mooncakes. It took me a few tries to get the looks right as it was tedious and tricky to get all the right "imprints" and mooncake shapes in macaron form. You may read all about it in this post. This year I thought of making macarons that not only look like the real deal, but also taste like it! Presenting my mooncake wannabes!


I didn't plan to make the snowskin version this year as I thought the baked version appears more like the real thing.

I made the mooncake shells concurrently with my Pusheen and Rilakkuma Teachers' Day bake so it's the same batter as Rilakkuma. It was a small batch of 12 mooncake macarons. I also used a bigger piping tip for the mooncake imprints this time round compared to last year as the smaller tip gets stuck now and then with batter. I had a long day of piping many Pusheens and Rilakkumas so I didn't want to go through the trouble of having to unblock the piping tip now and then! Resulting imprints from using a larger piping tip look less refined than last year's but I am not too perfectionistic about that. You may use any of your favourite macaron recipe to make the shells, or any one of my macaron recipes on the blog. What I really want to share in this post is the recipe for the filling as it is unique.

Here's a picture of the piped shells before baking.


Here is a shot of the shells after baking and after the "egg wash" effect was added. I didn't actually brush the shells with egg wash but just painted it such that it has an effect that looks like egg wash.

Checkout the feet!

I made two types of fillings to mimic the traditional mooncake filling: mung bean paste based and salted egg yolk based.

The mung bean filling recipe is adapted from my first attempt at using homemade mung bean paste as macaron filling last year. You may read about it in this post. I didn't need the filling to be really stiff over here since I am not making a macaron structure so the filling over here is quite different from my first attempt. The whole process of making mung bean paste, which is one of the common mooncake fillings, is rather time consuming and tedious. But you have the added advantage of having absolute control over how much sugar goes into the filling. This is quite an important criteria for me when it comes to macaron fillings as macaron shells already have a high sugar content. Do make the mung bean puree ahead of time and you may even freeze it for a long time. When you want to make the macaron filling, you may work with defrosted mung bean puree and you will find it less of a hassle this way. Which was precisely what I did!

I adapted the mung bean paste recipe from Christine's.

Recipe for mung bean cream 
Ingredients:
Mung bean puree
200g dried deshelled mung beans
A few pandan leaves, knotted or cut into shorter strips
Water

Mung bean paste
150 mung bean puree
28g brown sugar (more if you prefer sweeter)
24g milk (or coconut milk)
1 pandan leaf cut into smaller pieces
1/2 tsp salt
21g unsalted butter
1 tsp vanilla extract
1.5 tsp wheat starch

Mung bean cream
140g mung bean paste
40g heavy cream/ whipping cream

Note: this recipe is catered for macaron filling so it tends to be less sweet but saltier, to be paired with macaron shells that already have high sugar content. Please adjust sugar and salt content accordingly if used in other pastries.

Steps:
1. Prepare mung bean puree. Wash and drain dried mung beans a few times before soaking overnight. Drain the soaking water and rinse and drain one more time. Transfer beans into a shallow steaming plate. Add pandan leaves and cover the beans with enough water till about 1cm above the beans. Steam for 30-35 min or until beans are soft. Drain away excess water and remove pandan leaves. Press the beans through a fine sieve. You may freeze any excess puree for future use. The 200g of dreid beans suggested here is more than you need so there will be excess.

2. Prepare mung bean paste. Heat milk with Pandan leaf in microwave oven or in small saucepan. Let the leaf steep for 10 min. Discard the leaf. Place all ingredients except wheat starch in a nonstick frying pan or wok. Bring to a boil while stirring with a spatula. Once it's boiling, reduce heat to simmer. Keep stirring until liquid is reduced by two-thirds. Gradually add sifted wheat starch and stir until well combined. Continue cooking the mixture and stirring/kneading with spatula until a soft dough forms and all liquid has been cooked off, about 20-30 minutes. Transfer to a bowl and cool completely.

Freshly made brown sugar mung bean paste

3. Make mung bean cream. Gradually add cold heavy cream to mung bean paste and use a spatula to mix well. You may use an electric mixer to incorporate the ingredients together or have a workout using the spatula all the way!

Mung bean cream

Transfer into piping bag and pipe this filling in a ring on the bottom shell.

Recipe for salted egg yolk filling 
Ingredients:
32g sieved cooked salted egg yolk* (about 2 egg yolks)
32g unsalted butter, softened

Steps:
1.* Prepare salted egg yolks by cooking the yolks. You may do so in a few ways. Steaming the yolks only or steaming/boiling the whole egg with shell on, and then extracting the cooked yolk. Press the cooked yolk through a fine sieve and measure out the amount required. Cooking just the yolk takes about 9 minutes of steaming. Cooking whole eggs with shell on takes about 15 minutes.

2. Combine the salted egg yolks in part 1 with butter. You may use a spatula or small hand whisk to combine the two together.

Salted egg yolk filling.

Transfer into piping bag and pipe a dollop of this filling in the middle of the bottom shell.


Refrigerate the assembled macarons for at least 24h before consuming. Before consuming, let the macarons rest at room temperature for about 10 minutes.

Here's a closer look at the cross-section...

No hollows! And yums!

I got hubby to help me to do a taste test and he said it tastes like mooncake! My friend who requested for this set of mooncake macarons tried it said it's yummy and not too sweet!

With love,
Phay Shing


Read More »

Tuesday, 5 December 2017

Piglet and Pooh 'Ice Cream' Chiffon Cake Pops


Is it only me, or do you also see a heart shape? Lol =p This cute pair, Piglet and Pooh Ice Cream chiffon cake pops are definitely healthier than the real thing! Presenting the first Cartoon chiffon ice cream pops ever made! Plain ice cream versions are in my cookbooks =).

This Pooh has quite a special local flavour. It is colored and flavored by Salted egg yolk! If you like salted egg yolk, you can also see my previous post on Salted egg yolk chicks. The pink is strawberry and the cones are lightly colored with cocoa powder (vanilla-cocoa flavored).

I baked the animals in oven-safe glass bowls and the cones in paper cones. The picture tutorials for Ice cream Chiffon Cake pops are actually in Creative baking: Chiffon Cakes book (1st chiffon book).


I divided by batter roughly into 3 parts (1:1:2) for the two different animals and cone.

Piglet and Pooh Ice Cream Chiffon Cake Pops
Egg yolk batter
2 egg yolks
13g castor sugar
26g vegetable/corn oil
28g water
3g vanilla extract
40g cake flour, sifted (Prima)
One boiled salted egg
Dip of strawberry paste/emulco
1/5 tsp cocoa powder

Meringue
4 egg whites
45g castor sugar
1/4 tsp cream of tartar

1. Preheat oven to 160°C. Mash one boiled salted egg.

Boiled Salted Egg Yolks I used

2. Prepare egg yolk batter:

a. Whisk egg yolk with sugar using hand whisk until light and well-mixed.

b. Add in oil first, then water and vanilla extract and mix well.

c. Whisk in sifted cake flour and whisk well, ensuring that no lumps are formed.

3. Divide the batter into 3 parts ie 1:1:2.

To the first portion, add the mashed salted egg. To the second portion, add a chopstick dip of strawberry paste/emulco. To the last portion, add approximately 1/5 tsp teaspoon cocoa powder. *You may substitute with your preferred food coloring/flavour, or adjust amounts to desired colour.

4. Prepare meringue:

a. In a grease-free, dry bowl, using electric mixer, whisk egg whites with cream of tartar till frothy.

b. Add in ½ castor sugar for meringue and whisk at high speed till soft peaks form - peaks slope downwards forming a hook.

c. Add in rest of the castor sugar for meringue and whisk till firm peaks form - peaks point up but slightly hooked at the tip.

5. Divide the meringue into 3 ie 1:1:2.

6. Fold in meringue gently into each colored egg yolk batter 1/3 at a time. *Fold in unidirectional, gentle strokes and do not overfold.

7. Fill the bowls with the salted egg and strawberry batter till 3/4 full. Fill the vanilla-cocoa batter into 2 paper cones. 

8. Bake at 160°C for 10 min then at 140°C for 20-25 min, or until skewer inserted into center of cakes come out clean.

9. Pour batters into 15-cm baking pan lined with baking paper. These are for cutting the ears and hands. Bake at 160°C for 15 min.

10. Allow to cool completely on wire rack, before unmolding by hand.

I used charcoal chiffon sheet cakes (from another bake) to cut out facial features using bento cutters. You can also pipe on using melted chocolate or nutella. I cut out ears from the sheet cakes and used melted marshmallows to stick everything together. You can also use melted white chocolate to stick them together.

With lots of love,
Susanne


Updates:

Post book launch event sharing (2/12/17). Thank you so much for all your love and support (even if you couldn't come, your words of encouragement are more than enough!)


Deco Chiffon Cake books


Something nice to share, Deco Chiffon Cake Basics book on 20% discount at Popular for Popular member (till 10th Dec).


Read More »

Thursday, 10 August 2017

'Snowskin and Baked Mooncake' Macarons (new recipe for Gula Melaka macaron shells!)

This bake came about because I was inspired by Jennifer Lu's macaron version of taiyaki that I saw from a macaron Facebook group. Unlike the ferris wheel which I succeeded on my first try, or the macaron tricycle which I succeeded on my second try, mooncake lookalikes took me a few attempts to get it right. Presenting probably the world's first mooncake macarons that look like mooncakes!


I will share in detail the recipe for Gula Melaka "baked mooncake" macaron shells (French method) and the "mooncake" filling in this post. The "snowskin mooncake" macaron shells were made using an old recipe so I will just provide the link to it.

I have always wondered what if we replaced caster sugar with brown sugar or even Gula Melaka for making macarons. Gula Melaka also has a glycemic index that is a third of white sugar, making it less harmful for diabetics. A yummier and healthier option! I had some leftover chopped Gula Melaka from making Ondeh-Ondeh and some aged egg whites in the fridge so I thought why not try it out. When using brown sugar, keep in mind that it is more hygroscopic in nature than caster sugar (tends to absorb moisture from atmosphere) and this may potentially cause problems when baking macarons. I overcome this by baking at a higher temperature for a longer time to really dry out the shells (overbaked by usual standards) and add a little more cornflour to the powdered almond mixture. Overbaking caramelizes the sugar more, intensifying the caramel flavour that is already present in brown sugar. The resulting macaron shells are softer to bite after maturing with filling than regular shells and the caramel flavour is amazing😍! You don't have to bother with browned shells since they are supposed to look brown anyway :p.

Recipe for Gula Melaka macaron shells
Ingredients (makes about seven 5cm mooncake macarons, 14 shells):

35g egg whites (about 1 egg), preferably aged
35g Gula Melaka*, finely chopped and sifted (not necessary to use an extra fine sieve)
48g icing sugar (with cornflour added)
37g superfine almond meal
1/2 tsp cornflour
1/8 tsp fine sea salt
1/8 tsp cream of tartar (optional)
1/8 tsp Dutch processed cocoa powder (optional, I added to deepen the brown colour a little)

*You may replace with fine brown sugar

Steps:
1. Sift almond, icing sugar, salt, cornflour and cocoa powder together.

2. Prepare baking tray with mooncake template. You may use a scalloped cookie cutter to trace out the shape like I did. Line baking tray with baking paper.

3. Beat egg whites with cream of tartar on low speed with an electric mixer until foamy. Gradually add Gula Melaka and continue beating on medium low speed until stiff peaks form. The reason for using lower speed is to allow time for the sugar to dissolve. Alternatively, you may also use the Swiss meringue method using the same amount of ingredients to make the meringue. This also ensures that the Gula Melaka is dissolved in the egg whites. It is important to whip to stiff peaks and not just firm peaks.

Gula melaka meringue

4. Add in powdered ingredients in three batches and fold in carefully and gently using a spatula. When the powdered ingredients are incorporated, press the batter against the side of the bowl to deflate the batter a little until the batter falls off the spatula in a lava-like manner. You may refer to this post for how to fold and press the batter, and how to test the consistency of the batter.

5. Transfer batter into piping bag fitted with a suitable sized tip, which depends on the cookie cutter scalloped pattern that you traced. I used a Wilton #6 for mine. Pipe the base of the mooncake and let it partially dry. Add the pattern details (I used Wilton 1S tip) and dry the shells under a fan or in aircon room until dry to touch.


6. Set oven rack to lowest or second lowest position. Bake shells in preheated oven (fan off) at 150℃ for 15 min and at 130℃ for another 5-10 min or until feet no longer appears wet. It is ok to overbake the shells and let it brown a little. Cool completely on the tray before removing. Note that baking temperature and time will vary as each oven behaves differently. They key is to overbake the shells such that it is crispy and slightly browner when freshly baked.

Freshly baked shells!

You may notice that my macaron shells have an "egg washed" look. Here's the magic that took place post baking as you can see from the picture below.

Adding on "egg washed" look

Completed shells!

I am not releasing the details of how I made the scalloped edges look the way they are (you can't achieve this look by simply piping the batter the normal way) or how to add on the wash effect at this point in time but I am sure those of you who have been following my macaron blog posts will be able to figure out the tricks ;).

Here's a peek at the insides! The shells taste very close to my brown sugar cookies but with macaron texture!

Fluffy insides and no hollows!

The snowskin mooncake version was made using the reduced sugar recipe for the macaron shells (Italian method). Both regular and reduced sugar recipes can be found here. You may refer to my Creative Baking: Macarons book for a systematic presentation of the basics and complex shaped macarons. You may refer to my video tutorials for macaron basics and piping of complex shapes on the blog too.

Just to share some pictures of the process...

Piped and partially dried base

Added details

Freshly baked shells!

At this point in time, I haven't figured out how to include lotus paste into the macaron filling since I was focusing on getting the look right. I used a reduced sweetness white chocolate ganache as the base and added on Gula Melaka to colour it brown such that it looks a little like lotus paste. The salted egg yolk center is really salted egg yolk mixed with the ganache.

Recipe for mooncake macaron filling
Ingredients:
Basic vanilla white chocolate ganache
40g white chocolate, chopped (I used vanilla bean white chocolate)
40g unsalted butter
40g vegetable shortening
40g heavy cream
1/4 tsp salt
1/2 tsp vanilla bean paste
1/2 tsp Caramel flavouring (optional)

Gula Melaka ganache
65g vanilla white chocolate ganache
18-20g Gula Melaka syrup (melt 25g chopped Gula Melaka in 1-2 tbs water with one knotted Pandan leaf, set aside to cool)
1/8 - 1/4 tsp salt (according to taste)

Salted egg yolk ganache
13g vanilla white chocolate ganache
12g mashed cooked salted egg yolk (about 1 salted egg)

Steps:
1. In a microwave-safe bowl, melt white chocolate, butter and shortening at medium power for 20 sec. Mix well with a spatula. Repeat until mixture is melted. Be careful not to overheat.

2. Heat cream in a saucepan until bubbles appear. Pour over white chocolate mixture and stir until well combined.

3. Add salt, vanilla and caramel flavouring. Mix well.

4. Freeze mixture for 2 minutes and mix well with spatula. Repeat until mixture thickens. Start to whip it either with spatula or electric mixer until it resembles whipped cream. This white base can be used as the outer ring of filling for the snowskin mooncake version.

5. Make the Gula Melaka ganache. Add salt and Gula Melaka syrup a little at a time to the vanilla white chocolate ganache, mixing well between each addition. Add as much as you would like according to taste and the depth of colour. This will form the "lotus paste" portion of the filling.

6. Make the salted egg yolk ganache. Mix mashed salted egg yolk and vanilla white chocolate ganache together. Press the mixture through a fine sieve if it is lumpy.

7. Transfer all three types of filling into piping bags. Fill the shells as shown below:

Snowskin mooncake macaron filling

Baked mooncake filling

8. Refrigerate in airtight container for at least 24h before serving. Let the macarons stand at room temperature for about 5 minutes before eating.

My dad and younger kid had first dips to the mooncake macarons and they said it was yummy! Here's a closer peek at the insides...


With love,
Phay Shing
Read More »

Friday, 3 February 2017

Salted Egg Yolk Custard 3D Rooster, Ladybug & Watermelon Macarons

I just finished an extremely busy episode of macaron mania, completing three different requests concurrently in a single planned bake. I had some leftover batter of various colours and decided to play around with 3D hemispherical macaron shells again. And this was what I came up with! Roosters, a ladybug and a watermelon!


Guess what's the filling inside?

Runny salted egg yolk custard! Yums!

My last recent experiment with 3D shells by making ondeh-ondeh macarons and a cute turtle was so successful that I was game to try it again! I mentioned in that blog post that I was keen to try other trendy runny/lava fillings. I made runny salted egg yolk custard fillings before some time last year and the feedback was that it's really yummy so I thought why not make it again. The difference is, instead of using buttercream as the barrier layer between the shells and runny custard, I used whipped white chocolate ganache as the base.

I used the reduced sugar recipe for the macaron shells here. Both regular and reduced sugar recipes can be found here. You may refer to my Creative Baking: Macarons book for a systematic presentation of the basics and complex shaped macarons. You may refer to my video tutorials for macaron basics and piping of complex shapes on the blog too.

Piping on a hemispherical surface is a little tricky as the batter flows down the sides of the silicone cakepop mould due to gravity. The watermelon was the trickiest and it was my first attempt at piping tapered alternating stripes on a curved surface. Use a toothpick to pull the batter where necessary. Please refer to my first 3D macaron shell post for some notes on creating these odd shaped shells where I will highlight some difficulties you may face and how to overcome them.

For this experiment, I just piped hemispheres and a corresponding plain circle shell for each macaron...And decide what to make out of them after the bake. By this time I was exhausted from piping and baking the whole day already!

I reused the Pokeball template that I was using for one of the requests.

Other than the watermelon, I was not wondering what to turn each coloured macaron into. Since it's still the Chinese New Year period, I thought why not make more roosters. And so I started to decorate the yellow and white shells with stiff royal icing...

Add more icing sugar to the royal icing recipe until you get the right piping consistency where the icing is able to hold a stiff peak.

Here's a peek at the under side of a hemispherical shell. As you can see, it's quite a challenge to get the batter to flow evenly down the sides of the hemisphere.


I can't help but smile when I see these cute, cheerful creatures!


I tweaked the runny salted egg yolk recipe from the original post to make it slightly less runny here as it would be messy to eat. It's more like a thick lava consistency here. Keep in mind that the consistency of the custard should be the desired one at refrigerated temperatures.

I chose to use ganache instead of buttercream as it is easier to make and it stays firmer longer at room temperature in hot Singapore. I adapted the ganache from the low sugar version used in my ondeh-ondeh macarons.

The recipe for the salted egg yolk ganache and custard is just nice for 7 such hemispherical shells.

Begin by preparing the salted egg yolk puree. Steam 2 salted egg yolks for 9 minutes and mash while hot. Add 15g (1 tbs) of milk and mix well. Press the mixture through a sieve to remove the lumps. Divide the puree into two equal portions (about 24g each). Do add more salted egg yolks (and increase the milk correspondingly) if you would like a stronger flavour. I ran out of salted eggs at home at this point in time and didn't want to waste food for an experiment.

Recipe for lava salted egg yolk custard
Ingredients:
30g fresh milk (slightly warm)*
6g instant custard powder
1/4 tsp vanilla extract
1/16 tsp fine sea salt
24g salted egg yolk puree (or 1 egg yolk mashed with 7-8g milk. Use 2 salted egg yolks mashed with 15g milk for stronger flavour)

*Add 2-3g more milk if you want a runnier custard, less if you want it firmer.

Steps:
1. Dissolve salt in warm milk. Add custard powder and stir for a couple of minutes until smooth and slightly thickened. Add vanilla and mix well.

2. Add salted egg yolk puree in a few batches and mix well after each addition.

3. Refrigerate the custard with cling wrap touching the surface. Proceed to make the ganache.

Recipe for salted egg yolk ganache
Ingredients:
42g white chocolate, chopped
21g unsalted butter
21g vegetable shortening
26g heavy cream
1/16 tsp fine sea salt
1/2 tsp vanilla extract
24g salted egg yolk puree (use more for a stronger flavour, up to double the amount here)

Steps:
1. Place white chocolate, butter and vegetable shortening in a microwave-safe bowl. Heat for 20 seconds at medium power. Stir with a spatula. Repeat until mixture is smooth.

2. Place cream in a small saucepan. Heat until it starts to bubble. Pour the cream into the white chocolate mixture. Stir in one direction until smooth.

3. Add salt and vanilla and mix well. Freeze for 2 minutes and mix well with spatula. Repeat freezing and beating the mixture with spatula (or electric mixer at low speed for larger quantities) until mixture is smooth and creamy and able to hold a stiff peak. Don't worry if the mixture appears to separate in the beginning. It will come together in the end.

3. Add salted egg yolk puree in a few batches and mix well.

See the salted egg yolk bits?

Assembly
1. Transfer the custard and ganache into separate piping bags. Place the hemispherical shells in cakepop mould that was used to pipe the batter on.

2. Pipe ganache into hemispherical shell such that it coats the entire inner surface (first picture below).

3. Add the lava custard. (Second picture)

4. Pipe a layer of ganache to completely seal the runny custard. (Third picture)

5. Refrigerate for a few minutes to firm up the ganache. Pipe some ganache on the bottom shell. Sandwich the top and bottom shells together.

6. Refrigerate for at least 24h before serving. Do be patient as the macarons seriously taste better after maturing.


My kids love the 流沙 version of macarons! Something you get only in steamed buns which I have made on a number of occassions for my little ones before I was swamped with baking requests. Here's a peek at the yummy lava insides!


Pardon the pale colour as the camera didn't pick up the actual colour well. The taste is definitely unmistakably salted egg yolk custard!

Hubby had his cute portion too!

Nicer picture showing texture of the lava salted egg yolk custard

If you are a fan of anything lava salted egg yolk custard, do give this a try ;).

With lots of love,
Phay Shing


Read More »

Sunday, 8 January 2017

‘Baby Rooster’ Salted Egg Yolk Chiffon Cupcakes


I’ve been really busy since school reopened and looking forward to CNY already! Since the Year of the Rooster is coming, there has been lots of request for rooster bakes! Last week I posted a baby rooster chiffon cake, this week I made some 3D baby rooster cupcakes and 3D chiffon rooster for a friend. These are salted egg yolk in flavour, which is currently my favourite flavour, as I love things that are sweet and savoury! You ought to try salted egg yolk chiffon cake if you haven’t!

Today’s recipe is a easy salted egg yolk chiffon cake recipe that doesn’t involve boiling salted egg yolk with milk. I also found it much easier to sift the mashed egg yolk without flour so it should be done separately. I used ready-boiled salted eggs from the supermarket. These are readily available and really convenient, and I love that these boiled egg yolks are really easy and quick to mash and sieve, as they are not too dry and have just the right texture to work with. 

Boiled Salted Egg Yolks I used

Previously, I have shared how thankful I am to have a new capable assistant, the Kenwood Chef Sense, which whips up large volumes of fine quality meringue quickly and efficiently. It’s a great time-saver for me. In addition to the balloon whisk for meringue, the Kenwood Chef Sense also comes with a K-beater for mixing creamy cake batter and dough hook for bread. The K-beater has a unique “K” design said to be optimized for mixing, so I was keen to try it out, as it can be tiring and time-consuming using the hand whisk to cream eggs and also eliminate cake flour lumps completely. Verdict: It is indeed great for creaming eggs and eliminating lumps effortlessly and quickly. Looks like I’ll get addicted to hands-free!

K-beater of Kenwood Chef Sense


‘Baby Rooster’ Salted Egg Yolk Chiffon Cupcakes (makes 5+ cupcakes)

2 egg yolks
13g castor sugar
27 g vegetable/corn oil
35g water/milk
40g Prima cake flour
3 boiled salted eggs (I bought ready-boiled ones from supermarket)
Pinch of salt

3 egg whites
¼ tsp cream of tartar
30g castor sugar

*If you do not wish to use salted eggs, you also can make plain or orange chick cupcakes by a small adjustment of reducing the water/milk/juice by 1g.


1. Mash the egg yolks of the boiled salted eggs and pass through sieve to obtain fine salted egg yolk crumbs. One salted egg yields around 14g of mashed and sieved salted egg yolk crumbs for me.


2. Preheat oven to 160°C. Prepare glass bowls for baking the chiffon cake. I used 6-cm OD bowls, but you can also use 8.5-cm or 11-cm bowls to your convenience. You can even use eggshells. 

Line a 15-cm baking tray with baking paper (this is to cut out the wings later). If you prefer it simpler and don't need wings, you can omit the baking tray and make more cupcakes =).


3. Add castor sugar for egg yolk batter to egg yolks. Whisk at maximum speed till mixture is light and well-mixed. 


4. Add in oil and mix well. Add water/milk. Whisk till well-combined.


5. Add in sifted cake flour. Whisk till batter is smooth and there are no more lumps.
Then add in mashed, sifted salted egg yolk from (1) and whisk until no lumps.

Note: The above steps (3)-(6) can also done using hand whisk.


7. Prepare meringue:

Video tutorial for whisking meringue in 3 easy steps

a. Whisk egg whites with cream of tartar till frothy.

b. Add in ½ castor sugar for meringue and whisk at high speed till soft peaks form.

c. Add in rest of the castor sugar for meringue and whisk till firm peaks form, or just the point of stiff peak.


8. Gently fold in meringue into egg yolk batter 1/3 at a time. *Fold in unidirectional, gentle strokes and do not overfold.

9. Spoon the salted egg yolk batter into bowls till 80% full. Gently tap to remove bubbles.

10. Bake at 160°C for 15 min, then 140°C for 15 min, or until skewer inserted into centre of cake comes out clean.

11. Pour the remaining batter onto the prepared baking tray and bake the sheet cake at 160°C for 15 min.

12. Allow cakes to cool completely on a wire rack before unmolding by hand. Gently pull the cake away from the sides and bottom of the bowl. You may find the picture tutorials of hand unmoulding from bowls and moulds in ‘Deco Chiffon Cakes’ helpful.

13. Assembly:

Crown: Use red ‘hearts’ sprinkles.
*Note: The red heart sprinkles may 'run' a little bit after one day, so it is better you put it on on the day of consumption.

Beak: Cut triangles from orange ‘hearts’ sprinkles by slicing off the 2 round tops.
*The orange wilton sprinkles doesn't seem to have the problem of 'running' =)


Eyes: Cut thin circular slices from black lace candy. You can also pipe on using melted chocolate.


Wings: Peel baking paper off sheet cake and cut ‘wings’ using small oval cutter.


‘Glue’ on facial features and wings using melted marshmallow, made by popping a few marshmallows with a sprinkle of water in the microwave.


Here's the top view before the wings were added! Very easy to make since sprinkles were used, and as cute without wings.


The mini tangerines on the right are in Deco Chiffon Cakes book (below), made from orange/mandarin orange chiffon cake, as part of the '吉' Mandarin orange chiffon cake.


Hope you will like these easy and yummy Salted egg yolk chiffon Baby Roosters!

With lots of love,
Susanne


FYI Deco Chiffon Cakes and other titles having a festive discount (up to 30% discount) at Popular bookstores!


*Updated 19/1/17:
My baby Rooster chiffon cupcakes featured on Discover KL and Says.com!


Read More »