Thursday 29 September 2022

Pumpkin Zephyrs with Maltesers

This was an unplanned project that came about because the idea was so awesome I just had to try! Most bakers would use pumpkin shaped silicone molds for making pumpkin shaped desserts or marshmallows. But molds take up a lot of space and are expensive. For those of us who don't want to make that purchase, there is a simple way to create piped pumpkin shaped desserts!

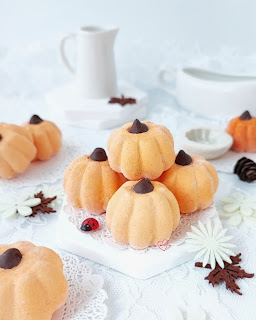
Presenting my piped pumpkin zephyrs filled with Maltesers and topped off with chocolate chips!


Zephyr or zefir is a type of confectionery that can be considered as an agar-based marshmallow. It is usually made with lots of fresh fruit or vegetable puree. These pumpkin zephyrs are made with lots of pumpkin puree. I used Marina's recipe over here as my reference for pumpkin zephyr but with some tweaks to it.


Here's a better view of the cross-section. I feel the Malteser makes it look really intriguing! Not only does it look intriguing, the texture when you bite into it is awesome too! The light crunchy centers and rich chocolate coating of the Malteser present a nice contrasting textural and taste experience as you bite into the pillowy yet melt in your mouth pumpkin zephyr!


I was so excited my experiment worked that I had to take a photo of my first done and dusted (literally with icing sugar and cornstarch) pumpkin!


I shared a video tutorial of piping these pumpkins and posted it on Instagram:

https://www.instagram.com/reel/CjDAXeJAJ3D/?igshid=NjZiMGI4OTY=

Please read the captions that come with the reel for more tips on piping these pumpkins. I would appreciate it if you can credit me if you use this piping technique for your piped pumpkin desserts😊.


with love,

Phay Shing

Read More »

Sunday 25 September 2022

Husky, Doberman & Labrador Retriever Chocolate Choux Pastries

 Someone requested for large dog breed choux pastries and this was what I came up with!


Husky, Doberman and Labrador Retriever!

Here are some pictures of each of the breeds!

Huskies!

Labrador retrievers!

Dobermans!

I used my default recipe which can also be found in my Deco Choux Pastries book. Simple round choux buns and eclairs with crispy craquelin on top are transformed into these lively dogs. The filling flavour requested was chocolate so I made chocolate diplomat cream.


I shared a stop motion reel of it on Instagram and you can see it here:

https://www.instagram.com/reel/CiaRjNEAGcD/?igshid=NjZiMGI4OTY=


with love,

Phay Shing

Read More »

Saturday 24 September 2022

Dinosaur Chiffon Cakes (Online class)


 Let's make some cute Dinosaur chiffon mini cakes! These are mint-flavored, fluffy, moist and super cute!! Link to sign up is here

You can watch a short preview of the class here

Hope you like it!! 

With lots of love, 

Susanne 


Read More »

Monday 19 September 2022

'Milk and Mocha Bear' Brown Butter Chiffon Cake with Mocha Jelly

 Here's the cake that my Milk and Mocha bear plushiemallows landed on! 

The little pink hearts are marshmallows too!

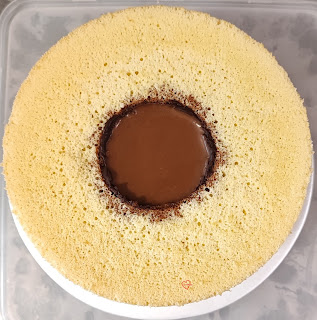
I settled on making a butter chiffon cake because the thought of having a heavy, rich butter cake after a heavy birthday celebration meal just doesn't go down well. But to incorporate that buttery aroma without the heaviness on the stomach, I decided to use brown butter instead of regular butter. The middle of the cake is filled with delicious mocha jelly too to complement the butter sponge 😊.


Brown butter chiffon cake

Butter chiffon cake recipe is adapted from Apron's Youtube video. I took the liberty of using browned butter and brushing on some browned butter after baking to impart a stronger and richer butter aroma, while retaining the light chiffon cake texture. The eggs I used were smaller than Apron's.

Ingredients (for one 15cm and one 17cm tube pans):
Egg yolk batter
7 egg yolks
140g milk
105g brown butter*
200g cake flour
10g cornflour
1/2 tsp Himalayan pink salt
1 tsp Kahlua coffee liqueur (may replace with vanilla extract)

Meringue
7 egg whites
1/2 tsp cream of tartar
150g caster sugar

* Start off with more butter than you need to make brown butter as the water content evaporates off as you cook the butter. I use more butter too as the excess can be used to brush the baked cakes for an even more buttery flavour. I used about 180g of unsalted butter to make the brown butter. There may be leftovers after brushing the cakes.  You may refer to this post on how to make brown butter.

Scale down to 4 egg portion recipe for 17cm chiffon tin if using smaller eggs, and 3 egg portion recipe for 15cm chiffon tin. If using jumbo eggs, use 3 egg portion recipe for 17cm chiffon tin and 2 egg portion recipe for 15cm chiffon tin.

Steps:
1. Prepare brown butter and add to milk. 

2. Preheat oven to 170C, top and bottom heat only. I placed a tray of water at oven base to steam bake but you may leave it out.

3. Make egg yolk batter. Whisk egg yolks until smooth, pale and thick. Gradually add butter-milk mixture and whisk until well combined. Add salt and coffee liqueur or vanilla and whisk until combined. Gradually sift in flours and whisk until no trace of flour is seen.

4. Prepare meringue. In a clean metal bowl, beat egg whites with cream of tartar until firm peaks or just reach stiff peak, gradually adding sugar once egg whites are foamy. Use medium speed to slowly build up the meringue.

5. Quickly but gently fold meringue into yolk batter in three additions. Pour into chiffon tins. 

6. Bake for 15min. Reduce temperature to 150C and bake for another 45min. If skewer doesn't come out clean, bake for another 10-20min at 140C. Steam baking extends the baking time needed. Note that each oven is different so adjust
baking temperature and time accordingly. Invert immediately to cool completely before unmoulding by hand. Store in airtight container until ready to assemble or consume.


Dark chocolate ganache
This was applied to the inner cylindrical walls of the chiffon cake to act as a barrier for the mocha jelly.

Ingredients:
50g dark chocolate couverture
15g milk

Steps:
1. Heat chocolate and milk in microwave oven until warm. 

2. Leave it to sit a minute before stirring in one direction until melted and smooth.

3. Coat the insides of the chiffon cakes using a small spatula. Reserve the extra ganache for making mocha jelly.


Mocha jelly
Ingredients:
50g ice cold water
9g fish gelatin powder (you may use sheets or bovine/porcine sources)
16g erythritol or caster sugar (adjust amount to taste)
140g hot water
1 tbs (4g) instant coffee powder
50g warm milk
Dark chocolate ganache leftover from previous part

Steps:
1. Bloom gelatin by scattering gelatin in ice water. Set aside for at least 10 min 

2. Dissolve instant coffee and sugar in hot water.

3. Add bloomed gelatin to the hot coffee. Stir to melt the gelatin. 

4. Add milk a little at a time to remaining ganache, stirring until well mixed with each addition. 

5. Gradually add the coffee mix to the ganache and stir to mix well with each addition. 

6. Pour mocha jelly into the cavities of the cakes. I topped it off with a thin layer of ganache (I made more) but it's not necessary. Refrigerate for at least 4 hours or until set.


Buffalo check patterned picnic mat and mocha decorations

Ingredients:
2 egg yolks
20g oil
30g milk
45g cake flour
white and teal gel food coloring
1/8 tsp coffee emulsion (emulco)
1/8 tsp chocolate emulsion

2 egg whites
1/4 tsp cream of tartar
40g caster sugar

Steps:
Follow above but divide egg yolk batter and meringue into ratio of 1:1:2:2 for white: dark teal: light teal : mocha. Add chocolate and coffee emulcos for the mocha colour/flavour. 

Prepare one pan for the picnic mat and another pan for the mocha decorations. I prefer lining my trays with teflon sheets but you may use parchment paper too. 

As the cakes are very thin, bake for only 8-10min. Preheat oven to 180C but reduce temperature to 170C once tray is in. Use top and bottom heat without fan to bake.

Added a small dip of coffee emulco for dark teal to make it appear less neon bright.

Just to share some pictures...

Batter for the picnic mat. Note that it should be glossy, smooth and able to hold its shape.


Piped batter for picnic mat


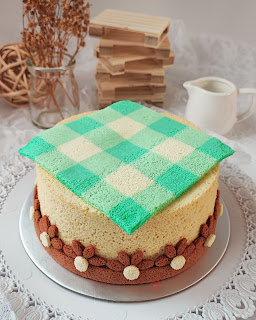
Mocha decorations and picnic mat added to brown butter chiffon cake with mocha jelly!

Couldn't resist squishing the plushiemallows again!


As hubby came down with Covid the day before we were supposed to meet as a family for a birthday meal, I could only pass the cakes to my dad and he helped me take a photo of a slice of the cake. Both mum and dad said it is delicious!


I made another cake for my uncle too since he was the one who requested for butter cake but he just wanted plain sponge. I took the liberty of brushing his cake with more brown butter to impart more butter flavour.

Does this look inviting?


with lots of love,

Phay Shing

Read More »

Sunday 11 September 2022

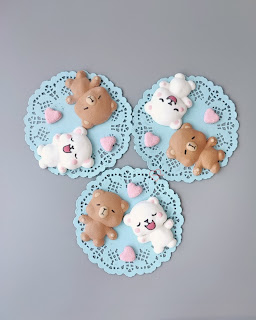
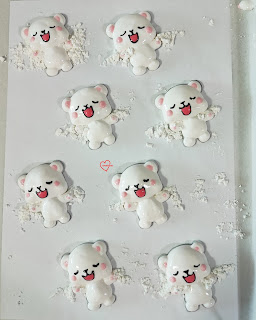
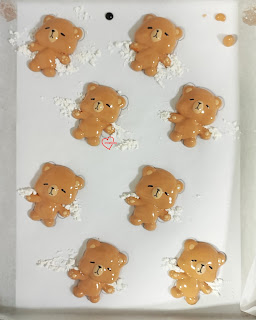
Milk and Mocha Bear Plushiemallows

Some bakes come about because I did a "reverse engineering" type of thought process. I was clueless about what to bake for my dad's and uncle's birthdays so I asked them what type/flavour of cake they would like. As usual my dad just said anything will do. Uncle said he wanted butter cake. My mind went..."Hmm...butter cakes can be quite rich so coffee may complement it well. Or perhaps mocha...Ooo Mocha bear!...and Milk bear!"

So here they are 😊


It was a good excuse to practice my templating method for making character marshmallows. I am excited to announce that I will be writing the 7th book in our Creative Baking series, Deco Marshmallows some time next year! My schedule is pretty full this year so I can only do some limited writing or brainstorming, while I clear my schedule of classes so I can concentrate on writing and making marshmallows for the book. This templating technique is much better than the traditional piping on bed of cornstarch method as you can see the outlines to pipe clearly, which is great for those who are artistically challenged. It also uses a lot less cornstarch and does not have the problem that piping on bed of cornstarch has --- the marshmallow may stick to the piping tip/bag instead of the baking tray as you pipe so you need to start over when that happens.

Just to share some photos of the piped marshmallows before they were dusted!

Milk bear

Mocha bear


While making Milk was a breeze and I successfully did it in one try, Mocha was challenging and it took me 3 tries. That's because I tried to flavour/colour it mocha. Vanilla base is easy but addition of flavourings other than extracts can be tricky as it messes with the consistency sometimes. I added instant coffee and cocoa powder at first but seems like due to the high fat content of the cocoa powder I am using, it is problematic for the meringue. Thank God I managed it eventually!

Recording the recipe for Mocha marshmallow for reference in case I forget!

Ingredients:
50g egg whites
130g caster sugar
54g light corn syrup
40g water
1/8 tsp salt
6g fish gelatin powder (may use other sources. This is the only one where different religious groups have no issues with).
1/2 tsp Kahlua coffee liqueur
23g ice water
1/2 tsp chocolate emulsion (emulco)
1/2 tsp coffee emulsion (emulco)
White, orange, yellow, espresso gel colouring as needed

Steps:
You may refer to this post as reference. I tweaked it so I don't follow it exactly now although I started out following it. I can't reveal too much technical details due to the book as I have a contract to honor with the publisher. For this flavour, I brought the syrup temperature higher to about 115C. 

Here's a video of Milk and Mocha in squishy action!


Don't worry about the wrinkles on the bear faces. They were there because I squeezed a little too hard 😅. The wrinkles disappear after letting the marshmallows rest for several seconds more, as you can see in my next post for using these bears as cake decoration! 

with lots of love,
Phay Shing

Read More »

Tuesday 6 September 2022

Brown Butter Mocha Custard Snowskin Mooncake

 I didn't plan on making any mooncakes this year due to my schedule and I am trying to pace myself to allow some breathing space. But after my brown butter chiffon cake bake with mocha jelly recently (which I will share on the blog in due time), I had some brown butter leftover. It's been sitting in my fridge staring at me everytime I open the fridge 😂. I eventually caved in and made mooncakes because I thought this flavour would be awesome --- brown butter mocha custard snowskin mooncake!

The bunny is made of the same mooncake too!

Here's a closer look at the filling...

I added some toasted pecans but you may omit or use other nuts like walnuts.

But I think an earlier photo of a mooncake make from leftover dough shows off the filling better as this shot is taken from another location at home, away from my usual spot!


The filling should mellow and appear smoother in a couple of days as these were only rested overnight in the fridge. I wanted to get this post out as soon as I can since Mid-Autumn is almost here!

Brown Butter Mocha Custard Filling
Ingredients:
2 eggs, 
45g cake flour (low protein flour, feel free to reduce if using more cocoa powder)
15g cornstarch
30g sugar (I used erythritol, adjust to taste)
A pinch of salt
40g brown butter*
125g fresh milk
1/2 tsp vanilla extract
2 tsp instant coffee powder (adjust to taste)
2 tsp cocoa powder (adjust to taste)

* Heat 70g unsalted butter in light coloured saucepan, stirring now and then. Use medium heat. When butter starts turning brown with little brown specks, remove from heat. Portion out 40g for use. Any excess can be used to oil the steaming plate.


This brown butter is taken out cold from the fridge as I chilled the leftovers from another bake.


Steps:
1. Oil steaming plate with brown butter.

2. Dissolve instant coffee granules in milk in a jug. Add vanilla, melted brown butter and eggs. Gently whisk to break the eggs up.


3. Sift together cake flour, cornstarch and cocoa powder in a mixing bowl. 

4. Whisk in sugar and salt to flour. Pour liquid mixture into dry mixture. Whisk together and sieve mixture onto steaming plate.


5. Steam for 15 minutes or until cooked (no longer liquid). 

6. Break up the steamed custard with spatula or metal spoon and press through fine mesh sieve to get a smooth custard filling. Cling wrap until ready to use.


Milk and Mocha Snowskin Dough

This is my favourite snowskin mooncake recipe that balances ease of making and ability to stay soft and moist for the longest time. I have tried four different methods of making snowskin mooncake: 
1. rubbing shortening into dry ingredients, followed by adding cold liquid 
2. adding oil and liquid to dry ingredients 
3. making from scratch from uncooked glutinous rice flour, which involves steaming of various ingredients
4. The one I am using here, which is adding hot liquid and melted shortening to dry ingredients.
It imparts the softness and higher moisture content of the 3rd method but way more convenient and easier.

Ingredients (makes about 12-13 mini mooncakes):
Milk dough
50g cooked glutinous rice flour (gao fen糕粉)
50g icing sugar
83g fresh milk
1/2 tsp Kahlua coffee liqueur or vanilla extract
16g vegetable shortening
White gel colouring (optional)

Mocha dough
50g cooked glutinous rice flour (gao fen糕粉)
50g icing sugar
83g water
1/2 tsp instant coffee powder
1/2 tsp cocoa powder
16g vegetable shortening

Note: If you do not have access to cooked glutinous rice flour, you can use this recipe or cook the glutinous rice flour by dry frying in frying pan or wok using medium-low heat until you are able to smell the cooked glutinous rice aroma.

Steps:
1. Sift together icing sugar and gao fen in a mixing bowl. Set aside.

2. In a small saucepan, heat vegetable shortening, milk or water, instant coffee and cocoa powder or coffee liqueur/vanilla extract until shortening is melted. There is no need to bring to a boil.

3. Pour hot liquid into sifted flour mix. Stir until a dough forms. Cover bowl with cling wrap and cool slightly until you are able to handle with your hands, about 5-10 minutes.

4. Knead until smooth. Cling wrap excess while working on assembly. Don't worry if the dough seems oily at first. It gets stickier with time.

Assembling Mooncakes
Milk snowskin dough
Mocha snowskin dough
Toasted pecans or walnuts, coarsely chopped
Brown butter mocha custard filling
Gao fen for dusting

Note: I am using mooncake moulds for 50g mini mooncakes. You will have to use different filling and snowskin dough weights for different sized moulds.

Steps:
1. Portion out custard filling into balls of 21g portions. Mix in about 2g chopped nuts into each portion. If you want to omit the nuts, use 23g of filling. I strongly recommend adding nuts to break the monotony of texture and it also adds another dimension to the taste.

2. Portion out 25g snowskin dough for each mooncake (excluding the different coloured pattern design). Dust the dough lightly if it sticks. Cover the balls of dough loosely with cling wrap if you are not working on them first to prevent drying out.

3. Press out the ball of dough between parchment paper and place ball of filling in the middle.


Wrap the filling with dough, dust it lightly with gao fen so it is not sticky and press it out using the mooncake mould. 

4. If you would like to make the fancy mooncake pattern in a different colour like I did, lightly dust the pattern on the mould and press in a small amount of coloured dough into the pattern using finger covered with cling wrap or a fondant tool. 


Place the ball of snowskin with filling into the mould and press it out.

5. Refrigerate in airtight container for up to a week. Note that snowskin mooncakes will dry out with storage time. Best consumed between 1-4 days of assembling. The custard filling needs some time to mellow as well so it is not advisable to consume freshly assembled either if you want to enjoy it at its optimum state.


Wishing all of you readers a Happy Mid-Autumn Festival in advance!


with love,

Phay Shing


Read More »

Sunday 4 September 2022

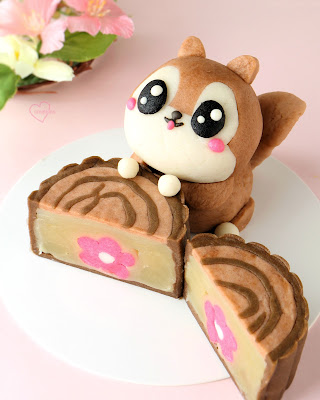
Squirrel Tree Stump Mooncake with Surprise inside


Squirrel Tree Stump Mooncake with Surprise inside! Watch a video on the making of the Squirrel mooncake surprise here

Recipe 
30g icing sugar, sifted (1/4 cup) 
20g shortening (1.5 tbsp) 
60g cooked glutinous rice flour (1/2 cup) 
7g wheat starch, sifted (2 ¾ tsp) 
65g cold water (0.6 cup) 
2 tsp LorAnn Caramel Bakery Emulsion, product of the USA (10g) 
Brown food coloring or cocoa powder 
200g lotus paste 


Hope you liked it! 
With love, 
Susanne 

Read More »