Showing posts with label Choux pastry. Show all posts

Friday, 17 July 2026

Tea Time Sugar-Free Bakes

 Someone requested that I teach a baking class featuring simple bakes without sugar, one sweet treat and one savoury treat. This was what I came up with!


The savoury treat is Gougeres, a cheese-based Choux pastry that can be enjoyed with or without a filling/dip. 
I use a combination of Gruyere and mature Cheddar with a sprinkling of Parmesan as well as some seasonings to impart flavour to the pastry without adding table salt.


Thee this reel for a better look at the pastries along with the ASMR of how crunchy they are!


The sweet treat is a sugar-free lychee blueberry cake with blue china butterfly pattern as the design as requested. The cake composition includes:
- Sugar-free lychee chiffon sponge
- Blueberry compote made without any sugar added
- Blueberry mascarpone whipped cream without sugar added
- Wafer paper butterflies as optional decorations


You may watch this reel for a peek at the process of making the mini cakes!

https://www.instagram.com/reel/DatlC2YyEQS/?igsh=cDBidHlnbjBtbnJm

I have both studio and online class for this. Studio class participants will have access to online class material for free. The online class doesn't have expiry date.


with love,

Phay Shing

Read More »

Sunday, 1 February 2026

Chili Crab Choux Pastry

 Decorative Choux pastries need not always be sweet. Here are some savoury, spicy and sweet cute choux pastries --- chili crab choux!


A closer look at the insides filled with chili crab diplomat cream that has real crab meat! This filling really works together with the crunchy pastry case! 


I will be sharing how to create these yummy treats which are inspired by one of Singapore's iconic dishes in an April class. Please click on the link below for more information or to register:

https://shop.redmanshop.com/products/chili-crab-choux-pastry-class-phytsv00006


with love,

Phay Shing

Read More »

Saturday, 13 September 2025

"The Most Durian" Durian Ice-Cream Creampuffs

 When my dad asked for a durian cake for his birthday this year, I immediately thought of decorating the cake with durian creampuffs that look like mini durians. So glad I managed it!


A closer look at the cross-section...


Although I have durian creampuffs as an entry in my Deco Choux Pastries book, they look more like soursops 😅. I decided to challenge myself to make more realistic durians out of choux pastry batter only and this time, I use a double-baking method to achieve the desired effect.

Here's a look at the choux pastries before the spikes were added.


You may refer to my reel for the video of the process and recipe. 


I will just include the ingredient list in the blog post for your convenience.

Makes about 12-14 "durians"
Choux Pastry:
20g unsalted butter
20g olive oil
120g water
1/4 tsp salt
1 tsp sugar
1/4 tsp pandan paste
1 drop green gel colouring 
1 drop yellow gel colouring 
45g plain flour + 3g, sifted
15g bread flour, sifted 
100g egg, beaten (may need more or less)
Brown gel colouring or cocoa powder as needed

Durian puree inserts:
(may not use all for filling choux)
100g durian puree (I used Mao Shan Wang)
10g cold water
2g gelatin*

Durian ice-cream:
175g durian puree
100g whipping cream of choice*
4g gelatin*
20g cold water/milk

* You may use dairy, non-dairy or a mix of both. If using full dairy, you may add a little icing sugar when whipping it (about 10% by weight of cream). If using non-dairy, you don't have to add sugar if there's already sugar added. I use a combination of both to get the best of stability and taste. Non-dairy cream remains soft when frozen too.

* Gelatin is added to prevent ice crystals from becoming large so the filling stays creamy and not rock hard when frozen. It's also a good stabilizer to prevent the cream from melting too fast when serving in tropical Singapore. You may use any form and bloom strength of gelatin according to preference.


Don't they look like actual mini durians if you don't look too closely 🤭? It's definitely not AI!

See the durian ice-cream cake that these creampuffs went on top of over here


with lots of love,

Phay Shing

Read More »

Monday, 17 March 2025

Hot-Cross Choux Buns

I decided to make a choux pastry version of the classic hot-cross bun and this is what I came up with!


What's on the menu?
- Spiced choux au craquelin (cream puff pastry with crunchy butter cookie layer)
- Orange icing cross (to give an added crunch)
- Cream cheese filling that's lightened with whipped cream and peppered with juicy orange juice soaked raisins. The filling is aromatically flavoured with dark brown sugar, cinnamon, vanilla and orange zest.

My family is really thankful to have found a church community that generally tries to live out the faith by showing love and generosity towards those in need. We have been on the receiving end of such generosity for some years now, and the motivation for them to do so is because of the new life that we have found in Jesus. It's a far cry from some who have used the name of Jesus for selfish personal gain and dragged it into the mud. So as part of the church's Culinary Arts Ministry, I am happy to share what God has gifted me with! Feel free to bring along your family or friends to join you to hear the Gospel in an informal setting at this event! 

You may watch part of the process of making these choux buns in this reel:


Hot cross choux buns
(makes about 32-36 mini buns)

Craquelin
You may prepare this in advance and keep frozen until needed, up to a month ahead of time if kept in airtight condition. Place the cutouts in layers separated by parchment paper if stacking for storage.

28g unsalted butter, slightly softened
24g caster sugar
28g plain flour
1/4 tsp cinnamon
1/4 tsp allspice

1. Mix butter and sugar together briefly with a spatula for about a minute. Sugar doesn't need to dissolve in the butter.

2. Add sifted flour, cinnamon and allspice. Mix well until a dough forms.

3. Roll to about 2-3mm thick (I roll mine to 2.4mm thick using metal guides) between parchment paper. Freeze until firm, at least 20 minutes.

 4. Cut 3mm circles with cookie cutter. Place cut-outs on a lined baking tray. Put back into the freezer until needed. 

Choux pastry*
120g water
1/4 tsp salt
1 tsp sugar 
20g unsalted butter, room temperature
20g olive oil (may replace with butter)
60g plain flour, sifted
2 large eggs**, lightly beaten 

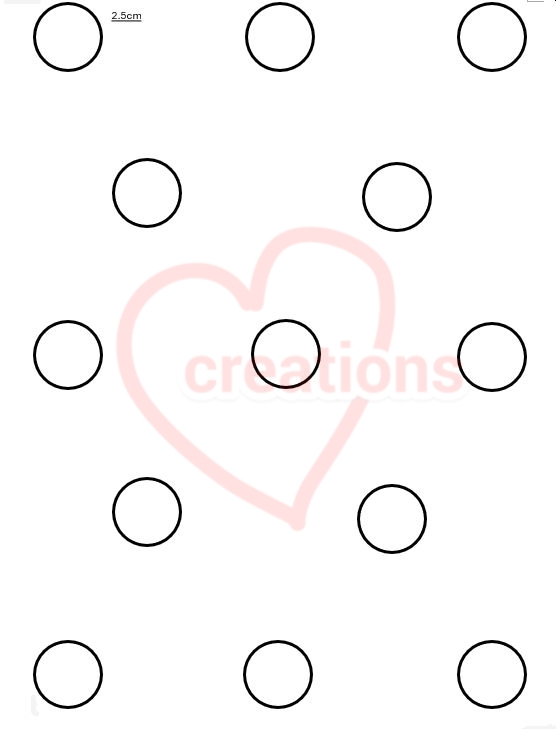
* The Instagram reel shows baking of pastry batter from frozen after piping into 3cm diameter silicone molds. If you don't have the molds, you may follow the steps described in this post. You may resize the template below provided to fit A4 paper for 2.5cm diameter circles. If baking from frozen, increase baking time by 5 minutes


**50-58g without shell on for each egg. Use more egg as necessary depending on batter consistency

1. Preheat oven to 220C/205C (fan). Line baking tray with 2.5 cm diameter circle template and place perforated mat over the template. You may use parchment paper or silicone mat if you don't have perforated mats. Perforated mats are the best for making sure the base of the pastry is flat and it helps to retain the pastry shape better.

2. Place water, sugar, salt, oil (if using) and butter in small saucepan. Bring to a rolling boil while stirring with spatula. Once it boils, remove from heat and pour the flour all in at once. Whisk quickly for the flour to absorb the liquid. Switch to spatula and knead until no flour is seen.

3. Put the dough back in stove to cook over low heat for 2-3 minutes to cook off excess water while kneading continuously with the spatula. I usually use a more precise weight measurement of an 8-10% reduction in weight of the dough after cooking instead of using time measurement. Transfer dough into a mixing bowl and let it cool to at least body temperature.

4. Add half the egg into the dough and mix well until smooth. Add half of the remaining egg and mix until smooth. Add the remaining egg a spoon at a time, mixing well after each addition, until the batter appears smooth and shiny, and is able to fall off the spatula slowly, leaving a deep "V" as it hangs off the spatula as shown in the reel.

5. Transfer batter into piping bag fitted with a large round piping tip (or just cut a 1 cm hole if you don't have piping tip). Pipe tall dollops of batter over the circle template until it reaches the circumference of the circles. The dollop of batter should be about 2.5-3cm tall.

6. Quickly place frozen craquelin circles on top of each piped batter and press down slightly. Dab a little water in the baking tray all around before putting into the oven. The steam produced by the water will help the pastries to rise although it's optional.

7. Bake for 10 min at 215C/200C (fan). Reduce temperature to 190C/ 175C (fan) and bake for 20min. Reduce temperature once again to 145C/ 130C (fan) and bake for another 15-20 min until pastry is totally crisp and dry but not browned further. Cool completely before filling or storing in airtight container. You may freeze it and fill it another day. Re-crisp the pastries in the oven by baking for 8min at 160-170C if you stored it in the freezer or for 5 min if stored at room temperature for up to a week. Do note that oven temperature and time is only a guide. Adjust according to what works for your oven. Do not open the oven door during the first 20-25 min of baking as the pastries may collapse.

Orange icing***:
50g icing sugar
4g meringue powder
10g fresh orange juice

1. Whisk together icing sugar and meringue powder. 

2. Add orange juice and whisk until icing is smooth and thickened, about a few minutes.

3. Transfer icing into piping bag fitted with a #44 ribbon piping tip or cut a side slit about 5mm long along one of the seams of the piping bag to mimic the ribbon piping tip without the actual tip. 

4. Pipe the cross on top of the pastries and tap down with a clean finger dampened with water to ensure the ribbons piped are flat against the pastry as shown in the reel.

5. Dry in 70C oven for 20 min or until hardened. Cool completely before filling.

*** If you don't want to use meringue powder for the icing, you may make royal icing the traditional way from raw egg whites. If using raw egg whites, whisk 12g egg whites with 60g icing sugar and 1/2 tsp orange juice until smooth for 6-8 minutes. Drying in the oven at 70C is necessary to cook the egg whites as well as dry the icing thoroughly. It will take about 1h or more. Feel free to use melted white chocolate for decorating the cross if you prefer something faster and find the extra crunch optional.

Hot-cross bun flavoured cream cheese filling:
300g cream cheese, softened
120g whip topping
180g whipping cream (at least 35% fat)
80g dark brown sugar
2-2.5 tbs orange zest
1/2 tsp cinnamon powder
120g raisins 
1-2 tsp vanilla extract (optional)
60g (4 tbs) orange juice (for soaking raisins)

1. Soak raisins in orange juice overnight in the fridge or for at least an hour. Drain the excess juice from raisins. Set aside.

2. Mix softened cream cheese, sugar and cinnamon together until smooth with a spatula. Add vanilla if you wish.

3. Whip cold whipping creams until firm peak with an electric mixer.

4. Fold whipped cream into cream cheese mixture in a few additions. 

5. Add orange zest and drained raisins. Mix well. 
Transfer into piping bag. Fill the pastries as shown in the reel. 


with love,
Phay Shing
Read More »

Friday, 6 September 2024

' Animals in Bee Suit' Marshmallow-Choux Pastry Delight

 If you want to learn the basics of deco marshmallows and choux pastries in one session, come and join me for this class!


The bee suit is made of patterned choux pastries and the animals are made of honey passionfruit vanilla marshmallows. The inside of the pastry is filled with dark chocolate passionfruit truffle and honey jelly.


I made the filling such that it is safe to leave it out in the hot tropics as it doesn't contain dairy. Great for gifting or party venues where there isn't air conditioning in hot Singapore.

Please click on this link for more information or to register for this class. There are two dates to choose from to suit your schedule. Don't be intimidated by the long hours as I want the participants to enjoy the process and not rush. You may leave early if you are done early 😊.

See the squish of the marshmallows in this reel!

https://www.instagram.com/reel/C6ORSsXSL5o/?igsh=MWg0eDNrNDg3aDlvdg==


with love,

Phay Shing

Read More »

Sunday, 25 August 2024

Bunny & Elephant Lychee Mixed Berry Rose Choux Pastries

 I had a request for some cute animal choux pastries with bunnies as a must. Here's what I came up with!


If the bunnies look familiar, that's because the requestor saw the choux pastry bunnies I made beginning of last year and wanted something similar. I adapted the choux pastry filling from this cake and it's always been a hit. I used less cornflour in the diplomat cream, agar as the gelling agent and a mix of berries for the choux pastry version.

Here's a peek at the cross-section view of the frozen filling of lychee rose diplomat cream, strawberry raspberry jam and lychee rose agar!


Why freeze them? Because they taste wonderful this way! I prefer eating them like ice-cream creampuffs. Refreshing on a hot day! This flavour combination is really popular for creampuffs and I can understand why! 

Here are some pictures of the process...


Freshly baked choux buns!


In the process of filling up the pastry. Doesn't the lychee rose agar jelly look inviting?

Here's a reel of the process:

https://www.instagram.com/reel/C-oXhQASzmy/?igsh=MWhrOHlkMGN3ZmJlaw==


with love,

Phay Shing

Read More »

Saturday, 27 April 2024

Capybara Yuzu Chocolate Hazelnut Choux Pastries

 My family loves capybaras because they are so cute! They are a source of inspiration for me when it comes to bakes too. Here's my choux pastry take on these cute creatures after I made macaron and marshmallow versions of them.


The capybaras are made of yuzu diplomat cream and chocolate hazelnut whipped cream, nestled in choux au craquelin coloured and shaped like fruits. 

Here's a reel of them!

https://www.instagram.com/reel/C556326ywaA/?igsh=bGZmeWVsbG4wNHR3

This is actually a class material I have with Baker's Gym. Registration is still open although we are almost full up! Please click on this link for more information or to register.


with love,

Phay Shing

Read More »

Sunday, 10 March 2024

Fruity Bear Lychee Raspberry Rose Choux Pastry Class

 Want to create a cute and yummy choux pastry creation? Join me for this class in April!


Filling is a delectable lychee rose diplomat cream, juicy pieces of lychees and homemade raspberry jam. The jam can be a mix of berries too!

Here's the reel for how I piped the filling and decorated the bear!

https://www.instagram.com/reel/C4LAtAmyxPf/?igsh=ejdyeHo5OGhmbDJq

Please click on this link for more details or to register.


with love,

Phay Shing

Read More »

Monday, 4 March 2024

Cat Bus Lychee Rose Mixed Berry Choux Pastries

 I made use of a new painting technique to create patterns on choux pastries covered with craquelin to make these Cat Bus creampuffs and Eclairs!


Of course the Totoro vegan marshmallows have to join in the scene!

Here's a look at the cross section showing the lychee rose diplomat cream with raspberry strawberry jam!


You can't see it clearly but there are juicy bits of lychee pieces inserted to give it a little more juicy bite.

It's time consuming to put together the full body version so I only made a couple of those but many more heads (some not shown in picture)

Good technique is necessary for a sturdy, crisp pastry and super hollow interior

I feel decorative choux pastry is not as popular as macarons or marshmallows although the possibilities are endless and it tastes the best in my opinion because it contains a lot less sugar. I hope to be able to showcase more choux pastry creations this year!

Here's the reel showing the making and filling of the full body cat bus choux pastry, and the ingredient list:

https://www.instagram.com/reel/C3m68gPSJ1-/?igsh=cmpyZWs1ZzR5NWVx


with love,

Phay Shing

Read More »

Saturday, 20 January 2024

Year of the Dragon Lunar New Year Greeting

It's my annual tradition to create a new year greeting showcasing all the major genres of bakes I work with. Here's what I made welcoming The Year of the Dragon!


What's in this picture?
1. Chiffon cake mandarin oranges. This year marks 10 years since I made my first mandarin orange chiffon cake oranges back in January 2014!
2. Macaron teacups on saucers. One of my signature 3D macaron creations.
3. Choux pastry dragon suit head, horns, frills and paws. I couldn't think of how to incorporate choux and marshmallow in a coherent creation until I thought of the rabbit in dragon suit idea. Glad it worked out!
4. Marshmallow bunny face and ears, as well as dragon wings. I made a fully marshmallow version of the rabbit in dragon suit too!

Watch the video in this post to see the squish in the marshmallow parts!

https://www.instagram.com/p/C2WADcgSJVH/?igsh=MTEyczdsMzFsYXY3NQ==


with love,

Phay Shing

Read More »

Tuesday, 11 July 2023

Chocolate Hazelnut Bear in Panda Suit Choux Pastries

I was given two bottles of Hazella, a chocolate hazelnut spread, by Phoon Huat (Redman) to try. I decided to share something cute, yummy, simple and uses minimal ingredients. Here are some chocolate hazelnut bears in panda suits!


There is no added artificial colouring too! I shared the recipe and decorating steps in my Instagram reels where you can see how I created the panda cap and bear filling. As mentioned in my caption with the reel I recommend watching my youtube videos for choux pastry technique if you are new to making choux pastries as it is a bake that requires some attention to detail and knowing how to work with your oven as well, but much as it is easier than macarons or chiffon cakes.

Chocolate Hazelnut Choux Pastry Bears 
(makes about 15 small pastries)

Please scale quantity according to preference as this is a small batch.

Choux pastry:
Craquelin:
21g unsalted butter
18g sugar
21g plain flour, sifted

Batter:
60g water
20g unsalted butter
1/8 tsp fine salt
1/2 tsp sugar
30g plain flour, sifted 
1 large egg, lightly beaten

Bear filling:
200-250g whipping cream of choice* 
250g Hazella (or any chocolate hazelnut spread)

Decoration:
Mini chocolate chips
Mini chocolate Crispearls (optional, for bear's nose)

*I used non-dairy cream that's pre-sweetened, stable in hot Singapore & impossible to over whip. Please use an electric mixer to whip the Whip Topping. Be careful not to over whip dairy cream if that is what you choose.

1. Make craquelin. Mix sugar & butter briefly. Add flour & form a dough. Roll until 2-3mm thick. Freeze until firm. Cut out 3cm circles & freeze until needed.

2. Preheat oven to 180C(fan)/190C. Line tray with perforated mat or baking paper.

3. Make batter. Place water, butter, salt & sugar in small pan. Bring to boil. Pour flour in & mix until dough forms. Cook over med-low heat to evaporate some water. Cool briefly in bowl. Add egg gradually until batter is able to hold a long "V" on spatula. 

4. Transfer into piping bag with round tip. Pipe generous mounds about 2.3cm at the base. Place craquelin on top. Bake for 20 min. Reduce temperature to 140C(fan)/150C & bake for 25 min until thoroughly dry inside.

5. Cool completely. Cut off the top of pastry & decorate with mini chocolate chips/melted chocolate for panda.

6. Whip cream until stiff. Mix 100-150g cream with 250g Hazella. Adjust ratio according to taste. Pipe bear with creams. Use melted chocolate & Crispearls to decorate. Assemble panda hat & refrigerate or freeze (Ice-cream version😋!)

A note about using melted chocolate for decoration. Please melt it using low heat and be careful not to overheat. You may use microwave or double-boiling to melt chocolate. Add a little shortening/butter/oil to make the consistency a little runnier for ease of painting/piping the features. It also helps prevent the chocolate from setting too fast. Adding a fat is optional but I find it helps to make it significantly easier to work with.


Besides using Hazella as a toast spread, why not try this as a simple two-ingredient chocolate hazelnut ice-cream! You may consume the creampuffs refrigerated or frozen (my preference!). I was honestly rushing when I took the photos and videos, hoping that I could still make use of some natural sunlight. This forced me to keep everything as simple as possible. So feel free to add Biscoff spread (crunchy one please😋) or Fererro Rocher to add even more dimension to you pastries!


with love,

Phay Shing

Read More »

Wednesday, 11 January 2023

Rabbit Pineapple Creampuff

 Lunar New Year is just around the corner and many bakers are baking pineapple tarts. I have decided to share a creampuff version of this well-loved pastry in cute bunny form to welcome the Year of the Rabbit!


I made the pineapple jam from scratch using the Ninja Foodi Power Blender Ultimate System from Ninja Kitchen Singapore. I was amazed at how easy it was to get pineapple puree that is so evenly blended at the touch of a button! There wasn't a need to manually pause & scrape down the blender multiple times. See it for yourself in the video below! It was super easy to clean too as the blade is removable.

https://www.instagram.com/reel/CnQUOEkAmZa/?igshid=NTdlMDg3MTY=


Please use my promo code: PSCB402 to enjoy $150 off original price of $499 for the blender! Visit Ninja Kitchen Singapore's website if you would like to make the purchase.

I used the pineapple jam on its own & added a sieved portion to whipped cream as filling for the creampuffs.

PINEAPPLE JAM
Ingredients:
1kg fresh pineapple flesh, cut into chunks (about 2 pineapples)
120g caster sugar
30g brown sugar
1/8 tsp salt
1 cinnamon stick

Steps:
1. Blend pineapple chunks
2. Cook pineapple puree with rest of ingredients over low heat till reduced to half (500g).
3. Discard cinnamon stick
4. Store in airtight glass jar in the fridge until ready to use.

Baker's Notes:
- Jam for pineapple tarts is reduced to 20% original weight of puree. But for choux pastry it's reduced to 50% for a softer & moist filling to complement the whipped cream & light, buttery pastry case. Taste isn't compromised! It tastes like a creampuff version of pineapple tarts!
- Adjust sugar according to taste & tartness of pineapples
- Add lemon juice if you like it really tart
- Add cloves/vanilla if you like
- Extra jam can be reduced further for making pineapple tarts 

CHOUX PASTRY
Please refer to chapters 7-9 on my YouTube channel on the basics of choux au craquelin for more details on the technique involved. Over here for chapter 7 on craquelin, over here for chapter 8 on basics of choux pastry batter, and over here for chapter 9 on piping and baking choux buns. I will just briefly describe the steps in this blog post.

Ingredients (makes about 18 mini choux buns):
Craquelin
21g unsalted butter, softened
18g sugar
21g plain flour, sifted

Choux batter
1 egg, lightly beaten (about 50g)
30g plain or bread flour, sifted 
1/4 tsp salt
1/2 tsp sugar
55-60g water
20g butter 
1/2 tsp vanilla extract (optional)

Decoration
Toasted almond slices
Dark chocolate couverture/chips
A little shortening or oil

Steps:
1. Make craquelin. Briefly cream butter and sugar together. Fold in flour. Roll the dough to thickness of 2-3mm between parchment paper. Freeze until firm. Cut out 3cm circles and place on lined baking tray, and freeze the cutouts again until ready to use.

2. Preheat oven to 200C(fan)/220C. Line baking tray with perforated mat (preferable) and 2.3cm circle template. You may line with parchment paper if you don't have the mat. Perforated mat helps choux pastries to retain better shape and have a flat base.

3. Make choux batter. Place water, butter, salt, sugar and vanilla into small saucepan. Heat on low heat to melt butter while stirring. Once butter is melted, quickly bring to roiling boil, stirring occassionally. Remove from heat and pour all the flour in at once. Stir until a ball of dough forms. Make sure all lumps of flour are mixed in. Cook on medium-low heat until some water from the dough is cooked off for about 2-3min (about 10% reduction in weight of dough). Transfer to bowl to cool for 10min.

4. Add half of egg and mix well until batter is smooth. Add half of remaining egg. Mix until batter is smooth. Add the remaining egg a tsp at a time, mixing until smooth with each addition, until batter is able to fall off spatula in 3 seconds.

5. Transfer to piping bag fitted with a 8mm round tip (Wilton #12). Pipe batter onto prepared tray. Dab some water around the piped batter. Carefully place craquelin on top of piped batter.

6. Put tray in oven. Immediately reduce temperature to 180C (fan)/190C and bake for 20-25 min. Reduce temperature to 140-150C and bake for another 20-25min or until thoroughly crisp. We need it crisp all the way as we are adding decorative pieces on the choux case. Do note that baking temperature and time may vary as each oven is different so adjust accordingly.

7. Cool completely before decorating by cutting the top one-third off. Carefully pierce 2 slits on the top piece before inserting almond slices for the ears. Paint or pipe on the eyes and nose of the bunny cap using melted chocolate with a little oil or shortening. Addition of shortening or oil helps the chocolate stay in piping/painting consistency for a longer time. Store in airtight container while preparing the pineapple whipped cream.

PINEAPPLE WHIPPED CREAM
Honestly I would prefer using pineapple diplomat cream to pair with the pineapple jam in the middle for filling but it would be conflict of interest to share my class material here. I chose to share a simple filling that is much faster to make and uses less ingredients so that you may be encouraged to give this a try!

Ingredients*:
150g Whip Topping (non-dairy whipping cream)
50g heavy cream (35% fat dairy cream)
80g sieved pineapple jam

*You may choose your preferred choice of cream depending on climate and where you are serving the pastries. Full dairy cream tastes the best and you may use double cream (45% fat) if you wish. Use stabilizers like gelatin and add a little sugar if using dairy cream. Singapore is very warm so I use non-dairy whipping cream with some dairy cream mixed in. Non-dairy cream is very stable and is pre-sweetened but doesn't taste as good as pure dairy cream. Adjust amount of sieved jam according to taste too.

Steps:
1. Whip whipping cream of choice until firm/stiff peak. Be careful not to overwhip if using purely dairy cream. 

2. Whisk/fold in sieved jam a little at a time.

3. Transfer a little cream into small piping bag with a small hole cut or Wilton #7 tip attached. Transfer the remaining cream into a large piping bag fitted with a large round tip (e.g.  Wilton 1A which is around 13mm in diameter)

ASSEMBLY
1. Fill the choux pastry with whipped cream until about half to three-quarters full. Use the rounded base of a half teaspoon to push the cream against the base and sides of the pastry case to create a well.

2. Fill the well with a heap of pineapple jam.

3. Pipe a generous mound of whipped cream over the jam from large piping bag for the bunny head.

4. Use cream from small piping bag to pipe on the paws, snout and ears. 

5. Add eyes using melted chocolate. Add rosy cheeks if desired. I coloured a little whipped cream with pink gel colouring for the rosy cheeks but you may use natural sources of food colouring like beetroot or red yeast if you like.

I was in a hurry racing against the sunset as it was getting a little too dark to take good videos and photos! I was also multi-tasking by working on this and cooking dinner at the same time 😆😅.

6. Place top piece of pastry case on top of bunny head and you are done!

Keep refrigerated for up to 3 days, or in the freezer for a month in airtight condition. The frozen pastry tastes like ice-cream filled creampuffs, and the chilled version tastes like creampuff version of pineapple tarts!

I tried to keep the design simple and artificial colouring minimal so that you can give this a try!

Please see my second reel below for making of the choux pastry, pineapple whipped cream and assembly:


Read More »

Thursday, 24 November 2022

Pineapple Bunny Choux Pastry in Macaron Teacup Class

 Let's welcome the Year of the Rabbit in 2023 with these cute Choux Pastry Bunnies in Macaron Teacups!


Filled with sweet and tangy pineapple jam and pineapple diplomat cream!


This class for learning two genres of bakes, macarons and choux pastries, will happen in January 2023. Please click on this link for more information on class details or to register .


with love,

Phay Shing

Read More »

Sunday, 25 September 2022

Husky, Doberman & Labrador Retriever Chocolate Choux Pastries

 Someone requested for large dog breed choux pastries and this was what I came up with!


Husky, Doberman and Labrador Retriever!

Here are some pictures of each of the breeds!

Huskies!

Labrador retrievers!

Dobermans!

I used my default recipe which can also be found in my Deco Choux Pastries book. Simple round choux buns and eclairs with crispy craquelin on top are transformed into these lively dogs. The filling flavour requested was chocolate so I made chocolate diplomat cream.


I shared a stop motion reel of it on Instagram and you can see it here:

https://www.instagram.com/reel/CiaRjNEAGcD/?igshid=NjZiMGI4OTY=


with love,

Phay Shing

Read More »

Wednesday, 17 August 2022

Cute Halloween Choux Pastry Special (Class)

 If you would like to learn how to make these cute pumpkin choux pastries, come and join me for this class happening in October!


The mini pumpkins are made of choux pastry too!

Each piece sits on a buttery sable!

The filling is not just one type but a total of four different complementary components put together to create a treat that is cute on the outside but tasty on the inside!


There's peanut butter diplomat cream, chocolate peanut butter diplomat cream, strawberry compote and vanilla whipped cream.

Here's a short video of cutting a pastry, revealing the insides!


I will cover the basics of choux au craquelin as well as how to create simple cute characters out of the fillings. As the design is simple but cute and interesting, this class is suitable for beginners. Please click on this link for more details or to register.


with love,

Phay Shing

Read More »

Sunday, 22 May 2022

Macaron Bear in Ondeh-ondeh Choux Pastry

 I discovered a baking studio near home and decided to give it a try. For my debut, I will be sharing how to make two genres of bakes in simple but cute form: macaron bears in ondeh-ondeh choux au craquelin!

Just in time for dinner dessert on Father's Day too!

If you don't look too closely, you may mistake the choux pastries for actual ondeh-ondeh balls!


Perhaps what may be different about this studio as compared to others I have worked with is the number and range of facilities they have. Baker's Gym where I will be teaching this, has the most number of ovens available, has a blast freezer and their teaching principle is to let everyone do individual work. This teaching principle happens to be my preferred way as well because you learn more when you have hands-on practice by yourself from start to finish.

Please refer to this link for more details of class content and to register.


with love,

Phay Shing

Read More »

Monday, 18 April 2022

Mermaid Pusheen Vanilla Choux Pastries (New technique!)

 I made these Mermaid Pusheen choux pastries in early January this year but only got around to posting it now. Better late than never!


These creampuffs with crunchy cookie dough (or craquelin) are filled with vanilla diplomat cream.

Choux pastries need not come in round choux buns, long Eclairs or donut shaped like Paris Brest. They can come in any shape you want! Besides demonstrating how to make non-regular shaped choux pastries, I am going to show you that it is possible to add on details using choux pastry batter on a baked choux pastry case instead of using chocolate, fondant or royal icing in a double-baking technique.

You may refer to this post for my default craquelin and choux pastry batter recipe. Note that baking temperature and time may vary according to your oven.

Begin by preparing the craquelin. You may refer to this post to see how I create customized shaped cookie dough cutouts without a customized cookie cutter.

Freeze this tray of craquelin cutouts until frozen hard, at least an hour or overnight.

Prepare choux pastry batter as per normal and pipe the mermaid Pusheen shape on perforated mat with a template underneath.

Place the craquelin on top of the piped batter. Note that the craquelin is about 5-10mm larger than the piper batter.

Bake as you normally would. Let the baked pastries cool for about 20-30min before piping on the pink frills on the pastries with choux batter. Pipe the pink tail and grey front paws separately on the perforated mat as well. Pipe only a thin layer of pink batter for the frills and dab down any peaks with a damp finger. Thick batter piped will not stick well to the contours of the pastry after baking.


Bake in preheated oven at 130-150C for 30min or until thoroughly dry. This baking temperature should be high enough to thoroughly bake the batter but not so high that it browns the pastries further. 

I have mentioned before that long baking times for choux isn't a concern for me as the filling has such high water content that it softens the cases within half an hour of filling it. If you prefer it really crisp, double-baking is perfect for you!


Add on the facial features, stripes and scales on the tail with royal icing . I used a gold star sprinkle for decoration as well. The pink tail and front paws were glued on using royal icing.

Recipe for vanilla diplomat cream can be found in this post .

Here's a short video of cutting a choux pastry, revealing the cross section!


Pardon the poor lighting as it was rainy, and the slightly messy cut as the crumbs trailed down the cream😅. I took this video and cover photo on a different day from the day I finished assembling the pastries (which had better lighting).

I made some mermaid Pusheen and unicorn Pusheen macarons along with these choux pastries as well! Stay tuned for another Pusheen themed post!

Get a copy of my Deco Choux Pastries book if you would like to have a comprehensive guide to making decorative choux pastries! I am also most active on Instagram so do check out my account at phay_shing if you would like to have a look at what I am up to in a more timely manner😊.


with love,

Phay Shing


Read More »