Monday, 3 February 2014

Milo and Mandarin Orange Chiffon Cake

I still have mandarin oranges to clear! Had yet another baking session with another neighbor who has been receiving my bakes. I decided to play around a little bit more so I made a layered Milo and mandarin orange flavored cake with orange peel decorations. This time round I remembered to remove the pith from the orange peel and the cake tasted better :).


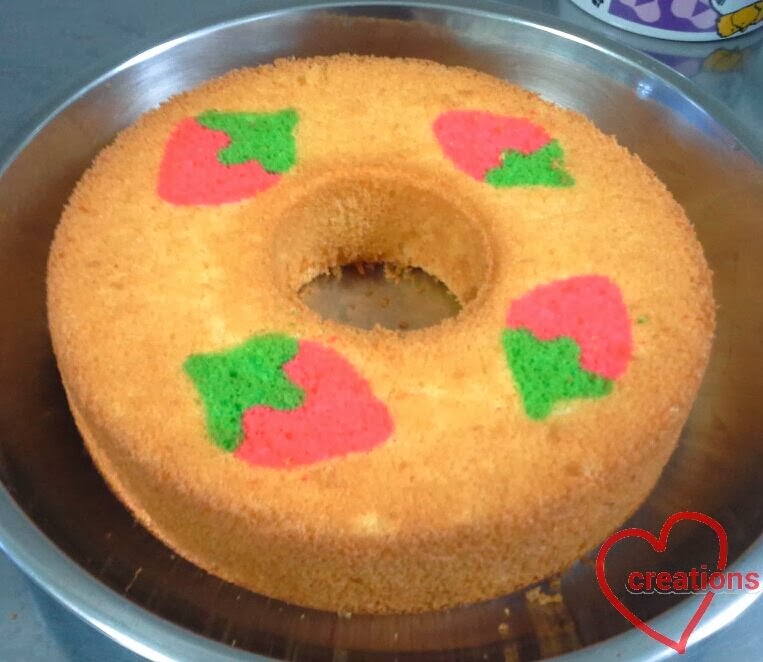
Since Valentine's Day is coming, I decided to do a Love and Hearts theme :).

I used the same recipe as my previous post, except that I divided the egg yolk batter into two and added Milo paste to one of them, and raised the oven temperature by 5 degrees Celsius as I was in a rush and needed a shorter baking time (40 minutes). The paste was made by mixing 5g of fresh milk with 9g of Milo powder. I poured the orange and Milo batter alternately to get a striped look from the outside. Try to pour the batter near the outer surface of the tin so that the different flavors will appear distinct when baked.

As I was too generous with the orange zest, the orange flavor overpowered the Milo flavor and I couldn't taste the Milo much. If you would like to attempt this, perhaps you could substitute with cocoa powder for a stronger chocolately taste and cut down on the amount of orange zest.

With love,
Phay Shing


Read More »

Sunday, 26 January 2014

Mandarin Orange “吉” Chiffon Cake


It was fun experimenting with my first Chinese New Year chiffon! While admiring an angpow with the character  "吉", I had the sudden idea that the centre of the chiffon tin could make up the "口".

After trying out the Junko recipe for kawaii decoroll, I realized that the key to get a patterning batter of good consistency (not runny) was to add a little bit of cake flour into the patterning batter! This helped a lot in the patterning of subsequent chiffon cakes.

After piping in the "吉", I decided that I couldn't draw nice oranges, so I decided to bake part of the mandarin orange in the cake, then top up with more slices for a 3D effect.

My hubby said that the mandarin oranges still tasted nice and sweet in the cake. 大吉大利 everyone!

With love,
Susanne


Recipe for this Mandarin Orange “吉” Chiffon Cake is now on Page 121 in my new cookbook Deco Chiffon Cakes, now on CNY promotion (20%) at Popular.


Read More »

Saturday, 25 January 2014

Mandarin Orange Chiffon with Orange Peel Decorations

A neighbor wanted to learn how to make chiffon cakes because I have been offering her some and she loves these soft cakes that are full of flavor and not too sweet. Since it is the Chinese New Year season and we are flooded with mandarin oranges, I thought why not make a mandarin orange chiffon. As she wanted to learn the basics and I wanted to play around with my bakes at the same time, I decided on using pre-cut orange peel to pretty up the cake so that my baking session with her will not be disrupted by funny things I do to decorate the cake. Here's my mandarin orange chiffon with orange peel flower decorations :).


The cake is really soft, fluffy and full of orange flavor. In fact it is so soft that I had some difficulty unmolding by hand without denting the sides of the cake! Take a peek at the insides filled with orange zest...


The recipe for this cake is adapted from Small Small Baker and I used my 17cm chiffon tin to bake this:

Ingredients:
Egg yolk batter
3 egg yolks (I used 65g eggs)
20g caster sugar
30g Canola oil
40ml fresh mandarin orange juice
Zest of 2 large mandarin oranges
52g cake flour
1/3 tsp baking powder

Meringue
4 egg whites
45g sugar
1/4 tsp cream of tartar

Steps:
1. Peel a mandarin orange and remove the pith (the white fibrous part of the skin) so that the peel will not be bitter when eaten. Use cookie cutters and a small fruit carving knife to carve out the shapes. Line the chiffon tin with the orange surface facing down. Keep in mind that your patterns will turn out laterally inverted so you have to be careful with patterns that involve forming words. I forgot to remove the pith for my first attempt as you can see from the photo below. The decorations turned out really bitter!


2.Preheat the oven to 160 degrees Celsius.
3. Whisk egg yolk and caster sugar until well combined. Add in oil, followed by orange juice and zest.
4. Whisk sifted flour and baking powder into the batter bit by bit until there is no trace of flour.
5. In a clean metal bowl, beat egg whites and cream of tartar with an electric mixer. When soft peaks are formed, gradually add in sugar and beat until stiff peaks are formed and the bowl can be overturned without the meringue falling out.
6. Add one third of the meringue into the egg yolk batter and mix well. Fold in gently but quickly the rest of meringue in 2 additions until there is no trace of egg whites.
7. Pour the batter into the chiffon tin and tap the tin a few times on the table to release any trapped air bubbles.
8. Bake for 45 minutes. Immediately invert the chiffon tin to cool completely for about an hour. Remove the cake by hand for a cleaner and prettier cake surface. Use a spatula to dislodge any stuck sections carefully and only when necessary. Store the cake in an air tight container. I personally prefer to refrigerate my chiffon cakes as they taste better that way :).

With love,
Phay Shing
Read More »

Wednesday, 22 January 2014

Honey Pear Tea Chiffon "Pears"

Hubby bought some honey pear tea jam on offer so I made some chiffon cake with this flavor. Before I began, I thought why not make them pear shaped. It will be really cute and fun! Here's my chiffon pears, big and small :).


I baked the big pears in the glass bowls that they are sitting in and the little ones in egg shells. Since the batter is already nicely golden yellow in color, there is no need to add any food coloring to make them look more pear-like. I adapted the recipe from Yuzu chiffon cakes, which are more common than honey pear tea.

Ingredients:
Egg yolk batter

3 egg yolks (65g eggs)
80g cake flour
20g caster sugar
52g honey pear tea jam
40g Canola oil
50g hot water
1/4 tsp vanilla essence (optional)
1/3tsp baking powder


Meringue
4 egg whites
45g caster sugar
1/4 tsp cream of tartar


Leaves and stems decoration
Chocolate coated biscuit sticks
Green tea powder
White compound chocolate
 

Steps:
1. Dissolve pear jam in hot water. Set aside to cool.
2. Preheat oven to 160°C
3. Whisk egg yolks and caster sugar until well combined. Add in oil, followed by pear jam dissolved in water. Mix in vanilla essence.
4. Whisk sifted flour and baking powder bit by bit until there is no trace of flour.
5. In a clean bowl, beat egg whites and cream of tartar with an electric mixer. When soft peaks are formed, gradually add in sugar and beat until stiff peaks are formed and the bowl can be overturned without the meringue falling out.
6. Add 1/3 of the meringue into the egg yolk batter and mix well. Fold in gently but quickly the rest of meringue in 2 additions until there is no trace of egg whites. Tap the bowl a few times on the table to release any trapped air bubbles in the batter.
7. Spoon batter into round-bottomed glass bowls (for the big pears) and egg shells* (for the small pears). Fill the glass bowls until they are about slightly more than half full and the eggshells until they are about 1/2- 2/3 full.
8. Bake for 15 minutes, then lower the temperature to 150°C for another 10-15 minutes.
9. Let the cakes cool completely before unmolding by hand. Store the cakes in an airtight container to prevent them from drying out.
10. Shape the small pears by wrapping each cake with cling wrap and tying a rubber band about 1/3 from the top as shown in the picture. Leave the rubber band on overnight.


11. Melt some chopped white compound chocolate over a double boiler and add in some green tea until the desired shade of green is reached. Keep stirring the mixture with a spoon until it is smooth. Transfer the green tea white chocolate into a piping bag with a No.3 Wilton piping tip. Lay out some biscuit sticks on a baking sheet and pipe leaves onto the sticks. When the chocolate has set, gently peel off the sticks. If the leaves break off the stems by accident, you may melt some milk chocolate to "glue" them back or use Nutella if you are feeling lazy.


12. Assemble the big pears by joining 2 cakes baked in glass bowls to form a sphere. Use a toothpick to make a hole from the top of the pear. Insert a biscuit stick with leaf attached. Break off the lower portion of the biscuit stick if it is too long.
13. Assemble the small pears by using a toothpick to make a hole at the top of each pear and inserting a biscuit stick.

I find the flavor of the honey pear tea in the cake not as strong as Yuzu even though the recipes are similar, probably because the honey pear tea jam is milder in flavor to begin with. Nevertheless, my neighbors had some of these and thought they are really cute!

With love,
Phay Shing

* Prepare the eggshells using the example shown by Susanne here.
Read More »

Monday, 20 January 2014

Mandarin Orange Chiffon "Oranges"

As I was preparing to visit my in-laws for Chinese New Year, I wondered what I could bake for my MIL. It was only the day before my family had to leave for the visit that I decided to bake mandarin orange chiffon cake for her, since we have so many mandarin oranges lying around during this season. So in the midst of cooking and spending time with my kids, I quickly whipped up some chiffon cupcakes. Suddenly, I had the inspiration to decorate them to look like oranges after the morning bustle died down and the kids were in school. Here's my mandarin orange look-alike :)


This was an unexpected bake that totally wowed everyone! Everyone remarked how real these looked. Can you tell the difference between the cakes and the real mandarin oranges? :P

I baked the cakes in multipurpose round-bottomed glass bowls that are microwave/ oven safe. Dimensions are: height ~ 6.5cm and diameter ~ 9cm. You may also bake them in round metal or silicone molds.


My MIL found the cake very soft, smooth and fragrant :). The orange flavor is really intense because I don't stinge on the orange zest. I adapted the recipe from Small Small Baker (makes about 6-8 "oranges", depending on the size of your molds):

Ingredients:
Egg yolk batter
2 egg yolks (I used 65g eggs)
13g caster sugar
20g Canola oil (or any other vegetable oil)
28ml fresh mandarin orange juice
Zest of 1.5 large mandarin oranges
37g cake flour
1/4 tsp baking powder
Orange gel food coloring

Meringue
3 egg whites
32g sugar
1/4 tsp cream of tartar

Decoration
Compound white chocolate, finely chopped
Green tea powder

Steps:
1.Preheat the oven to 160 degrees Celsius.
2. Whisk egg yolk and caster sugar until well combined. Add in oil, followed by orange juice and zest.
3. Whisk sifted flour and baking powder into the batter bit by bit until there is no trace of flour.
4. Add orange food coloring bit by bit until a desired shade of orange is reached. Take note that the shade will lighten up considerably when the meringue is added in so you may want to make it a darker shade than desired.
5. In a clean metal bowl, beat egg whites and cream of tartar with an electric mixer. When soft peaks are formed, gradually add in sugar and beat until stiff peaks are formed and the bowl can be overturned without the meringue falling out.
6. Add one third of the meringue into the egg yolk batter and mix well. Fold in gently but quickly the rest of meringue in 2 additions until there is no trace of egg whites. Tap the bowl a few times on the table to release any trapped air bubbles in the batter.
7. Spoon batter into round-bottomed glass bowls. Fill the bowls until they are about slightly more than half full.
8.  Bake for 15 minutes, then lower the temperature to 150°C for another 10-15 minutes.
9.  Invert the bowls immediately onto a cooling rack. (Update: this step of inverting the bowls is optional as I have realised from subsequent bakes.) Let the cakes cool completely before GENTLY unmolding by hand as the cakes are very soft and fragile. Store the cakes in an airtight container to prevent them from drying out.
10.  You may refer to my photo tutorial for shaping the cakes into orange shapes. Begin by using a citrus juicer to make an indent at the top of the hemisphere. Hold the juicer in place for several seconds before releasing it. If you find that the indent is not deep enough, repeat this step.
11.  Next, gently gather/ pinch in the bottom of the hemisphere if it flares outwards too much to look like an orange, and place the cake on a paper cupcake liner.
12.  Make the "wrinkles" at the top of the orange by using the back of a butter knife to imprint 5 indents. Hold the cake by cupping it with one hand and press the back of the knife firmly on the cake. Rock the knife gently forwards and backwards, and side to side to make the imprint. Repeat if necessary to ensure that the imprints do not disappear.
13. Divide the white chocolate into 2 portions and place them in small bowls. Place the bowls in a small saucepan of hot water and keep stirring until the chocolate melts and flows easily. Add some green tea powder to one of the bowls and stir until the powder and chocolate are well combined and smooth. You may pipe the "stem stubs" onto the oranges using piping bags but I prefer to use a toothpick to apply the chocolate for such a small volume. Draw a star in the middle of the orange using the green tea white chocolate. When it has set, add a drop of plain white chocolate at the center of the "star". 


I had lots of fun making these and I hope that you will too if you intend to make these to bless your family and friends during the next Chinese New Year. They are really cute and yummy!

Check out my updated post for these "mandarin oranges" in yummy cookie basket ;)
Check out the appearance of these delectable oranges together with other "fruits" in my "basket of fruits" chiffon cake made for my dad's birthday :)
If you need more visuals for shaping the oranges, check out here for a video tutorial!


With lots of love,

 Phay Shing


Read More »

Monday, 6 January 2014

Strawberry Yoghurt Chiffon "Watermelon" and "Strawberry" Pops


I woke up one morning and had the sudden inspiration to dress up my chiffon pops as fruits! This was the very first of the chiffon fruit pops created!

I had a very close group of mummy friends whose kids had just started N1, and wanted to gift these chiffon fruit pops to the kids for being so brave! Since these were for kids, I went for strawberry yoghurt chiffon which is healthy and popular with kids.

I baked the chiffon cakes in paper cones and egg shells similar to that of the rainbow chiffon cake pops to make the "watermelon" slices and "strawberries" respectively.

I used food marker to draw on the seeds of the watermelon and let it dry.

The kids had fun guessing what fruits they were :p One of my happiest bakes! :)

With love,
Susanne

My recipe is now in Creative Baking: Chiffon Cakes book, out at all major bookstores!


And here's a video tutorial for making the Watermelon Chiffon Cake pops! Very privilege to be shot by the pros at Smart parents.sg, mediacorp!


Read More »

Sunday, 5 January 2014

Orange Milo Horse Chiffon Cake Pops

When I saw Susanne's rainbow cake pops baked in eggshells, I was so inspired that I decided to try it! I quickly emptied a few eggs, washed the shells and wondered what I should bake. Since this is the Year of the Horse, I decided to do some horsey cake pops :). Next, I had to decide which flavors I should use that go well together and color the cake the right way, naturally if possible. So here's my orange Milo chiffon cake and horse cake pops :)


I ran out of chocolate Pokey sticks at home so one of the horses have a wooden skewer stuck in it. Don't they look cute? They look good for birthday parties of kids who love horses too. I adapted the recipe from Susanne's rainbow cake pops but used orange juice instead and added Milo and cocoa powder to colour the cakes naturally.


I used a small knife and sawing motion to gently cut off a bit of cake from the top of the "head" to create the ears.

I used melted compound chocolate for adding on the horses' hair, eyes and nostrils. You may wish to pipe more chocolate on top and down the back of the horses' heads to form the mane. Let the chocolate air dry completely.

Use a toothpick or wooden skewer to make a hole at the bottom of the cakepop. Insert a biscuit stick into the hole when you are almost ready to serve to prevent the biscuits from going soft too much.

My kids had lots of fun eating these and couldn't help smiling when they see these cute cakes :). I hope they put a smile on your face too!

With love,
Phay Shing
Read More »

Wednesday, 1 January 2014

Rainbow Piggy Char Siew Bao

Before I began my adventure with chiffons, I was on a mission to find the best bao (steamed bun) skin recipe. This is my second time using this recipe and I love it! I decided to kick start a new year with rainbow piggy char siew baos, partly because we had some left over char siew from dinner the day before. Here's my set of mini piggy baos :)


I adapted the bao skin recipe from Guai Shu Shu with some modifications. I love it for it's simplicity (straight dough method), mild sweet taste and soft fluffy texture. I used the recipe from Rasa Malaysia for the char siew filling.

Ingredients for bao skin:
200g Hong Kong Bao flour
37g cornflour
35g caster sugar
Pinch of salt
1/5 tsp double acting baking powder dissolved in 1 tsp of water
1 1/4 tsp dry yeast
122g water (warm water is not a necessity)
14g vegetable shortening

Steps:
1. Mix all dry ingredients (flours, sugar, salt and yeast) together in a large bowl and make a well in the center.
2. Pour water into the well and use a wooden spoon to stir the ingredients together until well combined and a dough is formed. Pour out the dough onto a non-stick mat or lightly floured clean work surface and hand knead for 5 minutes (or you may use a stand mixer or breadmaker to help you do all the kneading but I prefer to knead by hand). Add in dissolved baking powder 1/4 tsp at a time and knead until it is absorbed into the dough. Stir the baking powder mixture as the powder tends to settle to the bottom after a while. Knead for another 5 minutes after all the baking powder has been added.
3. Knead the vegetable shortening into the dough in a few additions, making sure that the shortening is absorbed into the dough before adding more. After all the shortening has been added, knead for another 15 minutes or until the dough is smooth and elastic and passes the windowpane test.
4. Let the dough rest in a lightly greased bowl covered with cling wrap for about 30 minutes or double in size. Punch down the dough and knead a few times to release any trapped air.
5. Try to work quickly from this point onwards when portioning and wrapping the buns, keeping any resting portions covered loosely with cling wrap. Lightly flour work surface and hands to prevent the dough from sticking. Take about 1/5 of the dough and divide it into 6 portions, coloring each portion with the colors of the rainbow (pink, orange, yellow, green, blue and purple). Portion the rest of the uncolored dough for the pigs' heads. I chose to make super mini baos so I only used 16g worth of dough for each pig. You may make bigger buns using 30g of dough for medium sized ones or up to 50g or more of dough for big buns.
6. Use a small rolling pin or your hands to flatten the ball of dough before adding the filling. Make the edges thinner than the center of the dough. Pinch seal the dough after wrapping with filling and place the pinched side down on a small piece of baking sheet. Pinch a bit of colored dough to make the snout of the pig, using a toothpick to shape the nostrils. Attach the snout to the center of the pig's face. Pinch a bit of colored dough and shape into small triangles for the pig's ears. Attach black sesame seeds onto the pig's face for the eyes. Use a toothpick to press the seed into the dough to secure it.
7. Place the wrapped buns in a steaming basket and cover them loosely with cling wrap to prevent them from drying out. Proof for 30 minutes.
8. While the buns are proofing, prepare a wok or steamer for steaming. Make sure the water is boiling before putting the buns in to steam. Steam small buns (30g or less of dough) for 10-12 minutes and larger buns (50g or more of dough) for 15 minutes at medium heat. Turn off the heat and let the buns rest for 5 minutes before removing the lid.
9. Steamed buns are best eaten freshly steamed. If you are not consuming them immediately, store them in an airtight container after they have cooled down completely before freezing them. When you want to consume the stored buns, re-steam them for 15-20 minutes (depending on the size of your buns) straight from the freezer. They will taste just as good as freshly steamed buns :).

Here's a peek at the insides of the char siew bao!


With love,
Phay Shing

Read More »

Sunday, 29 December 2013

Sakura Hello Kitty Strawberries and Cream Swiss Roll

After my successful attempts with chiffon, I felt ready to take on swiss rolls! Another bake that I was intimidated by because of the many steps involved and the horror stories about cracked rolls while rolling. After watching Ochikeron's very helpful video tutorial a few times, I made my first swiss roll! A patterned one at that. Here's my Sakura Hello Kitty swiss roll!


As it was my first attempt, I followed Ochikeron's recipe very closely and only substituted cornflour with cream of tartar as the egg white stabilizer. Whenever fruit liquor was mentioned in the recipe, I used strawberry essence. I didn't have a 10x10" square tin so I rummaged through the trays that I have at home and baked the cake in an 8.5 x 11" aluminum tray.


I was really pleased to see the patterns turn out nicely!


As my tray had rounded corners, I had to cut off some portions of the cake before applying the cream and laying out the strawberries. This view looks really appetizing!


I was really nervous about rolling the cake, praying hard that it doesn't crack. So glad that it didn't!


Having to wait patiently for the cream to set was pretty hard as I was really eager to see the results of my labor. I waited for an hour and couldn't wait anymore. In my haste to see the cross-section of the cake, Hello Kitty's face got smeared with cream :P.


The cake is very, very soft and melts in your mouth! I will definitely use this recipe again if I plan to do swiss rolls.... maybe not in the near future as it is a rather time-consuming bake.

If you do try this out I am sure you will have as much satisfaction from it as I did :).

With love,
Phay Shing


Read More »

Friday, 27 December 2013

Pastel Rainbow and Hearts Vanilla Chiffon Cake Pops


I absolutely love rainbows. After the unexpectedly wonderful reception of the Christmas tree cake pops, I dreamed of making rainbow chiffon cake pops that were so pretty to look at, and so small that one could pop into and melt in the mouth!

Round cake pops was something I wanted to achieve as my son was requesting for basketball chiffon pops for his birthday. Hence, I started experimenting with other mediums to bake the chiffon cakes pops in. I stumbled onto egg shells which I had been collecting to make agar agar, and also silicone heart moulds, simply because I love hearts.

I made them for my best friend's kids who absolutely loved it according to her and made me really happy and humbled! It was such a joy to make sweet treats for those who appreciate! This is probably my favourite and prettiest creation.

See how exciting it is to unmould the cakes!


With love,
Susanne


Read More »

Tuesday, 24 December 2013

Christmas Trees Pandan-Strawberry Chiffon Cake Pops


It was going to be Christmas and parents were asked to contribute to the kid's Christmas party in school. My first idea was cake pops since it is cute and will be easier to divide among the kids. However researching and after trying out cake pops, I was a little disappointed. I found them too sweet and hard for the kids.

At this time, my daughter was crazy over ice cream cones and frequently requested chiffon cakes in ice cream cones. She loved to peel off the ice cream cone and eat the cone and cake separately. It was one day when I saw her holding the conical chiffon cake when the 'Eureka!' moment came. Why don't I try out Christmas Tree-shaped chiffon cake "pops"??!

This came about the birth of chiffon cake pops! I experimented first with ice cream cones, and then paper cone cups for water which could be found from skp. I baked pandan chiffon cakes in the cones, and then peeled off the paper. The result: soft, light and fluffy conical chiffon cakes that rose beautifully in the paper cones!

Next, I experimented with patterning "decorations" on the Christmas trees with the new chiffon patterning technique on big cakes. I used red strawberry paste as I wanted a dual-flavoured cake and patterned both swirl and polka designs so that the kid gets to choose! The above picture shows the final result. A forest patch of swirl and polka trees with dual Strawberry-Pandan flavor on hearts snow ground!

The best part? My son's class teacher told me the kids absolutely loved the cute trees. It was the first item to be wiped out within the first few minutes and the kids said it was delicious! It was really such a joy to hear that from the teacher!

The recipe is shared below :)

80g cake flour
25g caster sugar
3 egg yolks
50ml vegetable/corn oil
50ml coconut milk (I substituted with fresh milk/water for health reasons)
1 tsp green pandan paste
½ tsp vanilla extract
½ tsp red strawberry paste

Meringue:
4 egg whites
45g caster sugar
¼ tsp cream of tartar

Method:

1. Preheat oven to 160°C.
2. Prepare the conical cup holder by wrapping at least 2 layers of aluminium foil over a baking tray, and then using chopsticks to make holes. Gently insert the cups into the holes while making them bigger (see picture above).
3. Beat egg yolks with sugar with whisk till foamy before stirring in oil, milk and vanilla extract.
4. Next add in sieved flour and whisk till no trace of flour found.
5. Meringue: Beat the egg whites with ¼ tsp cream of tartar till stiff peak, mixing in caster sugar in 2 additions.
6. Red patterns: Take 6 tsp of egg yolk batter out and mix ½ tsp strawberry paste. Scoop over 10 tbsp of meringue, then quickly but gently fold it in till well-combined (I use Cynthia’s handfolding method). Note: I made the red batter a little ‘stiffer’ since I didn’t intend to pre-bake the patterns (like in the chiffon tin).
7: Green chiffon cake: Add 1 tsp green pandan paste to the remaining egg yolk batter. Fold in 1/3 of the rest of the meringue by spatula, and then the rest using handfolding method.
8. Transfer the red patterning batter over to pipette or bag with wilton 5 tip. Place a spoonful of green batter in the cone, and then pipe red swirls in the cones using the wilton tip. Cover the swirls GENTLY with spoonfuls of green batter till the cup is 2/3 full.
For the polka dot designs, I piped the red dots as I added the green batter (alternate the two 2 times).
9. Bake the cake in preheated 160°C oven for 30-35 min.
10. Unmould as soon as cake pops are cool. Gently peel open the paper cones bottom up, following the paper lines to ensure cake tips are not broken.
11. Stick toothpicks or lollipop sticks below and viola! You may want to decorate the apex of the trees with stars or hearts using glace frosting (2 cups icing sugar, 2 tbsp soft butter, 2 tbsp boiling water) or kaya.

This post is written with lots of love,
Susanne
Read More »

Monday, 23 December 2013

Hello Kitty Pandan Chiffon Cake

After my first successful attempt at patterning a chiffon cake, I was really excited to give it another try. And so, I baked my first Pandan chiffon cake with Hello Kitty design! I took the liberty of patterning the sides of the cake with alternating brown and pink dots too.


I will not type out the recipe here as it was taken wholesale from The Baking Biatch, which uses Pandan leaves instead of bottled Pandan paste.

The challenge of this technique to pattern a chiffon cake is the baker has to be pretty good at freehand drawing in order to pipe the designs on, especially complicated ones. It occurred to me that it would be wonderful if we could use a template to help, just like patterned Swiss rolls. Artistically challenged bakers will be thrilled if this technique works.

Susanne warned against greasing or lining the chiffon tin with baking sheet as the batter needs to "cling" onto something to rise. The "kay kiang" (acting smart) part of me thought that the batter at the base of the tin where the designs are doesn't need to climb, so it should be OK to line the base with baking sheet. I happily traced some Hello Kitty and ribbon designs on a baking sheet and piped the designs on using the same technique as I did with my first attempt, except that I beat another egg white separately for the meringue used in the colored batters. This was how it looked like after baking the design for 1.5 minutes.


I was so happy to see the pretty design nicely baked and proceeded with baking the rest of the cake. I had some leftover batter again so I let the kids play with it. They decided on piping a letter "P" on the cupcake... "P" for "Parking" according to them :P. After unmolding and slicing the cake, I was in for some disappointment.


All chiffon cakes have to be inverted immediately after coming out of the oven to cool. I had forgotten that when the cake is upside down, the base has nothing to "cling" on to. This resulted in the patterned surface sagging. However, the cake is still soft and moist, and I learnt an important lesson :).

Looks like we have to rely on good artistic skills to pull off this kind of stunt successfully.

With love,
Phay Shing

Read More »

Saturday, 21 December 2013

Rainbow Pandan Chiffon Cake


I was looking for a cake to thank my son's school principal who had been very kind to us when we most needed help (like a rainbow when we most needed it). It was during our short vacation that the sudden inspiration came to me. Since the chiffon tin was a doughnut shape, it was perfect for making two rainbows! The rainbow chiffon cake was the perfect idea for thanking her!

As an experiment, I did not prebake the rainbow patterns batter for 1.5 min (and partly because I was in a rush). The consistency for all the colours were right except for green because at this time, I did not yet have wilton green colour; so I just mixed wilton blue and yellow to get the shade of green but did not correct for the increase in volume. As you can see, the green batter slightly runny compared to the rest of the colours. But overall, the rainbow was still cheery ^_^ and the principal was very happy to have received the pretty cake!

The recipe is below, but we have since optimized the recipe for patterning in future posts (stay tuned!) and have since purchased the whole set of wilton colours. The next rainbow cake will be one with all 6 colours!

5 Egg Yolks
20g Caster Sugar
80ml Fresh Milk (subtract 5 ml for colouring so I added 75 ml)
40ml Corn Oil
80g Cake Flour
1/2 tsp strawberry paste and wilton colours (blue, yellow).
1 tsp pandan paste for main batter

Meringue Batter:
5 Egg Whites
80g Caster Sugar
¼ tsp cream of tartar

Method:-
1. Beat egg yolks with sugar with whisk till creamy before stirring in oil and milk.
2. Next add in sieved flour and whisk till no trace of flour found.
3. Take 2 tsp of egg yolk batter out for each colour and mix in colour. Scoop over 4 tbsp of meringue and quickly but gently fold it in till well-combined (I still love Cynthia’s handfolding method).
4. Use a wilton 230 tip to pipe designs on base of chiffon tin.
5. Bake for 1.5 min (I omitted this step today as an experiment). Results were good for all colours except green (I don’t have green wilton so I mixed blue and yellow but didn’t correct for volume.. ahh).
6. Add 1 tsp pandan paste to the rest of the egg yolk batter. Mix well and gently fold in the rest of the meringue. Gently pour in the rest of the batter over the rainbow patterns.
6. Bake the cake in preheated 160°C oven for 50 minutes (my oven is 5-10 deg below settings so maybe 45 min is sufficient).
7. Invert when cake is removed from oven and unmould when cake is cool.

With love,
Susanne
Read More »

Friday, 20 December 2013

Strawberry Yoghurt Chiffon Cake

I have always thought that cakes are loaded with tonnes of butter and sugar so I never gave them serious consideration when I was trying out new things to bake....until I discovered chiffon cakes! They are so light and much lower in fat and sugar content than say pound cakes. What stopped me from attempting to bake one was my fear of beating egg whites as the whole process sounded so complicated. But when Susanne baked her gorgeous Sakura Matcha chiffon cake with Sakura patterns on it, I was so inspired that I decided to put aside my fears and give it a shot. And so I began my chiffon fun by buying a 17cm chiffon tin and baked my first chiffon cake -- strawberry yoghurt chiffon! I fell in love with chiffons from this point onwards :).


Susanne has been very kind to share the recipe with me and patiently answered the questions I bombarded her with for my first bake. Here's the original recipe for making strawberry yoghurt chiffon cake:

Ingredients:
Egg yolk batter
3 egg yolks
15g caster sugar
30g vegetable oil
1/5 tsp salt
3/4 tsp vanilla essence
60g strawberry yoghurt
60g cake flour

Meringue
 3 egg whites
37g caster sugar
1/5 tsp cream of tartar

Steps:
1.Preheat the oven to 160 degrees Celsius.
2. Start with the egg yolk batter by pouring egg yolks and sugar in a bowl. Whisk with a hand whisk until sugar dissolves.
3. Add vegetable oil, salt, vanilla essence and strawberry yoghurt, and mix well.
4. Fold in sifted flour gradually and whisk until no trace of flour can be seen.
5. In another bowl, whisk egg whites until frothy with an electric mixer and add in cream of tartar. Add sugar gradually and beat until the meringue forms stiff peaks. A good test to see if you have reached the stiff peak stage is to turn your mixing bowl upside down and the meringue should not fall out.
6. Fold in one third of the meringue into the egg yolk batter until no trace of meringue can be seen. Quickly but gently fold in the remaining meringue in two batches until well combined.
7. Pour the batter into a 17 cm chiffon tin and bake in a preheated oven at 160 degrees Celsius for 40-45 minutes.
8. Immediately invert the chiffon tin onto a cooling rack/ an upturned cup/ bottle after removing it from the oven and leave to cool completely. When the cake is cooled, remove the cake from the tin. Susanne pointed me to this very helpful video demo of how to unmould chiffon cakes from the tin using bare hands. The result is much cleaner than running a spatula or a knife around the cake to release it from the tin.

I have been playing with my kids' food for a few years now by making it look cute sometimes to entice the kids to eat. So I couldn't resist the opportunity to play around with patterning my first chiffon, risky as it sounds :P. I took about one heaped teaspoonful of egg yolk batter for each of the colors, red and green for patterning the cake. I added gel food coloring (Wilton) until a desired shade is reached. After getting all excited about making my chiffon look cute, I was stumped by how much meringue to add to the colored egg yolk batters. Having come so far, I decided to do a rough estimation and get on with it. I added 3-4 tablespoons of meringue into each of the colored batters, put them into piping bags with a No. 3 Wilton tip and piped the strawberry designs onto the base of the chiffon tin. I baked the designs for 1.5 minutes before pouring in the rest of the batter to bake.*

If you are an experienced chiffon baker, you would have realized that my main batter would not have enough meringue to make it light enough, especially since this recipe has the same number of egg yolks and whites. I only found that out when the cake came out of the oven :P.


  As you can see the cake is not very tall. The cake was dense but very fragrant. On hindsight, I should have beaten another egg white separately as the meringue for the patterns. Overall, I was happy with my first attempt and was definitely motivated to try again :). I had some leftover colored batter so I decided to let my elder kid play with it.


We piped some designs on a baking sheet and baked it in our cheap (costs less than $30) and teeny toaster oven. The kids had fun eating the results although the "cakes" are a bit burnt around the edges :P.

I learn something new with each bake and definitely have fun baking chiffons that are arty-farty. Will share more of my experiences when I have the time.

With love,
Phay Shing

* After quite a few tries with patterning chiffon cakes, we realized that the batter for patterning is of a better consistency when cake flour is added. Stay tuned for up-coming posts for the improved method of patterning chiffons.

Read More »

Sunday, 15 December 2013

Sakura Matcha Chiffon Cake


For the longest time, I was wondering why no one patterned chiffons like swiss rolls which uses similar egg separation techniques. My birthday was coming and being a fan of Japanese anime, I dreamed of a matcha cake with pink sakura flowers. 

My experiment paid off! This represents the first of the patterned chiffon cake inspiring many other prettier ones to come. Needless to say, I had a very happy birthday with my cake! :)

I was very happy that reviews for the cake, especially from my sil was very good! If you're a matcha fan, you would love it. For this cake, I used Ellena guan's 3 egg yolk, 4 egg white recipe which I still love very much for it's lightness and spongyness. More whites than yolks make the chiffon cake fluffier and softer!


Each slice was pretty and had strawberry cake layered in between two layers of matcha cake! It's my first loving creation for my dear family!

Detailed picture tutorial will be out in a Creative baking Chiffon Cakes book coming Jan 2016.

With love,
Susanne

Read More »