Sunday, 24 April 2016

Pink and Blue Owls on 'Tree Cluster' Pandan-Vanilla (Cocoa) Chiffon Cake


It’s been really busy with the book event that just passed and chiffon marathon for photoshoots for the 2nd chiffon book in the pipeline. As I shared, I’m really so thankful and humbled for the opportunity, and super excited working on it! I actually made this pair of sweet Boy girl Owls Chiffon Cake for my friend’s lovely twins a while back but only got to posting it now.

I made the owls from piping the ‘V’ on glass oval bowls, and then baking a blue and pink chiffon cake in it. There’s a picture of the bowls with piped features and cake baked over in the link here. Here’s the recipe I used:

Vanilla Chiffon Cake (blue/pink owls)
2 egg yolks
20 g castor sugar
13 g vegetable/corn oil
28 g water
3 g vanilla extract
40 g cake flour, sifted
Pink and blue gel food colouring

Meringue
3 egg whites
¼ tsp cream of tartar
30 g castor sugar

Method:
1. Preheat oven to 160oC. Prepare a tray of water at the bottom of the oven (I used the lowest rack to bake the cake).

2. Whisk egg yolks with sugar till fluffy. Add in oil, water, vanilla extract and whisk until well-combined.

3. Sift in flour and stir till smooth batter formed. Ensure they are no lumps.

4. Spoon out 1 tsp for patterning batter Divide the remaining batter into two. To each portion, add a dip of wilton blue and pink gel food colouring respectively. Mix well.

5. Beat egg whites and cream of tartar until foamy using an electric whisk. Add in sugar in 2 additions and beat until firm peaks are formed (or just reach stiff peaks). The peak formed doesn't flop over but it's not overly stiff either. Scoop over 2 tbsp meringue over into patterning batter and fold gently.

6. Transfer the plain batter into a piping bag and cut a 2-mm hole. Pipe five ‘V’s on the glass bowl for owl feathers pattern for each bowl. Bake at 160oC for 2 min. After that, allow the bowls to cool.

7. Divide the rest of the meringue into the two and gently fold the meringue into the blue and pink batters respectively in 2 additions. *You can do this while baking the patterns in the oven.

8. Pour the blue and pink cake batter into each glass bowl till 2/3 full. Bang the bowls on the counter top to get rid of big air bubbles.
9. Steam bake at 160oC for 10 min then 150oC for 25 min or until skewer comes out clean.

10. Remove from oven and invert immediately on cooling rack, similar to picture in the link above.

11. After bowls have cooled completely, gently pull cake from sides of the bowl and unmould by hand.

Using knife, cut off a rectangle at the centre of the tip of the cake to make the shape of the ears. The other details on the owls e.g eyes and wings were cut from sheet cakes (same chiffon cake recipe coloured brown, black, blue and pink, baked in baking pans-lined with baking paper), and glued on with melted marshmallows.

For the base chiffon cake, I used a 3 egg yolk, 4 whites pandan chiffon cake recipe for the base, and a 1 egg yolk, 4 whites ‘reduced egg yolk’ vanilla chiffon recipe at the top for the 9-inch (23-cm) tube pan. I deposited the pandan batter to make mounds, before spooning in vanilla batter. Such ‘frilly’ designs will be covered in detail in the 2nd chiffon book, Deco Chiffon Cakes. Here, I also portioned out 5 tsp from the vanilla batter and added in 1 tsp cocoa powder (for the tree trunks), and these were made by spooning in the cocoa batter alternately with vanilla batter. Look out for more updates on the work-in-progress on Deco Chiffon Cakes.. am really excited about it!

Thankful cake was well-received by the lovely twins and their equally lovely mummy!

With lots of love,
Susanne

Oh yes, there are some photos from the recent Creative Chiffon book events here. It was really fun and encouraging! Big big thank you to everyone's support!! Should be the last of the last event already!


Read More »

Friday, 22 April 2016

Unicorn Macaron Carousel II (reduced sugar recipe)

 I made two unicorn macaron carousels at the same time!

Pardon the short post as I am really busy and will be busy till Mother's Day because I have a huge order to cater to. Challenging but it's a privilege to bake for many mums :). Just to share some pink carousels with unicorns flying around :)


I made two carousels as one is for a request and the other is for the book event display.


You may refer to this post for the unicorn template and piping instructions, and this post for the size of circles and assembly instructions for the carousel. I have filled these with lemon white chocolate too. I strongly recommend you to get a copy of my Creative Baking: Macarons book which covers the basics to fancy shaped macarons, including troubleshooting guide and recipes for fillings that are less sweet.

This was made during my experiment with reduced sugar macaron shell recipe.


Although it's great to know that reduced sugar option is available, the batter is slightly different to work with. Rice flour substitute for icing sugar seems to affect the drying time although I can't conclude just yet. It took me a longer time to dry the shells but the weather was really humid. I tried cornflour replacement and I find the texture a little too chewy for my liking although drying time seems shorter. The unicorns and round shells here are made with rice flour replacement and the texture is still delicate. I tried a combination of rice and cornflour and it seems to work pretty well with rice flour : corn flour = 3:1

Just to share a couple of pics during assembly...

Assembling the base structure and the roof. These have to be left resting overnight to ensure structural stability.

Assembling the unicorns. These have to be left to firm up overnight too to prevent the unicorns from slipping down the pole.


I hope these pretty carousels put a smile on your face as it did to mine when I finally could sit back and admire them :). Now back to my biggest macaron mania of making 800 cheery bear macarons! Holding flowers this time.

With love,
Phay Shing


Read More »

Monday, 18 April 2016

Cheery Bear Macarons Again!

It's them again!! I hope you are not tired of seeing these cheery bears with beer mugs. They have put a smile on many people's faces with their cuteness and whimsical characters :).


This setup is going to be on display at Kinokuniya in Takashimaya this coming Saturday, 23rd April. I will be doing a demo for piping the 3D pop-up features on the bears.


You may find the detailed recipe, piping steps and templates in my Creative Baking: Macarons book.


I decided to create a simple dollhouse concept to display these critters sitting at a table with miniature macarons. So totally cute overload :p. I baked round macarons of various sizes and stuck them together with royal icing. The brown coloured icing is coloured with cocoa powder. The brown macaron shells are also coloured with Dutch processed cocoa and filled with dark chocolate.

The table and stools are made from circles with diameters of 2cm, 3.5cm and 5.5cm.

Piping circles of different sizes

Baked shells for bear, table, stools and mini macarons. I decided not to use the tiny 1.2cm brown macarons as stool legs as they aren't necessary.

Assembled table and stools!

See the bears with some other awesome displays this Saturday, including a unicorn macaron carousel and many other cute critter macarons!

With lots of love and fun,
Phay Shing
Read More »

Sunday, 17 April 2016

'Pooh Piglet Tsum Tsum' Rainbow Chiffon Cake


I finally did what I thought was impossible to stack a Tsum Tsum! I don’t think I would have tried it again after the previous lesson, if not that my friend was really persistent about it =p. Having learnt from my lesson and gained more experience, I tried an architecturally more sound design, making the top Tsum Tsum smaller, the full body to support and only having two to try (don’t think it can go any higher without squashing the base cake!). But still it was very experimental and nerve wracking… I’m really thankful it worked out!

It’s also my first time baking a Rainbow Chiffon Cake in a 10-inch (25-cm) chiffon tube pan. The Rainbow Chiffon is now the cover of Creative baking: Chiffon Cakes and its 7-inch (18-cm) recipe shared on Pg 65. For the 10-inch pan, I used a 10 egg recipe, multiplying all ingredients by two. Usually egg whites are rounded to the nearest egg white.


To make the body of the Tsum Tsum, I combined chiffon cake baked from two bowl cakes, with a normal chiffon cake in tube pan corresponding to the diameter of the bowls for the middle. Eg. for the pooh, I used 4-inch bowls with 4-inch chiffon tube pan. These were glued together using melted marshmallow cream (sprinkle some water and pop marshmallows into a microwave). You will still need dowel support in the Tsum Tsum to ensure everything doesn’t fall apart. All other details are made from chiffon cake baked as sheets on layer trays and glued on using marshmallow cream.

Really thank God I pulled this off and everything was well–received!

With lots of love,
Susanne
IG: @Susanne.DecoChiffon


Read More »

Friday, 15 April 2016

Reduced-Sugar Macaron Shell Recipe & Video Tutorial For Piping Large Circles

I am writing this post because people have been complaining that macarons contain too much sugar, can we reduce the amount of sugar? Someone also requested for a video tutorial for piping large macaron shells (13cm diameter) that I use for my unicorn carousel. I shall tackle these two requests here as I prepare to make another carousel but pink this time.


I mentioned in my Creative Baking: Macarons book that you can't reduce the amount of sugar in macaron shells as sugar is required for structural stability. This is technically true if you just reduce the amount of sugar without any replacement. I tried to do a search for reduced sugar recipes but have not found any that is lower than the ratios I use. However, I found that it is common for people to substitute almond meal with rice flour to make macarons for nut allergy sufferers. Macaron purists will protest and say that those are not really macarons but it did give me an idea to try using rice flour to substitute part of icing sugar. You can't just take away sugar from the recipe without substituting with something else that will help with structural stability. Rice flour is gluten-free and would produce a more melt-in-your-mouth texture than wheat flour (cake flour, plain flour, pastry flour).

*Update (20/4/16): Cornflour can be used instead of rice flour too! But I personally prefer the rice flour version texture wise as it is more delicate. The cornflour version is chewier. I tried using a ratio of 3:1 for rice flour: cornflour and it works well :). Cornflour helps the shells to dry faster whereas rice flour gives the shell a nice delicate melt-in-your-mouth texture. The issue I had with rice flour alone is it seems to extend the drying time required.

Besides substituting part of the icing sugar, I have also reduced the amount of meringue used (and therefore less sugar) as I find that the mass does not need that much meringue for this combination. Adding too much meringue results in a runnier batter. So instead of the usual ratio 1.25:1.25:1.25:1 for almond(plus rice/corn flour if using):icing sugar:caster sugar:egg whites, I used 1.47:1.2:1.2:1. I am pleased to say that the resulting texture is about the same as regular macarons without rice flour. I have also added a bit of salt to counter the sweetness. You may substitute a larger percentage of icing sugar with rice flour but I personally prefer not to deviate too much from a tried and tested ratio. Afterall, nothing beats sugar when it comes to melting in your mouth. Macarons are like delicate candies and one is not supposed to have too many at one shot so don't be too hung up about the high sugar content. Just use tea flavours, cocoa, sour fruits or salty fillings to counter the sweetness and you will have a delectable little treat :).

Here's a photo of the cross-section of a macaron to prove that the texture is still lovely. Crisp thin outer shell, soft fluffy and only slightly chewy interior. No hollows.


Recipe for reduced sugar macaron shells
Mass:
200g superfine almond powder/meal
180g icing sugar
20g rice flour
1/8 tsp fine sea salt
78g egg whites*
Rose pink and dusty rose gel food colouring (or whatever colours you want)

Italian meringue:
72g egg whites*
180g caster sugar
67g water
1/4 tsp cream of tartar (optional)

*preferably aged but not necessary

Updated recipe (22/4/16)
I have used this quite a few times with much success although the percentage of sugar replacement is less than my earlier attempts. Having said that, this recipe of 300g almond meal contains 40g less sugar overall than what the traditional recipe calls for. Please scale the recipe accordingly as I am using this for my big batch of 800 macarons. This recipe can make about 110 macarons. If you feel brave enough to experiment, you may increase the amount of icing sugar substitution with rice and cornflour.

Mass:
300g superfine almond powder
280g icing sugar (without cornflour. If you only have icing sugar with cornflour added, I suggest halving the amount of cornflour and replace with rice flour instead.)
15g rice flour (2 tbs, I included measurement in spoon so that it is easier to scale down)
5g cornflour (2 tsp)
1/8 tsp fine sea salt
118g egg whites
Powder or gel food colouring

Meringue:
112g egg whites
280g caster sugar
104g water
1/4 tsp cream of tartar (optional)

Steps:
1. Prepare baking trays with circle templates. Place baking paper over template. Stick the baking paper to tray later with a bit of Italian meringue or macaron batter when you have made it.

2. Prepare the mass. Sift almond, rice/corn flour, icing sugar and salt together into a large mixing bowl. Add egg whites and mix well with a spatula. Divide into two or as many portions as you like if making more than one colour. Remember to weigh the mass for each colour. Add the colouring. Powdered or natural sources of colouring may also be added at this point.

3. Prepare Italian meringue. Heat caster sugar and water in a small saucepan until 115°C. In the mean time, beat the egg whites (with cream of tartar if using) with electric mixer at medium low speed until soft peaks form. Reduce mixer speed if necessary if temperature of syrup is not reached. Once temperature is reached, increase mixer speed to medium high and carefully pour the syrup in a thin stream into the egg whites, avoiding the beaters. Continue beating for another 10-12 minutes until the meringue is stiff, glossy and cool. Portion out the meringue for various colours according to the formula: weight of meringue = 0.51 x weight of mass

4. Macaronage. Fold the meringue into the mass in two additions until the batter moves in a lava-like way. Please refer to this post for the macaron basics on folding and testing batter consistency.

5. Transfer batter into piping bag fitted with 6-7mm diameter tip (Wilton #12). Pipe the various circles. Bang tray on table to remove trapped air. You may use a toothpick to pop any stubborn bubbles. Here's a video on how to pipe larger shells (10cm and above) using the trace-and-fill technique which is also shown in the book and in this post. You may use whatever way to pipe the circles actually :). Just do what you are comfortable with.

Piping a 13cm diameter macaron shell

Here are all the different sizes of shells...

6. Let the shells dry under the fan in aircon room until dry to touch. Drying time can range from 30 minutes - 2.5 hours depending on humidity.

7. Preheat the oven near the end of drying time. Set the oven rack to lowest position. Bake the shells according to the following time and temperature. Note that this is a guide as each oven is different. Remember not to use the fan mode during baking. It will cause lopsided feet and even cracked shells. Check that the feet are dry for doneness. Let the shells cool completely before removing from baking paper.

13cm diameter: 140°C for 15 minutes, 130°C for 10 minutes, 20-25 minutes at 115°C

10cm diameter: 140°C for 15 minutes, 130°C for 5 minutes, 115°C for 15-20 minutes.

6cm diameter: 140°C for 10 minutes, 130°C for 5 minutes, 115°C for 10-12 minutes

3.5 and 2.5 cm diameter: 135°C for about 18 minutes.

I hope this has been an informative post!

Update 19/1/17: if you prefer using the French method, checkout this post for the reduced sugar version for French method!

Update 30/1/19: if you prefer using the Swiss method, checkout this post for the reduced sugar version for Swiss method!

With love,
Phay Shing
Read More »

Thursday, 14 April 2016

Strawberry Yoghurt 'Watermelon' Chiffon Cake Pops Video Tutorial


I first made these Strawberry Yoghurt 'Watermelon' chiffon cake pops from paper cones, together with 'strawberries' from egg shells at the start of my baking journey 2.5 years back! It's very nostalgic thinking of it! I remember I made them for my friend's kids when they all started pre-school as an encouragement for them =).

My 'Watermelon' chiffon pops (updated recipe) is now in 'Creative baking: Chiffon Cakes' book! You can see it in the left hand corner of the poster hehe.


And here's a video tutorial for making the 'Watermelon' Chiffon Cake pops! Very honoured to be filmed by the pros at Smartparents.sg, mediacorp (formerly Mother & Baby) for the video tutorial. All video credits to them! Hope you will find the video very useful for making these sweet treats for your loved ones!


With lots of love,
Susanne


Read More »

Tuesday, 12 April 2016

Robot Tier Vanilla Chiffon Cake (natural coloring Gardenia yellow)


This is cute Robot Chiffon Cake made for the most adorable 1 yo boy Isaac from Punggol babies. I have linked to his birthday blog post as I was super touched by the video made by his loving aunt Claudia (of thelovingmum.sg) and it has more intimate shots/videos of the celebration and the cake.

The vanilla chiffon cake is entirely naturally coloured yellow here with dried Gardenia fruit extract (brought from my MIL from Bangkok), combined with Queen’s natural colouring. Just soak a big handful of the dried fruits (20+ pieces) in hot water and you get a very strong natural yellow dye (top). My MIL shared it's commonly used in Thailand to colour their foods. Queen's natural turmeric-based yellow coloring (few drops) was used to top up the yellow shade (below).


Thankful chiffon cake was very well-received! I have been using this vanilla chiffon cake recipe and reviews have been that the chiffon is tasty and texture really soft and fluffy! Hope you can try it too.

I’ll share the recipe for the 18-cm (or 7-inch) chiffon cake. The bigger 25-cm cake (or 10-inch) uses a 9 egg recipe (triple this recipe).

Vanilla Chiffon Cake (18-cm)

Egg yolk batter
3 egg yolks
20g castor sugar
39g vegetable/corn oil
42g water (*boiled with gardenia yellow, 20 pcs)
1 tsp vanilla extract
60g cake flour, sifted
Pinch of salt
*Queen’s natural yellow colouring (top up the shade)

Meringue
4 egg whites
¼ tsp cream of tartar
45g castor sugar

*Ingredients/steps in asterisks can be omitted it you do not need the yellow shade

1. *Prepare natural yellow extract from gardenia yellow by boiling hot water with the fruit for 10 min.

2. Preheat oven to 160°C. *Prepare a tray of hot water under the lowest rack. Steambaking is optional but helps to incorporate moisture and control the oven temperature rise. You need to bake 5+ min longer if you add steambaking.

3. Prepare egg yolk batter:

a. Whisk egg yolk with sugar using hand whisk till pale and fluffy.

b. Add in oil, water (or boiled gardenia yellow extract) and vanilla extract and mix well.

c. Whisk in sifted cake flour and a pinch of salt. Mix well. *Ensure no lumps are formed.

2. Prepare meringue:

a. In a grease-free, dry metal bowl, using electric mixer, whisk egg whites with cream of tartar till frothy (left pic below).

b. Add in ½ castor sugar for meringue and whisk at high speed till soft peaks form (arrow points to soft peaks forming a 'hook', middle pic below).

c. Add in rest of the castor sugar for meringue and whisk till firm peaks form, or just the point of stiff peak. Firm peaks give finer, softer texture (arrow points to firm peaks, right pic below).


3. Fold in meringue gently into egg yolk batter 1/3 at a time. *Fold in unidirectional, gentle strokes and do not overfold.

4. Gently pour or scoop the batter into an 18-cm tube pan. Gently tap on counter top to remove air bubbles.

4. Bake at 160°C for 15 min then 140°C for 30-31 min, or until skewer inserted into centre of cake comes out clean.

5. Invert pan to cool on a wire rack completely.

6. Unmould the chiffon cake by hand (see video tutorial ‘Hand unmoulding Chiffon cakes for a clean finishing’).

The antennae and arms were made from thin swissrolls.
The spiral legs were made by joining multiple donuts from baking chiffon in silicone donuts mould.
The red balls at the tips and joints are made from baking chiffon in silicone cake pop moulds.
The red round feet are from baking chiffon cake in glass bowls (Iwaki brand, 11 cm OD).
For huge tier cakes like this, you will need to use dowel supports like normal fondant tier cakes to prevent the bottom tier from being squashed as chiffon cakes are very soft.
All other details eg teeth, gears and the name were cut from chiffon cake baked as sheet cakes in baking trays.
It’s rather tedious and time-consuming to assemble I have to admit but it’s really a passion for me =).

I was super touched by the blog posts and video made by his aunty and mummy. He is really loved!

Each cake is a loving creation, sharing the love and creating memories =).

With lots of love,
Susanne

More loving creations here =)


Read More »

Monday, 11 April 2016

Thomas and Friends Brown Sugar Cookies

I have a request for Thomas, Percy, James Harold and Toby brown sugar cookies from a friend. I must say that this project is not for the faint-hearted! Presenting my first attempt at making these cookies including 3D pop-up faces!


It took me 3 days to make the templates, bake the cookies and trace the outlines, and another 3 days of intensive icing to complete decorating. My eyes and hands were really tired at the end of this project.

You may refer to this post for the cookie and royal icing recipe, and this post on how to make homemade templates for making cookies with complex designs. My brown sugar cookies always get rave reviews for taste so do give it a try. The cookies are very forgiving. I tend to overbake a little (not burn) as the cookies soften a little after icing. They taste better with age too.

Here are the freshly baked cookies! Can you guess which cookie is for which character? Roll the cookie dough to thickness of 5-6mm for these rather large cookies. They are at least 10cm in size. Bake at 160°C for 16-18 minutes or until firm and browned, rotating the tray halfway through baking.


I spent the first day of icing completing the outlines and black parts. I colour the icing black with charcoal powder.


Creating 3D pop-up features is actually easier than it looks. I have created 3D pop-up nose for my Elsa cookies last year and have chosen to do it again for the noses and cheeks of these vehicles.

Begin by adding a dollop of icing at the spot where you want the pop-up feature to be. I usually use white icing or the same colour as the icing that covers the face. Wait for the icing to dry before covering the face with more icing. When flooding the face with icing, use a toothpick to nudge the icing into place around the pop-up feature. Don't pile up too much icing around the feature or the border will not be clear.

Pop-up nose on Harold

Pop-up cheeks and nose on Toby!

End of day 2 of icing! I used edible marker for Harold's name and the blacks of the eyes as shortcut :p.

Finally finished on day 3!

Remember to dry the icing thoroughly before packing. These cookies can keep for a month in airtight condition and stored at cool and dry place. I like to use the oven to speed up the drying. I use the fan mode but turn on the heat only for several seconds to warm up the oven a little. Drying can take up to a couple of hours. If you stay at a dry climate, you may air dry the cookies overnight before packing them.

All packed and ready to party!

Thank God that these were very well received as usual!

With love,
Phay Shing


Read More »

Thursday, 7 April 2016

Unicorn Macarons with Spiced Apple Swiss Meringue Buttercream & Salted Caramel (updated recipe)

Someone saw my unicorn with shooting stars macarons and loved it so much she wanted some for her birthday! As I was baking these concurrently with another batch of safari themed macarons (will post in near future), I used the colour scheme that was available from the other bake to create these dainty creatures. It's quite a challenge to bake with kids home during the school holidays so I didn't want to stress myself out with too many coloured batter.


You may find the template for unicorns in my previous unicorn macaron post. I tried as far as possible to use natural food colouring to colour the batter. Purple sweet potato powder for purple, natural sourced yellow powder for yellow and cocoa powder for brown. Some artificial colouring is still needed to give a more vibrant shade but less is needed. You may omit the natural food colouring if unavailable.

Checkout my Creative Baking: Macarons book for a more systematic and detailed step by step writeup of macaron basics and pointers!


Recipe for macaron shells
Ingredients (approximately 64 unicorns, 128 shells):
200g superfine almond meal
200g icing sugar
200g caster sugar
160g egg whites, divided into two equal portions
75ml water

Purple sweet potato powder (optional)*
Queen's natural sourced yellow powder food colouring (optional)*
Dutch processed cocoa powder*
Yellow, orange and purple gel food colouring

*add about a few grams of powdered natural colouring per 100g of almond. Add a pinch of cocoa powder to colour light brown. Add a little yellow and orange gel food colouring to the brown shades to give the shells a warmer tone.

Purple sweet potato powder, Dutch processed cocoa and yellow powder. All natural!

Steps:
1. Prepare baking trays with A4 paper templates on it. Place a sheet of baking paper on top. Use some Italian meringue to stick the corners of the baking paper down when you have made the meringue.

2. Sift almond and icing sugar together in a large mixing bowl. Add half of the egg whites (80g) and mix well until a thick paste forms. This is the mass.

3. Divide the mass into ratio of 12:2:1:1 for yellow: purple:light brown: dark brown. You may simplify things by using one shade of brown. If so, use ratio of 6:1:1 for yellow:purple:brown. I was just using the available colours from my other batch of safari macarons.

4. Make the Italian meringue. In a clean metal bowl, beat 80g of egg whites with an electric mixer at medium-low speed until foamy and opaque. Do not beat past the soft peak stage. Reduce mixer speed if necessary. In the mean time, heat caster sugar and water in a small saucepan until 115°C. Use a candy thermometer to measure the temperature. It's easier to work on the egg whites and syrup simultaneously with a stand mixer but it's possible with handheld mixer as well although what I used to do was to monitor the syrup temperature while whisking the egg whites manually until it's time to pour the syrup in. When temperature is reached, remove saucepan from heat. Turn up mixer speed to medium high and carefully pour the syrup into the egg whites, avoiding the beater. Continue beating for another 10 minutes until meringue is stiff, glossy and cool.

5. Divide the Italian meringue into portions according to the ratio above or simply use the formula weight of Italian meringue = weight of mass x 0.55. Fold the meringue into the mass in two or three additions using the fold and press motion until batter flows in a slow-moving lava-like way. You may refer to this post for video tutorials of macaron basics like how to fold the batter and test the consistency.

6. Transfer yellow batter into piping bag fitted with a Wilton #8 tip (about 4-5mm). Transfer the purple batter into piping bags fitted with Wilton #5 tip. Transfer the brown batters into piping bags fitted with Wilton #4 tip.

7. Pipe the batter onto baking tray. You may refer to this post for video tutorials on piping complex shapes. Remember to bang the tray on the table a few times after piping to release trapped air bubbles and flatten any peaks. I had to use the toothpick often for these intricate macarons.

Piped shells

8. Dry the piped shells for 1-2 hours in air-conditioned room or under a fan until the shells are dry to touch when you run a finger across the surface. Preheat oven to 135°C towards end of drying time. Set oven rack to lowest position.

9. Bake for 10 minutes and rotate the tray.  Bake for another 7-8 minutes before checking on the shells. If the feet appear wet, bake for another 5 minutes at 120°C and check again. Cool the shells on the tray before gently peeling the baking sheet away from the shells.

Freshly baked!

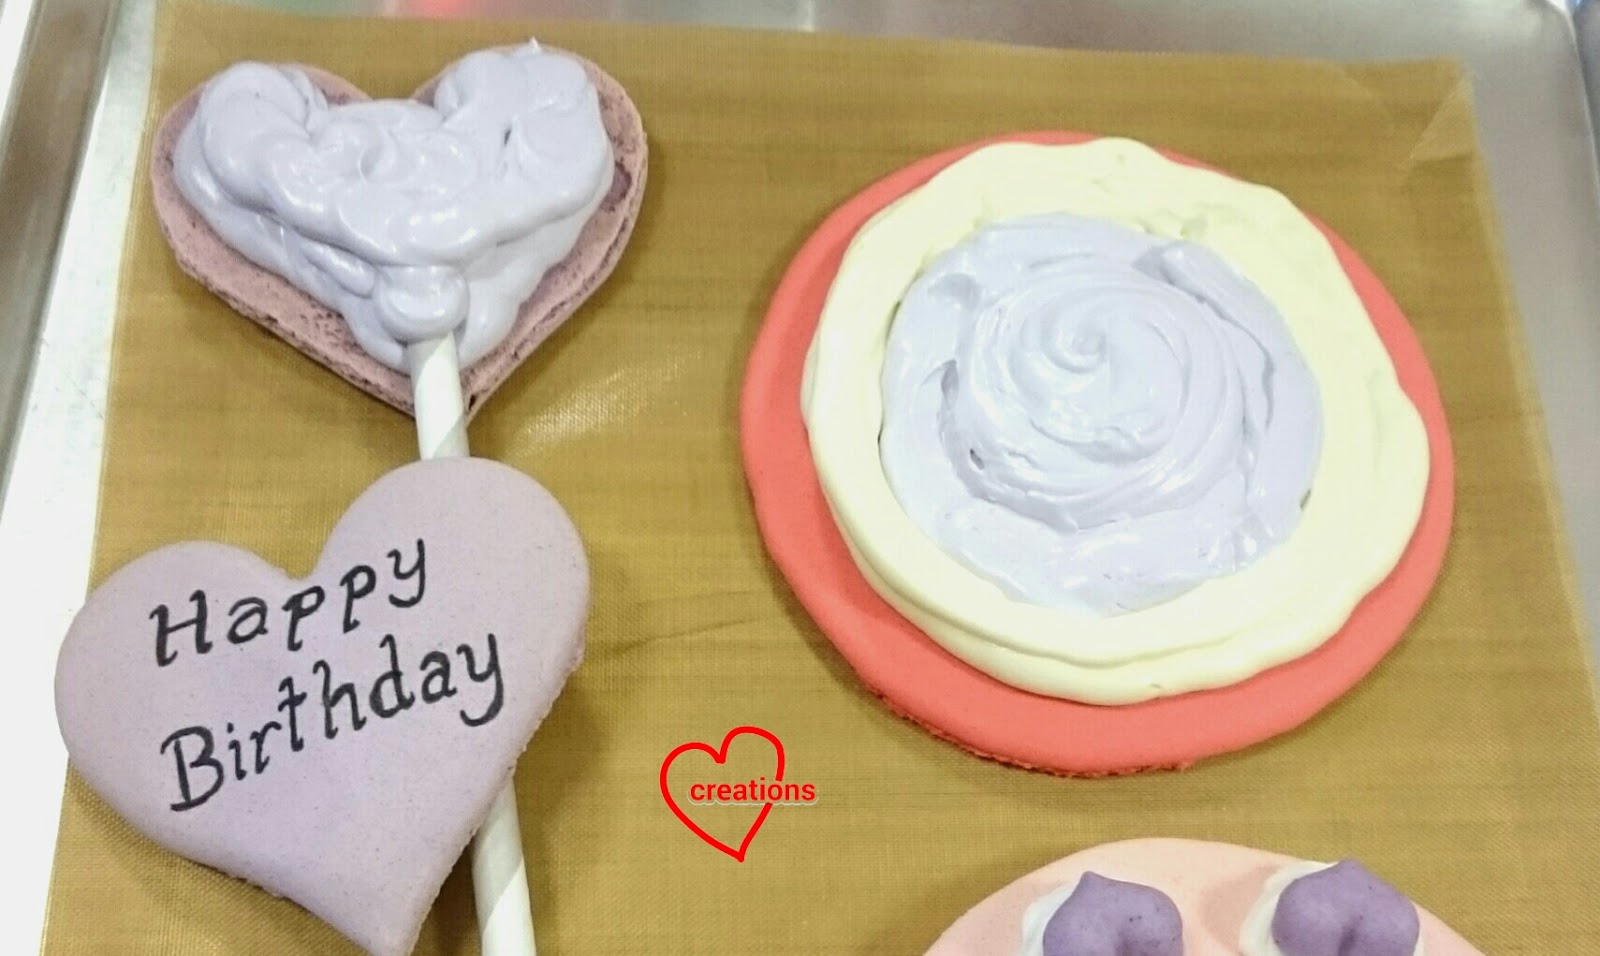
Use edible black marker to add on the eyes.

Check out the awesome feet up close!

I filled these with spiced apple Swiss meringue buttercream and salted caramel. I updated both recipes a little so will type out in detail here.

Spiced apple swiss meringue buttercream (less sweet)
Ingredients:
Basic vanilla smbc
63g egg whites (about 2 eggs)
45g caster sugar
113g unsalted butter, softened but cool and cut to tablespoon-sized pieces
1/8 tsp salt
1tsp vanilla bean paste

Applesauce for use with basic smbc
1 Granny Smith Apple, peeled and finely grated
1 tbs lemon juice
15g brown sugar (or to taste. Remember to keep the applesauce really tart as it is paired with sweet macaron shells)
1/2 tsp ground cinnamon
1/8 tsp Allspice
Pinch of salt

Steps:
1. Make applesauce. Place all ingredients for applesauce in a small saucepan. Cook over low heat, stirring often until liquid is reduced. About 20 minutes.


2. Heat about 1" of water in a deep saucepan with low heat. Place egg whites, salt and sugar in a heatproof bowl that can fit over the mouth of the saucepan without the base touching the water. Place the bowl on top of the saucepan. Use a hand whisk or a hand held electric mixer to whisk the egg whites until foamy and temperature reaches 71.1°C and all sugar has dissolved. Be careful to keep moving the egg whites. About 5-6 minutes.

3. Remove bowl from heat. Use an electric mixer and beat the egg whites at high speed until stiff, glossy and cooled to room temperature. About 10 minutes. I place a damp towel under the bowl with a standing fan blowing at the bowl to speed up the cooling process. Use a spatula to scrape off the sides of the bowl now and then to ensure even beating of the egg whites.

Stiff and glossy meringue

4. When the meringue has cooled (I use the candy thermometer to check temperature of meringue deep within the pile), add butter one cube at a time and beat at medium speed. Don't worry if it appears to curdle. Just keep beating and gradually adding each piece of butter until it is well incorporated. Increase speed when all butter has been added and beat for another minute or two until fluffy. Add vanilla and beat until well combined.

Freshly made basic smbc!


5. Gradually add applesauce (about 65g) to smbc and mix well.


You may store this in the freezer and thaw and re-whip before use.

Salted caramel (updated recipe)
Ingredients:
60g heavy cream
100g caster or granulated sugar
2tbs water
15g unsalted butter
1tsp sea salt
1 tsp vanilla extract

Steps:
1. Place sugar and water in a deep light coloured saucepan. Heat over medium heat, you may swirl the pan to help the sugar dissolve but don't stir.

2. Meanwhile heat cream and vanilla in a small saucepan until bubbles appear. Set aside.

3. When the sugar solution turns amber, remove from heat and slowly pour the cream in and stirring continuously with a long wooden spoon. The mixture will bubble violently so be careful. Don't panic. Just keep stirring and it will calm down.

4. Add unsalted butter and stir until combined. Add salt and stir.

You may use the caramel once it has cooled to room temperature or you may store in the fridge/freezer. Let it come to room temperature before using.

Pipe the spiced apple smbc onto the bottom shells. Add some salted caramel before placing the top shell on. Refrigerate for at least 24h before serving.


I had leftover batter for brown so I made these bears!

Enjoy! My kids got to eat some extras and they loved it! It's one of my macaron fillings that's bursting with flavour and homemade goodness!

With love,
Phay Shing


Read More »

Monday, 4 April 2016

Rainbow Elsa Doll Chiffon Cake


I made this Rainbow Elsa Doll Chiffon Cake for a friend's princess sometime back! I was happy to try this idea I originally had for my #3 :). It's my first try baking my Pastel Rainbow Chiffon Cake in a doll cake tin! Its full recipe is now in Creative Baking: Chiffon Cakes book and it graces the book cover!


I have shared before the doll tin has a centre tube which acts as support for the chiffon cake so that the cake is soft and fluffy like in normal tube pans. Feedback from my friend was very good too! :)

Just sharing pics of my Times book event that just passed. Very thankful for everyone's support!


With lots of love,
Susanne

Read More »

Sunday, 3 April 2016

Ombre Birthday Cake Macaron on Lychee Rose Sponge & Pudding Cake

I have a request for a macaron "birthday cake" on top of a lychee rose sponge and pudding cake. Here it is :).


In order to create the ombre pink "cake", I baked three 10cm diameter macaron shells. A heart shaped "happy birthday" sign was requested so I baked some purple heart shaped shells as well. The tricky bit about baking large macaron shells is the baking temperature and time. You may refer to this post for macaron recipe and baking temperature and time for 10cm shells.

Here are some photos of the piped macaron batter...


I used some purple sweet potato powder to colour melted white chocolate to create the little purple hearts on top of the cake. Royal icing was used to create the "cream" on top of the cake and the flame on the candle, which is just a short section of a paper straw. I filled the "cake" with lychee swiss meringue buttercream.


Ta-dah! My first macaron cake!

Recipe for the lychee rose sponge and pudding cake can be found here. I scaled it to a 3 egg yolk 4 egg white recipe to fit two 7" round baking pans which I cut to form 6" circular cakes. Don't throw away the cake cut-out as it will be used later. Briefly, the ingredient list for two 7" lychee rose chiffon cakes...

3 egg yolks
10g caster sugar
45g canola/ vegetable oil (I used coconut oil that only has a faint coconut smell)
45g canned lychee puree
1/4 tsp rose water
1/4 tsp lychee flavouring
1 tsp vanilla extract
Pinch of salt
60g cake flour

4 egg whites
1/4 tsp cream of tartar
45g caster sugar

I used aluminium foil to wrap the base of an adjustable cake ring to assemble the cake. I poured excess pudding mixture into a silicone baking tray (or tray lined with silicone baking sheet/mat) to create leaf shaped pudding cut-outs for decorating the cake.


The bit of sponge cake cut out is used to line the base of the pudding cake. This is to cover the pudding base that can appear a little untidy.

Do not store the macaron decorations with the pudding cake as moisture from the pudding cake will cause the macaron shells to turn soggy. Place the macaron decorations on the pudding cake just before serving. Store both sponge and pudding cake and macarons separately in the fridge in airtight boxes.

Thank God that the macaron and cake were very well received! As usual, I get the comment that the cake is refreshing :). Perfect for eating after a sumptuous birthday meal!

With love,
Phay Shing


Read More »