Friday, 17 June 2016

Monkey Themed Macarons on Lychee Rose Chiffon Sponge & Pudding Cake

This request for a monkey themed lychee rose sponge and pudding cake was my last bake before I went on my break from baking for orders. I posted earlier on how the realistic looking banana macarons are made. Here they are adorning the cake :).


I made the macarons a few days in advance before the cake...


You may refer to the banana macaron post for the basic recipe. The giant monkey and coconut tree macarons were filled with dark chocolate ganache. Baking large macaron shells require longer baking times  with the temperature at 110-120°C after 20-25 minutes of baking to prevent browning of the shells.

Just to share some photos of the macaron making process...

Piping the large shells in stages


I decorated the shells with royal icing and edible marker.


Filling the shells with dark chocolate ganache and adding in long lollipop sticks

The original lychee rose sponge and pudding cake can be found here. I made some minor changes to the ratio of ingredients to include a bit more liquid in the cake batter. I used an adjustable cake ring instead of a springform pan to make a slightly larger cake. This cake has always gotten very good reviews as it is light and refreshing, perfect for eating after heavy birthday meals.

Lychee rose chiffon sponge
Ingredients (two 9"round pan):
4 egg yolks
15g caster sugar
65g canola/ vegetable oil
65g canned lychee puree (sieved to remove woody bits)
1/4 tsp rose water
1/4 tsp lychee flavouring
1 tsp vanilla extract
90g cake flour
A pinch of salt

6 egg whites
1/4 tsp cream of tartar
60g caster sugar

Steps:
1. Line the pans with baking paper. Set oven rack to second lowest position and preheat to 150°C. Place a tray of water at the base of the oven (optional).

2. Prepare egg yolk batter. Whisk egg yolks and sugar until thick and pale. Add oil and whisk until well combined. Add lychee puree, rose water, lychee flavouring and vanilla extract. Whisk until combined. Gradually sift in flour and salt and whisk until no trace of flour is seen.

3. Prepare meringue. In a clean metal bowl, beat egg whites with cream of tartar until firm peaks (just before stiff peaks), gradually adding sugar once the egg whites are foamy.

4. Gently but quickly fold the meringue into the egg yolk batter in three additions. Scoop the batter into the two prepared pans. Tap the pans on the table to release trapped air bubbles.

5. Bake at 150°C for 20 minutes or until skewer comes out clean. Cool for 5 minutes before removing from pan.


Freshly baked!

I used an adjustable cake ring instead of a 9" springform pan this time so I increased the amount of pudding.

Lychee rose pudding
Ingredients:
A)
300g evaporated milk
660g water
500g canned lychee puree in syrup
2 tsp rose water
1/2 tsp lychee flavouring
100g caster sugar
1/4 tsp salt
5 tsp agar powder
Liquid  green food colouring
Liquid yellow food colouring

B)
96g custard powder
480g canned lychee syrup
80g water

Steps:
1. Wrap the base of the cake ring with aluminum foil and place the assembly on a baking tray.


2. Combine ingredients in B) in a large jug or bowl and stir until custard powder dissolves.

3. Combine ingredients in A) in a saucepan and bring to boil, stirring continuously.

4. Stir B) again before pouring into A), stirring the contents in the saucepan continuously. Bring to boil again while stirring. Boil for a minute more.

Assembly
1. Scoop some pudding into the base of the cake ring.


2. Place a sponge cake on top.

3. Scoop more pudding to cover the sponge, taking care to cover the sides as well.

4. Put the second sponge cake in the cake ring. Cover the sides of the sponge with pudding.

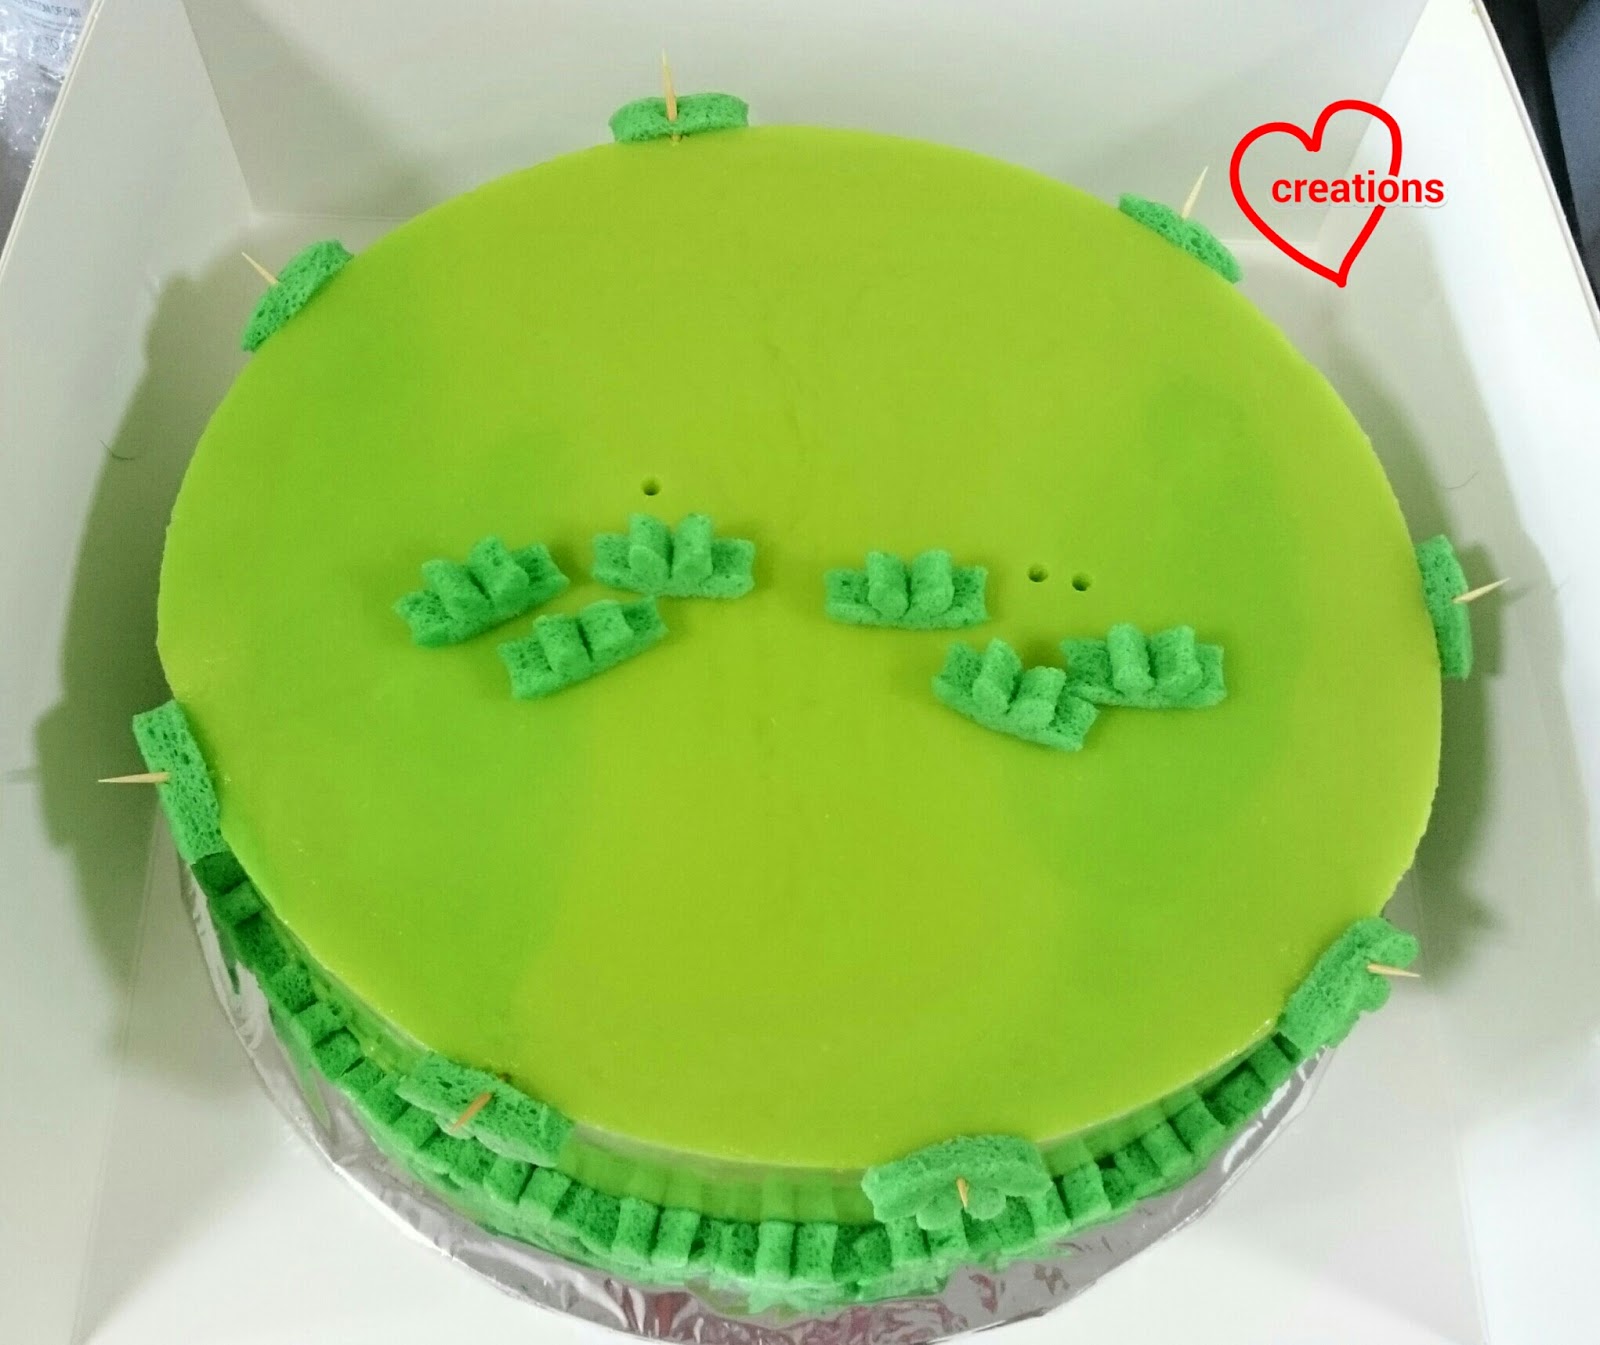
I tried to play around with slight change in shades of green by adding colouring along the way as I filled the cake ring but it doesn't show up very clearly :p.

The cake tastes better after a day or two of chilling in the fridge to let the flavours come together.


I baked green layer cake in 10x12" tray for grass deco on the cake. I used a daisy cookie cutter to cut out the cake and half it to create the grass.

In order to attach the banana macarons at the side of the cake, I carefully inserted a short length of toothpick into each banana.


This is the first time I am assembling a sponge and pudding cake with macaron deco this way so I learnt that the macarons must not come into direct contact with the pudding....during my short photography session! I quickly lined the sides of the pudding cake with bits of chiffon cake "grass" as a barrier between the macarons and the pudding, and dried the parts of the macaron shells that were wet with paper towel.


The macarons have to be packed separately from the sponge and pudding cake to prevent them from turning soggy. Assembly of the macaron deco has to take place before eating the cake at the party venue.

All packed! I made a spare set of monkey  and coconut tree just in case.


Thank God despite the hiccups along the way, the cake and macarons were very well received!

With love,
Phay Shing


Read More »

Monday, 13 June 2016

Father's Day Special: Star Wars Assorted Macarons (French Method!)

I had some aged egg whites to clear from the fridge and since I had time during my break from baking for orders, I decided to give the French method a try again after relying on the Italian method for the longest time. I was pleasantly surprised that the taste and texture of the macaron shell this time round were pretty close to what I get using the Italian method. Here's my successful attempt which is meant for my hubby who is a Star Wars fan :)

BB8, stormtrooper and R2D2 macarons!

As there were too many macarons for hubby to finish, I gave some away to a birthday girl and someone who needs a pick-me-up. The rest were up for grabs. I opened for sale and they were snapped up within an hour of announcement! I filled half of the macarons with hubby's favourite spiced apple swiss meringue buttercream with salted caramel and the other half with dark chocolate ganache laced with coffee and liqueur. I decided to make the dark chocolate ganache more adult-friendly knowing that kids are probably not consuming these ;). Add coffee and liqueur to dark chocolate and you transform an otherwise delicious and rich but gentle version of chocolate to a mind blowing powerful one.

Many people have tried Daniel Leong's recipe for French macarons and raved about their success. I thought why not give this recipe a try. I adapted my recipe from the one that Jeannie Tay posted on her blog over here. My previous attempts usually resulted in shells that were way too chewy for my liking. I prefer the delicate texture of macarons made with the Italian method. Upon studying the ingredients carefully, it's not hard to see why his recipe works so well. The ratio of castor sugar:egg whites is pretty high. This results in a firmer and more stable meringue than in recipes that call for less. I have seen recipes with castor sugar that is less than a third of the weight of egg whites, whereas the castor sugar is about 90% of the weight of egg whites in Daniel Leong's recipe. Similarly, the icing sugar:almond meal ratio is also pretty high. Icing sugar provides structural stability to the macaron shells as well. With these combined factors for improving the stability of the batter, chances of success is increased.

I tweaked Daniel's recipe a little by including a bit more salt to counter the sweetness, cream of tartar to stabilize the meringue, cornflour and egg white powder to help the piped shells to dry faster. You may omit all these but I was working on a humid and rainy day and didn't want to wait for hours for the shells to dry.

Do checkout this blog post for video tutorials of macaron basics such as how to test the consistency of batter, how to test if the shells are dry, how to pipe the batter and how to remove shells from baking sheet. Folding the batter using French method is slightly different from Italian method. You begin by folding more gently with the French method to avoid deflating the meringue too much whereas you can be more rough with the Italian method.

Feel free to half the recipe. I was clearing out the egg whites in my fridge so the portion is bigger over here.

Macaron shell recipe (French method)
Ingredients (makes about 40 macarons, 80 shells):
140g egg whites (aged in the fridge for a few days at least)
126g caster sugar
1/4 tsp cream of tartar
1/2 tsp egg white powder (optional)
150g superfine almond powder
200g icing sugar (without cornflour added)
1 tsp cornflour (omit if your icing sugar contains cornflour)
1 tsp white powder food colouring*
1/8 tsp fine sea salt

*Or gel food colouring or omit if you wish. If using gel, add to the meringue when you just reach the stiff peak stage. Beat a while more to incorporate the colouring until you get a really stiff peak.

Steps:
1. Prepare baking trays with template under a baking sheet.

2. Sift together almond, icing sugar, cornflour, salt and powdered colouring. Set aside.

3. In a clean metal bowl, beat egg whites with cream of tartar and egg white powder until  foamy. Gradually add caster sugar and beat until stiff peaks form and you are able to over turn the bowl without the meringue falling out.

Stiff, glossy peaks!

4. Scatter some of the almond mixture over the meringue and fold gently until evenly incorporated. Repeat until all the powder mixture is added. Now you may fold the mixture more vigorously, deflating the batter a bit more and testing the consistency as you go along. To test, drop some batter off the spatula. It should flow slowly in an almost continuous ribbon (see video tutorial link). If the batter breaks off at a few points, continue folding. If your batter is too runny, you have overfolded it. It's better to err on the side of underfolding. Use some batter to stick the baking sheet onto the baking tray.

5. Transfer batter into piping bag fitted with a Wilton #10 tip (about 5-6mm). Pipe the shapes accordingly and use a toothpick to nudge the batter where necessary. Remember to bang the tray on the tableto flatten any peaks.

Just piped. Note the peaks.

After banging the tray on the table 

Piping stormtroopers

Piping BB8s

6. Dry the piped shells in aircon room and/or under a fan. The shells should be dry to touch when you run a finger across the surface. About 2 hours for me.

7. Bake at lowest rack in preheated oven at 140°C for 10 minutes, rotate the tray and continue baking at 130°C for another 7 minutes. If the feet still appear wet, bake for another 5 minutes at 120°C and check again. People have asked how I keep pastels  pastel and whites white. Good temperature control is the key. A higher starting temperature is necessary to set the structure and prevent hollows in shells but a lower temperature is necessary  towards the end of baking time to prevent browning. Always use an oven thermometer too!

8. Cool completely before attempting to gently peel the baking sheet away from the shells.

I had to do a taste test before I decided if it was worth the effort to follow through with deco and filling.

Nice fluffy interior, only slightly chewy, crisp outer shell!

I still prefer the Italian method for a more delicate texture, especially the reduced sugar version with rice flour substitution. Hubby thinks so too. But for an easier way of making macarons logistics wise (no need for boiling syrup and candy thermometer), this recipe is a keeper!


I used royal icing and edible marker to add on the details. It took me about one and a half days to complete all of them due to the fine details involved! Kids were home for the school holidays too so I was a little distracted.

Checkout the awesome feet on these stormtroopers!

Finally finished deco!

Here's the recipe for the adult version of dark chocolate ganache...

Dark chocolate ganache with coffee and liqueur
Ingredients:
120g dark chocolate, chopped
35g heavy cream**
15g unsalted butter
1tsp vanilla bean paste
1/8 tsp fine sea salt
1 tbs liqueur (I used Choya. You may use rum, Baileys or Grand Marnier)*
1/2 tsp instant coffee granules*

*The addition of coffee and liqueur is to enhance the dark chocolate richness and not to overpower it so only small quantities of coffee and liqueur were used. You may add more if that's your preference.

** You may use more cream for a softer ganache, up to a ratio of 2:1 for cream:chocolate. I am catering for hot Singapore where the room temperature is about 28°C.

Steps:
1. Melt chococolate with butter in microwave-safe bowl for 20 seconds on medium power. Stir with spatula. Repeat until mixture is smooth and chocolate has all melted.

2. Heat cream with coffee granules added until it starts to bubble.

3. Pour cream onto melted chocolate. Stir well in one direction.

4. Add salt and stir until dissolved.

5. Mix vanilla in liqueur. Add the mixture one tsp at a time to the ganache. Mix well.

6. Set aside at room temperature to firm up to toothpaste consistency. About half an hour to an hour. You may put the ganache in the fridge to speed up the process but do check every 10 minutes or so.

7. Transfer ganache to piping bag and pipe onto bottom shells.


8. Sandwich the filling by placing top shells onto the bottom shells. Refrigerate in airtight container for at least 24h before serving. Let the macarons sit at room temperature for at least 15 minutes before eating when taken out from the fridge. If the ganache is still hard, leave it out a while longer.

The other half of the macarons were filled with spiced apple swiss meringue buttercream and salted caramel. The recipe can be found here.

Hubby's favourite!

This batch of macarons took about 4 days to mature to a level that I am satisfied with. When consumed too early, the texture is not as delicate.

Hubby loved the macarons a lot, needless to say :). The other recipients loved the fact that these macarons are not too sweet!

To my love, my dads and all dads out there, blessed Father's Day!

Update 14/1/17: check out this post for the recipe for reduced sugar macaron shells using the French method!

With lots of love,
Phay Shing
Read More »

Sunday, 12 June 2016

'Durian' Durian Cottony Cake (early Father's day present)


My dad loves to eat durians! I made these ‘durians’ from durian-flavoured ogura cake for my dad and my friend’s dad (seems most dad’s love durians ;))!

It’s made with real premium durian flesh, the flavour and smell is so strong and fragrant, and texture so cottony and soft! Even though I’m not a durian lover, I’m a convert (at least of its pastries hehe)! I called it cottony cake due to its delicate texture but also the recipe is closer to ogura cake, though in actual I merged chiffon and ogura recipes.

Check out the texture!


This is another version I made:


I will first share recipe for a plain durian cottony cake for the 8-9-inch tube pan first as it’s oh-so-good and easy to try for beginners. Below that, I will share the recipe how to make a ‘durian’ fruit version =). For the ‘durian’ version, I used pandan paste for the green colour of the shell and durian paste/emulco for the durian fruit. Both, especially the pandan paste enhances the durian flavour too! I was really surprised the pandan-durian portion to be our favorite! 

I made the spikes from baking chiffon cake in mini paper cones (the top version), but if you find that troublesome, you can also cut out small triangles from chiffon sheet cake (bottom version). Both look pretty cute.

Here, I also experimented with using prima top flour to replace part of the cake flour. I’m loving the ultra-fine texture of top flour! Mixing a little into the cake flour increases its lightness! If you do not have top flour, just substitute it with equal portions of cake flour. Here goes!


Plain Durian Cottony Cake (for 8-9-inch tube pan)

*if you use 9-inch, cake will be slightly shorter

3 egg yolks
1 whole egg
28g castor sugar
65g vegetable/corn/coconut oil
70g coconut milk
84g durian puree
80g prima cake flour
20g prima top flour (*can be substituted with cake flour)


7 egg whites
¼ tsp cream of tartar
73g castor sugar

1. Prepare durian puree by blending 2 rows of durian flesh or mashing durian flesh and then passing it through a sieve. 176g durian with seeds approximately yields 90g durian puree.


The durian puree is finger-licking good!

2. Prepare a tray of water under the lowest rack. Preheat oven to 160°C.

3. Whisk egg yolks and whole egg with sugar until pale and light.

4. Add in oil, coconut milk, durian puree and mix well.

5. Whisk in sifted cake flour, top flour (you can also replace with cake flour) and mix till smooth and well-combined.

6. Prepare meringue:

a. In a grease-free, dry metal bowl, using electric mixer, whisk egg whites with cream of tartar till frothy.

b. Add in ½ castor sugar for meringue and whisk at high speed till soft peaks form.

c. Add in rest of the castor sugar for meringue and whisk till firm peaks form. Firm peaks give finer, softer texture.

7. Fold in meringue gently into egg yolk batter 1/3 at a time. *Fold in unidirectional, gentle strokes and do not overfold.

8. Gently pour or scoop the batter into an ungreased 8- to 9-inch chiffon tube pan. Gently tap on counter top to remove air bubbles.

9. Bake at 160°C for 15 min, 150°C for 10 min, 140°C for 20 min, then 130°C for 15 min, or until skewer inserted into centre of cake comes out clean.

10. Invert pan to cool on a wire rack completely.

11. Unmould the chiffon cake by hand (see video tutorial ‘Hand unmoulding Chiffon cakes for a clean finishing’).


‘Durian’ fruit Durian Cottony Cake (makes 1 durian or 2 halves)

2 egg yolks
1/2 whole egg
14g castor sugar
33g vegetable/corn/coconut oil
35g coconut milk
42g durian puree
40g prima cake flour
10g prima top flour (*can be substituted with cake flour)
Few drops of durian paste/emulco (only added to yellow portion)
1/5 tsp pandan paste (only added to green portion)

3.5 egg whites
¼ tsp cream of tartar
36g castor sugar

1. Prepare durian puree by blending 1 row of durian flesh or mashing durian flesh and then passing it through a sieve. 88g durian with seeds approximately yields 45g durian puree. Photos as above.

2. Prepare a tray of water under the lowest rack. Preheat oven to 160°C. Prepare one silicone cake pop mould (for durian fruit), 2 oval glass bowls (for durian, you can also use round bowls), 20-30 mini paper cones (for spikes, cut leaving the tips)


3. Whisk egg yolks and whole egg with sugar until pale and light.

4. Add in oil, coconut milk, durian puree and mix well.

5. Whisk in sifted cake flour, top flour (you can also replace with cake flour) and mix till smooth and well-combined.

6. Spoon out 6 tsp egg yolk batter to another bowl and leave plain (for the cream husk), spoon out 6 tsp batter to another bowl and add a few drops of durian paste/emulco (for the yellow fruit). To the rest of the batter, add pandan paste (for the green shell).

6. Prepare meringue:

a. In a grease-free, dry metal bowl, using electric mixer, whisk egg whites with cream of tartar till frothy.

b. Add in ½ castor sugar for meringue and whisk at high speed till soft peaks form.

c. Add in rest of the castor sugar for meringue and whisk till firm peaks form. Firm peaks give finer, softer texture.

7. Portion out 12 tbsp meringue for the plain and yellow batters, leaving the rest of the meringue for the green batter.

8. Gently fold in meringue into respectively egg yolk batters 1/3 at a time. *Fold in unidirectional, gentle strokes and do not overfold.

9. Spoon green batter onto the bowls till 3/4 full, then spoon the plain batter onto the middle. Gently tap on counter top to remove air bubbles. Bake bowls at 160°C for 15 min, 150°C for 10 min, 140°C for 15+ min, or until skewer inserted into centre of cake comes out clean.


10. Spoon the rest of the green batter into the mini cones and bake at 160°C for 12+ min, or until skewer comes clean.

11. Spoon the yellow batter into cake pops moulds and bake at 160°C for 12+ min.

12. Leaves the moulds on a wire rack to cool completely.

13. Unmould the chiffon cake by hand by peeling/pulling at the sides similar to the big chiffon tube pan.

14. Use melted marshmallows to glue the fruits and spikes on.

Hope you will enjoy this delicious cottony soft durian creation! Happy advance Father's day to all!!

With lots of love,
Susanne


*Newer version of Durian Chiffon Cake here.


More loving chiffon cake creations here:


Read More »

Friday, 10 June 2016

Rainbow & Unicorn Macarons with Earl Grey White Chocolate Ganache

I had a request for rainbow and unicorn macarons along with a pink macaron carousel!


Reduced-sugar recipe with only rice flour replacement was used for the shells. I must admit that these designs are one of the most tedious and challenging to pipe, especially the rainbow. I made these concurrently with the pink unicorn macaron carousels. I have made the rainbow on clouds before so will not mention in detail. Just to share some photos of the process...

Piping unicorn shells

Piping rainbows!


I filled the shells with whipped Earl grey white chocolate ganache.


This was on display at the book event at Kinokuniya in April!


With love,
Phay Shing

Read More »

Thursday, 9 June 2016

'Tinkerbell Pot' Raspberry Jelly Chiffon Cake


Ahh.. this Raspberry jelly chiffon flavour is, according to my mum and friend (who tried a few other flavours), the best of the lot! I was pleasantly surprised/amazed at what they said (I have a savoury tooth so I still prefer salted egg yolk =p)!

I made this 'Tinkerbell pot' Raspberry jelly chiffon cake for a dear friend few months back. Sorry for the delayed posting as I've been really busy with family and book! Thanks to Michelle Marie Mower for first introducing the brilliant idea of using Jello. This is actually my 2nd trial after some optimization which I tweaked according to me (and my family's) preference.

I used about half the jelly powder, so that the jelly candy taste is not overpowering but still strong and fragrant, and for lighter sweeter pink shade/colour, and so that the chiffon was not too sweet for our liking. I also used higher liquid: flour ratio (for more moisture and lighter texture) and higher meringue: yolk ratio (for lighter, melt-in-the-mouth-like texture). The resulting egg yolk mixture was also not so thick so it was easy to fold and incorporate into the egg whites. And of course lastly, temperature control to prevent browning for deco-chiffon cakes. The reviews were really good! So I hope you will like this resulting Raspberry jelly chiffon cake!

My friend loved Tinkerbell, and provided a cute little baby Tinkerbell topper, so I designed the chiffon cake into an Enchanted forest pot for her. I used my 8-inch doll cake tin for this. I had previously shared these cake tins are great for chiffons as they have a centre tube too! I cut the flowers and leaves from layer chiffon cake, and shaped vines from swissrolls. I also used cake pop moulds for the top of the flower and magic mushroom. The recipe below is a 5 egg yolk recipe for the 8-inch doll tin, but you can also use the recipe for a normal 8-inch or 9-inch chiffon tube pan.


Raspberry Jelly Chiffon Cake (doll cake tin or 8- to 9- inch chiffon tube pan)

Egg yolk batter

5 egg yolks
67g vegetable/corn oil
78g milk
108g prima cake flour
44g raspberry jello powder
½ tsp baking powder
pinch of salt

Meringue

7 egg whites
75g castor sugar
¼ tsp cream of tartar


1. Whisk egg yolks with raspberry jello powder, oil and milk with an electric mixer at low speed (I find electric mixer helps to dissolve/incorporate the jelly powder easier).

2. Whisk in sifted cake flour, baking powder and salt, and mix till well-combined.

3. Prepare meringue:

a. In a grease-free, dry metal bowl, using electric mixer, whisk egg whites with cream of tartar till frothy.

b. Add in ½ castor sugar for meringue and whisk at high speed till soft peaks form.

c. Add in rest of the castor sugar for meringue and whisk till firm peaks form, or just the point of stiff peak. Firm peaks give finer, softer texture.

4. Fold in meringue gently into egg yolk batter 1/3 at a time. *Fold in unidirectional, gentle strokes and do not overfold.

5. Gently pour or scoop the batter into an ungreased 8- to 9-inch chiffon tube pan. Gently tap on counter top to remove air bubbles.

4. Bake at 160°C for 15 min, 150°C for 10 min, 140°C for 20 min, then 130°C for 10-15 min, or until skewer inserted into centre of cake comes out clean.

5. Invert pan to cool on a wire rack completely.

6. Unmould the chiffon cake by hand (see video tutorial ‘Hand unmoulding Chiffon cakes for a clean finishing’).

Just so happens my cake is shaped like a dumpling lol.. happy duan wu jie everyone!!

With lots of love,
Susanne

Ps: You may be interested in 2 recipes I contributed to Mummyfique, it's been an honour chatting with them!

And Creative chiffon book 1:

And book 2, Deco chiffon cakes in the making!


Read More »

Monday, 6 June 2016

Charlie Brown and Snoopy Lemon Macarons

This request for Charlie Brown macarons came at a time when I was really busy but I managed to squeeze it in together with woodland creature and piano keyboard macarons!


I had leftover batter from making the keyboard so a few Snoopies were born!

Although I made only several of these macarons, I will type out the full recipe for baking half of them as Charlie Brown and half of them as Snoopy.

Please refer to this post for video tutorials of macaron basics, this post for video tutorials of piping complex shapes and my Creative Baking: Macarons book for more details and pointers. I will just briefly describe the process here.

Macaron shell recipe (makes about 40-50 macarons, 80-100 shells)
Ingredients:
Mass
200g superfine almond powder
200g icing sugar
80g egg whites
1/8 tsp salt (optional)
A pinch of Dutch processed cocoa powder
A drop of orange gel food colouring
A tiny dip of copper coloured gel food colouring
1 tsp Charcoal powder
Black gel food colouring
White powder / gel food colouring

Italian meringue
200g caster sugar
75ml water
80g egg whites
1/8 tsp cream of tartar (optional)


Steps:
1. Prepare baking tray with templates for Snoopy and Charlie Brown, and baking sheets.

2. Prepare mass. Combine sifted almond and  icing sugar in a large bowl. Add egg whites and mix well to form a paste. Divide the batter into ratio of 4:3:1 for beige:white:black. Colour the masses accordingly. Beige is created by adding  pinch of cocoa powder, a bit of orange and copper gel food colouring. The resulting mass should appear pale brownish orange. Add charcoal and black gel colouring for black mass. Add white colouring to colour white.

3. Prepare Italian meringue. Heat sugar and water in a small saucepan until 115°C. In the mean time, beat egg whites in clean metal bowl with electric mixer at medium low speed until soft peaks form. Reduce mixer speed if necessary. Once syrup is ready, increase mixer speed to medium high and carefully pour syrup into egg whites in a thin stream. Continue beating on high for 10 minutes or until meringue is stiff, glossy and cool. Divide meringue for the various colours according to the formula weight of meringue = 0.55 x weight of mass.

4. Fold meringue into mass in two additions  until it flows off the spatula in a slow-moving lava-like manner.

5. Transfer batter into piping bags fitted with the appropriate tip sizes. Pipe the characters onto the baking tray. Remember to bang the tray on the table after each stage of piping. Use a toothpick to pull the batter where necessary or to pop stubborn air bubbles.

Piping Charlie Brown

Piping Snoopy

6. Dry the piped shells in aircon room and/or under a fan until you are able to run a finger across the shells without feeling any stickiness. About 1-2 hours.

7. Bake in preheated oven at 140°C for 10 minutes with tray at lowest rack. Rotate the tray and bake for another 10 minutes at 130°C. If the feet still appear wet, bake for another 5 minutes at 120°C. Let the shells cool completely before removing from baking sheet.

I used a fine edible marker to draw Charlie Brown's face by freehand. I guess after a year plus of making fancy macarons and cookies, I am more able to draw by freehand more confidently :p. You may use a template to trace the face on but I didn't feel like putting in the extra work which turned out unnecessary.

Decorated shells


I filled the shells with lemon white chocolate ganache and lemon curd as requested.

Recipe for lemon curd may be found here. Replace lime with lemon.

Lemon white chocolate ganache recipe
Ingredients (Fills about 12 macarons):
55g white chocolate, chopped
5g vegetable shortening
5g unsalted butter
6g lemon juice*
6g lemon curd*
6g heavy cream*
Zest of a lemon
1/8 tsp lemon paste (optional)
1/3 tsp fine sea salt

*you may use 9g lemon juice and 9g cream if you don't have lemon curd available or don't intend to use it.

Steps:
1. Place white chocolate, shortening and butter in a microwave-safe bowl. Heat using medium power for 10 seconds and stir. Repeat until all the chocolate is melted and smooth.

2. Place the rest of the ingredients in a small saucepan and heat over low heat until it starts to bubble. Pour over melted chocolate and stir until well combined.

3. Refrigerate for 10 minutes and beat the mixture with a spatula until creamy and homogenous. If it still appears runny, put back in the fridge for another 5 minutes and repeat beating the mixture until it is able to hold a stiff peak.

4. Transfer the ganache into piping bag and pipe a ring on the bottom shell.

See the bits of lemon zest in the ganache?

5. Fill another piping bag with lemon curd and pipe to fill the centers.

Filling up the center with lemon curd

Store in airtight container for at least 24h before serving.

These were very well received in terms of looks and taste! The birthday girl couldn't stop laughing when she saw the box of Charlie Brown's :D.


With love,
Phay Shing
Read More »

Thursday, 2 June 2016

Banana Macarons with Whipped Earl Grey White Chocolate Ganache

I had a request for some banana shaped macarons filled with Earl grey flavoured filling. Here they are :)


These bananas along with giant monkey and coconut tree macarons were meant to be cake topper decorations for a lychee rose sponge and pudding cake.

I had plans to slow down and take a break from baking for orders during the June school holidays as it's been really tiring juggling all the family demands and creating bakes that have to be fantastic in looks and taste. I only had one assignment planned for the last week of baking before my "sabbatical" so I took my time to enjoy the ride :). Therefore the realistic looking bananas! I went all out to have fun decorating them!

I made the macarons using the regular recipe without sugar reduction as the shapes involved are complex. I made minion macarons, giant monkey and coconut macarons along with these bananas in one baking session. The realistic highlights on the macaron shells were created by using edible marker and some gel food colouring dissolved in vodka. A fine brush was used to blend in the colours. I will type out the recipe for a full batch of banana macarons even though I made only 10.

Please refer to this post for video tutorials of macaron basics, this post for video tutorials of piping complex shapes and my Creative Baking: Macarons book for more details and pointers. I will just briefly describe the process here.

Macaron shell recipe (makes about 60 macarons, 120 shells)
Ingredients:
Mass
200g superfine almond powder
200g icing sugar
80g egg whites
1/8 tsp salt (optional)
5g Queen's natural yellow powder food colouring (omit if unavailable and replace with more yellow gel colouring )
2-3 drops of yellow gel food colouring
1/8 tsp Dutch processed cocoa powder

Italian meringue
200g caster sugar
75ml water
80g egg whites
1/8 tsp cream of tartar (optional)

Queen's natural yellow powder food colouring 

Steps:
1. Prepare baking tray with template and baking sheet.

2. Prepare mass. Combine sifted almond, yellow powder and  icing sugar in a large bowl. Add egg whites and mix well to form a paste. Add yellow gel until desired shade is obtained.

3. Prepare Italian meringue. Heat sugar and water in a small saucepan until 115°C. In the mean time, beat egg whites in clean metal bowl with electric mixer at medium low speed until soft peaks form. Reduce mixer speed if necessary. Once syrup is ready, increase mixer speed to medium high and carefully pour syrup into egg whites in a thin stream. Continue beating on high for 10 minutes or until meringue is stiff, glossy and cool.

4. Fold meringue into mass in two additions until just combined. Scoop out 1 tbs of batter and add cocoa powder to it. Continue folding batter until it flows off the spatula in a slow-moving lava-like manner. It's ok to overfold the brown batter a little.

5. Transfer yellow batter into piping bag fitted with #6 Wilton tip (about 4mm diameter). Transfer brown batter into piping bag fitted with #4 tip. Remember to bang the tray on the table after each stage of piping. Use a toothpick to pull the batter where necessary or to pop stubborn air bubbles. The 3D pop-up look of the bananas was created by piping the 1st and 3rd bananas in each bunch and letting them dry till a sticky membrane forms before piping the middle banana. Here's the sequence of piping...


6. Dry the shells in aircon room and/or under a fan until the surface is dry to touch. About 1-2 hours.

7. Bake in preheated oven at 140°C for 10 minutes on lowest rack, followed by 130°C for 7-8 minutes or until feet no longer appears wet. Cool completely before removing from baking sheet.

Freshly baked shells! I have started decorating one of them. Can you tell which one it is?


The next part involved decorating the shells. You may leave it as it is if you are happy with the look. If you want to venture on to create the realistic look, go ahead :).

I dissolved some green gel food colouring in vodka and painted it on near both ends of each banana to create a subtle green tinge.


Next, I applied very gentle pressure to create dotted lines along the length of the bananas and quickly applied some vodka wash gently with a brush to create a brown washed out effect along the length of the bananas.


I used brown edible marker to colour parts of the tips of the bananas to create darker brown shades and to create some rough texture look.

Everything is done subtly like makeup that makes a face look natural but beautiful so you may not see some of the colours very well in the photo.

Decorated macaron shells! Do they look real?

I filled the macarons with whipped Earl grey white chocolate ganache, a filling that is really good and stable at Singapore's room temperature (27°C), flavorful and not too sweet.


Thank God that they were very well received along with the cake. Everyone was impressed by how real the bananas looked :)

With love,
Phay Shing

Read More »