Showing posts with label sanrio. Show all posts

Saturday, 4 October 2025

Sugar-Free Tiramisu Parfait

 These are the Tiramisu parfaits that the sugar-free Pochacco marshmallows went on!

I made these for my hubby's super early birthday treat!

You may refer to the reel for the recipe and video of assembling:


But for your convenience, I will put the ingredient list here.

You may replace all the ingredients marked "*" with caster sugar for the regular sugar version.

Vanilla sponge:
Yolk batter:
2 egg yolks
10g Lakanto* (Erythritol with Monk fruit extract)
10g Maltitol*
55g cake flour, sifted (may be replaced partly with almond flour to further lower the GI)
Pinch of salt 
15g water
1/4 tsp vanilla extract 

Meringue:
2 egg whites
1/8 tsp cream of tartar
10g prebiotic soluble fibres* (I used Alchemy Fibre)
20g Maltitol*

Cream filling:
2 egg yolks (or half of a large egg)
13g Maltitol*
A pinch of salt
180g whipping cream (35% fat)
170g mascarpone, softened at room temperature 
1 tsp Kahlua coffee liqueur (optional)
1/2 tsp vanilla extract (optional)

Other ingredients:
60g concentrated coffee or espresso
120g sugar-free Oreo cookies without cream, crushed (I used Gullon's no sugar added cocoa sandwich cookies without the cream. You may replace it with sugar-free grated chocolate or cocoa powder, or omit)


Just to share some photos of the process...


Soaking sugar-free sponge with concentrated coffee

Piping sugar-free mascarpone cream

Adding crushed sugar-free oreo cookie crumbs


If I didn't tell you this is sugar-free, you wouldn't know because it's yummy!


with lots of love,

Phay Shing

Read More »

Saturday, 27 September 2025

Sugar-Free Pochacco Coffee Lavender Marshmallows

 The end of the year looks set to be busy so I decided to make the birthday bake for hubby really early while I have the inspiration 🤭. I made some sugar-free marshmallows as decorative toppers for another sugar-free bake. Presenting my coffee lavender sugar-free Pochacco marshmallows!


Here is the video of the piping process:


I am not able to share the recipe as it's a class material. I added some prebiotic soluble fibres as well to further lower the overall GI of the confection, and add dome benefits for gut health and cholesterol management.

 You may also see my book Deco Marshmallows for another sugar-free marshmallow recipe that produces the fluffiest and bounciest marshmallows but I decided to switch to another sugar replacement that is more easily available and doesn't have a strong aftertaste. 

Here are some works-in-progress pictures:


I couldn't resist taking the following shot just to show how tiny the little chick friends are!


Stay tuned for the sugar-free Tiramisu that these sugar-free marshmallows are supposed to go with! 


with lots of love,

Phay Shing

Read More »

Sunday, 14 July 2024

Pompompurin Lemon Bars

 This impromptu bake happened because I had extra egg yolks and lemons lying around!


I had exactly 4 extra yolks and 4 lemons to use up so it's about half the reference recipe I used from Serious Eats.
The only thing was I didn't want to end up having half an egg leftover from a bake that is trying to use up leftovers so I tweaked the ratios slightly to fit a pan size that happens to be slightly bigger than half the pan size in the reference recipe. So everything worked out well!

Although I made lemon bars before in the past over here for a sugar-free version, I prefer this recipe for two reasons. 1. The cookie crust remains crispy even after a few days due to icing sugar used instead of castor sugar. 2. There's no flour in the lemon layer so it's more like lemon custard.

Lemon Bars
Makes about 8 squares in 4x9" tray

Cookie base:
70g plain flour 
35g icing sugar
1/8 tsp salt
1 lemon zest
65g cold butter

🔸Blitz everything in blender until it resembles fine breadcrumbs
🔸Press into loaf pan lined with parchment paper overhanging off the edges for ease of lifting off the pan
🔸Bake at 180C for 22-25 min or until lightly browned

Lemon filling:
190g sugar
2 eggs
4 egg yolks
3 lemon zest
Pinch of salt
160g lemon juice (about 3.5-4 lemons)

🔸Whisk everything except lemon juice in a saucepan. Add lemon juice & whisk
🔸Whisk on low heat for 3 min till warm. Increase to med-low heat. Whisk until 77C & thickened
🔸Pour through a sieve onto baked cookie base
🔸Bake at 180C with foil covering tray. I used top heat only for 20min or until firm to avoid burning the cookie base
🔸Cool uncovered. Refrigerate covered for at least 1-2 hours before cutting into squares.
🔸Decorate with melted chocolate. I used my Pompompurin macaron template so I didn't have to pipe by freehand 🤭

Piping chocolate

I set the piped chocolate in the freezer for a few minutes before carefully using tweezers to place them on the bars.


The bars can be stored in the fridge for a few days.


with love,

Phay Shing

Read More »

Monday, 10 June 2024

Pochacco chiffon cake (blow bubble experiment)


Mixing up some Fun with a Cake that Blows Bubbles! 🫧🍰🥰 with homemade edible bubble solution. Reel video here

With love,

Susanne 

Read More »

Thursday, 16 May 2024

Chocolate Cheesecake Tarts (Classic Chocolate and Sanrio)


Which is your favorite cheesecake tart? Recipe for these no-bake chocolate cheesecake tarts below =) 

I experimented with a no-bake cookie dough as tart crust so that it is easier to shape, and will be teaching the chocolate version at my church APRC’s culinary arts ministry this Sunday. You can watch a reel video here for some steps. 

Dark Chocolate Cheesecake Tarts (by Susanne Ng
Makes 4 

Tart crust 
60g oat flour 
160g oreo cookie crumbs 
80g unsalted butter, melted 
30g honey 

Combine all in a medium mixing bowl. Mix with spatula and divide into 4 (around 70g mixture per tart). Spread and line base and sides of tart case with tart crust mixture. You can also roll out the dough to line the tart case. 

Chocolate cheesecake filling 
160g cream cheese, room temperature 
80g castor sugar 
110g dark chocolate callets (58%), melted 
10g cocoa powder, sifted 
110g heavy cream, chilled  

1. Melt chocolate in microwave (30+20 secs) or double boiler and allow to cool. 
2. Soften cream cheese with spatula, then beat cream cheese with sugar using spatula till smooth. 
3. Whip heavy cream to firm peaks using an electric mixer. 
4. Whisk/fold in half cream to melted chocolate, then whisk all in. 
5. Fold in cocoa powder, then quickly whisk to incorporate evenly.  
6. Whisk in cream cheese mixture till even. 
7. Fill 90-95g per tart (divide into four). Chill at least 15min to set cheesecake. 
        *Best to unmold after 2 hours. 
8. Decorate with gold flakes, or as desired. 

Recipe for the classic cheesecake version is found here (in caption)

With lots of love, 
Susanne


Read More »

Tuesday, 2 April 2024

Pompompurin Brown Sugar Cookies

 Besides Pompompurin macarons, I made brown sugar cookies as requested by my friend!


Here's a picture with both macarons and brown sugar cookies in view!


My friend loves my brown sugar cookies and looks forward to having them each year. This is the 10th year I am making them for her daughter's birthday!

You may refer to this post for my brown sugar cookie and royal icing recipe. There's a good reason why she asks for it every year. It's so fragrant and tasty without being overly sweet. Do give it a try if you would like an iced cookie base that actually tastes better with age/storage 😊. 


with love,

Phay Shing

Read More »

Friday, 22 March 2024

Kuromi Honey Lemon Marshmallows

 My friend requested for some Kuromi marshmallows for her daughter's birthday but she wanted something that tastes less sweet. I made the marshmallows in honey lemon vanilla flavour to fulfill the request!


Here are some works-in-progress photos before I dusted the piped marshmallows!


Watch the video tutorial of making these from the reel! Do read the captions for explanation for the technique:

https://www.instagram.com/reel/C4iAt88S3kG/?igsh=MXQ5bnh5MDEza3ZsMA==

Basic recipe and how to adapt it to various flavours and consistencies for piping can be found in my Deco Marshmallows book.


with love,

Phay Shing

Read More »

Saturday, 13 January 2024

Pompompurin Raspberry Macarons

 This is the 10th year my friend has been requesting macarons from me and this year, it's Pompompurin! 


Her favourite filling is raspberry Swiss meringue buttercream with raspberry jam, both of which are much lower in sugar than most recipes so they pair very well with sweet macaron shells. Swiss meringue buttercream is also lighter in texture than ganache so the whole confection is refreshing, fruity tasty and light. No wonder it's her favourite!

I have shared the piping tutorial as well as detailed recipe of the low sugar jam and buttercream in my Instagram reel so you may refer to it here:

https://www.instagram.com/reel/C19N6BjSOqs/?igsh=MXBtb3FlcjR1ZXc4cw==

As usual, I used my default Swiss meringue method recipe to make the macaron shells.

Here's a look at the baked shells before decorating:


Besides macarons, I also made brown sugar cookie versions of these. It is also the 10th year she is having brown sugar cookies from me because to her, it's the best cookies ❤️. Stay tuned for those in a later post!


with love,

Phay Shing

Read More »

Monday, 28 August 2023

Tuxedo Sam Roll Cakes


Tuxedo Sam roll cakes, adorned with a surprise bow inside! It's made for Sanrio's Friend of the Month

Watch the video tutorial here

With lots of love, 
Susanne


Read More »

Tuesday, 20 June 2023

My Melody and Kuromi Macaron Carousel

 My friend requested for a My Melody and Kuromi macaron carousel and this was what I made!


I used my default Swiss meringue method recipe for the macaron shells.


Here's a video tutorial on how I create My Melody's lop-eared fold. A secret I have kept for many years! Some people asked how I did it way back in 2017 but I wasn't ready to reveal it yet.

The details are added on using royal icing and edible marker. I made royal icing transfers for My Melody's flower

I like to experiment and change designs along the way so this time round, I did something a little different for the carousel frame.


These are some of the standard pieces.

I included some small flowers piped using #2D tip from underfolded batter.

Blueberry ganache is the logical choice for filling to match the purple frame so that's what I used as the filling. The natural purple from fresh blueberries is lovely! I used a stiffer and darker coloured ganache for the middle of the carousel frame, hidden from sight by adding some freeze-dried blueberry powder to impart a stronger blueberry flavour without adding moisture. 

Blueberry yuzu ganache
Blueberry compote:
150g blueberries
15g yuzu juice concentrate (or lemon juice)
15g sugar

Light colored ganache:
150g white chocolate (finely chopped from bar or use couverture chips)
75g compote
15g unsalted butter, slightly softened at room temperature

Dark colored stiffer ganache:
150g white chocolate
45g compote
5g yuzu juice concentrate (or lemon juice)
20g freeze dried blueberry powder
10g unsalted butter, room temperature

You may not use all the ganache for the carousel but they cam be kept frozen for longer storage.

Steps:
1. Prepare blueberry compote. Cook over medium-low heat until reduced to about 140g in total. Press through sieve to remove the skins.

2. Melt white chocolate over double-boiler or using microwave at medium-low power in 10 second bursts, stirring between each heating cycle.

3. Mix warm compote with freeze-dried blueberry powder and yuzu for the stiffer ganache. Heat it up again slightly if it has cooled down after mixing.

4. Pour warm compote/compote mixture over melted chocolate. Stir in one direction until well mixed. Use an immersion blender if you wish.

5. Add softened butter and mix well. Press cling wrap onto surface and refrigerate for at least half an hour or until ready to assemble.

I added some chopped toasted hazelnuts coated in dark chocolate in the middle of the larger macarons like the base and the roof. I used a 1:1 ratio for nuts: dark chocolate by weight.

In order to support a softer filling than I normally use for load-bearing macaron structures, I piped a ring of medium-stiff royal icing for the central pillar pieces of the carousel frame.

I also reinforced the straw with royal icing so that the characters don't have the risk of sliding down the straw.

As usual, I let the weight bearing pieces rest overnight after partial assembly before adding on more load. This is to allow the royal icing time to harden fully.

I think the carousel frame looks lovely on its own 😍

Here's a reel of the assembly process:

https://www.instagram.com/reel/CttiocAAq95/?igshid=MzRlODBiNWFlZA==


with love,

Phay Shing 

Read More »

Monday, 27 March 2023

Sanrio Hanami Dango Vegan Macarons

I am finally done with the first draft of Deco Marshmallows! While waiting for the editor to get back to me with it, I have decided to work one something I have been procrastinating for years---vegan macarons! 

As Sakura season is here, I am inspired by the Hanami dango, which is a traditional Japanese confectionery that announces the arrival of spring. Of course I couldn't resist the chance to make it kawaii with Hello Kitty, My Melody and Keroppi! 

Matcha, strawberry and vanilla white chocolate ganache as filling to match the traditional colours 

Besides vegan macarons with vegan fillings, I took the chance to try out vegan royal icing for some of the fine details.

All credit goes to Meiyee (Instagram account: nm_meiyee) for sharing her vegan recipes. Her work is beautiful, naturally coloured and flavoured! I adapted from her recipes that are shared so I didn't follow exactly what she did but do check out her account for the recipes and to marvel at her work! 

I used bakeable matcha powder with no additional artificial green colouring for the matcha shells and ganache. I added freeze-dried strawberry powder and a tiny bit of bottled strawberry emulsion for strawberry. I used matcha Pocky sticks for the "skewer" (I know it's not vegan but I prefer having everything edible but I didn't want to make the biscuit sticks from scratch too 🙈)

Here are some photos of the process:

Freshly baked shells. I was working on a separate set for future vegan macaron class material at the same time.

I actually rushed through the decoration and didn't manage to finish as I had to go out of the house. This is the works-in-progress decoration with vegan royal icing. Could have been better if I didn't rush

Strawberry, matcha and vanilla vegan white chocolate ganache before whipping it up to lighten the texture.

Filling up the macarons and inserting a matcha Pocky stick


Experienced macaron bakers will be able to tell that I had issues with one of the colours of batter and they would be right! I knew what went wrong and but am confident I can rectify it for the class. After all, this is my first attempt and it was rather ambitious of me to try three colours/flavours of macaron shells in a single batch. The flavour that I left to the last to work on had issues because the meringue needed to be whipped stiffer again and I should have trusted my instincts to do so. Can you tell which one it is? 

I am excited to be able to include vegan macarons as part of my class content after this experiment. Stay tuned for class announcements July onwards for vegan macarons! But note that I won't be teaching the Sanrio characters. 


Check out my Instagram reel for some video snippets of the aquafaba meringue and macaron batter!


with love,
Phay Shing


Read More »

Monday, 6 March 2023

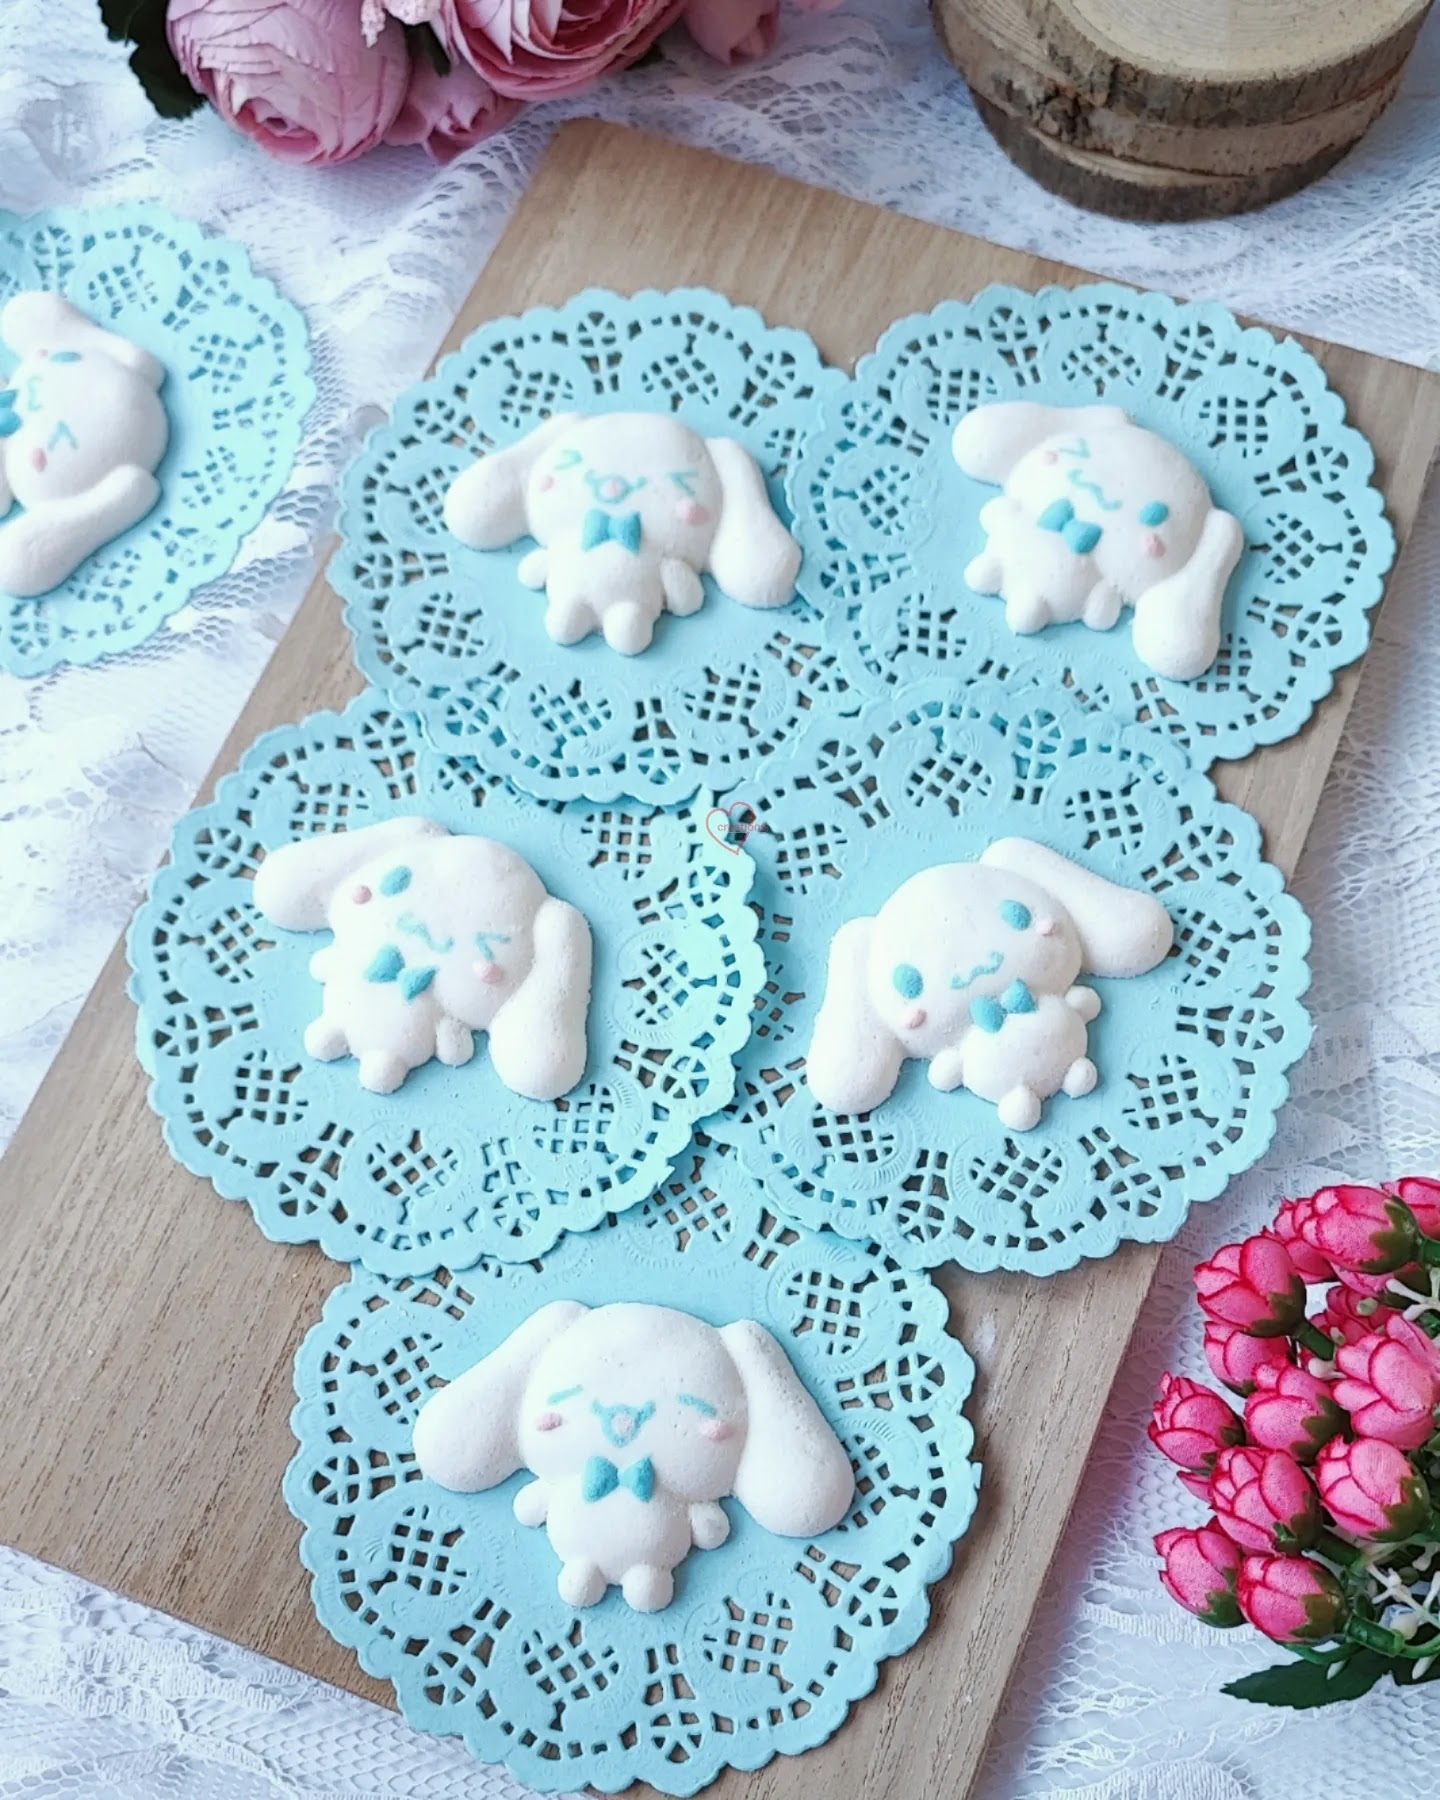
Sugar-Free Cinnamoroll Marshmallows

 This was my first attempt at sugar- free character marshmallows in December last year. I decided to give Cinnamoroll a try since my friend requested for some Cinnamoroll cookies and macarons at the same time. 


Ever since this first attempt, I have refined the recipe until I can safely say I am satisfied with the ingredient ratios for sugar-free character marshmallow making! Working with sugar replacements isn't as straightforward as they don't behave like sugar does when working with sugar syrups. So glad to find the formula to work with where hubby my taste tester can tell me "This is more like proper marshmallow!" 

I will share this formula in my upcoming Deco Marshmallows book but for now, you can take a sneak peek at how I piped these using the templating method in the video over here:

https://www.instagram.com/p/CoVyFGKSY2s/?igshid=NTdlMDg3MTY=

The templating method is much easier for those of us who are artistically challenged and uses so much less cornstarch! Here is a peek at the piped marshmallows before dusting!


with love,

Phay Shing

Read More »

Saturday, 25 February 2023

Cinnamoroll Brown Sugar Cookies

 My friend who has been buying bakes from me for her daughter's birthday every year since 2015, requested for Cinnamoroll brown sugar cookies. She loves the taste of my cookies because they are really fragrant with caramel notes. 


I used my default brown sugar cookie recipe and royal icing. I made a template for cutting out the shape of the cookie dough.

Cookie dough cutouts on perforated mat lined baking tray before baking

As the details on this design are rather complex, I made royal icing transfers for the flowers and cupcake on Cinnamoroll.


I couldn't resist taking photos of the two bakes she requested: macarons and brown sugar cookies! See my previous post for the recipe for the macarons.


Stay tuned for a third Cinnamoroll creation that I made for her!


with love,

Phay Shing

Read More »

Wednesday, 15 February 2023

Cinnamoroll Mixed Berries n Cream Macarons

 My friend requested for some Cinnamoroll macarons and brown sugar cookies (sharing in another post) for her daughter's birthday. I filled the macarons with strawberry Swiss meringue buttercream and strawberry-raspberry compote.


This friend started off as a customer who bought macarons and brown sugar cookies from me during my early years of baking and she has been ordering from me every year for her daughter's birthday ever since! This is the 9th year I am baking for her! 

I used my default swiss meringue method recipe for the macarons. 

Piped batter

I added in the details using royal icing to decorate.

Mixed berry compote
Ingredients:
300g frozen or fresh strawberries/raspberries (sieve raspberries to remove pips if you prefer smoother compote)
30g sugar (or to taste)
Pinch of salt
1 tsp lemon juice

Steps:
Cook everything together in saucepan until reduced to 60% original weight on over low heat. 

Mixed berry Swiss meringue buttercream
Ingredients:
75g egg whites
50g caster sugar
Pinch of salt
135g unsalted butter, cubed and slightly softened
50g mixed berry compote

Steps:
1. In a clean, grease-free mixing bowl, double-boil egg whites, caster sugar and salt while whisking constantly until the egg whites reach 71.1C. Remove from heat.

2. Beat the egg whites at medium-high speed until cooled to room temperature and stiff peaks.

3. Add softened butter one cube at a time, waiting for each addition to be incorporated before adding the next. Continue beating for another 2min.

4. Add compote a little at a time, mixing well with each addition. You may add a little strawberry paste if you wish to enhance the strawberry flavour further.

Fill the macarons by applying a thin layer of buttercream on the bottom shell before piping a ring of buttercream. Fill the middle with compote. Pipe a little buttercream over the compote before sandwiching with top shell.


with love,

Phay Shing

Read More »

Thursday, 16 June 2022

My Melody and Keroppi Roll Cakes


Cute Sanrio Animal Roll Cakes! Which one is your favorite? Keroppi or My Melody? 

Watch the video here on the BTS (behind-the-scenes) of making of the rolls! 

I created this recipe using Suncorefoods natural food powders! 

Recipe
4 egg yolks
20g sugar
40g oil
40g milk
1 tsp vanilla extract
60g cake flour
@suncorefoods red radish, yellow safflower, blue spirulina for the colors

4 egg whites 
50g sugar 
1/4 tsp cream of tartar 

Filling 
200g whipping cream 
Surprise: star chocolate 

Whisk egg yolks with sugar, followed by oil, milk and vanilla. Whisk in flour and divide the batter into 2(red) : 2(light green): 1(plain): 1(dark green). Add food coloring and mix well. 

Whisk egg whites till firm peaks. Divide the meringue as above and fold in. Pipe keroppi the frog and my melody rabbit designs in 8” pans and bake at 150C for 20mins. 

Whip cream till medium peaks. Spread over the cakes, arrange the surprises and roll up. Decorate with chocolate. Enjoy! =) 

With love,

Susanne 


Read More »

Sunday, 22 May 2022

My Melody Watermelon Chiffon Cake


My favourite fruit is watermelon! What's yours? 

Another watermelon-inspired bake, here's my My Melody masquerading as a watermelon! 

Wishing you a blessed week! 

Love, 
Susanne 

Read More »

Wednesday, 23 December 2020

Twinkling Chiffon Cake Gingerbread House


Celebrating Christmas with our lovely Sanrio characters! 
I always dreamed of making a chiffon cake gingerbread house with twinkling lights!

See the twinkling lights video here.

The photos can't capture the lights inside the house well, so do check out the video. The entire gingerbread house and Sanrio characters are all made from chiffon cake! 

I had wanted to make a chiffon cake house with twinkling lights for long time, so I am really excited about it! Very thankful for the opportunity to try this out in collaboration with Sanrio.

We are also having a Sanrio bake-along for Sanrio characters x Susanne deco chiffon currently. For more details check out my post here
 
Have a blessed Christmas with your loved ones!

With lots of love,
Susanne


Read More »

Sunday, 1 November 2020

My Melody and Little Twin Stars Anniversary Chiffon


My Melody and Little Twin Stars Anniversary Chiffon Online Class is here!💖💖

Celebrating My Melody and Little Twin Stars 45th anniversary this year together, with this special mix characters chiffon class with a delicious cream cheese filling and hearts surprise within the same bake!

Sign up for the class here!🙂💕

These are official licensed Sanrio baking classes in collaboration with Sanrio =).

**A special FREE gift! In addition to the main My Melody and Little Twin Stars Anniversary Chiffon template, a free repeated characters template is included as a bonus!!

Baking kits with cream cheese filling, patterning batter, all food colouring and equipment for this cake are also available (for delivery within SG)!

With lots of love,
Susanne
Read More »

Friday, 25 September 2020

Hello Kitty Donut Tower Chiffon


Knock knock!! It’s HERE! One of our all-time favorite Sanrio characters is here!

Introducing the Hello Kitty Donut Tower Chiffon Online Baking Class and Kit! 💖💖

Very thankful for the opportunity to collaborate with Sanrio on official licensed Sanrio baking classes.

In the online class, you will learn how to make a special two-tier pinata wavy pattern chiffon cake with a 3D Hello Kitty chiffon and a super delightful surprise! In addition, a new flavour refreshing lemon chiffon is shared!🍋 Official Sanrio Hello Kitty templates and downloadable recipe are provided.
 
Sign up in link is here
 
The online class is available to everyone, and launching at special promo price now.

Baking kits with pans are also available for delivery to your doorstep (within Singapore region only). 


Hope the cute cake makes you smile!

With lots of love,
Susanne

Media features and more details of baking class:
Read More »