Friday, 26 May 2023

Diabetic-Friendly Pumpkin Spice Latte Cake with Marshmallow Flowers

 I decided to make a simple cake that is assembled in a container for mum's birthday because this bake happened towards the tail end of my preparation for Deco Marshmallows' photoshoot.


The cake is a coffee chiffon sponge with thin layers of maple dark chocolate ganache and chopped toasted hazelnut, pumpkin spice diplomat cream and coffee jelly. I tried to make the components as diabetic-friendly as possible but had to use some maple syrup and Maltitol as Allulose alone doesn't taste as good. Maltitol is a sugar replacement often used as a sweetener for sugar-free chocolate but still contributes to glycemic index. Maple syrup is a tasty refined sugar-free syrup substitute that has a low GI. Why this choice of flavour combination? Because I have leftover pumpkin puree from making an entry in my marshmallow book 😆. 

The florals are made of agar-based marshmallows. I used apple or pumpkin puree for them. The yellow roses are naturally coloured from pumpkin and are made sugar-free. The other florals and leaves were extras I kept from making for the book.

I will share the detailed recipe for the four components of the cake. Feel free to vary the ratio of components during assembly according to taste. You may assemble in smaller cups too for individual sized treats! Freeze the whole thing and it's an ice-cream cake! Diplomat cream frozen is like ice-cream 😋

Sugar-free coffee chiffon sponge 
(10 x12" sheet cake)
Egg yolk batter
3 egg yolks
10g maple syrup (replace with zero calorie sugar replacements for totally sugar-free sponge)
30g vegetable oil
20g fresh milk, warmed (increase to 30g if using dry sugar replacements)
6g instant coffee
1tsp vanilla extract
Pinch of salt
45g cake flour

Meringue
3 egg whites
20g Inulin or Alchemy fibre
50g Allulose
1/4 tsp cream of tartar

Steps:
1. Line 10 x 12 tray with Teflon sheet or parchment paper. Preheat oven to 170C (top and bottom heat only). Dissolve instant coffee in warm milk. Add vanilla and salt to the mixture and set aside.

2. Make egg yolk batter. Whisk egg yolks with maple syrup until thick and pale. Add oil and whisk until well combined. Add coffee milk and whish until well combined. Gradually sift in flour and whisk until no trace of flour is seen.

3. Make the meringue. In a small bowl, whisk together Allulose and Inulin. Set aside. In a clean metal bowl, beat egg whites with cream of tartar until foamy. Gradually add sugar and beat until firm peaks. Use medium speed to beat to build up the meringue slowly for a more stable meringue and finer air bubbles. Make sure you are able to consistently get firm peaks before you stop beating to ensure meringue is sufficiently firm.


4. Gently but quickly fold meringue into egg yolk batter in three additions until no trace of meringue is seen. Pour into prepared tray.

5. Bake for 12-13 minutes or until skewer comes out clean. Immediately flip onto fresh parchment paper and cool completely covered with another parchment. 


Sugar-free pumpkin spice diplomat cream
1 egg yolk
20g Allulose (or sugar of choice, quantity according to taste)
Pinch of salt
9g cornstarch
100g milk
150g pumpkin puree, sieved*
1/2 tsp vanilla extract
3/4 tsp Pumpkin spice**
100g whipping cream of choice***

* Bake pumpkin until softened and press through a fine sieve to get the puree. If your puree is very wet, you may reduce it over low heat if you wish. I didn't want to be too heavy handed with the spice component so adjust quantity according to taste.

** I didn't have pumpkin spice mix so I used what I have at home, which was 1/2 tsp cinnamon, 1/8 tsp ginger and 1/8 tsp Allspice

*** You may use dairy or non dairy, add sugar or omit it according to taste and type of cream. Pumpkin is naturally sweet. I used a pre-sweetened non-dairy whipping cream. You may use Everwhip for a sugar-free dairy-free whipping cream that is pre-sweetened with sugar replacements.

Steps:
1. Heat pumpkin puree, milk, pumpkin spice and vanilla in saucepan until steaming hot (not boiling).

2. In the meantime, whisk together egg yolk, Allulose, salt and cornstarch until smooth in a heatproof heavy bowl or glass jug. 

3. Pour hot pumpkin milk in a thin stream into the egg yolk mixture while whisking the egg yolk mixture continuously. Pour everything back into saucepan. Cook over medium-low heat while whisking continuously. Once mixture starts to thicken and bubble, whisk for another 1 minute before removing from heat.

4. Transfer into a bowl and press cling wrap on the surface. Refrigerate for at least 2 hours or overnight.

5. When ready to assemble the cake, whip whipping cream of choice to firm peaks. Briefly whisk pumpkin spice pastry cream to loosen it. Fold whipped cream into pastry cream in a few batches. Transfer into piping bag with a hole cut.


Sugar-free coffee jelly
(set in lined 7x7" tray)
16g gelatin sheets
120g ice water
4g instant coffee
120g hot water
20g Maltitol (or sugar of choice, according to taste)

Steps:
1. Soak gelatin sheets in ice water in a microwave-safe bowl. Set aside.

2. Dissolve Maltitol and instant coffee in hot water. 

3. Microwave bloomed gelatin to melt it using medium power for 10 seconds. Stir and repeat heating if necessary. 

4. Add coffee to melted gelatin and stir until well mixed. Pour into prepared tray. Refrigerate until firmly set. Cut into squares or small pieces, place on a lined tray and refrigerate.

Maple dark chocolate ganache with toasted hazelnuts
90-100g chopped toasted hazelnuts
50g no sugar added chocolate (I used the ones from Pascha)
60g heavy cream
30-40g Maltitol
25g maple syrup
Pinch of salt
20g unsalted butter, softened

Note: If you are using pre-sweetened chocolate, omit the Maltitol. Use dark chocolate if possible so it doesn't end up too sweet. You may use more chocolate as well if not using unsweetened chocolate due to the difference in fat content.

1. Place chocolate, finely chopped or use chips in a heatproof bowl.

2. Heat cream, maple syrup, Maltitol and salt in a saucepan. Stir until sugar and salt dissolves and mixture just starts to bubble a little at the edges. 

3. Pour hot cream mixture over chocolate and let it sit for a minute. Stir in one direction gently until chocolate is melted and smooth.

4. Add softened butter and mix well. Add hazelnuts and mix well.


Assembly
1. Line base container with sponge (cut to size of container). Brush with diluted maple syrup (hot water : maple syrup, 1:1)

2. Cover with thin layer of diplomat cream before coating with a thin layer of chocolate hazelnut. Coat with another thin layer of diplomat cream.

3. Line the sides of the container with coffee jelly. 

4. Fill up the middle of the cake with more cream and coffee jelly. 


Refrigerate for 5 minutes. 

5. Spread a thin layer of chocolate hazelnut.  Top of with some diplomat cream. 

6. Brush another layer of cut sponge with diluted maple syrup and place the sponge syrup down on the cake. Brush the top of the sponge with more maple syrup if you wish. Decorate the top circumference with some coffee bean shaped  chocolates.


Here's a peek at a cut slice! Pardon the messy cut!

My family enjoyed the cake even though it was after a buffet meal and it was a flavour that is not commonly found here❤️.


with lots of love,
Phay Shing
Read More »

Friday, 12 May 2023

Ferrero Rocher Filled Hydrangea Marshmallow Bouquet

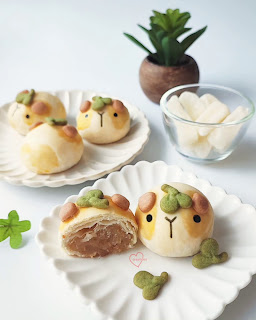
As the dates for photoshoot draws closer, I am getting really busy with marshmallow making madness so there isn't time for new content for blogging. But I simply have to share these florals that I made for the photoshoot of Deco Marshmallows!


The blue and purple hydrangeas were made using raspberry and green apple puree. The yellow one was made from pumpkin puree but using passionfruit or mango puree along with apple puree will yield similar colour. The yellow one is sugar-free too! Ferrero Rocher makes for a very good filling!

Here's another floral arrangement that I made and hastily took a photo of. I forgot to line the plate with a doily or paper before arranging the flowers on 🙈.


The roses and tulips were made using green apple puree.

All the leaves are coloured with matcha powder.

Marshmallow florals are best made using agar-based recipes. Such marshmallows are known as zephyrs/zefirs, originate from Eastern Europe and can be piped like buttercream flowers. Agar based marshmallow batter is much stiffer than gelatin based batter so it holds up any ridges very well, giving whatever you pipe a sharp definition. My upcoming book will cover such marshmallows too! You can look forward to more agar-based entries, not just florals 😉.


Blessed Mother's Day to all moms out there!


with love,

Phay Shing
Read More »

Tuesday, 9 May 2023

Heart-shaped Roll Cake


Heart-shaped ❤️ Roll Cake Tutorial! 

I was inspired to shape a swissroll into a heart shape for mother's day. Hope you enjoy it too!🥰 

Recipe (10" cake) 
3 egg yolks 
15g castor sugar 
30g oil 
30g milk 
1 tsp vanilla extract 
45g cake flour, sifted 

Whisk all ingredients above till smooth. Add pink food coloring. 

3 egg whites 
40g castor sugar 
1/4 tsp cream of tartar 

Whip egg whites till firm peaks. Gently fold in egg yolk batter above. Bake at 170C for 22 min. Slice the cake into two. 
Fill the cake with fresh whipped cream and heart-shaped strawberries. Shaping technique in my IG video 💕 

With love, 

Susanne 


Read More »

Wednesday, 3 May 2023

Grogu Matcha Marshmallow

This was an unplanned creation as I am really swamped with making each entry in Deco Marshmallows. I was making a matcha marshmallow character for the book when I realised that May the 4th is around the corner and I can take a little time out to create Grogu, baby Yoda!

Pardon the off-colour as my phone camera doesn't pick up the true colours sometimes 


This is the correct color


A works-in-progress shot!


As I wanted to keep things as simple as possible, I used a store bought product for Grogu's body. I bought Twiggies, a cream filled sponge by Gardenia.

Watch the reel on how I made this! Recipe for matcha marshmallows will be in Deco Marshmallows.


with love,
Phay Shing


Read More »

Tuesday, 2 May 2023

Rainbow Comic Chiffon Cake


Double Rainbow Cartoon Chiffon Cake, with recipe🥰. 'Too-n' cute to eat?  

Ingredients (7" angel cake pan)🌈 
1 whole egg 
27 g castor sugar 
52 g oil 
52g milk 
7g vanilla extract 
80g cake flour, sifted 

Whisk all ingredients above till smooth. Divide the batter into 6 and add respective food coloring. 

5 egg whites 
1/4 tsp cream of tartar 
65 g castor sugar 

Whip egg whites till firm peaks. Divide the meringue into 6 and fold into each color. Pipe on the rainbow stripes. Bake at 140C for 55 min for the big cake and 25 min for the small cake. Outline with chocolate ganache.💕 

Recipe video here on my IG.  

With love, 

Susanne


Read More »

Wednesday, 26 April 2023

Lychee Cake with Marzipan Covered Walnut Brown Sugar Cookie Deco

This is a way overdue post! I didn't get around to posting it because it has so many components to this bake! I made this cake for my friend's son who was turning 21... a year ago 🙈. She wanted a theme that showcased his love for Chelsea and his stage in life as a young man about to enter business school. I made a lychee raspberry rose cake with marzipan and cookie cake topper.


It's my first time making anything remotely fondant-like as the centerpiece. Those of you who know me long enough know that I don't touch fondant because it does not taste good. Marzipan on the other hand, is still somewhat edible although sweet as well. Almond is nutritious after all 😆. 

I used Cooking Tree's recipe for marzipan, which contains more almond than sugar and doesn't use raw egg whites. The books, laptop, scarf, outer layer of soccer ball, the limbs and outer layer of the figurine were all made of marzipan. The Graham cookie base was covered with a thin layer of marzipan too.

Marzipan 
240g almond flour
200g icing sugar
50g light corn syrup (or honey but honey imparts colour)
30g water

Steps: 
1. Sift together almond flour and icing sugar.

2. Add light corn syrup and water and knead until a dough forms. Dust with extra icing sugar if it gets too sticky.

3. Add gel colouring and form into shapes desired. Keep any unused portions cling wrapped to prevent drying out. Like fondant, marzipan can be left out to dry to harden.


As I didn't want the decorative parts to contain too much sugar, I used edible cookie dough for the head, body and center of soccer ball.

Edible cookie dough with toasted walnut 
(Adapted from chefsweets.com/veganedible-cookie-dough)
38g butter (I use Golden churn)
44g light brown sugar
Pinches of salt
1/2 tsp vanilla extract
40g heat treated plain flour (microwave to reach 71.1C)
20g chopped toasted walnut

1. Briefly cream together butter, brown and salt.

2. Add vanilla extract and mix well. 

3. Add sifted heat treated plain flour and mix until a dough ball forms. Add chopped toasted walnuts (optional) and mix well. Store in airtight condition at cool room temperature until ready to use, preferably within a few days.

Here's the weight of marzipan and edible cookie dough I used for the various parts. I am recording this more for myself but it's great if you find it helpful too!

Soccer ball
The core is 8g cookie dough, followed by a layer of 8g marzipan wrapping around it. The outer surface is made up of 20 small white balls and 12 small black balls. The small balls are 1-1.5g each. The white ball in middle made up of the core and marzipan wrapping it should be about 8x bigger than smaller balls.

Marzipan soccer ball that tastes way better than any fondant 😆

Figurine
Legs 56g
Shoes 7g each
Body 52g  (marzipan + cookie)
Hands 10g each
Head 50g (marzipan + cookie)

The head and body are marzipan wrapped edible cookie dough.

I mounted the scene on a large Graham cracker base. But instead of whole wheat flour, I used plain flour for a softer texture. This firm but yummy base is necessary for anchoring the marzipan figurine to the base so it doesn't fall apart accidentally during transport. I ran a skewer from the head through the body into the cookie base. 

Graham cracker
142g whole wheat flour or plain flour
85g light brown sugar
½ tsp cinnamon powder
½ tsp baking soda
3/8 tsp salt
50g unsalted butter (slightly softened but still firm)
23g milk
42g honey
1tsp vanilla extract
Chopped toasted walnuts (optional)

1.  Line 7" round baking tin with parchment at the base and sides. Preheat oven to 150-160C.

2. Whisk together flour, sugar, salt, cinnamon and baking soda in a mixing bowl.

3. Add butter in and use fingertips to rub in until fine breadcrumbs form. Alternatively, you may use a blender, a pastry cutter, or a pair of butter knives to do this.

4. In a measuring jug, mix together honey, milk and vanilla. Pour into dry ingredient mixture and form a dough. The dough will be sticky.

5. Press dough into baking tin, making sure the top is flat. Press in some toasted chopped walnuts if you wish. Bake for 30 min. Cool completely.


Freshly baked large cookie base


I used desiccated coconut that is coloured green with vodka and vanilla extract added as the "grass". The desiccated coconut was glued onto the marzipan covered base using a little water.

Ta-dah! My first hand molded figurine cake topper!

The cake on which the cake topper sits is made of three layers of lychee rose chiffon cake filled with chopped canned lychees, lychee jelly, lychee rose diplomat cream and raspberry lychee reduction. The whole cake was then coated with lychee rose Italian meringue buttercream (IMBC).

Lychee rose chiffon cake
(makes three 9.5" cakes)
9 yolks
112g oil
113g canned lychee puree, strained
1.5-2 tsp rose syrup
1.5 tsp vanilla extract
1/8 tsp salt
190g cake flour

meringue*
9 whites
135g caster sugar
1/2 tsp cream of tartar

* Split the meringue ingredients into separate batches if you don't have multiple ovens. Bake in preheated oven at 150C for 30 min. Cool in oven for 5min with door ajar. Cool in open for 5 min before removing from pan. Line base of pan with parchment.

I didn't want to make this long post even longer than necessary so you may refer to this post on method of making the chiffon cake batter.

Lychee Rose IMBC 
( Reference recipe from Catherine Zhang over here)
300g canned lychee syrup
15g caster sugar (added to syrup that is not too sweet)
2 egg whites (76g) + 5g caster sugar
1/2-1 tsp rose syrup
300g unsalted butter, softened but cool
20g icing sugar (optional)

1. Place egg whites and 5g sugar in standmixer and mix of low speed. The little bit of sugar is to help stabilize the meringue.

2. In the meantime, heat 300g canned lychee syrup with 15g caster sugar. I added a little sugar as the syrup wasn't too sweet to begin with so I wasn't sure there was enough sugar in the lychee syrup.  Heat syrup until 115C without stirring.

3. When syrup reaches about 110C, turn mixer speed up to medium and whip until soft peaks. Turn mixer speed down if syrup is not yet 115C. 

4. When syrup is ready, turn mixer speed up to medium high and slowly pour syrup down the sides of the mixing bowl. Continue beating until totally cooled to room temperature.

5. At medium speed, add butter 1 tbs at a time. Continue beating 10minutes more until light and silky.

6. Add rose syrup and beat until well combined.

7. If your IMBC is rather soft due to low sugar content of lychee syrup, you may add a little icing sugar and beat for a couple of minutes at this point.

Refrigerate up to a week or a month in freezer

Filling in cake
10 chopped canned lychees
Lychee jelly
Lychee rose diplomat cream
Raspberry lychee reduction

Lychee jelly
Bloom 6 sheets of gelatin (12g) in 50g cold lychee syrup. Melt in microwave. Stir in 100g lychee syrup. Set in fridge until firm before cutting into small pieces.

Raspberry reduction
110g raspberry puree (strained to remove seeds)
15g lychee syrup

Cook over low heat and reduced to 70g.

Lychee Rose diplomat cream
2 yolks
20g cornflour
50g milk
150g lychee puree, strained
6g rose syrup
Pinches of salt
15g unsalted butter
100g whipping cream*
(I use non-dairy whipping cream which is pre sweetened and stabilized. If using dairy cream, stabilize with gelatin and add sugar)

Please refer to this post for the method for diplomat cream.

Here's a peek at assembling the layers. I spread some raspberry reduction before layering on diplomat cream and topping with lychee jelly and chopped lychees.


I coloured half the IMBC blue so that I could frost the cake in Chelsea colours.

Thank God it was very well received!


with love,
Phay Shing
Read More »

Monday, 24 April 2023

Burger and Fries Chiffon Cake Class


Here's my next hands-on class in May, a cute Burger and Fries Chiffon Cake Class! Hope they made you smile! 

Best wishes, 

Susanne 


Read More »

Wednesday, 12 April 2023

Shiba Inu, Rilakkuma & Korilakkuma Vegan Mitarashi Dango Macarons

 This was the last project I embarked on before focusing on making marshmallows to take step-by-step photos for Deco Marshmallows. Shiba Inu, Rilakkuma and Korilakkuma Mitarashi dango macarons! 

The macaron shells, decoration and filling are all vegan except for the caramel coated Pocky stick.

This is my third attempt at vegan macarons but first attempt at Swiss method for vegan macs. I think I prefer this to the French method which I used earlier for my Hanami dango macarons. I decorated the macaron shells with vegan royal icing. The brown shells are coloured with Hojicha powder.

Inspired by Mitarashi Dango, which is a traditional Japanese rice dumpling smothered in an irresistibly sweet soy sauce glaze. The dumplings are skewered on a bamboo stick and enjoyed all year round. I filled mine with toasted white sesame ganache and soy sauce caramel, both are vegan. But the "wooden skewer" is a caramel Pocky biscuit stick which is not vegan. I can't bring myself to make that from scratch as well after all the work 🙈.

I am unable to share the recipe and method as I intend to use it for future class material. But you may have a look at my Instagram reel to see the process of making these! 


Just to share some pictures...

Freshly baked macaron shells! Although the brown is coloured with Hojicha powder, you can't taste it much as the filling is strong flavoured.


Toasting white sesame seeds until aromatic

White sesame paste made with a little peanut oil and a pinch of salt added to toasted white sesame.

Filling macaron shells with toasted white sesame soy sauce ganache and soy sauce caramel. Not forgetting the caramel Pocky stick!


These macarons have a depth of flavour that is so delightful! From the first bite until you swallow, the lingering taste in your mouth changes. My kids gave a thumbs up!

Keep a lookout for class announcement for Shiba Inu Mitarashi dango macaron class probably third quarter of this year on my Instagram!


with love,

Phay Shing

Read More »

Sunday, 9 April 2023

Lemon Minions Bunny Egg Cakes


Sharing some cute Lemon Minion Bunny Egg Cakes with recipe =) ❤️ 

Ingredients (5 egg shells) 
1 egg yolk 
13g vegetable oil 
7g lemon juice 
7g milk 
1/4 tsp vanilla extract 
20g cake or all-purpose flour  
¼ tsp lemon zest 
Yellow and blue food coloring 

1 egg white 
25g castor sugar 
Few drops lemon juice 

Whisk egg yolk with oil, lemon juice, milk, vanilla, zest. Add sifted flour and whisk till well combined. Divide the batter 2 (yellow): 1 (blue). Whisk egg whites with sugar and lemon juice in a new bowl till firm peaks. Fold in the meringue into respective colored batter. 

Pipe yellow batter till 1/2 full, followed by a layer of blue batter in each egg shell. Bake at 140C for 30 mins. Crack open the egg shells when the cakes are cool. Decorate with melted chocolate. 

Hope they made you smile!!❤️❤️🥰 

Video baking/assembly reel here on my IG: @susanne.decochiffon 

With love,
Susanne

Read More »

Monday, 3 April 2023

Passionfruit honey Winnie the Pooh Marshmallows

 Part of book writing involves testing of recipes that I write in the book. I took the chance to make Winnie the Pooh passionfruit honey marshmallows to satisfy my curiosity to see if there is a difference between fresh and freeze-dried fruit options for marshmallows. I took the chance to satisfy my curiosity to see if there's a difference using tapioca starch instead of cornstarch as dusting too. Here's what I made!


Here's a peek at the piped marshmallow batter before I added in the small details!


You may see how I piped both designs in my Instagram reels:

and

I coloured the brown marshmallow parts with chocolate paste. The facial features and "Hunny" lettering where painted or piped on with melted dark chocolate. Yes the hunny pots are marshmallows too! 


The little bees on top of some of them were made out of yellow candy melts, a little bit of blue sprinkle and melted dark chocolate. 

See how squishy they are in this video!

https://www.instagram.com/reel/CpbdbWJgrqE/?igshid=YmMyMTA2M2Y=


with love,

Phay Shing


Read More »

Monday, 27 March 2023

Sanrio Hanami Dango Vegan Macarons

I am finally done with the first draft of Deco Marshmallows! While waiting for the editor to get back to me with it, I have decided to work one something I have been procrastinating for years---vegan macarons! 

As Sakura season is here, I am inspired by the Hanami dango, which is a traditional Japanese confectionery that announces the arrival of spring. Of course I couldn't resist the chance to make it kawaii with Hello Kitty, My Melody and Keroppi! 

Matcha, strawberry and vanilla white chocolate ganache as filling to match the traditional colours 

Besides vegan macarons with vegan fillings, I took the chance to try out vegan royal icing for some of the fine details.

All credit goes to Meiyee (Instagram account: nm_meiyee) for sharing her vegan recipes. Her work is beautiful, naturally coloured and flavoured! I adapted from her recipes that are shared so I didn't follow exactly what she did but do check out her account for the recipes and to marvel at her work! 

I used bakeable matcha powder with no additional artificial green colouring for the matcha shells and ganache. I added freeze-dried strawberry powder and a tiny bit of bottled strawberry emulsion for strawberry. I used matcha Pocky sticks for the "skewer" (I know it's not vegan but I prefer having everything edible but I didn't want to make the biscuit sticks from scratch too 🙈)

Here are some photos of the process:

Freshly baked shells. I was working on a separate set for future vegan macaron class material at the same time.

I actually rushed through the decoration and didn't manage to finish as I had to go out of the house. This is the works-in-progress decoration with vegan royal icing. Could have been better if I didn't rush

Strawberry, matcha and vanilla vegan white chocolate ganache before whipping it up to lighten the texture.

Filling up the macarons and inserting a matcha Pocky stick


Experienced macaron bakers will be able to tell that I had issues with one of the colours of batter and they would be right! I knew what went wrong and but am confident I can rectify it for the class. After all, this is my first attempt and it was rather ambitious of me to try three colours/flavours of macaron shells in a single batch. The flavour that I left to the last to work on had issues because the meringue needed to be whipped stiffer again and I should have trusted my instincts to do so. Can you tell which one it is? 

I am excited to be able to include vegan macarons as part of my class content after this experiment. Stay tuned for class announcements July onwards for vegan macarons! But note that I won't be teaching the Sanrio characters. 


Check out my Instagram reel for some video snippets of the aquafaba meringue and macaron batter!


with love,
Phay Shing


Read More »

Sunday, 26 March 2023

Strawberry Cartoon Chiffon Cake Class


Love cartoons and desserts? Combine your passions in my new Strawberry Cartoon Chiffon Cheesecake Class! 🍓🍰 

I'll teach you Step-by-Step how to make the cutest yummiest cartoon cake ever! 😍  Here's a video to see what you will learn! 
Sign up link is here

With lots of love,
Susanne


Read More »

Tuesday, 21 March 2023

Eeyore Sugar-Free Ube Coconut Chiffon Dome Cakes

 I am almost done with draft 1 of Deco Marshmallows! But before I complete writing the last two recipes and create the respective templates for them, I decided to take a short break to satisfy my curiosity as well as test out the ube paste that I am going to use in one of the marshmallow entries. Having had success with the sugar-free chocolate Rilakkuma swiss roll, I am curious to know if it works for decorative chiffon cake characters as well. Here's the result of my experiment!


This is actually my second attempt. The first attempt was considered a fail for me although taste and texture wise was great. Why so?

I use Allulose and Alchemy fibre as my sugar replacements for sugar-free chiffon cakes. I explained my choice of sugar-replacements in my previous post and you can read about it. 

While this combination of sugar replacements produce chiffon cakes that have texture like the real deal, Allulose browns at a much lower temperature than sugar. If you are baking strong colours, earthy, brown or black colours, the browning of Allulose would not be as obvious. But browning will show up more obviously for pastels and tricky colours like blue and purple. This makes baking "naked chiffons" or character chiffons trickier if you don't want the cakes to appear brown at all.

Using coconut milk like I did for this bake doesn't help either as the cake tends to brown more easily than if water is used but I prefer not to compromise the taste for looks. I used steam baking and lower temperature to help to mitigate the browning.

Video of the process is on my Instagram:

https://www.instagram.com/reel/CqEyn-EgGdl/?igshid=YmMyMTA2M2Y=

Sugar free ube coconut Eeyore dome cakes (makes one 7x7" sheet cake + 4 domes baked in glass bowls*)

Egg yolk batter
2 egg yolks
5g Allulose
30g oil of choice 
30g coconut milk
1.5 tsp ube paste/extract**
45g cake flour
Pinches of salt
white gel coloring (as needed or optional)**
1 drop of purple gel coloring (optional)**
2-3 drops strawberry paste**
1 small toothpick dip of peach gel colouring**

Meringue
3 egg whites
22g Alchemy fibre
53g Allulose
1/4 tsp Cream of tartar/lemon juice

* I used glass bowls that are about 9cm in diameter at the top and 6.5cm in height. You may use any metal or silicone molds about the same size as well but do note that any markings using edible marker should match the colour of the batter or pipe by freehand.

** Use 2 tsp ube paste and omit all extra colouring and flavouring if you are making plain ube coconut cake without Eeyore design. Bake in 6" chiffon tin or in 10x12" tray for Swiss roll.

Steps:
1. Preheat oven to 150C with tray of water at base of oven. Line 7x7" tray with Teflon sheet or parchment paper. Trace out the snout on outer side of glass bowls with edible marker.

2. Make the egg yolk batter. Whisk egg yolks, salt and Allulose until pale and thick. Add oil and whisk until combined. Add coconut milk and whisk until combined. Gradually sift in cake flour and whisk until no trace of flour is seen. Add a little white gel colouring if you wish to make the batter base less yellow. 

3. Portion out 2 tsp of batter and add strawberry paste to colour it pink. Portion 2 tsp of batter and colour it peach coloured. Add ube paste to the remaining batter. Add purple gel colouring if desired.

4. Make the meringue. Whisk together Allulose and Alchemy fibre in a small bowl. In a clean metal bowl, beat egg whites with cream of tartar until firm (almost stiff) peaks, adding sugar-replacement mix gradually once egg whites are foamy.

5. Fold in 4 tbs of meringue into the each of the pink and peach batters. Fold in the rest of the meringue into purple ube batter. Fold in the meringue in two or three additions. Transfer purple and peach batter into piping bags with hole cut.

6. Pipe purple batter into glass bowls until it reaches the line marked by edible marker for the snout. Pipe the snout with peach batter. Fill up the whole glass bowl with more purple batter, leaving about 1cm unfilled. 

7. Pour the pink batter into the 7x7" tray and spread it to fill half (one side) of it. Fill the other half with purple batter.

8. Place all cakes into the oven. Reduce temperature to 140C. Bake for 10 minutes or until the sheet cake is baked through. Remove from oven and immediately flip it out onto a fresh sheet of parchment paper. Continue baking the dome cakes at 130C for another 15 minutes. Reduce temperature to 110C and bake for another 10 minutes or until skewer comes out clean. Please adjust baking temperature and time according to your oven. All temperatures mentioned in this post is as read by the oven thermometer.

9. Let the dome cakes cool completely before carefully unmolding by hand. Be gentle as chiffons are delicate! 

Extra details like the hair and eyes
10g butter
10g egg whites
10g cake flour
10g powdered erythritol (replace with icing sugar if you don't have. Although it won't be 100% sugar-free, this is negligible)
1g charcoal powder
1g cocoa powder (may replace with charcoal)

Steps:
1. Preheat oven to 150C and line a small tray with teflon sheet or parchment paper.

2. Whisk everything together until smooth. Transfer into a small piping bag with a small hole cut.

3. Pipe a blob with spikes for Eeyore's hair. I did this by freehand. Pipe a patch of batter about 6x6cm in area for the eyes. Batter doesn't have to be too thick. About 2mm thick will do.

4. Bake for 7-8 min or until it appears dry. 

5. Cool completely before carefully removing the hair and use a Wilton #12 tip to cut out the eyes.

Assembly
1. Use a knife to press a line down the front of Eeyore's face.

2. Use a tear drop shape cookie cutter to cut out the ears from the sheet cake. I made one out of metal can. Press the pink and purple cutouts together for each ear.

3. Melt some sugar-free chocolate (I used 100% cocoa with no sugar added from Pascha) and colour it black with charcoal powder or oil based black colouring, or use black chocolate chips. Paint on the nostrils, stitches and eyebrows with melted chocolate.

4. Glue on the hair and eyes with melted chocolate. 


I had to stop work here as it was night time and had other household things to deal with but took the chance to take a photo of the works-in-progress look.

5. Glue on the ears with melted marshmallows or cake glue. Use short pieces of wooden skewer to help to secure it in place if necessary but warn your recipients! 

As with all sugar-free bakes made with sugar replacements, eat in moderation as some people have digestive systems that are sensitive to them.


with love,

Phay Shing


Read More »

Wednesday, 15 March 2023

Black Pink Oreo Chiffon Cake


Black pink oreo chiffon cake recipe!

Video tutorial here.  
I was surprised that many of you were interested in this recipe, so here’s the tutorial. This is a very yummy cake! 

Black pink oreo chiffon cake (6” heart pan) 
2 egg yolks 
30g vegetable oil 
24g milk 
4g vanilla extract 
42g cake flour, sifted 
5 black pink oreos 

2 egg whites 
45g castor sugar 
Pinch of cream of tartar 

Crush 2 pink oreos (without filling) into fine crumbs. Mix egg yolks with oil, milk and vanilla extract.  Add in cake flour, pink oreo crumbs and a drop of pink food coloring (optional). 
Whisk egg whites with cream of tartar and castor sugar (added gradually) till firm peaks. Fold the egg yolk batter above into the whipped egg whites. 
Arrange the pink oreos (6 halves) at the base of the cake pan. Pour the cake batter over. Bake at 140C for 45+ min, till the centre of the cake is dry. Enjoy! 

With love, 

Susanne 


Read More »

Monday, 13 March 2023

Sugar-free Rilakkuma Chocolate Swiss Roll

 In the midst of writing Deco Marshmallows, I couldn't resist taking a little time out to make this simple bake because we stumbled across an awesome source of chocolate that is 100% cacao with no sugar added BUT is so smooth! Once we tasted the chocolate chips which were suitable for use in baking and making hot chocolate, I knew I had to try it for my bakes. Most other 100% cacao chocolate we have tasted tend to be a little dry and gritty. Here's my rich chocolate swiss roll made without white sugar!


Even the decoration for Rilakkuma is made without white sugar!

The Swiss roll is made of sugar-free chocolate chiffon sponge and sugar-free dark chocolate cremeux. Those of you who aren't familiar with cremeux, it is a cross between ganache and custard.

Where is this awesome chocolate from you may ask? It is from Pascha. I used their unsweetened dark chocolate chips. The sugar replacements I used for the cremeux are a mix of Allulose and Maltitol, and for the chiffon sponge I used a mix of Alchemy fibre (which is a blend of Inulin and edible gum) and Allulose. Why these choices of sugar replacements? They are all soluble in water so you don't get any grittiness from them like you would from Erythritol. While Alchemy fibre is not sugar, it adds bulk to the bake, is a good meringue stabilizer and good for diabetes management and digestive system. I thought of using it when I saw Swee Heng, a bakery chain in Singapore, use it for their sugar-free chiffon cakes. While Maltitol is a sugar replacement, it contains carbohydrates and will raise the blood sugar levels a little (but much less than sucrose), unlike Allulose and Alchemy fibre. I used a little Maltitol instead of using all Allulose because I have it lying around at home and it needs to be used up 🙈. All the sugar replacements used here taste less sweet than white sugar (sucrose) so I used more than if white sugar were used. The chocolate doesn't contain sugar at all so that needs to be compensated as well. You may adjust the amount of sugar according to taste. We don't have a sweet tooth so if you prefer sweeter tasting cakes, please add more sugar replacement.

Sugar-free dark chocolate cremeux (with yuzu option)
Ingredients:
150g heavy cream (may replace with 40g butter and 110g full fat milk)
150g full fat milk
60g egg yolks (about 3-4)
55g Allulose (45g if not adding yuzu concentrate)
20g Maltitol (15g if not using yuzu concentrate, may replace with Allulose)
Pinches of salt
140-145g sugar-free 100% cacao dark chocolate (unsweetened)
3g gelatin bloomed in 20g 100% yuzu juice concentrate (optional)

1. If adding yuzu, bloom gelatin in chilled yuzu juice concentrate. Set aside. Omit gelatin if not adding juice concentrate.

2. Whisk together egg yolks, salt and sugar replacements in a heatproof bowl. 

3. In the meantime, heat milk and cream in a saucepan until steaming hot but not boiling. Pour into egg yolk mixture in a thin stream while whisking the egg yolk mixture to temper the egg yolks. Pour everything back into the saucepan.

4. Whisk the custard and cook until 82-84C. 

5. Place chocolate and bloomed gelatin in large mixing bowl. Pour hot custard over and let it sit for 2 minutes. Use an immersion blender to blend until smooth.

6. Press cling wrap onto the cremeux and cool to room temperature before refrigerating overnight or at least 4 hours.


7. When ready to assemble with sponge, remove from fridge and let it sit at room temperature for 30 minutes. Loosen the cremeux gently with a spatula before using.


I added a little yuzu to offset the richness of the chocolate. You may use orange juice concentrate and orange zest to add some citrusy notes too.

Sugar-free chocolate chiffon sponge
Ingredients (makes one 10x12" and one 7x7" sheet cakes):
Egg yolk batter
4 egg yolks
10g Allulose
20g sugar-free 100% cacao dark chocolate (unsweetened)
45g vegetable oil
45g boiling hot water 
10g cocoa powder (I used Valrhona)
65g cake flour
½ tsp baking powder
Pinch of salt
1.5 tsp vanilla extract 

Meringue
4 egg whites
30g Alchemy fibre
70g Allulose
¼ tsp cream of tartar 

1. Line the trays with Teflon sheets or parchment paper. Preheat oven to 170C. 

2. In a heatproof or microwave safe bowl, bloom cocoa powder by whisking in boiling hot water. Let it sit for 1 minute. Add unsweetened chocolate and stir until melted and smooth. Microwave or double boil if necessary if the chocolate is not fully melted. Set aside.

3. Prepare egg yolk batter. Whisk together egg yolks, salt and Allulose until thick and pale. Add oil and whisk until combined. Add chocolate paste in 2. and whisk until well combined. Add vanilla and whisk until combined. Gradually sift in flour and baking powder and whisk until no trace of flour is seen.

4. Prepare meringue. In a small bowl, whisk together Alchemy fibre and Allulose. In a clean metal bowl, beat egg whites with cream of tartar until firm peaks, gradually add sugar-replacement mix once the egg whites are foamy. 
You should also be able to flip the bowl upside down without the meringue sliding out or flopping around.

Meringue with firm peak


5. Quickly but gently fold meringue into egg yolk batter in three additions. Divide the batter among the two trays in a ratio of approximately 5:2 by weight for larger: smaller tray.

6. Bake for 12 min or until skewer comes out clean. Immediately flip the cakes out onto fresh sheet of parchment paper and roll up the larger cake to cool. Note that each oven is different so adjust temperature and time accordingly.

Freshly baked 10x12" sheet cake

When you are ready to assemble, unroll the large sheet cake and pipe a generous amount of cremeux in the middle of the sponge. Use a small spatula to smooth out the cremeux as necessary. Roll it into a tight roll, cutting off the excess strip of sponge if necessary if you are making Rilakkuma's face for each slice of cake. Refrigerate for 2 hours.

In the meantime, you may cut out Rilakkuma's ears from the smaller sheet cake using 2-2.5cm round cookie cutters. Cut off a little cake along the circumference with the same cutter so the ears can sit nicely on the head. Keep the small cake cutouts in a container or covered until ready to assemble.

I used white strawberries for Rilakkuma's snout as it is in season now. You may use other fruits like banana if you wish but dip it in lemon juice to prevent oxidation. I used mango for Rilakkuma's inner ears. I used a smaller round cutter or you may use jumbo straw to cut it out. Leave the cut pieces of fruit on paper towel in the fridge to remove excess water.

When it is time to assemble, you may melt a little chocolate with charcoal powder (or use black chocolate) and added on the eyes, nose and mouth of a cut slice of swiss roll. Cut slices of swiss roll with a serrated knife and arrange the ears and facial features on the serving plate. 

Serve with extra fruits (highly recommended) as this is a very rich cake that serious chocoholics can appreciate. And by serious chocoholics I mean those who appreciate cacao without too much added sugar to offset the natural bitterness. My hubby is one such person and he's the type that likes his eating chocolate, chocolate drink and chocolate bakes with a touch of bitterness from the cacao. Needless to say, hubby gave a thumbs up for the cake! Best eaten chilled when the cremeux is firmer.


with love,

Phay Shing
Read More »