Showing posts with label Longevity peach. Show all posts

Wednesday, 1 November 2023

Chiffon Cake Longevity Peaches (no artificial colouring added) on Pandan Kaya Cake

 I have been making longevity peach chiffon cakes for the past 9 years and this is the first time I decided to make it as naturally coloured as possible for my grandmother's 88th birthday. You may click on this link to see my past bakes that are longevity peach themed and made in various flavours like lychee rose and yuzu. Grandma likes to celebrate her birthday according to the lunar calender so the actual date we celebrate is not fixed each year. Because of this, I had to make the cake for her at a rather busy period so I kept things simple but yummy.

Here's this year's longevity peach cake for grandma!

The peaches sit on top of my signature pandan kaya cake!

Here's a better look at the peaches!


The peaches are almost naturally coloured, not 100% naturally coloured, because the bottled pandan paste I used for the leaves already has artificial green colouring added. In the past I had to use white colouring to make the peaches appear whiter instead of yellow, and used pink gel colouring to add on the pink. This time round I used a chiffon cake recipe adapted from Mimi that doesn't use any egg yolks to omit the use of artificial white colouring, and I used diluted fresh dragonfruit puree to colour the peaches pink naturally. The peaches were made a week in advance and frozen due to my busy schedule, but they still appeared and tasted as good as new!

You may refer to this post for my reduced sugar pandan kaya cake that is still tasty and refreshing at the same time. I increased the amount of sugar/gula melaka by about 20% for both the chiffon sponge and pudding to suit the tastebuds of my grandma and the whole clan of the extended family since this request was not a "siew-siew-siew-siew dai" (less-less-less-less sweet in colloquial Singapore) order 😆, but is still less sweet than commercially sold cakes in general. My cousin commented that it tastes better than Bengawan Solo's signature pandan kaya cake!

Chiffon cake longevity peaches (makes about 12-15 mini peaches):

Egg yolk batter
35g cake flour
Pinches of salt
10g caster sugar
15g vegetable oil (I used canola)
40g milk
1/4 tsp vanilla extract
1/8 tsp cocoa powder
1/4 tsp pandan paste

Meringue*
2 large egg whites (about 38-40g each egg white)
30g caster sugar
1/4 tsp cream of tartar

Decoration
Pink dragonfruit puree, sieved & diluted with water 
Water or simple syrup** 
Cake glue or melted marshmallow

* I split ingredients in half as the leaves & peach body have different baking time & temperature profiles

** Make simple syrup by dissolving sugar in hot water in 1:2 ratio. Using syrup instead of water helps to keep the sponge moist longer during storage

Steps:
1. Line a baking tray (or 2) with teflon sheet or parchment paper. Size of tray doesn't matter as we just need to spread the batter as thin a layer as possible for the leaves. Lightly grease heart shaped silicone molds with a little oil. You may use egg shells if you don't have the heart molds, and carve out the shape after baking. Wash and air dry eggshells thoroughly if using them. Preheat oven to 125C with fan on.

2. Make egg yolk batter. I know the name seems somewhat inappropriate because there is no egg yolk used but this is the same portion that is in all chiffon cake recipes where the yolk normally goes. In a mixing bowl, use an electric mixer to mix oil, milk, vanilla, salt and sugar together. Sift in flour and whisk until well combined. Divide into 2 equal portions. Add sifted cocoa powder and pandan paste to one portion, cover with cling wrap and set it aside. Cocoa powder is added to deepen the green colour and make it appear less neon bright.

3. Make one portion of meringue with one egg white portion of ingredients. In a clean metal bowl, beat egg white with cream of tartar until firm peaks, gradually adding sugar once the egg whites are foamy. Take your time to build up a stable, tight and glossy meringue at medium speed. Going high speed all the way creates large air bubbles and the meringue is not as stable.

4. Quickly but gently fold the meringue into the white egg yolk batter in 3 additions. Transfer into piping bag. Fill the mold until full.

5. Bake for 25-35 min. Increase temperature to 150-160C and bake for another 5 min. Cool completely before unmolding. Note that the baking profile is just a guideline and is dependent on mold size and oven so adjust accordingly.

6. Preheat oven to 170C with the fan on. 

7. Prepare another batch of meringue. Fold meringue into green egg yolk batter. Pour into lined baking tray and spread as thin a layer as possible.

8. Bake for 30 seconds. Turn off the oven fan and continue baking for 8-9 min or until done. Keep an eye on it as it can go from done to brown within a minute or less. Immediately flip onto fresh parchment paper and cool completely before cutting out the leaves with cookie cutter. You may use scissors/knife and a homemade template if you don't have an appropriate cutter.

9. Use scissors to trim off browned parts of the peach body. You may also use scissors or a small fruit knife to carve the shape if you used egg shells to bake.  Use the back of the knife to make an imprint in the middle of the peach.

10. Brush the tip of the peach with diluted dragonfruit puree. I didn't measure the dilution ratio as the exact measurement is not important. I go by the colour I get visually. You can always apply another coat if the colour is too faint, or add a little more puree to your paint. Don't use undiluted puree as the colour is too dark. Use some water to blend the pink colour towards the white parts of the peach. In the past I used a toothbrush spray to create the ombre pink effect but this method is much cleaner!

11. Glue the leaves onto the peach body using cake glue or melted marshmallow. Store in airtight condition in the fridge or freezer until ready to consume.

Here's the reel of the process of making the peaches!

https://www.instagram.com/reel/CzJF8h9y0VV/?igshid=MzRlODBiNWFlZA==

I had leftover pandan sponge and pudding so I assembled a few pandan kaya cupcakes. 

Looking cute!


I think I am going to stick with this method of making chiffon cake longevity peaches from now on with the exception of substituting the milk with some other liquids for flavour variation. I hope this post is helpful for those of you who want to create healthier versions of longevity peaches for your loved ones that minimizes artificial food colouring. You may use matcha powder for the leaves to make it fully naturally coloured but I wanted the peaches to match the flavour profile of the cake below. Maybe I shall try that next time! 


Update: I did an Instagram poll and majority are in favour of a longer, more detailed video tutorial so I made a youtube video version of it and you may see it here:

https://youtu.be/-qU4WdBn6DQ?si=6iTMFX7E4kkrj-wv


with lots of love,

Phay Shing

Read More »

Monday, 17 October 2022

Kyoho Grapes, Strawberries n Cream Longevity Peach Chiffon Cake

 I made this longevity peach cake for my grandma's birthday!

Vanilla chiffon sponge with my version of Chantilly cream, kyoho grapes and strawberries

It has been a few years since I made longevity peach themed cakes when there was a time early in my baking journey that I made them so often for requests!

I couldn't resist taking a photo of the chiffon peaches in a steaming basket 

Although I stuck with my default vanilla chiffon cake recipe for the main cake, I decided to use more egg yolk for the peaches for richer taste but it needs more white colouring to compensate. You may refer to my past longevity peach chiffon cake peaches for reference if you wish. I used to make other flavours like lychee rose, which is really yummy too!

Here are the heart silicone moulds and cookie cutters I used for the small and medium sized peaches. The minis are bite-sized. The medium-sized ones are about three bite-sized. I used lemon juice to make the longevity peaches but feel free to replace with water if you want plain vanilla flavour.


Vanilla lemon longevity peaches
Ingredients (makes 12 med & 12 small peaches, one thin 10x12 inch sheet cake):
Egg yolk batter
3 egg yolks
15g caster sugar 
56g vegetable oil
28g lemon juice
28g water
80g cake flour
1tsp white powder colouring (or use gel colouring)
1/8 tsp salt
1tsp vanilla extract
More white gel colouring as needed
1/4-1/2tsp pandan paste

Meringue
4 egg whites
1/4 tsp cream of tartar
85g caster sugar 

Steps:
1. Line 10x12" tray with teflon sheet. Parchment paper will do as well but it may wrinkle. Lightly grease the silicone molds with oil. Preheat oven to 170C, top and bottom heat only.

2. Make egg yolk batter. Whisk together egg yolks, sugar and salt until pale. Add oil and whisk until smooth. Add lemon juice, water and vanilla and whisk together. Gradually sift in cake flour and white powder until no trace of flour is seen. Add more white colouring if desired.

3. Make meringue. In a clean metal bowl, use electric mixer to beat egg whites with cream of tartar until firm peaks form, gradually adding sugar once the egg whites are foamy. Take your time to slowly build up the meringue so that it is stable with tight compact air bubbles.

4. Quickly but gently fold meringue into egg yolk batter in 3 additions. Transfer about 2/3 of batter into large piping bag and fill the silicone moulds until full. 

5. Bake for 5 min at 160C, reduce temperature to 140C and bake for 20min, reduce to 130C for another 10-15min or until skewer comes out clean. Cool completely before carefully unmoulding by hand. Preheat oven to 170C again.

6. Add pandan paste to the remaining batter. The batter would have deflated a little by now but it is ok. Just gently fold in pandan paste. Smoothen out the batter until it is a very thin layer in the 10x12" tray. Bake for 8-9 min or until done. Immediately flip the cake out onto fresh sheet of parchment paper. Cool completely before cutting out the leaves with cookie cutter.

Important note:
Adjust baking temperature and time according to your oven as each oven behaves differently even if they are the same model and batch.

Decorating and assembling longevity peaches
I used cake glue to stick the leaves on instead of melted marshmallows out of convenience. I sprayed the ombre pink coating on the hearts with pink coloured water and a toothbrush. Spray the hearts pink before assembling the leaves. You may pipe on the eyes with melted black candy melts or chocolate. The red cheeks were added on using red edible marker.

Filling
Instead of using a stabilized whipped cream, what I used for this cake is even simpler as it doesn't include gelatin stabilization but tastes just as good as it is stable.

I used a ratio of 2:3 for Whip topping: double-cream by weight. Whip topping is a non-dairy whipping cream that is pre-sweetened and very stable. Double cream is more stable than regular dairy cream that has lower fat percentage, but still as delicious but richer. Simply whip the whip topping until stiff peaks, no danger of overwhipping here. Loosen the double cream with a hand whisk until it is smooth and thick but not able to hold a peak. Gradually fold the whip topping into the loosened double cream. Transfer into piping bag for cake assembly. Be careful not to overwhisk the double cream or it will split. You may add some vanilla extract if you wish.

I made some syrup by using kyoho grape juice squeezed from some grapes, sugar and hot water. This syrup was used to brush the vanilla sponge surfaces to keep it moist as well as add flavour. There is no fixed ratio of sugar: liquid, up to personal preference. I usually use about 1:2 sugar: liquid by weight.

Just to share some pictures of the layers in the cake.


Even without the longevity peaches, the cake looks inviting!


So glad it was very well received and everyone loved it!

If you would like to know how I make such neat fruits n cream cake, you may refer to my Instagram post:

https://www.instagram.com/p/CjmC-w8Pfvq/?igshid=NjZiMGI4OTY=


with lots of love,

Phay Shing

Read More »

Wednesday, 3 October 2018

Longevity Peach Lychee Rose Chiffon Sponge and Pudding Cake (version 2)

It has been about a year since I made longevity peach chiffon cake. There are two updates I made to the recipe that I have been using. Between then and now, I have tried using cornflour instead of custard powder as one of the pudding gelling agents for other sponge and pudding cakes and find that it works as well. So for once, my lychee rose sponge and pudding cake doesn't have yellow pudding 😊. Afterall, custard powder is just cornstarch with added colouring, flavouring and salt. I have also introduced freeze dried lychee powder as it is packed with lychee flavour without the slightly chemical aftertaste that the bottled liquid flavourings have.

All peaches are made from lychee rose chiffon sponge cake!

You may refer to this post, this post and this post for the recipe of lychee rose chiffon and how to make the longevity peaches. I did tweak the recipe a little since I have access to freeze dried lychee powder. Otherwise the steps are the same. For your reference, I will just type out the ingredient list for making heart shaped chiffon pops of various sizes.

Recipe for longevity peach chiffon pops
Ingredients (makes one 10cm heart, four 6cm hearts and twelve 3cm hearts):
1 egg yolk
5g caster sugar
32g canola oil/ vegetable oil
38g lychee puree (sieved)
1/4 tsp lychee flavouring
1/4 tsp rose water
1/4 tsp vanilla extract
1/2 tsp freeze dried lychee powder
A pinch of salt
44g cake flour
Some white gel food colouring

3 egg whites
1/5 tsp cream of tartar
35g caster sugar

You may refer to this post for the non reduced egg white chiffon sponge recipe and pudding recipe. I also used some freeze dried lychee powder for the pudding and replaced custard powder with cornflour. I have also reduced the amount of lychee flavouring I use as it has a slightly chemical aftertaste. The freeze dried lychee more than compensates it. For your convenience, I will also type out the ingredient list here.

Recipe for lychee rose chiffon sponge
Ingredients ( makes two 7.5" round cakes and one 12x10" layer cake):
5 egg yolks
1 whole egg
8g caster sugar
90g canola oil/ vegetable oil
90g lychee puree, sieved
1/2 tsp rose water
1/4 tsp lychee flavouring
1 tsp freeze dried lychee powder
1.5 tsp vanilla extract
1/8 tsp salt
135g cake flour

9 egg whites
1/2 tsp cream of tartar
105g caster sugar

I baked extra green sheet chiffon cakes for the leaves and green layer on top of the base sponge.

Recipe for lychee rose pudding
Ingredients:
A)
150g evaporated milk
330g water
250g lychee puree, strained
1 tsp rose water
1/4 tsp lychee flavouring
1 tsp freeze dried lychee powder
50g sugar
1/8 tsp salt
2.5 tsp agar powder

B)
48g cornflour
240g canned lychee syrup
40g water

Do note that the quantity for pudding I posted here is quite a lot as it caters for sponge and pudding cakes where the pudding covers the whole cake. If you are not covering the whole cake, you may halve the recipe.

I use plastic cake ring for layering the sponge and pudding layers

Feedback for the cake was it was not too sweet and suits the family's taste buds 😊.

I also made extra sponge and pudding cupcakes for my friend and did simple deco with extra cake pieces.

Keep in mind that I really put this together hastily 😆

Thank God for helping cope with the many things I have to handle.

With love,
Phay Shing
Read More »

Monday, 20 November 2017

Two-Tiered Lychee Rose Longevity Peach Sponge and Pudding Cake

I had a request some time back for lychee rose longevity peach cake. The requester saw the longevity peach cake I made for my grandma two years ago and loved it very much. I decided to make something similar but two-tiered this time :)


This is a refreshing dessert that goes well as the last dish for a sumptuous birthday celebration meal. Alternating layers of light lychee rose sponge and pudding, served with succulent lychees stuffed with pudding. The longevity peaches are light and refreshing chiffon sponge cakes too!

I won't go into details of the bake as the detailed recipe can be found in the blog post for my grandma cake. The thing that I did differently here is in the assembly. I used flexible plastic meant for wrapping around cakes as shown in the photos below. I did this for my Ondeh-Ondeh pandan kaya Gula Melaka chiffon cake for my dad too.

6.5" and 4" cakes

The edges of the cake is much cleaner this way than using springform pans like I used to.

Unmoulded cakes

I don't have a picture of the cut slice of this cake but I made one for my grandma two years ago so it looks something like this:

Alternating layers of soft lychee rose chiffon sponge with refreshing pudding, eaten along with succulent lychees!


Give this cake a try if you love lychee :).

With love,
Phay Shing

Read More »

Friday, 6 May 2016

Lychee Rose and Yuzu Chiffon Cake Longevity Peaches

I have a request for chiffon longevity peaches in two different sizes and flavours for a 66-year old lady!


I have shared how these peaches are made here and here so I will mainly share the cake recipe in this post. Please refer to the older posts for shaping and assembly instructions. I baked the green and red layer cakes separately from the peaches.

I use Daiso big heart silicone moulds for the big peach and Tovolo silicone mould for the smaller peaches. As the Tovolo ones were much thicker walled, I stacked the Daiso one with another big heart mould to provide more insulation as I bake both big and small hearts together.


Yuzu reduced yolk chiffon peaches (makes about eight 5cm hearts and one 10cm heart. Adapted from Susanne's post)
Ingredients:
1 egg yolk
7g caster sugar
32g canola/vegetable oil
40g yuzu tea*
1/4 tsp orange essence (optional)
44g cake flour
A pinch of salt
A few drops of white gel food colouring

3 egg whites
32g caster sugar
1/5 tsp cream of tartar

*Dissolve 3tbs yuzu marmalade in 108ml of hot water. I know this is way more than what is used but I chose to work with this amount because of what I do next. Blend the yuzu tea to break down the big citrus peel into smaller bits. This releases more flavour into the tea. Let the blended tea sit in the fridge overnight to let the citrus peel goodness seep into the tea. Strain the tea before use. Most bakers would just dissolve the marmalade and strain out the peel straight away but I prefer to work this way so it's optional to follow :). If you are not blending the tea, dissolve 1.5tbs of marmalade in 54ml of hot water and sieve out the peel straightaway.

Blended yuzu tea

Steps:
1. Preheat oven to 160°C. Place rack at second lowest position. Put a tray of water at base of oven (optional).

2. Prepare egg yolk batter. Whisk sugar and egg yolk until pale and thick. Add oil and whisk until well combined. Add yuzu tea and essence (if using) and mix well. Gradually add in flour and salt and whisk until no trace of flour is seen. Add a few drops of white gel food colouring if you wish to have a whiter peach base. Mix well.

3. Prepare meringue. In a clean metal bowl, use electric mixer to beat egg whites with cream of tartar until firm peaks form or about to reach stiff peak, gradually adding in sugar once the egg whites are foamy.

4. Fold the meringue into the egg yolk batter in three batch's quickly but gently with a spatula. Spoon the batter into the heart moulds until almost full. Gently tap the moulds on the table.

5. Turn the temperature to 150°C once the moulds are in the oven. Bake for 5 minutes before reducing temperature to 135°C and bake for 30 minutes. Check for doneness. If skewer doesn't come out clean, reduce temperature to 125°C and bake for another 10 minutes or so. Cool completely before gently unmoulding by hand. 

**please use baking temperature and time as a guide as each oven is different. If you are using a different mould the baking temperature and time would be different too.


Lychee rose reduced yolk chiffon peaches (makes about eight 5cm hearts and one 10cm heart)
Ingredients:
1 egg yolk
7g caster sugar
32g vegetable oil
38g lychee puree (blend canned lychee and sieve to remove woody bits)
1/4 tsp lychee flavouring (optional)
1/4 tsp vanilla extract
1/4 tsp rose water
44g cake flour
A pinch of salt
White gel food colouring

3 egg whites
1/5 tsp cream of tartar
30g caster sugar

Steps:
Same as yuzu chiffon peaches.

Here are some freshly baked and shaped peaches...


Don't fret if your peach is a little browned on the outside. It is safer to bake longer than to have the cake collapse. Simply use a small serrated knife dipped in water to carefully shave off the browned bits.

After assembly, remember to brush the lychee peaches with some of the canned lychee syrup and the yuzu peaches with some yuzu tea to keep the cakes moist and impart more flavour.

All packed!

With love,
Phay Shing

Read More »

Tuesday, 27 October 2015

Longevity Peach Lychee Rose Chiffon Sponge & Pudding Cake

You have seen cakes with cream and "naked" chiffon cakes like what we have on our blog. Here's a "new" type of cake that I came up with for my grandma's and aunt's birthdays. My aunt whose birthday is also around the corner celebrated at the same time too! Soft lychee chiffon sponge sandwiched with refreshing lychee rose pudding, topped with canned lychees stuffed with more pudding! If you can't imagine what this cake is like, think of Pandan kaya cake but lychee and rose flavoured instead :). And without the coconut milk!


Here's a small slice of the cake cut by the waitresses at the restaurant that my extended family went to for the birthday celebration.

That's a teeny bit of liu sha 寿桃 from the restaurant that you see there on the left.

Everyone was "moaning" that they are too full after eating all the wonderful food from the restaurant but everyone finished their portion of cake because it's light, refreshing and not too sweet :). Everyone, both young and old, gave the cake a thumbs up so do give this recipe a try if you are looking for alternatives to creamed cakes but would not like plain chiffon sponge. I may look at doing other sponge & pudding cake flavours in the future as I think that this is a very good combination for birthday celebrations, especially if you have to eat cake after a sumptuous meal.

It's been a really busy period for me and the busyness continues even after the photoshoot for chiffon cakes is over as I still have to work on the macarons for photoshoot. My mum said just keep the cake for grandma simple and without the "寿” written on the cake. I made this cake along with another one with the same flavour for a friend's aunt, who is also my friend. Two cakes concurrently! Thank God I managed to finish both cakes in time despite some hiccups because of my experiment with filling macaron shells with pudding, which I will share in my post for the second cake in the near future.

This cake is made up of a few parts -- the peaches, two 9" round lychee chiffon sponge cakes, lychee rose pudding and stuffed lychees.

Please refer to this post for the recipe for peaches. I baked really mini ones in heart shaped ice cube tray like the ones for this cake, and a huge peach in the largest heart shaped silicone mould that I have (bought from Daiso). Bake the ice-cube tray peaches for 9 minutes at 150°C followed by 135°C for 5 minutes or until skewer comes out clean. Bake the large peach at 150°C for 9 minutes and 130°C for another 20-25 minutes. I placed a tray of water at the base of the oven to create steam during baking. Just to share some pictures of the process.

Spray painting the huge peach

Adding on the leaves.

Recipe for lychee chiffon cake (makes two 9" round cakes)
Ingredients:
4 egg yolks
15g caster sugar
60g canola/vegetable oil
60g canned lychee puree (blend lychees with a bit of syrup from can and strain through fine meshed sieve)
1/4 tsp rose water
1/2 tsp lychee flavouring
1 tsp vanilla extract
Pinch of salt
90g cake flour

6 egg whites
1/4 tsp cream of tartar
60gg caster sugar

Steps:
1. Prepare baking tray of water at base of oven (optional). Preheat oven to 150°C. Line the base of both 9" pans with baking sheet.
2. Whisk egg yolks and sugar until pale and thick. Gradually add oil, followed by puree and flavourings and whisk until well combined. Gradually add in sifted flour and salt until no trace of flour is seen.
3. Prepare the meringue. In a clean metal bowl, beat egg whites with cream of tartar until stiff peaks form, gradually adding in sugar when meringue is at soft peak stage.
4. Quickly but gently fold the meringue into the egg yolk batter in three additions. Divide the batter equally for the two pans. Tap the pans on the table a few times.
5. Bake for 20 minutes or until skewer comes out clean. Cool in the pan for 5 minutes before removing onto cooling rack to cool completely with a sheet of baking paper over the cake.

Freshly baked!

Recipe for lychee rose pudding
Ingredients:
(A)
150g evaporated milk
330g water
250g canned lychee puree in syrup, strained
1tsp rose water
1/2 tsp lychee flavouring
50g caster/ granulated sugar
1/8 tsp salt
2.5 tsp agar powder
1/2 tsp liquid yellow food colouring (optional)
(B)
48g custard powder
240g canned lychee syrup
40g water

1. Combine all ingredients in (B) in a jug and stir until custard powder dissolves.
2. Place all ingredients in (A) in saucepan and boil over medium low heat while stirring continuously.
3. Once the mixture boils, stir (B) again before slowly pouring into (A). Keep stirring while boiling. Remove from heat after the mixture boils for a minute, stirring continuously.

Pudding mixture

Assembly
1. Scoop some pudding into the base of a 9" spring form pan. Make sure you keep stirring the pudding mixture in the saucepan now and then to prevent it from setting.
2. Place one sponge cake on the pudding in the pan. Carefully scoop some pudding to fill in the space around the cake.


3. Scoop more pudding to cover the layer of cake before placing the second sponge cake on top. Scoop some pudding to fill the space between the cake and the wall of the pan.
4. Refrigerate for 2h or until set.
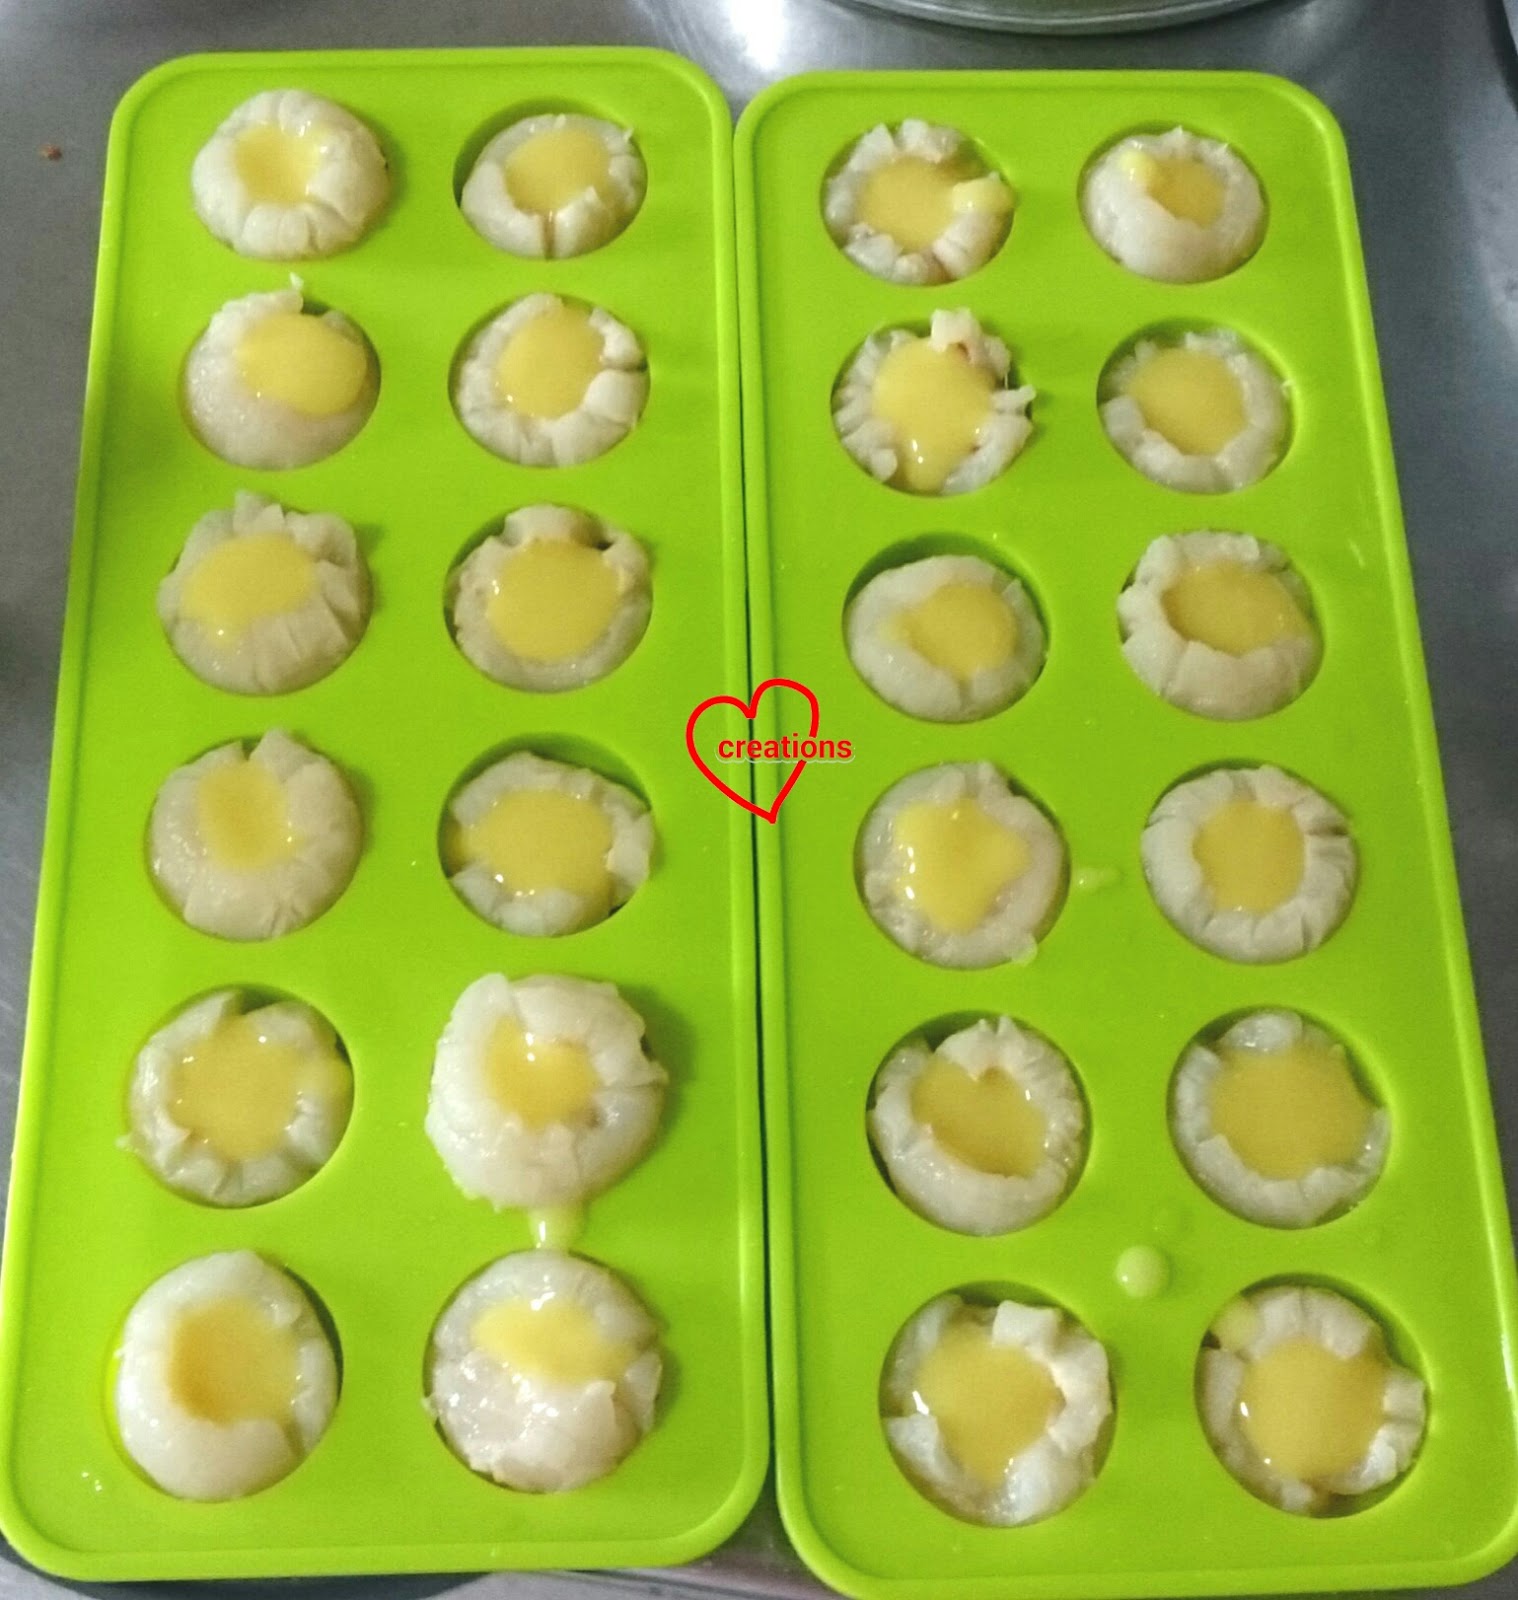
5. Transfer some pudding into a piping bag and pipe pudding into canned lychees that have been pat dry with paper towels. Refrigerate until pudding sets.

Stuffed lychees

6. Carefully remove cake from springform pan and place on cakeboard. Decorate with longevity peach cakepops and canned stuffed lychees. I used toothpicks to secure the lychee to the cake.
7. Brush the longevity peaches with a bit of syrup from the canned lychees to keep them moist.

Keep the cake refrigerated until it is time to serve. The cake tastes better after storing in the fridge for a day after the flavours from the pudding and sponge have come together!

Blessed birthday to 婆婆 and 二姨!

With lots of love,
Phay Shing

Read More »

Wednesday, 21 October 2015

“寿” Pandan Chiffon Cake with Gula Melaka Swiss Meringue Buttercream (macaron shell decorations)

This is one of those cakes that taste better than it looks :p. I made this 6" Pandan chiffon cake with Gula Melaka swiss meringue buttercream together with the large order of 40 longevity peach cupcakes :). All decorations are macaron shells except the leaves.


The lady who ordered this for her 90-year-old grandmother loved the design of a longevity peach themed cake I made last year and would like something similar. So this cake was modelled after my old one.

Since I had some leftover cake and a bit of cream, I made one small layered cake to eat at home and take a sample cross-section of the cake too!


It's the first time I am decorating a cake with macarons because this order came at a really busy time, coinciding with photoshoot sessions for the chiffon cake book I am co-authoring with Susanne. With such a large quantity of longevity peaches to make as well, I decided to stick with simple decorations that can be made way ahead of time. Macaron shells freeze very well so it's the perfect choice :).

Macaron decorations
You may refer to this post for the macaron shell recipe for white and brown shells. I made these together with Brown and Cony macarons and froze them. Just to share some photos of the process...

Freshly piped macaron shells!

I dissolved some pink gel colouring in a little Vodka (Yay! Finally got some! Free too from a goodie bag :)) to make pink paint. I brushed on the pink flower patterns and pink shades on the peaches. I prepared some stiff green royal icing by adding some icing sugar to my stock of flooding consistency royal icing until I get the right piping consistency. I piped on the leaves using a piping bag with a corner snipped off.

Painting in pink and icing with green royal icing

Pandan chiffon cake

Begin by preparing Pandan juice. I don't measure exact amounts. Just roughly pick our about 20-30 Pandan leaves and blend with 100ml of water. I used more leaves this time as most are young and small. Strain out the juice and squeeze out any juice left in the pulp through a coffee filter. Let the juice collected sit in the fridge to settle for a few days. Use only the dark green layer that has settled at the bottom of the bowl.

Freshly made Pandan juice

Separating the clear liquid layer from the dark green layer.

Ingredients (makes four 6" round thin layer cakes^):
3 egg yolks
10g caster sugar
35g canola/vegetable oil
19g Pandan juice
32g coconut milk
1/4 tsp vanilla extract
1/4 tsp Pandan paste
1/4 tsp coconut flavouring (optional)
58g cake flour
1/8 tsp salt

4 egg whites
40g caster sugar
1/4 tsp cream of tartar

^ I actually baked more layers than needed just in case. I also didn't have more than one 6" round pan so I baked big layer cakes and used the 6" round pan to cut out circles. Edges are not neat but it's not an issue since the cake is going to be covered in cream. You could also bake a tall 6" cake and slice it across. Increase the baking time if you are doing it this way.

Steps:
1. Preheat oven to 160°C. Place a baking tray of water at the bottom of oven to create steam (optional). Set oven rack to second lowest position. Line baking pans/trays with baking paper.

2. Whisk egg yolks and sugar until pale and thick. Add oil and whisk until well combined. Add coconut milk, Pandan juice and all the flavourings. Whisk until well combined. Gradually sift in flour and salt, whisking until no trace of flour is seen.

3.  Prepare the meringue. Beat egg whites with cream of tartar in a clean metal bowl with electric mixer until soft peaks form. Gradually add sugar and beat until stiff peaks form.

4. Quickly but gently fold in the meringue into egg yolk batter in three batches. Scoop the batter into the prepared trays. Tap the trays on the table a few times to release trapped air bubbles.

5. Bake for 12 minutes or until skewer comes out clean. Note that baking time may vary as each oven is different. Immediately remove from tray and peel off baking paper.

6. Cool the cakes before assembly or storage in the freezer. If you are freezing the layer cakes, place baking paper between layers and double cling-wrap the cakes, minimizing air space. Place the wrapped cakes in ziplock bags to ensure a really airtight storage. Improperly stored cakes in the freezer will result in dry cakes.

5 layers here but I only used 4 as I was afraid that there was not enough cream.


Gula Melaka Swiss Meringue Buttercream (smbc) (recipe adapted from here and here*)
Ingredients:
64g Gula Melaka, crushed
2 Pandan leaves, cut to 5cm strips
24g water
2 large egg whites (about 80g)
24g brown sugar
1/8 tsp salt
80-100g unsalted butter, softened and cut to tablespoon sized cubes
1/2 tsp vanilla bean paste
1/4 tsp coconut flavouring (optional)

*I took the best of both recipes, replacing all white sugar with less brown sugar but increasing amount of Gula Melaka from one recipe, and including Pandan leaves in making the Gula Melaka syrup and some vanilla bean paste from another recipe. What you get is something that is not overly sweet but so full of flavour! I took the liberty of adding an extra hint of coconut flavour to up the notch in pleasuring your senses ;).

Steps:
1. Dissolve Gula Melaka in water with Pandan leaves over low heat in a small saucepan. Set aside to cool.
2. Place egg whites, brown sugar and salt in a heatproof metal bowl over a saucepan with 1" of water. Make sure bottom of bowl doesn't touch the water. Heat the saucepan with medium-low heat such that the water is gently simmering. Use a hand whisk to whisk the egg whites until temperature reaches 71.1°C (measure with candy thermometer) or until the mixture is warm and sugar is dissolved. Rub the egg whites between your fingers to see if it has dissolved.
3. Remove from heat and use electric mixer to beat on medium high speed until stiff peaks form and cooled. About 6-10 minutes.


4. Add butter one cube at a time and keep beating. Don't worry if it starts to curdle. Just keep beating and adding the butter and it will all come together in the end.


5. Add vanilla bean paste, coconut flavouring and Gula Melaka syrup 1 teaspoon at a time, beating well after each addition. Beat until light and fluffy. You may use it immediately or freeze/refrigerate until time to frost the cake. Just bring to room temperature and rewhip until fluffy before frosting the cake.


Yums!!! So yummy I ended up licking the spatula and bowl :p. After storing the smbc of course.

Assembly

1. Place a layer of Pandan cake on cakeboard placed on turntable. Brush with some syrup (5g white sugar dissolved in 20ml hot water. I used a bit of Pandan water to impart some Pandan flavour.). Spread a thin layer of gula melaka smbc with a spatula.


2. Repeat step 1 for three more layers of cake. Cover the top and sides with smbc. Use a large offset spatula to smooth out the top as you rotate the turntable. Use a bench scraper to smooth out the sides.


Pardon the not-so-good frosting with smbc as it's been a long time since I last frosted a cream cake :p. Thank God smbc is so much easier to work with than dairy cream!

3. Place macaron shell decorations on top. Those of you who are expert at piping buttercream decorations would prefer to do that :). I prefer to just slap on the deco when I am hard pressed for time, and focus on the sponge cake and cream. Upsize the gula melaka smbc ingredients if you would like to pipe buttercream decorations as the portion here is just about enough to frost the cake.

Thank God that the cake was well received! My hubby who doesn't like cakes in general said this is yummy and not too sweet!


This post is linked to the event Little Thumbs Up ~ October 2015
Event Theme : Coconut
and hosted by Jess of Bakericious


With love,
Phay Shing


Read More »

Tuesday, 6 October 2015

Longevity Peach Lychee Chiffon Cupcake 'Peaches' (updated recipe)


I have a request for a pretty large number of lychee flavoured longevity peach cupcakes together with a small longevity peach themed cake for a 90-year-old lady's birthday. I have updated the recipe to make the cake more fragrant. Original recipe can be found here. Here are four of the peaches...


And here are all 40 of them!


I must admit that it's a test of patience and endurance for me to make so many peaches. I usually make only 12 for a batch so this is a first for me. The peaches are baked in heart shaped Tovolo silicone moulds this time instead of the ones sold at Daiso.

Ingredients (makes about 12-14 peaches and one 8" square thin layer cake):
1 egg yolk
10g caster sugar
42g canola/vegetable oil
48g lychee puree (blend some canned lychees in a bit of syrup, strain to remove woody bits)
1/2 tsp lychee flavouring
1/4 tsp vanilla extract
1/4 tsp rosewater
65g cake flour
1/4 tsp baking powder
A pinch of salt
1/2 tsp Pandan paste
A drop of green gel food colouring
A few drops of white gel food colouring (optional)

4 egg whites
1/4 tsp cream of tartar
40g caster sugar

Steps:
1. Line square pan with baking paper. Place silicone heart shape moulds on a large tray that fits into the oven. Prepare a baking tray of water at the bottom of the oven to create steam (optional). Set oven rack to second lowest position.

2.  Beat egg yolk and sugar until pale and all sugar has dissolved. Gradually add oil and whisk until well combined. Gradually add lychee puree and whisk until well combined. Gradually add sifted flour salt and baking powder and whisk until no trace of flour is seen.

3. Divide egg yolk batter into ratio of 1:3 for green:white batter. Add Pandan paste and green colouring to the smaller portion. Add lychee flavouring, rose water, vanilla and white food colouring. Mix well.

4. Make the meringue. You may want to divide the meringue ingredients into ratio of 1:3 as the green layer cakes and heart shaped cakes are baked at separate times. Beat egg whites and sugar in a clean metal bowl together with cream of tartar until soft peaks form. Gradually add sugar and beat until stiff peaks form.

5. Fold the meringue into each of the coloured batter in 3 additions, following the ratio above.

6. Bake layer cake at 160°C for 10-11 minutes or until skewer comes out clean. Bake hearts at 160°C for 5 minutes, followed by 140°C for 15 minutes, then 125°C for another 10-15 minutes. This baking time is for my thick-walled silicone heart shaped moulds. I used a different temperature setting for my earlier longevity peaches which were baked in thin-walled silicone moulds.

Note that baking times are approximate as each oven behaves differently.

7. Remove baking paper immediately from layer cake. Cool the white cupcakes before unmoulding by hand.

Freshly baked and cooled

8. Use a small knife to make an indent for centerline.

Unmoulded and centerline marked

Assembly
1. Prepare the pink coloured paint for spray painting. I used a mixture of pink gel food colouring and natural food colouring dissolved in lychee syrup (from the can).


2. Dip a toothbrush in the paint, knock off the excess and spray it onto the peaches.


3. Cut out leaves and a small rectangle strip from the green layer cake for the leaves and stem of the peach. Roll the rectangle strip like a swiss roll to form the stem.

4. Melt some marshmellows with a sprinkle of water as the glue. Stick the leaves and stem onto the peaches using the glue. Brush the peaches with a bit of lychee syrup. Store in airtight container in the fridge.

My parents had some extra peaches and they loved it! Working on the peaches was made more pleasant for me because the cupcakes were really fragrant!

Thank God that the cupcakes were well received at the party!

With love,
Phay Shing
Read More »

Wednesday, 2 September 2015

Lychee Longevity Peach Chiffon Cake with Hidden Stuffed Lychee Dessert

My friend loved the longevity peach cake design I made for my grandma last year and wanted the same design for her father-in-law's birthday, but with a completely different flavour. Lychee flavour was requested so here's my version of longevity peach cake made entirely out of soft chiffon cake!


Previously before I figured out how to make chiffon cake peaches, I used snowskin mooncakes. It was a "slap-forehead" moment because the way to make chiffon peaches is similar to the snowskin version. Being an adventurous baker, as those of you who have followed our blog know, I decided to try something new with the hidden surprise inside the hole of the chiffon cake. I thought why not include a lychee flavoured dessert which is refreshing to be eaten with the cake, perhaps lychee stuffed with something. When I did a search on the internet, I only found lychees stuffed with cream cheese. I didn't think the elderly would appreciate that. So I experimented with lychee pudding, adapted from my Pandan kaya recipe but with lychee and a hint of rose flavour. It is so lovely I have to share it with you! My family members who tried it loved it very much! The rose water added here is to enhance the lychee flavour and not to overpower it so the rose flavour is mild. Because the amount of pudding stuffed in the lychees is small, you won't taste it much but I can imagine it served in larger proportions with succulent lychees!

I use good stuff in my bakes!

Longevity peaches
I changed the proportion of ingredients for the teeny peaches but method is the same as the one posted here. Here's the revised recipe.

Ingredients (makes 12 small and 6 medium peaches without green layer cake):
1 egg yolk
7g caster sugar
20g canola oil
20g lychee pureed in canned syrup
A few drops of rose water
30g cake flour
A pinch of salt
White gel food colouring

2 egg whites
1/8 tsp cream of tartar
20g caster sugar

Some photos of the process...

Shaping, spray painting and assembling

Completed peaches!

寿 patterned layer cake and chiffon cake
Ingredients (makes one 6x6" layer cake and one 17cm chiffon cake):
Egg yolk batter
4 egg yolks
12g caster sugar
53g canola/vegetable oil
53g lychee pureed in canned syrup
1/4 tsp rose water (optional but enhances flavour)
1/2 tsp vanilla extract
80g + 1/2 tsp cake flour
1/8 tsp salt
2 tsp Queen's natural sourced yellow powder food colouring*
1/8 tsp red yeast powder
1 drop red gel food colouring

Meringue for pattern
1 egg white
Pinch of cream of tartar
12g caster sugar

Meringue for layer cake
1 egg white
Pinch of cream of tartar
10g caster sugar

Meringue for chiffon cake
4 egg whites
1/4 tsp cream of tartar
40g caster sugar

*omit if don't have and replace with gel food colouring. Or omit colouring totally.

Steps:
1. Place a baking tray of water at bottom of oven (optional). Set rack to second lowest position. Preheat oven to 160°C. Place an inverted 寿 template under baking sheet/silicone mat in 6" baking tray. Lightly grease baking sheet/silicone mat to prevent the pattern from sticking. I used a bigger tray but for recording purposes I scale it down to 6" tray. Was lazy to cut another silicone mat :p.

2. Prepare egg yolk batter. Whisk egg yolk and sugar until pale and thick. Gradually add oil and whisk until well combined. Gradually add in lychee puree, rose water and vanilla extract. Mix well. Gradually whisk in 80g sifted flour and salt. Whisk until no trace of flour is seen.

3. Scoop out 1.5 tsp of egg yolk batter and add in red colouring, sifted red yeast powder and 1/2tsp cake flour. Add sifted yellow powder to the remaining egg yolk batter. Divide yellow batter into ratio of 1:4.

4. Prepare meringue for pattern. Beat egg white with cream of tartar until stiff peak forms, gradually adding in sugar. Quickly but gently fold 4 tbs of meringue into red batter in 3 additions. Transfer to piping bag fitted with a Wilton #5 or #7 tip. Carefully pipe the 寿 on in a thick layer. Bake for 2 minutes if using baking sheet and 3 minutes if using silicone mat.

Baked pattern

5. Prepare meringue and batter for layer cake the same way as step 4, using the smaller portion of egg yolk batter and adding any leftover meringue from step 4 into freshly beaten meringue. Pour the batter slowly over the pattern. Tap the tray a few times on table to release trapped air. Bake for 13-14 minutes or until skewer comes out clean. Immediately remove from tray and cool with another baking sheet over it. Reduce oven temperature to 150°C.

6. Prepare meringue and batter for 17cm chiffon cake the same way as step 4. Bake at 150°C for 15 minutes, then 140°C for 20 minutes and finally 130°C for 10-20 minutes or until skewer comes out clean. Immediately invert to cool. Carefully unmould by hand when cooled.

Freshly baked!

Lychees stuffed with lychee rose pudding
Ingredients:
10-12 canned lychees, woody bits removed, drained and pat dry with paper towels
(A)
50g fresh milk
15g evaporated milk
35g water
26g lychee pureed in canned syrup, strained through fine meshed sieve
1/8 tsp rose water (optional if unavailable)
1/8 tsp lychee flavouring (optional)
5g caster/granulated sugar
Pinch of salt
1/4 tsp agar powder
(B)
5g custard powder
30g canned lychee syrup

Note that the portion here is small. You may upsize it.
Update: I realised that fresh milk separates when boiled, creating a slightly grainy texture to the pudding. Using diluted evaporated milk helps to create a smooth textured pudding. 

Steps:
1. Place canned lychees in some sort of holder e.g. ice cube tray. Place in fridge uncovered.


2. Mix ingredients in (B) well. Set aside.

3. Mix ingredients in (A) in a small saucepan. Heat over medium-low heat while stirring constantly. When boiling, stir (B) again and slowly pour into (A) in a steady stream while stirring (A) constantly. Keep stirring until mixture thickens.


4. Let the pudding cool while stirring frequently. When you feel that it is cool enough to touch without scalding yourself, transfer into piping bag/ziplock bag and fill the lychees with pudding.


5. Refrigerate the stuffed lychees for about an hour uncovered.

Yums! The pudding is good enough to eat it on its own!

Fill the hole in chiffon cake with stuffed lychees


Place the peaches around the circumference of the cake and cover the hole with the 寿 patterned cake. I cut out the word from the layer cake and used charcoal powder dissolved in some water to paint on the black border using a toothpick.

 Use melted marshmellows to secure the peaches on the cake. Brush the peaches and layer cake with some syrup (5g sugar dissolved in 20g canned lychee syrup) to prevent the small or thin parts from drying out. Store in airtight condition in the fridge.

The fudge is so good that if anyone wants a lychee rose version of Pandan kaya cake (layered lychee sponge and lychee fudge), I am sure it will be a hit! In fact, I think I may do that for grandma's 80th birthday :). Update: Here's the post for my grandma's cake! Indeed it was a hit and everyone finished their portion despite moaning that they were too full to eat after a sumptuous birthday meal!

My friend's family loved the looks and taste of the cake! The combination of juicy stuffed lychee eaten with soft and light chiffon sponge was great :).

With love,
Phay Shing


Read More »