Monday, 30 January 2017

Pirate Strawberry and Dark Chocolate Macarons

This is an overdue post of pirate macarons that I made some time back. Don't they look so cheerful that they put a smile on your face?


If they look familiar, that's because I made them more than a year ago for a sea themed party over here. I baked these friendly pirates along with the request for Lego Friends themed macarons.

I used the reduced sugar recipe for the macaron shells here. Both regular and reduced sugar recipes can be found here. You may refer to my Creative Baking: Macarons book for a systematic presentation of the basics and complex shaped macarons. You may refer to my video tutorials for macaron basics and piping of complex shapes on the blog too.

Just to share a few pictures of the process...

Piping the shells

Freshly baked shells along with the Lego Friends bake!

Decorating with royal icing and edible black marker. I used silver dragees for the earrings, stuck on with a bit of royal icing.

I filled the pirates with strawberry and dark chocolate ganache. The recipe for both types of fillings can be found here.


With love,
Phay Shing

Read More »

Saturday, 28 January 2017

‘Guji Guji’ Yuzu-orange Chiffon Cake


Here’s my Guji Guji 拜年! Wishing everyone a Happy, Healthy and Propserous Lunar New Year!

Since it’s Chinese new year, I will keep this post short as it’s a time of rest and family! =D

The cake is inspired by Guji Guji (咕鸡咕鸡), Mediacorp’s adorable chicken mascot this year. I’m sure we’ve all seen the cute Guji Guji dancing on TV and all over Singapore! My friend sent me a photo of the plush Guji Guji toy she loves and asked if I could make it for her family reunion.

I tried out a two-tone ‘hatching egg’ design for the base chiffon cake, using yuzu-orange dual flavours (yuzu top, orange bottom). The zig zag design is actually similar to my Seawaves cake in Deco Chiffon Cakes, so you can find more picture tutorials there. The Guji Guji is made from lemon chiffon cake, by joining two bowl cakes, one for body and head. The rest of the details were cut from sheet cakes.

祝大家新年快乐,万事如意, 生体健康,鸡年大吉!

Happy new year!

With lots of love,
Susanne


Deco Chiffon Cakes

Honored for my Guji guji cake to be regrammed by Mediacorp Channel 8 @ch8sg on their official Instagram account!


Read More »

Friday, 27 January 2017

Ombre Dahlia Pandan Kaya Gula Melaka Cupcakes

My friend tasted my Pandan kaya gula melaka cake I made for her last year and loved it so much she wanted more for her birthday this year! I decided to make something in sweet ombre theme for the flower cupcakes she requested this time. Presenting my version of ombre dahlias!


The detailed recipe and assembly steps of the Pandan kaya gula melaka cupcake can be found here so I will not repeat it in this post. What I will focus on is the change in recipe I did for the sheet cakes for the flowers. Very often people ask how do you get certain colours right because of the yellowish nature of the egg yolk batter. By reducing to one yolk, it helps especially for colours such as blue, purple and pink which will turn out green, grey and orangey respectively due to the yellowish undertone. But I thought of using whole egg this time to increase the moisture content (increasing water and oil doesn't have the same effect). The texture is indeed smoother and softer! Note that the sugar content is quite low in the recipe. This is to compensate for the sugar syrup which will be brushed on during assembly to keep the cake moist with storage.

 I have briefly mentioned how to assemble the dahlias in this post but will update with some step by step photos.

Recipe for Pandan chiffon sheet cakes
Ingredients (makes two 10x12" trays):
Egg yolk batter
1 egg (60-65g with shell on)
10g caster sugar
60g canola/coconut/vegetable oil
70g Pandan water (boil 2-3 cut up leaves in about 400ml water. Cool to room temperature)
1/4 tsp Pandan flavouring (transparent type)
1/8 tsp vanilla extract
80g cake flour
1/8 tsp fine sea salt
Pink, purple and white gel food colouring

Meringue
5 egg whites
65g caster sugar
1/4 tsp cream of tartar

Note: this portion of batter is enough for about 9-10 dahlias.

Steps:
1. Weigh your bowl for egg yolk batter to help you divide it more easily later on. Line the baking trays with baking paper. Preheat oven to 170°C and set oven rack to second lowest position (note that we usually use 160°C as starting temperature. I realise that I get better quality sheet cakes if I start with a higher temperature for the first few minutes then lower it to 150°C for the later few minutes of baking time. Your oven may be different from mine so adjust the temperature accordingly).

2. Prepare egg yolk batter. Beat egg and sugar until pale and thick. I used a hand whisk to whisk for about 5 minutes. You may use an electric mixer to do the job. Add oil and whisk until well combined. Add water and flavourings and mix well. Gradually add in sifted flour and salt and whisk until no trace of flour is seen.

3. Portion the batter into the number of ombre colours that you would like. If your oven is not big enough to accomodate the two baking trays, you may wish to divide the meringue ingredients into two. Colour the batter accordingly.

Ombre pink and purple!

4. Prepare the meringue. In a clean metal bowl, beat egg whites and cream of tartar until firm peaks form or just reach the stiff peak stage, gradually adding sugar once soft peaks form. I find that it helps to use medium speed instead of high speed to beat the egg whites so that you can monitor the stage of meringue more carefully without over beating.

5. Fold the meringue into the various egg yolk batters quickly but gently in two batches. Pour the batter onto the baking trays such that a thin layer of batter is in the tray, about 1cm or less. Tap the tray on the table to release air bubbles.

6. Bake for 3 minutes and then turn the temperature down to 150°C and bake for another 6-7 minutes or until toothpick comes out clean. Immediately flip the cakes onto another baking sheet and gently peel the baking sheet off the cake. Cool the cakes before using as deco or clingwrap (double layer) and store in freezer.

Freshly baked!

I used 4 different flower cutters to cut out the cakes.


Here are the ombre cutouts!


Use a circle cutter to cut out the center portion of the biggest cutout. Use melted marshmellows as glue to stick the layers on. Gently press the middle of the subsequent layers into the depression at the middle. You may need to use a chopstick for the smallest cutout. Stick some white dragees in the middle and brush with syrup to keep the petals moist.


All ready for the birthday girl!


With love,
Phay Shing


Read More »

Thursday, 26 January 2017

‘Legend of the Blue Sea’ Pink Octopus Chiffon Cake


Made the cute pink octopus from Legend of the Blue Sea which just ended last night. I rarely watch Kdramas but this was really really nice, sweet and touching... Love happy endings! =) 

I decorated with pearls (tears) and played with a new wave front pattern over the sea on the base chiffon.

For those interested in making a chiffon cake octopus, you can refer to my previous post Kaya chiffon cake with Yam chiffon baby octopus. I have also shared various kind of seawaves chiffon patterns in Deco Chiffon Cakes and Creative baking: Chiffon Cakes.

I didn't make the cake for myself of course though I like the show very much. It's made for a friend who's a LOTBS fan =).

With lots of love,
Susanne

#LOTBSfinale


Read More »

Wednesday, 25 January 2017

Ondeh-Ondeh Macarons (3D Shells!)

Sometimes I get inspiration from nowhere and this is one occassion. I have been wanting to explore the possibilities that came with my discovery of making 3D macaron shells last year. I finally have the capacity and chance before getting really busy with planning for macaron classes (Yes! I am finally giving classes!) and making lots of macarons in February. Here's my version of ondeh-ondeh, macaron style 😉!

Checkout the oozy gula melaka filling and the cute turtle too!

A view from the side to see the hemispherical shells more clearly.

Both my kids loved the taste of these ondeh macarons and couldn't wait to get their hands on the turtle! I am really happy that this concept of incorporating runny fillings in 3D shells work and opens up the avenue of other trendy runny fillings that are perhaps not so sweet. For those of you who know me, I don't have a sweet tooth and therefore my bakes tend to be less sweet. I tried by best to reduce sugar in this recipe.

Knowing that the end product would be pretty sweet, I reduced sugar for both shell and ganache in an attempt to make it less cloyingly sweet. It's my first time incorporating dessicated coconut into the shells as well. It really makes the shells very fragrant with an added coconuty bite! As this was an experiment and I didn't have any macaron request pending at the moment, I used the French method to make a small quantity of macarons. My preferred Italian method would have wasted too much resources if this experiment failed.

I strongly recommend you to refer to this post for the basics of French macarons.

Recipe for ondeh-ondeh macaron shells
Ingredients (makes about 12 macarons, 24 shells):
40g egg whites (aged for a few days in fridge)
36g caster sugar (you may reduce but meringue will be less stable)
1/8 tsp cream of tartar (optional)
13g dessicated coconut, sifted once
30g superfine almond powder
50g icing sugar
6g rice flour*
1g cornflour*
1/16 tsp fine sea salt
1/2 tsp Pandan paste

*Replace with icing sugar for non-reduced sugar version.

Steps:
1. Sift almond, dessicated coconut, icing sugar, rice flour, cornflour and salt together. Set aside.

2. In a clean metal bowl, beat egg whites with cream of tartar until foamy with an electric mixer. Gradually add caster sugar and beat until stiff peaks form. Once stiff peaks are formed, scrape the meringue down from the sides of the bowl with a spatula and beat for several seconds more to ensure that the meringue is really stiff. Use medium speed to beat the meringue.

3. Add Pandan paste into meringue and briefly mix it in with mixer.

4. Scatter about a third of the dry sifted ingredients over the meringue. Gently fold in using a spatula. Repeat until all dry ingredients are added. Test the consistency of the batter. If it has not reached the slow moving lava-like stage, continue to fold. You may use more force to knock out more air in the batter. You may refer to this post for some video tutorials on macaron basics.

5. Transfer batter into piping bag fitted with a 6-7mm diameter round tip. If you are making regular macarons, simply pipe out the circles on tray lined with baking paper. You may use a circle template if you wish. I piped some bigger circles for the base shells of the 3D macarons.


In order to pipe the 3D shells, use an inverted silicone cakepop mould as the surface and pipe away!


You may have noticed that the surface of the shells appear rougher than usual. This could be due to the addition of the coconut.

6. Bang the tray on the table to release trapped air. Let the shells dry in an air-conditioned room or under a fan until the surface of the shells are dry to touch. When shells are almost dry, preheat the oven to 160°C and set oven rack to lowest position.

7. Place macarons in oven and turn down the temperature to 140°C. Use only top and bottom heat. Bake for 18-25 minutes or until feet appear dry. You may reduce the temperature to 115°C after 15-20 minutes of baking.

8. Cool the shells completely before peeling the baking sheet or silicone mould away from the shells.

Awesome feet!

The 3D shells were slightly browned at the base because I was multitasking with the kids when baking =.= And I forgot to eyeball the oven temperature


Really happy with the texture of the shells even though the surface is rough! Delicate and only slightly chewy. No hollows!


Use royal icing to decorate the turtle.

I had to smile when I see the smiley turtle :)

Steam about 2-3 tbs of dessicated coconut with 1/2 tbs of water sprinkled over it for about 10 minutes. Add a knotted Pandan leaf as well to add that fragrance if you wish. Set aside to cool. You may omit this if you prefer to leave the top surface of the macaron shells clean and free from toppings.


I piped a little royal icing on top of the shells to stick the steamed dessicated coconut on. You may use melted marshmellows as glue too if you don't want to mess around with royal icing.


The macarons are filled with a ring of Pandan caramel ganache and gula melaka caramel in the middle. My original Pandan caramel ganache recipe here would be too sweet for pairing with gula melaka so here's the reduced sugar version.

Prepare the gula melaka filling first. In actual ondeh-ondeh, the gula melaka centers are simply chopped up pieces of the sugar. But the centers turn runny when the ondeh-ondeh is boiled. In order to replicate this effect, I had to create a thick gula melaka syrup that has the consistency of honey when refrigerated. Here's a rough formula I came up with. You may have to adjust your boiling time to get the right consistency. If it's too thick, simply add water a little at a time. I included salt in it to counter the sweetness. You may choose to omit if you want to be a purist about it.

Recipe for gula melaka filling
Ingredients:
65g gula melaka, chopped
39g water
1/4 tsp salt
1 Pandan leaf, knotted

Steps,
1. Place all ingredients in a small saucepan and bring to a boil. Simmer for 2 minutes and let it cool to room temperature.

2. Discard Pandan leaf. Refrigerate the syrup for 10 minutes. Check the consistency. If it is too runny, transfer to saucepan and boil for a couple of minutes and bring to refrigerated temperature again. If it is too thick, add water 1/8 tsp at a time and stir until consistency is like honey.

Recipe for reduced-sugar Pandan caramel ganache
Ingredients:
56g white chocolate, chopped
28g unsalted butter
28g vegetable shortening
35g heavy cream
1/4 tsp fine sea salt
1/3 tsp Pandan paste
1/2 tsp caramel flavouring
1/4 tsp lemon juice (to balance out the sweetness)

Steps:
1. Place white chocolate, butter and shortening in a microwave-safe bowl. Heat for 20 seconds and stir with spatula. Repeat until everything is melted.

2. Place cream, Pandan paste, caramel flavouring and lemon juice in a small saucepan. Heat until the cream starts to bubble. Pour over the melted chocolate mixture. Stir until well combined.

3. Add salt and mix well.

4. Freeze for 2 minutes and use a spatula to mix well. Repeat freezing for 1-2 min and whipping the ganache until the texture is smooth and creamy. You may use an electric mixer for larger batches. Don't worry if the mixture appears to separate in the beginning. Just keep freezing and whipping up the mixture and it will all come together in the end.

This ganache on its own may taste weird but that's because it's supposed to be paired with something really sweet.

Assembly
Assembly for the regular macaron shells is straightforward. Pipe a ring of ganache and fill the center with gula melaka. Refrigerate at least 24h before serving. Leave the macarons at room temperature for 10-15 minutes before consuming.

Filling regular macaron shells.

In order to fill the 3D shells, begin by coating the insides of the hemisphere with ganache (first picture below). Fill the cavity with gula melaka (second picture). Cover the syrup portion with more ganache, such that the ganache completely "seals" in the syrup (third picture). Refrigerate the filled hemispheres for a few minutes to firm up the ganache. Use the cakepop mould to hold the shells in place. Pipe some ganache on the bottom shell (fourth picture) and sandwich the two shells together.


This has certainly been a fun experiment and great learning experience for me :). It's a bonus that it turned out yummy too!

Update: My friend who had one said it's very yummy! She couldn't wait for it to mature a day before eating it 😅.

The turtle finally gets eaten by my younger kid!

Yums!

I am very pleased that this cross-section captures the beautiful macaron texture, creamy ganache and oozy gula melaka center very well!

Hubby gave a thumbs up too! To my surprise, he commented that it's not overly sweet but in fact a very good rendition of ondeh-ondeh in the form of macarons! Hubby is one of my fiercest critics so do give this recipe a try if you are a fan of ondeh-ondeh :)

Checkout the Italian method version of Ondeh-Ondeh macarons over here!

With love,
Phay Shing


Read More »

Monday, 23 January 2017

Kuih Bahulu (Bake & Celebrate!)


Kuih Bahulu or Ji Dan Gao, is my family’s favourite during Chinese New Year! I actually started baking simple stuff during CNY before I started my creative chiffon journey. Today I have a date with some of my dear baking friends to share about our contributions to "Bake & Celebrate: Cookies and Treats", which is a cookbook compilation of various CNY cookies and cakes that has just been launched at all major bookstores.

The contributed Kuih Bahulu recipe was my 3rd try on the recipe. The feedback from family and friends is that it's moister and spongier on the inside, while retaining it's crispiness on the outside, so it's yummier than those sold in stores! I think it's due to the lower flour content I used in my recipe, which sort of follows my version of light chiffon cakes =p. So I'll like to share it with you.

Ingredients:
1 Large egg (80g)
30g Castor Sugar
1/2 tsp Vanilla extract
30g Plain flour
1/4 tsp Baking powder

Baking temperature 190°C. For 9+ min.

Key points to note: 
1) Before using the flour, it is useful to sift the flour and baking powder 2x, as well as toast this flour/baking powder mixture lightly in the oven before using it to fold in. For a very light, crispy outside.

2) Whisk large egg with castor sugar and vanilla extract till ribbon-stage, before folding in the flour with baking powder lightly with a hand whisk. 

Ribbon-stage: this is very important for a very nice spongey inside! 

Folding in flour lightly with hand whisk: also very important for yummy, spongey inside! Do not overfold with a electric mixer.

3)  A high temperature 190°C and short baking time is used. For a brown crispy outside and moist spongey inside. 

4) Lastly, it is very important to oil the moulds generously 2x, as well as preheat the moulds with the oil for the cakes not to stick, as the cakes stick easily.


As usual, being a little free-spirited in my baking, I have baked these in both traditional aluminion molds (from baking shops), as well as silicone molds and muffin pans. Yes they work and taste equally yummy!! Those from the bundt pans are very pretty especially!


The recipe with many other cookies and treats from other baking friends are in Bake & Celebrate (published with Marshall cavendish), available at all major bookstores. The book is retails at $14.90 and is a nice, small handy-size unlike my chiffon cake books. 


I've also made a book flip video on my Instagram stories for today. 

Wishing everyone 新年快乐 in advance! 

With lots of love,
Susanne


Read More »

Sunday, 22 January 2017

Koi Fish (and Firecrackers) Yuzu Chiffon Cake


We’ve heard about ‘Koi’ agar agar, how about ‘Koi’ chiffon cake? The firecrackers are also made from chiffon cake swissrolls! I originally had the inspiration to make these last year and designed them for Deco Chiffon cakes (my 2nd chiffon cookbook), but they taken out last minute in favor of the Baby rooster chiffon cake as this is the year of the Rooster =). 

Nevertheless, I’m thankful I got to try these out when a friend gave me the opportunity to bake these for her this CNY. The flavour requested was Yuzu chiffon cake, one of my favorites! This round, I had increased the yuzu marmalade used for stronger flavour. The same Yuzu chiffon cake recipe is used for both the Koi fishes, as well as 6-inch Yuzu chiffon cake base.

Something different for a change, lovely Koi fishes made from yummy Yuzu chiffon cake!


‘Koi Fish’ Yuzu Chiffon Cake (Makes 6 koi fishes)
2 egg yolks
12g castor sugar
27 g vegetable/corn oil
38g water
40g Prima cake flour
1.25 tbsp yuzu marmalade or honey citron tea
Pinch of salt
Red/yellow natural/gel food colouring

3 egg whites
¼ tsp cream of tartar
25g castor sugar

1. Make yuzu tea by stirring in 1 ¼ tbsp of yuzu marmalade in 38g hot water. Filter the tea to remove the bits. 

2. Preheat oven to 150°C.

3. Beat egg yolks with sugar with whisk till pale yellow before stirring in oil and yuzu tea.

4. Add in sieved flour and salt and whisk till no trace of flour found.

5. Spoon out 3 tsp batter to 2 bowls, add a drop of red or yellow food colouring to each of the two bowls and mix well. *I used PME natural red and yellow food colourings.

6. Meringue: Beat the egg whites with ¼ tsp cream of tartar till firm peaks form or just to the point of reaching stiff peak, mixing in caster sugar in 2 additions.

7. Transfer out approximately 6 tbsp meringue into red and yellow egg yolk batter, leaving the rest for the plain yuzu batter.

8. Gently fold meringue into respective egg yolk batters 1/3 at a time.

9. Spoon a teaspoon of red batter into Koi mold, gently spread randomly, followed by the yellow batter. *You can also omit the yellow batter, using only red.
I got my Koi fish molds from here. Metal molds can also be used or preferred.


10. Fill the rest of the Koi mold with plain yuzu batter, gently tap to remove air bubbles.

11. Bake at 150°C for 10 min, at 140°C for 10-15 min, or until skewer inserted into centre of cake comes out clean.

12. Allow to cool completely on wire rack.

13. Gently unmould by hand by pulling cake from sides before flipping over. For picture tutorials of unmoulding from various molds, you can refer to Deco Chiffon Cakes.

14. Draw on the eyes using melted chocolate, or from cake cut-outs or ready-made ‘eyeballs’ candy (stick on with melted marshmallow).

15. Further use a fruit knife to deepen the grooves or cuts on the body by going over the lines.


The base cake uses the same Yuzu chiffon recipe for a 6-inch (15-cm) tube pan. Very soft and yummy!


Yuzu Chiffon Cake (6-inch chiffon tube pan)
2 egg yolks
12g castor sugar
27 g vegetable/corn oil
38g water
40g Prima cake flour
1.25 tbsp yuzu marmalade or honey citron tea
Pinch of salt

3 egg whites
¼ tsp cream of tartar
30g castor sugar

1. Make yuzu tea by stirring in 1 ¼ tbsp of yuzu marmalade in 38g hot water. Filter the tea to remove the bits.

2. Preheat oven to 160°C.

3. Beat egg yolks with sugar with whisk till pale yellow before stirring in oil and yuzu tea.

4. Add in sieved flour and salt and whisk till no trace of flour found.

5. Meringue: Beat the egg whites with ¼ tsp cream of tartar till firm peaks form or just to the point of reaching stiff peak, mixing in caster sugar in 2 additions.

6. Gently fold meringue into egg yolk batter 1/3 at a time.

7. Fill the chiffon pan leaving 2.5 cm from the top, gently tap to remove air bubbles.

8. Bake at 160°C for 15 min, at 140°C for 20+ min, or until skewer inserted into centre of cake comes out clean.

9. Allow to cool completely on wire rack inverted.

10. Gently unmould by hand (see video tutorial).


‘Firecrackers’ Swissrolls

Using half of the recipe above (i.e. 1 egg yolk, 1.5 egg whites, with added red natural/gel coloring). Bake the batter on an 8-inch square pan lined with baking pan at 160°C for 15 min. Roll up while still warm to prevent cracking.

After the cake has cooled completely, unroll the sheet cake, cut into 1-inch by 1-inch squares and roll up the mini swissrolls. Assemble the mini swissrolls into a firecracker. I used string candy for the centre ‘rope’.


Mini ‘tangerines’

From baking orange chiffon in cake pop molds, shared in Deco Chiffon Cakes book (my 2nd chiffon book) as part of the ‘吉' chiffon cake. Leaves and calynx are cut from sheet cakes.


The chiffon ‘Koi fishes’ and ‘firecrackers’ swissrolls are versatile as cupcakes gifts like the agar agar or as décor on cakes. In their original versions, they were meant as cupcakes! But here’s how I used them to decorate cakes as gifts.


Hope you will like these new ideas!

Wishing everyone 年年有余 (鱼)!A reason why Koi fishes are so popular during Chinese new year!


With lots of love,
Susanne


Some good news to share: Deco Chiffon Cakes, Creative baking: Chiffon Cakes, Macarons and other cookbooks having a festive discount (20% discount and up) at Popular bookstores!


Hop on here for 3D Salted egg yolk Baby Rooster Chiffon Cake (my baby roosters have found their mummy! =p


Read More »

Thursday, 19 January 2017

3D 'Rooster' Salted Egg Yolk Chiffon Cake


My little baby roosters have found their mummy! =p Don't they look so happy? The mummy is kind of overweight due to all the Chinese new year feasting =D

I've previously shared an easy salted egg yolk chiffon recipe and method for making these cute baby rooster cupcakes. The big 3D rooster was actually made at the same time using the same salted egg yolk recipe but in a doll cake pan. The lady had a special request to have less sweetness, so I reduced the sugar content and salted egg yolk accordingly by 80% so that the flavour would be balanced. The colour looks darker and I think that's normal due to the longer baking time of the big cake in the oven.

For the big 3D version, the crown was cut out from sheet cake instead of using hearts sprinkles. The nose was baked for chiffon cake in paper cones instead of sprinkles as well. I used melted marshmallows to stick them on.


Here's another family reunion photo of the salted egg yolk rooster family! =D Cheeesse..

I'll be posting slightly faster these 2 weeks to clear the CNY bakes!

With lots of love,
Susanne


PS: Something nice to share, the salted egg baby rooster cupcakes were featured on DiscoverKL and says.com !

Another good news, my Deco Chiffon Cakes and other cookbooks eg Creative baking: Chiffon Cakes, Macarons, and another cookbook Bake & Celebrate (in which I'm contributing a kueh bahulu recipe), are all on 20% (and up) discount and Popular now! So here's a good chance to get for your loved ones if you haven't!


Hop on here for Chiffon cake Koi fishes (and firecrackers)! Something different from the usual agar agar!


Read More »

Wednesday, 18 January 2017

Mandarin Oranges and Yuzu Rooster Chiffon Cupcakes (updates for shaping oranges!)

I believe many of you have seen and attempted making mandarin orange look alike chiffon cupcakes ever since I came up with them 3 years ago. This is the fourth consecutive year that I am making these mandarin oranges! I made a couple of yuzu flavoured rooster cupcakes to go along with them to welcome the year of the rooster :)


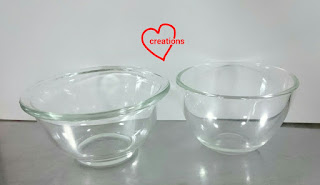
These mandarin oranges have a special place in my heart and baking journey as it's one of my earliest creative chiffon bakes baked for a loved one, and I made the discovery that chiffon cakes can be baked in glass bowls and shaped by hand or knife. The first set of mandarin oranges were made for my mother-in-law when we visited for Chinese New Year. Read about it here :)

My friend requested for the mandarin orange cupcakes this year and it's the largest quantity I have baked for a request so far. 20 mandarin orange cupcakes! Since I don't have that many glass bowls, some of the oranges were larger using a 11cm OD bowl instead of my usual 8.5cm ones. I needed two rounds of baking to complete the oranges.


The recipe and video tutorial for shaping the oranges can be found in this post so I shall not repeat them here. What I would like to update is a new shaping technique that I found much neater, to round out the bottoms of the oranges. Instead of using your hand to tuck in the base of the cake, use the same glass bowl that the cake was baked in to round out the base of the cake as shown in the picture below:

Gently tuck the base of the cake (near the rim of the bowl before unmoulding) into the bowl and leave it in there for 15-20 minutes before taking it out. The bases will be very neatly tucked in!

I used this neat trick for the head and body of the roosters as well! I baked the heads in 8.5cm OD bowl and the bodies in 11cm bowl. The other parts of the roosters were baked as sheet cakes in a 7" square tray and cut out using cookie cutters.

Check out the neat rounded bottoms of the cakes! Assembling the head into the body with melted marshmellow and toothpick.

The recipe for yuzu chiffon cupcake can be found here.

Ta-dah! Roosters!

With love,
Phay Shing

Read More »

Tuesday, 17 January 2017

'Flying Doraemon' Rainbow Cloud Chiffon Cake


This is a chiffon cake for my son’s birthday! Doraemon is one of the things he has likes and the only cartoon my hubby encourages as it’s in Chinese =p. The idea I had in mind was the flying Doraemon scene which I find super cute! I made a chiffon flying Doraemon on a Rainbow-Cloud sky chiffon cake backdrop. The cloud backdrop was inspired by the cartoon and a dear friend.


Cloud-Sky

Cloud-Sky Chiffon Cake (8-inch tube pan)
Egg yolk batter
6 egg yolks (or 2 egg yolks + 1 whole egg)
40 g castor sugar
79 g vegetable/corn oil
76 + 5 g water
10 vanilla extract
120 g Prima cake flour, sifted
1.5 tsp blue pea flower extract (40 blue pea flowers in 10g hot water)
Blue gel food colouring

Meringue
8 egg whites
1/2 tsp cream of tartar
90 g castor sugar

1. Preheat oven to 160°C. Prepare a tray of water under the lowest rack for steambaking. *Optional but helps to increase moisture and control oven temperature for ogura-like texture.

2. Beat egg yolks with sugar with whisk till pale and light before stirring in oil, water, and vanilla extract.

3. Add in sieved flour and whisk till no trace of flour found. Divide the batter 2/3 and 1/3. To the 2/3 portion, add blue pea flower extract and a dip of blue gel food colouring (optional but brightens up the colour). To the 1/3 portion, add 5 g water.

4. Meringue: Using an electric mixer, beat the egg whites with ¼ tsp cream of tartar till frothy. Add in half the castor sugar for meringue and whip till soft peaks. Add in all the castor sugar and whip till firm peaks form or just to the point of reaching stiff peak.
*Firm peaks give finer, softer texture, especially with steam baking.

5. Divide the meringue 2/3 and 1/3 for each coloured batter. Gently quickly fold in the meringue into respective batter in 3 additions.

6. Spoon the plain batter in cloud-like blobs at the base and sides of the pan, then fill the surrounding spaces with blue pea flower batter. Repeat till the batter is 2-cm from the brim. 

7. Bake the chiffon cake for 15 min at 160°C, then 150°C for 10 min and then 140°C for 25+ min, or until skewer inserted into centre of cake comes out clean.

8. Invert the chiffon cake once removed from oven and allow to cool completely.

9. Unmould the chiffon cake by hand (‘Hand Unmoulding Chiffon Cake for a Clean Finishing’ video tutorial).

*The cake is a little similar to 'World map Chiffon Cake' (right most pic in collage below) from my 2nd book Deco Chiffon Cakes. You may find the picture tutorials in the book useful for patterning the clouds in the chiffon cake.


After unmoulding, I filled the centre hole with marshmallows surprise and covered it up with a circle cut out from leftover batter baked as sheet cake. 


Rainbow

You may find the recipe for Chiffon Cake Rainbow (also right most pic in collage below) with picture tutorial in Creative baking: Chiffon Cakes (1st book).


Doraemon

I piped on the face with chiffon batter in a Doraemon mold, then added the rest of the features using chiffon sheet cake cut-outs with marshmallow cream. 


Here's a slice of my chiffon cake finally! Sorry it wasn't cut too beautifully as it was cut on the spot at the celebration using the blunt cake knife.


Happy birthday dearest Caleb!! 

With lots of love,
Susanne


Read More »