Monday, 28 December 2020

'黑皮牛耶!' Year of the Ox Choux Pastry In Macaron Teacups

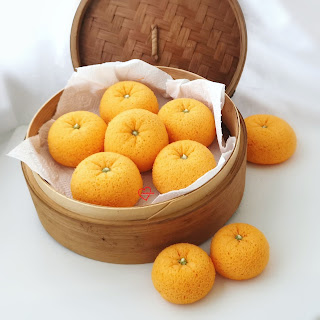
It has become a personal annual tradition of sorts for me to put up content to welcome the new year featuring three genres of bakes that are dear to me. It started out with the personal tradition of making the mandarin orange chiffon cake "oranges" but it has since expanded to include macaron teacups with a new year greeting and the Chinese zodiac animal for the year. Since 2021 welcomes the Year of the Ox, I have to wish everyone "黑皮牛耶! Happy New Year!" 


To those of you who aren't familar with Chinese, "黑皮牛耶", the four characters on the macaron teacups literally translates to "black skinned ox yeah" but when read aloud, it sounds like "happy new year" in English. You can see why I can't resist making this pun in 2021🤣

"黑皮牛耶!" indeed! 🤣. Look at their happy and cheeky faces! Black may seem like an inauspicious colour but without this choice of colour, I won't be able to pull off the pun. 

You may refer to this post for details of the mandarin orange chiffon cake oranges. I took a nice photo of just the oranges this year but won't be doing a separate blog post for it because the one in 2016 is comprehensive enough. 


You may refer to this blog post for details on making the teacup macarons. I have been conducting macaron teacup classes and will continue to do so as they are rather popular. 

What is new that I would like to share here is the choux pastry Ox. Some of you asked for the template so I will share it here too. Please refer to this post for the detailed recipe for making the choux pastry batter and craquelin. Add charcoal powder to the craquelin and choux batter to colour it black, preferably sifted with the flour. About 1 tsp will do for a 2 egg portion of choux batter. Baking the pieces for the ox is relatively easy as you don't have to be concerned about browning. The main head piece is made using a 2.3-2.5cm diameter template for the piped circles of batter and 3cm cookie cutter for craquelin cutout. 

Here is a picture of the baked choux pastry cases. I baked some plain uncoloured large choux au craquelin at the same time. 


Prepare some plain coloured choux batter for the horns. If you don't want to prep the batter twice (once for each colour) , you can use halved sliced almonds for the horns. Although you may split the choux batter and colour a portion black while leaving a small portion plain, do note that adding charcoal powder after the egg has been added to the choux batter limits the expansion capacity of the choux bun a little but it will still work.

This is the template for making the ears, horns and arms of the Oxen. 

Stretch this picture to fit an entire A4 paper for the right sizing. I didn't want to switch on my laptop for the original so I took a photo of the template using my phone camera so pardon the shadow😅. 

Piped batter for the small parts. Bake at 175C for 15 min or until horns appear golden brown. You may need to return the long arms to the oven to bake at 130C for another 5 to 10 min to ensure it is totally crispy. 

When cooled completely, carefully use a toothpick to make a 2cm diameter hole at the base for piping in the filling when ready to eat. I always recommend filling just before eating. Use the toothpick to make holes for inserting the horns and ears. Use black royal icing to secure them if necessary. Use more royal icing to add on the facial details. You may dry the assembled choux cases in 70C oven for 20 min to thoroughly dry it out. 

Tadah! Cute little ox! 

I am not providing any recipe for filling because you can fill it with any filling you like and I have shared a number of flavours in our blog that you can choose from. 

Happy New Year to all who have followed us all these years! 2020 has been an eventful year for all. May 2021 be one that is better! God bless! 


With love, 

Phay Shing


Read More »

Thursday, 24 December 2020

Christmas Tree Tier Chiffon Cake


"When they saw the star, they were overjoyed." - Matthew 2:10

Joy to the world, the Lord is come! Let earth receive the king!

May this Christmas bring you and your family much love, joy and peace!

I had a lot of fun making this Christmas tree! This is my first 5-tier chiffon cake, made from multiple pandan chiffon cake bundts. I stacked them up to make a tree and decorated with colourful chiffon cake pops "balls". The tree is almost 10-inch tall and topped with a chiffon cake "star". 

Here is a little assembly video just for fun.

Merry Blessed Christmas to you and your families!

With lots of love,
Susanne


Read More »

Wednesday, 23 December 2020

Twinkling Chiffon Cake Gingerbread House


Celebrating Christmas with our lovely Sanrio characters! 

I always dreamed of making a chiffon cake gingerbread house with twinkling lights!

See the twinkling lights video here.

The photos can't capture the lights inside the house well, so do check out the video. The entire gingerbread house and Sanrio characters are all made from chiffon cake! 

I had wanted to make a chiffon cake house with twinkling lights for long time, so I am really excited about it! Very thankful for the opportunity to try this out in collaboration with Sanrio.

We are also having a Sanrio bake-along for Sanrio characters x Susanne deco chiffon currently. For more details check out my post here
 
Have a blessed Christmas with your loved ones!

With lots of love,
Susanne


Read More »

Monday, 21 December 2020

Gingerbread Spice Logcake

I wanted to create a different flavour for logcakes this year when my mum requested for them for our extended family. I was rather clueless about what to do until I made the gingerbread spice reindeer macarons last week. Presenting my version of gingerbread spice logcake! 


I made 3 of these actually, decorated with gingerbread man macarons made with leftover macaron batter from making the reindeer

Let me explain what goes into the logcake to tantalise you with the aroma and flavours

Sponge: dairy-free chocolate chiffon 
Filling : muscovado sugar and spice pastry cream lightened with whipping cream (A. K. A. Diplomat cream), and roasted walnuts
Outer frosting : whipped white chocolate ganache that is lightly spiced and lightly flavoured with passionfruit to give the cake a mild fruity tang to complement the warm spices, muscovado sugar and chocolate. 


You may refer to this post for the gingerbread spice macarons. Just to share a couple of pictures for the macarons... 

Piping the macaron shells. This was rather impromptu so I used gingerbread man cookie cutters to trace the template but used a round cookie cutter to give it a bigger head for a more chibi effect. 

The macaron shells were decorated with royal icing. 

Recipe for chocolate chiffon sponge
I have made chocolate chiffons for a few years for log cakes and each one has a slight variation. This time round I decided not to generate any excess egg yolks. At the same time I want to bring out the chocolate flavour in the cocoa powder so I chose to bloom the cocoa powder first in boiling water instead of sifting with cake flour. 

Ingredients (makes one 10 x 12" sheet cake) :
Egg yolk batter
3 egg yolks
5g caster sugar
28g vegetable or canola oil
13g valrhona or other Dutch processed cocoa powder
30g boiling water
1/2 tsp vanilla extract 
1 tsp kahlua coffee liqueur (optional) 
26g cake flour 
1/6 tsp baking powder
A pinch of salt

Meringue
3 egg whites
1/5 tsp cream of tartar
40g caster sugar 

Steps: 
1. Preheat oven to 170C. Set oven rack to middle position. Line baking tray with teflon sheet or parchment paper. 

2. Make egg yolk batter. Dissolve cocoa powder in boiling water. Add salt and dissolve. Set aside to cool with cling wrap covering bowl. 

3. Whisk egg yolks and sugar in a mixing bowl until pale and thick. 

4. Add oil and whisk until combined. Add dissolved cocoa with water and whisk until combined. Add vanilla and kahlua coffee liqueur. Whisk until well combined. 

5. Add sifted cake flour with baking powder and whisk until no trace of flour is seen.  

6. Make meringue. Beat egg whites with cream of tartar using electric mixer until foamy. Gradually add sugar and continue beating until firm peaks or just reach stiff peaks. 

7. Gently but quickly fold the meringue into egg yolk batter in 3 batches. Pour into lined baking tray. Bake for 13 minutes or until skewer comes out clean. Immediately flip it out onto a clean sheet of parchment paper. Roll it up to cool completely. 


Freshly baked chocolate chiffon sponge. 

Muscovado sugar and spice diplomat cream
Ingredients:
2 egg yolks
20g cornflour 
24g muscovado sugar (more if you have sweet tooth) 
200g milk
1 tsp vanilla bean paste
3/4-1 tsp cinammon powder*
1/4-1/2 tsp ginger powder*
1/8-1/4 tsp allspice powder*
A pinch of salt
15g unsalted butter
80g whipping cream (I used non-dairy for better stability in hot Singapore) 

* adjust quantity according to how spicy you like

Steps: 
1. Heat milk, spices, salt and vanilla in saucepan until steaming hot but not boiling. In the mean time, whisk together egg yolks, cornflour and muscovado sugar. 

2. Once milk is hot, pour in a thin stream into egg yolk mixture while whisking the egg yolk mixture continuously. Pour back into saucepan. 

3. Heat mixture over stove while whisking continuously using low heat. Once mixture thickens, remove from heat and continue whisking until smooth. Return to heat and whisk and cook until thickened until preferred consistency. I personally prefer it thicker. 

4. Transfer the custard into a bowl and add butter and whisk until melted. Press cling wrap on surface of the pastry cream. Refrigerate for at least 30 min or overnight. 

5. When ready to assemble, whip the whipping cream until firm peaks. Briefly whip the chilled pastry cream with spatula until loosened. Fold in whipped cream. 


Muscovado sugar and spice diplomat cream


Passionfruit and spice whipped white chocolate ganache
Ingredients:
1 gelatin sheet bloomed in ice water
125g heavy cream 
60g white chocolate couverture (I used Callebaut) 
1/2 tsp vanilla extract 
1/8 tsp cinammon powder**
1/8 tsp ginger powder**
1 tsp freeze-dried passionfruit powder **
70g whip topping (this is a non-dairy whipping cream that is pre-sweetened. You may replace with dairy cream but add 1/2-1 tbs of icing sugar when whipping it) 

**optional or adjust according to taste. The quantities I used are deliberately small as the filling is already strong flavoured and I wanted something milder and more refreshing to complement it. 

Steps:
1. Heat cream with spices and vanilla until just bubble. 

2. Add gelatin and whisk until dissolved. 

3. Pour 1/3 hot cream over white chocolate and wait 30 sec. Stir until melted. Add rest of cream and stir until smooth. Press cling wrap on surface and refrigerate overnight.

4. When ready to assemble, beat on high speed with mixer. Fold in whip topping. 

I had some leftover diplomat cream so I folded it into the whipped ganache. 

Assembly
1. Unroll cooled chiffon sponge. Spread some diplomat cream on surface. Add some halved walnuts. 


2. Roll it up with parchment paper wrapping around the roll. Freeze for at least 2h or overnight. 

3. Use a serrated knife to slice off both ends. 

4. Apply some diplomat cream on cakeboard and place the main roll on cakeboard. Apply some diplomat cream to glue on the cut off pieces to the main log. 


5. Coat the outer surface of the logcake with whipped ganache. Don't worry sbout being neat as you don't have to be! 


6. Use a fork to draw the bark pattern on the logcake. 


Add decorations as you wish. I just decorated with a gingerbread man macaron and plastic holly logcake decoration. 


Keep refrigerated until ready to serve. If you wish to enjoy it like an ice-cream cake, you may keep the logcake frozen but thaw it at room temperature for 30 min or a few hours in the fridge before slicing to serve. Excess diplomat cream mixed with the whipped ganache can be frozen and served as ice-cream on its own or with chocolate sauce and chopped walnuts. 


Blessed Christmas to all! 


With love, 

Phay Shing

Read More »

Saturday, 19 December 2020

'Korilakumma-Claus is coming to Town' Chiffon Cake


Ho Ho Ho! Korilakumma-Claus is coming to town!  

A just-for-fun creation, as we know that the true meaning of Christmas is the birthday of Jesus! 💓

The creation is made entirely from chiffon cake, including the chimney that is carved from a square chiffon cake.

A different year this year, hope you having a good holiday with your loved ones!

With love,

Susanne


Read More »

Friday, 18 December 2020

Reindeer Gingerbread Spice Macarons

I have to admit that this is a rather last minute request and impromptu bake. Even the flavour was decided rather last minute, after I baked the shells. Nonetheless, I am glad I managed to squeeze in this bake while preparing for my reindeer choux pastry class!

Playful reindeer frolicking among the trees! 

What started off this impromptu bake was an egg white sitting in the fridge. I used the French method to make these reindeer. The design is what I used for my reindeer carousel masterclass. You may refer to this post for my French method recipe but please adjust oven baking time and temperature according to your oven. 

I used royal icing and edible marker to decorate the reindeer. 

What is new that I would like to share in this post is the gingerbread filling. I manage to come up with one that is firm enough as doorgifts/sheltered picnic settings in tropical Singapore but not too sweet. Some of the ingredients are a little unorthodox but it helps to temper the sweetness level and adds that hint of fruitiness that complements the spices.  I used Mimi's recipe as a reference but tweaked it to something that won't melt into a puddle in tropical climates. 

If you are living in a temperate country, feel free to increase the whipping cream portion to 50g.


Gingerbread spice whipped ganache

Ingredients:

100g white chocolate (chopped or use chips) 

15g unsalted butter

5g 70% dark chocolate couverture (optional) 

25g heavy cream

10g cocoa butter (may replace with white chocolate) 

Pinch of salt

1/2 tsp vanilla extract

1 tsp cinnamon powder 

1/4-1 tsp ginger powder (depending on how spicy you want) 

1/4 tsp Allspice

1 tsp freeze-dried passionfruit powder (optional) 

Steps :

1. Place all ingredients in a microwave-safe bowl. Heat in 10 second bursts at medium power using microwave oven and stir well. Alternatively you may use double-boiling method. Be careful not to overheat the chocolate. 

2. Chill melted ingredients in fridge for 5 minutes. Stir and return to fridge for another 3 minutes. Whip until lightened in texture. You may need to repeat chilling for 3 min again and whip again until texture resembles buttercream. 


3. Transfer to piping bag and fill the shells. Keep in airtight condition in fridge for up to 2 weeks. Let the filled macarons mature for at least 24h before consuming. 


Hope this batch of reindeer puts a smile on your face! 


With love, 

Phay Shing

Read More »

Monday, 14 December 2020

Hurricane Christmas Tree Pattern Chiffon Cake with Sumikko Gurashi Shirokuma


Using the Hurricane Chiffon Cake technique to make Christmas trees on the sides of the cake! 🎄💖

Hurricane chiffon cake tutorial here for those who missed it:


This Christmas trees cake uses the Hurricane Type 1 for neater pattern!

Tree Hurricane Chiffon Cake (15-cm tube pan) (by Susanne Ng)
3 egg yolks
18g castor sugar
40g vegetable/corn oil
42g milk/ coconut milk
60g cake flour
4g vanilla extract
1/2 tsp pandan paste
Pink food colouring

3 egg whites
35g castor sugar
¼ tsp cream of tartar

1. Preheat oven to 140°C.

2. Prepare egg yolk batter:
a. Whisk egg yolk with sugar using hand whisk.
b. Add in oil, milk, vanilla extract and mix well.
c. Whisk in sifted cake flour till no lumps are found.

3. Divide the egg yolk batter into two. To the green batter, add pandan paste. To the other batter, add a drop of pink food colouring.

4. Prepare meringue:
a. In a grease-free, dry metal bowl, using electric mixer, whisk egg whites with cream of tartar till frothy.
b. Add in castor sugar for meringue gradually and whisk at high speed till firm peaks form.

5. Divide the meringue into two and gently fold meringue into respective egg yolk batter in 3 additions.

6. To make the hurricane pattern at the side:

Fill the base with pink batter. Cover with green batter.

Type 1:
Using the base of a spatula/spoon, draw downwards, then circle up (without touching the side of the pan), and then draw downwards again. Repeat till you reach one full circle (see video).


And the cake is topped by a sweet bear wishing you a Beary Blessed Christmas in advance!

With lots of love, Susanne


Read More »

Wednesday, 9 December 2020

Slime and Magma Cube Nama Chocolate Mochi

As my elder kid gets older, what he is interested in changes as well. The yearly birthday bakes is like a diary of sorts, documenting what he likes. But as he gets older, his taste gets more exotic and the bar set for me is higher. 

"Ma, why don't we try something different this year." 

By different, he means different genre of bake. I made him chiffon cake, cookies, macarons, choux pastry and even a chocolate bomb with macaron hidden inside before for previous birthdays. This year, he requested for mochi. Not just any mochi but mochi in his favourite flavours and in the form of some characters in his favourite game --- Minecraft. Presenting my version of Matcha mochi with Matcha Nama chocolate and azuki bean in the center, and Mocha mochi with Nama dark chocolate and coffee salted caramel in the center. 

Slime and Magma cubes! 

The only challenging part of this is figuring out how to get it to be cuboid without special moulds. I tried my technique of using cookie cutters to make snowskin mooncakes for this but somehow it didn't work. Not sure if it is the fact that the filling is cold and can go soft after a while. I gave up trying with the square metal cookie cutter after a couple of atempts and just stuffed it in a silicone ice cube tray. It worked!... Sort of 😂. You need to make sure the mochi is sufficiently dusted with flour so that it doesn't stick to the mould or it will end up tearing again.

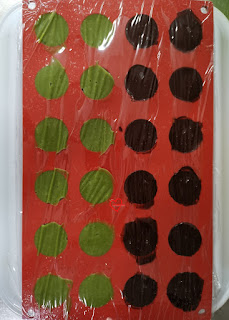
You begin by making the Nama chocolates. I used Just One Cookbook's recipes as a reference for both dark chocolate and matcha chocolate versions. Nama chocolate is actually just chocolate ganache dusted with cocoa or matcha powder. I skipped the dusting and prepared the chocolates using my lazy one-bowl method of preparation. 

Nama dark chocolate 
Ingredients :
100g 54.5% Callebaut dark chocolate 
50g whipping cream 
1/2 tsp Kahlua coffee liqueur 

Steps :
1. Place everything in a microwave-safe bowl or heatproof bowl. Melt the chocolate using medium power at 10 second bursts of using microwave. Alternatively you may use double boiler to melt the chocolate. Stir well until chocolate is melted and mixture is smooth. 

2. Transfer into 3cm silicone hemisphere moulds and press a cling wrap on the surface. Refrigerate for 1h.

3. Reserve a little melted chocolate in piping bag. 

Matcha Nama chocolate 
Ingredients :
100g Callebaut white chocolate 
30g whipping cream 
7g unsalted butter 
4g (1/2 tbs) matcha powder 

Steps:
1. Place everything except matcha powder in microwave-safe bowl or heatproof bowl. Melt the chocolate in a similar way as pt 1 above.

2. Add matcha powder and mix well. 

3. Transfer into 3cm silicone hemisphere moulds and press a cling wrap on the surface. Refrigerate for 1h.


4. Reserve a little melted chocolate in piping bag. 

You may omit the coffee salted caramel or leave out the coffee and use plain salted caramel if you wish. I usually a stash of homemade salted caramel in the freezer as it freezes well. 

Coffee salted caramel
Ingredients:
1 tsp instant coffee granules
1 tsp boiling hot water 

Note: you may prepare your salted caramel by dissolving the coffee granules in the hot cream for making salted caramel. But because I already have salted caramel in store, I add the coffee after the caramel has been made. 

Steps:
1. Dissolve instant coffee in hot water. Doesn't matter if not all the granules are dissolved. 

2. Add coffee into salted caramel in a microwave-safe bowl. Mix well. Microwave for 10 sec at medium power. Mix well. Repeat heating and stirring until mixture is hot enough and starts to bubble. 

3. Let coffee caramel cool for 10 min at room temperature. Sieve coffee caramel into piping bag. 

Assembling of the mochi filling involves first making a well in the middle of the set chocolates. You can use anything you have on hand to create the well. Spoons, fondant tools, mini melon baller etc. 


Fill the cavities with coffee salted caramel or partially mashed azuki beans. 


Glue the halves of the hemispheres together using some melted chocolate left in the piping bags. Use gloves to handle the chocolates as heat from your fingers will melt it. 

Each ball of chocolate is about 16g. 

Put the assembled chocolates into the fridge or freezer while you work on the mochi. 

Mochi 
Ingredients:
45g icing sugar
45g cooked glutinous rice flour + extra for dusting 
75g water 
Powder flavouring * 
12g olive oil (or shortening /other oil) 
Gel colouring (if using) 

* 1/2 tsp Matcha powder OR 
1/2 tsp instant coffee granules and 1/2 tsp cocoa powder. Omit this for plain mochi

Note: traditional mochi doesn't contain any oil and raw glutinous rice flour is used in the preparation. I used cooked glutinous rice flour as I still have leftover from snowskin mooncake making. I add oil so it can keep moist and soft longer. So after a few days, the mochi texture will resemble snowskin mooncake texture. And if you guessed that I actually used a snowskin mooncake recipe for my mochi, you are absolutely right! 

Steps:

1. Sift together icing sugar and cooked glutinous rice flour. If powdered flavouring is used, sift that in together as well. 

2. Place water, oil and gel food colouring in small saucepan. I added a drop of green for the matcha mochi and a drop of red for the mocha mochi to get the final product to look more like the characters. Heat the mixture until it just starts to boil. 

3. Pour the liquid into the sifted flour. Mix well with a spatula until a dough forms. For the matcha mochi, I added a few drops of white gel colouring and mixed it until the colouring is absorbed but colour is not homogeneous. This is to give it a slightly molted look but is optional. Cling wrap mixing bowl and set aside to cool for about 10 min or until dough is cool enough to handle. 

4. Briefly knead the dough with spatula and portion into 20g balls. Dust with some flour if it is too sticky. I like to use parchment paper as my work surface. 

5. Flatten a ball of dough and place a ball of chocolate in the middle. 


6. Carefully wrap the filling with dough, placing it seam side down. 


7. Dust each ball of mochi with cooked glutinous rice flour. Place into silicone ice cube trays. These are slightly bigger than 3cm. Carefully press it in to fill the corners as far as possible. 


8. Freeze for 1h covered. In the mean time, prepare some plain dough for making the Magma eyes. Prepare some greenish black dough for making the Slime eyes and mouth. I used a mix of matcha powder and charcoal powder to colour the dough. 

9. Roll out the dough until about 1mm thick for both plain and green-black. I used fondant square cutters to cut out the small squares and laid them on a tray lined with parchment. 

10. Air-dry the cutouts for 15 min. Use edible marker or edible paint to add on the red, orange and yellow details of the Magma eyes. 


11. Pop the frozen mochi out of the ice cube tray and place them on a baking tray lined with parchment paper. 

12. Brush a little water on the spots where the eyes are supposed to go. Carefully place the eye cutouts in place. 


13. Store the assembled mochi in airtight container in fridge for up to 5 days. The texture of mochi is soft for first 2 days but will firm up more after that. 

Here is a view of the cross-section! 


With lots of love, 

Phay Shing
Read More »

Wednesday, 2 December 2020

Pandan Coconut Gula Melaka Woodland Choux Pastries

It is not often that I get requests for choux pastry bakes because somehow it doesn't seem as widely known in Singapore as macarons or cakes. So I took every chance to make this woodland themed birthday bake a magical one! 

Bunny, dog, raccoon and bear on top of a tree stump. Everything except the grass is made of choux pastry! 

Pandan coconut gula melaka flavoured filling was requested so I made a diplomat cream with this flavour. I even flavoured the royal icing grass with pandan paste to complement the whole set. The tree stump is a large pastry covered with gula melaka white chocolate frosting. 

The critters are so adorable I couldn't resist taking a shot of them as loose pieces before mounting them on the choux stump! 


I finally bought some tree stump display plates for photography from Daiso! 

I had to take a shot of one with cross-section cut to show the yummy filling. I made sure there are bits of gula melaka interspersed in the diplomat cream for that extra burst of flavour. 


If this woodland themed design looks somewhat familiar to you, it is because I made something similar for an entry in my Deco Choux Pastries book. 

Detailed recipe for the craquelin and choux pastry batter can be found in this blog post. I will share the detailed recipe for the stump frosting and new pandan coconut gula melaka diplomat cream. 

Just to share some photos of the process... 

Craquelin cutouts for the animals and mushroom caps


Choux batter with craquelin before and after baking

Piped batter for the ears and arms of the animals

Freshly baked small parts! 

Notice that I use perforated mat for the larger pieces and parchment paper for the smaller pieces. Perforated mat with the holes help to anchor the pastry cases in place, helping it to retain its shape better. 

Piping a large pastry case for the stump. This needs to bake for a long time, about an hour, and then cut open to bake some more at lower temperature of 130C to thoroughly dry it out.

The large pastry case is still moist inside even after baking for an hour. It needs to be cut open for a more thorough bake 

I like to bake my cases till totally dry as they have a longer shelf life that way. You can bake these in advance, up to a week and store in airtight container at room temperature. If you prefer softer pastries, simply fill then in advance to soften before consuming. I prefer mine crispy. 

The stump is frosted with white chocolate base thar has a milk gula melaka caramel flavour. 


Stump frosting

Ingredients:

90g white chocolate

10g bitter dark chocolate

20g shortening

1/8 tsp salt

1/8 tsp caramel flavouring

10g gula melaka melted in a little water, cooled to room temperature

Steps:

1. Place all ingredients in a microwave-safe bowl and melt the contents together using 10 second bursts of heating at low power and stirring after each round of heating. Alternatively, you may use double-boiling method. 

2. Let the melted chocolate mixture sit at room temperature to firm up to toothpaste consistency. 

3. Use a spatula to coat the sides of the pastry case with the frosting. Use a fork to draw lines on the stump resembling tree bark patterns. 


Pandan coconut gula melaka diplomat cream

Ingredients:

3 egg yolks

60g gula melaka finely chopped

1/3 tsp salt

30g cornflour 

2 tsp pandan paste

300g coconut milk

25g unsalted butter

80g non-dairy whipping cream*

20g heavy cream*

40g gula melaka, coarsely chopped


Steps:

1. Heat coconut milk with pandan paste and 60g finely chopped gula melaka in a saucepan over medium-low heat until steaming but not boiling. Stir now and then to help the gula melaka dissolve. 

2. In the mean time, whisk egg yolks with salt and cornflour until a smooth thick paste forms in a glass measuring jug or heavy bowl. 

3. Pour heated coconut milk mixture in a thin stream slowly while whisking the egg yolk mixture. Pour everything back into saucepan. Cook over medium-low heat while whisking continuously until mixture starts to thicken. Take it off the heat and whisk until smooth. Put it back on heat and whisk until custard is cooked to desired consistency. Some prefer it thicker and some prefer it runnier. For thicker consistency, cook longer. 

4. Once desired consistency is reached, remove from heat and add butter. Whisk until smooth. Press cling wrap onto surface of pastry cream and refrogerate for at least an hour iuntil firm. You may prepare this a day in advance. 


5. Whip whipping cream until firm peaks form. I use a mixture of dairy and non-dairy cream. You may use either or use a different ratio for both. Keeping in mind that dairy doesnt hold up well in hot climate but non-dairy doesn't taste as good and comes pre-sweetened. 

6. Briefly beat chilled pastry cream with spatula to lighten texture. Fold whipped cream into pastry cream. 

7. Fold in coarsely chopped gula melaka. You may add more if you prefer. Transfer into piping bag to fill the pastry cases. 


I recommend filling choux pastries just before or shortly before you eat so that you can enjoy it crisp. I cut a hole at the base of the cases about 10 or 20 cent coin in size so that it is easy to fill the cases. 

Thank God it was very well received in terms of looks and taste! 

With love, 

Phay Shing

Read More »