Saturday 29 July 2023

Chocolate Hazelnut Bear Swiss Roll

 Phoon Huat wanted me to create content with detailed recipe sharing using their chocolate hazelnut spread, Hazella, once again, so I chose to share this simple bear swiss roll!


I had simplicity in mind when I made this so I used as few ingredients as possible & kept it to only one round of baking. You may have noticed I baked a very thin sponge. That's to make it easier to roll without cracking & you get more rounds within the swirl for a more aesthetic effect. Feel free to use whatever pan sizes you have at home & use the principle shown here to create your own bear Swiss roll! I used the tray (37x31.5cm base area) that came with my built-in oven.

Ingredients:
Egg yolk batter
3 egg yolks (60-65g with shell on)
45g boiling hot water/milk*
90g Hazella (chocolate hazelnut spread)
1/2 tsp vanilla extract
48g cake flour
1/4 tsp baking soda*

Meringue*
3 egg whites
1/4 tsp cream of tartar*
45g sugar (use up to 60g if you prefer more stable meringue & sweeter cake)

Chocolate hazelnut whipping cream
75g whipping cream of choice*
75g Hazella 

Decoration
White chocolate chips
Mini dark/milk chocolate chips

* See technical tips/notes.

Steps:
1. Line base of baking tray(s) with Teflon sheet (preferable) or baking paper. Preheat oven to 175C (no fan)/160C (fan)

2. Make egg yolk batter. Whisk hot water or milk with Hazella until smooth. Add egg yolks & vanilla. Mix well. Gradually sift in cake flour with baking soda. Mix well.

3. Make meringue. Beat egg whites with cream of tartar until foamy. Gradually add sugar & beat until firm peaks.

4. Fold meringue into egg yolk batter in 3 additions. Add meringue to egg yolk batter for first two additions. For the last addition, pour the mixture into the meringue. Fold gently to avoid deflating the meringue.

5. Pour batter into prepared tray(s). Use bench scraper to smooth out batter into thin layer. Bake for 9-12 min or until done (skewer comes out clean). Immediately flip baked sponge onto fresh sheet of baking paper, roll up to cool. Note that baking temperature & time are oven dependent so adjust accordingly.

6. Cut out 2 squares & a long rectangle (as long as you can) sponge using cakeboards or baking trays as guides. I used 6" cakeboards. You may use small rectangle pieces instead of square pieces for the ears if you prefer the bear to have smaller ears. Just make sure the width (the side of sponge perpendicular to rolling direction) of all 3 sponge pieces are the same. Keep in airtight condition until ready to assemble.

7. Make chocolate hazelnut whipping cream by whipping whipping cream of choice to stiff peak. Add Hazella & mix well. Adjust ratio of whipping cream & Hazella according to preference.

8. Spread thin layer of cream on square sponge pieces for the ears. Roll the sponges very tightly. Cling wrap & shape the rolls. Spread slightly thicker layer of cream on the rectangle sponge for the head. Roll up & cling wrap. Freeze all 3 rolls for at least 2 h. Refrigerate unused cream.

9. To assemble, cut off 1/3-1/2 of the ear rolls length-wise. Apply cream to the cut surface. Stick onto large roll. Freeze for at least 10 min before slicing. Decorate slices with white & mini dark chocolate chips for the bear eyes, nose & snout. 

*Technical tips/notes:
🥛Hot water or milk, choice of ingredient ratios:
Most chocolate hazelnut chiffon cake recipes you find from a Google search copy from the same original source which used milk. That recipe has very high wet to dry ingredient ratio. The result is a denser, moister cake which may be trickier to work with due to the high fat/moisture/cocoa content because all these interfere with the meringue stability. You may use those recipes as reference if you wish, especially if you are a seasoned chiffon cake baker. My rationale for a "drier" sponge batter (but still way higher wet to dry ingredient ratio than regular chiffon cakes) is to make this bake as easily successful as possible for beginners. Hazella already contains milk so you may use water if you don't have milk on hand.

🫙Baking soda & cream of tartar:
Again, I included these to increase chances of success. You may omit them both if you are a seasoned baker. Cream of tartar is an acid that helps with meringue stability. Using it will prevent the meringue from deflating prematurely so your sponge remains light & airy. The type of cocoa powder in Hazella is not specified so I am assuming it isn't alkalized. Using baking soda helps to counteract the acidity in the cocoa, as well as from the cream of tartar.

🥚Meringue:
Make sure that you can consistently make firm peaks (peak that stands tall with a small curl at the end) all over your meringue. Gently whisk by hand & test several times to make sure. At any time the meringue flops instead when you test, you need to continue whipping. Underwhipped meringue will deflate quickly during folding stage. But be careful not to over whip your meringue or it becomes broken, not smooth. Using more sugar helps the meringue to be more stable & gives you a larger margin between just nicely whipped & overwhipped. Use low to medium speed to whip egg whites to build the meringue slowly. Meringues that are built up slowly are more stable without large air bubbles. Use fresh eggs! They really make a difference in the quality of meringue! Make sure your metal or glass mixing bowl is dry & grease-free.

🍦Whipping cream of choice:
I chose the simplest option of non-dairy, pre-sweetened & stabilized cream. It's impossible to overwhip & doesn't melt into a puddle in tropical Singapore. You may use dairy or a mix of both types for better taste. Be careful not to overwhip dairy cream or it will split. You may choose to add sugar &/or stabilizers if using dairy cream.

Please see the video tutorial of this from my Instagram reel:


Having tried other brands of chocolate hazelnut spread, I must say that Hazella comes across as the richest and most flavourful one, both for chocolate and hazelnut flavours in the spread. Whatever bakes you make with it will taste rich!

I hope you find these tips helpful! Happy baking!


with love,
Phay Shing


Read More »

Monday 24 July 2023

Less Sweet Pandan Kaya Cake

This cake was tailor-made for my friend's mum's 70th birthday. How good was it? The birthday girl who has a long history of refusing cake because she doesn't like cream, butter or anything too sweet finished the slice given to her! The rest of the cake? Everyone else finished it within minutes despite being too full after a meal. It's tasty, refreshing & not too sweet. I decorated the cake with blueberry-apple marshmallow flowers & simple cocoa gula melaka chiffon basket weave ring.


Here's the review from my friend!

Those of you not familiar with the colloquial language of Singapore, siu-dai or siew-dai means less sweet. So I had the challenge of making a cake that is really less sweet but still tasty enough for the birthday girl and everyone else at the celebration.

Not many people make pandan chiffon cake the old school way from homemade pandan juice concentrate nowadays because it's a labour of love! I use a combination of homemade concentrate & bottled pandan paste to impart flavour & colour that my recipients love so much over the years.

I adapted the recipe from this basket weave cake I made for my mum a few years ago.

Pandan Chiffon Sponge

(makes two 7.5" round sponges)

A)

45g oil

70g pandan juice concentrate*

40g coconut milk

12g Gula Melaka, grated (coconut palm sugar)

1/4 tsp salt

1/2 tsp vanilla extract

1/2 tsp pandan paste 


B)

120g cake flour, sifted into large bowl


C)

6 egg yolks


D)

6 egg whites

1/2 tsp cream of tartar

72g caster sugar (use more if prefer sweeter & for more stable meringue)


Pandan Kaya pudding

E)

720g coconut milk

300g water^

60g clear pandan water*^

45g Gula Melaka, grated (use more & add caster sugar if prefer sweeter)

3/4 tsp vanilla

3/8 tsp pandan paste

3/8 tsp caramel essence (optional)

1/4 tsp salt

3/4 tsp green liquid colouring (optional)

2 tsp agar powder


F)

78g cornstarch

390g water^


* Blend about 25-30 mature pandan leaves with 120g of water. Strain juice & squeeze out as much liquid as you can from pulp. Let juice settle over 3 days in fridge. Separate clear water from concentrate. 

^ Traditional recipes use pandan water from water boiled with a few pandan leaves. Over here I just used what is usually discarded. It saves you the effort for one step!

Steps:

1) Line pans with parchment paper or teflon sheet. Preheat oven to 140-150C (no fan) with optional steam baking. Note that baking temperature and time is oven dependent so adjust accordingly.

2) Place A) in saucepan & heat until gula melaka is dissolved & mixture is 80C.

3) Pour 2) into B) & whisk until a dough forms.

4) Add C) 2 yolks at a time. Whisk until well combined after each addition.

5) Make meringue (D). Whip egg whites with cream of tartar until firm peaks form, adding sugar gradually once egg whites are foamy. Slowly build up your meringue using medium speed to avoid creating large air bubbles and to help with stability.

6) Fold meringue into 4) in 3 batches. I like to use the whisk to fold in the first two batches and finish off using a silicone spatula.

7) Fill pans until 80% full. Bake for 40 min or until done. 

8) Cool completely & unmold. Slice each cake horizontally for 4 pieces of sponge.

9) Mix F) in jug. Set aside.

10) Put E) in pot, whisk to disperse agar & set aside for 5 min. Bring to boil while whisking continuously. Continue simmering for 1 min while whisking. 

11) Whisk F) again to disperse cornstarch before pouring in a thin stream into 10) while whisking continuously. Continue cooking pudding for another 1-2 min. Remove from heat.

12) Assemble cake by alternating sponge and pudding layers within a cake ring or acetate sheet. Stir pudding mixture in pot to prevent it from setting during assembly. Refrigerate for at least 3 hours before unmolding. Neaten the pudding layers if need be by carefully cutting stray bits off.

See my Instagram reel for snippets of the process!

https://www.instagram.com/reel/CvE_U7PgJKl/?igshid=MzRlODBiNWFlZA==

Traditional pandan kaya cake is usually totally covered with the pudding and garnished with some desiccated coconut or finely grated fresh coconut. I kept the design clean and simple for this cake so I omitted the coconut and revealed the pudding and sponge layers as part of the aesthetics.

See how squishy my marshmallow flowers are in this post! I used some sugar-replacement to replace white sugar so it is overall a little more diabetic-friendly. Keep a lookout for my Deco Marshmallows book which will cover how to make marshmallow flowers made from lots of fresh fruit, as well as how to make them without white sugar too!


Do give this cake a try if you are looking for something that's tasty, refreshing and not too sweet for birthday celebrations! 


with love,

Phay Shing


Read More »

Tuesday 11 July 2023

Chocolate Hazelnut Bear in Panda Suit Choux Pastries

I was given two bottles of Hazella, a chocolate hazelnut spread, by Phoon Huat (Redman) to try. I decided to share something cute, yummy, simple and uses minimal ingredients. Here are some chocolate hazelnut bears in panda suits!


There is no added artificial colouring too! I shared the recipe and decorating steps in my Instagram reels where you can see how I created the panda cap and bear filling. As mentioned in my caption with the reel I recommend watching my youtube videos for choux pastry technique if you are new to making choux pastries as it is a bake that requires some attention to detail and knowing how to work with your oven as well, but much as it is easier than macarons or chiffon cakes.

Chocolate Hazelnut Choux Pastry Bears 
(makes about 15 small pastries)

Please scale quantity according to preference as this is a small batch.

Choux pastry:
Craquelin:
21g unsalted butter
18g sugar
21g plain flour, sifted

Batter:
60g water
20g unsalted butter
1/8 tsp fine salt
1/2 tsp sugar
30g plain flour, sifted 
1 large egg, lightly beaten

Bear filling:
200-250g whipping cream of choice* 
250g Hazella (or any chocolate hazelnut spread)

Decoration:
Mini chocolate chips
Mini chocolate Crispearls (optional, for bear's nose)

*I used non-dairy cream that's pre-sweetened, stable in hot Singapore & impossible to over whip. Please use an electric mixer to whip the Whip Topping. Be careful not to over whip dairy cream if that is what you choose.

1. Make craquelin. Mix sugar & butter briefly. Add flour & form a dough. Roll until 2-3mm thick. Freeze until firm. Cut out 3cm circles & freeze until needed.

2. Preheat oven to 180C(fan)/190C. Line tray with perforated mat or baking paper.

3. Make batter. Place water, butter, salt & sugar in small pan. Bring to boil. Pour flour in & mix until dough forms. Cook over med-low heat to evaporate some water. Cool briefly in bowl. Add egg gradually until batter is able to hold a long "V" on spatula. 

4. Transfer into piping bag with round tip. Pipe generous mounds about 2.3cm at the base. Place craquelin on top. Bake for 20 min. Reduce temperature to 140C(fan)/150C & bake for 25 min until thoroughly dry inside.

5. Cool completely. Cut off the top of pastry & decorate with mini chocolate chips/melted chocolate for panda.

6. Whip cream until stiff. Mix 100-150g cream with 250g Hazella. Adjust ratio according to taste. Pipe bear with creams. Use melted chocolate & Crispearls to decorate. Assemble panda hat & refrigerate or freeze (Ice-cream version😋!)

A note about using melted chocolate for decoration. Please melt it using low heat and be careful not to overheat. You may use microwave or double-boiling to melt chocolate. Add a little shortening/butter/oil to make the consistency a little runnier for ease of painting/piping the features. It also helps prevent the chocolate from setting too fast. Adding a fat is optional but I find it helps to make it significantly easier to work with.


Besides using Hazella as a toast spread, why not try this as a simple two-ingredient chocolate hazelnut ice-cream! You may consume the creampuffs refrigerated or frozen (my preference!). I was honestly rushing when I took the photos and videos, hoping that I could still make use of some natural sunlight. This forced me to keep everything as simple as possible. So feel free to add Biscoff spread (crunchy one please😋) or Fererro Rocher to add even more dimension to you pastries!


with love,

Phay Shing

Read More »

Monday 10 July 2023

Garfield 45th Birthday Chiffon Cake


Happy 45th birthday to our favorite cat!🎉

So honored to make this surprise cake for Nickolodean Asia!💖

Assembly reel can be found here!

With lots of love,

Susanne


Read More »

Saturday 8 July 2023

Shiba Mitarashi Dango Vegan Macaron Class

 This is the second vegan macaron class I am offering: Shiba Mitarashi dango macarons!


The Swiss meringue method is covered in this class. Just like the first vegan macaron class, vegan royal icing is also covered. I wanted to include an essential ingredient in Mitarashi dangos, which is soy sauce, into the macarons so the filling is soy sauce caramel with toasted white sesame ganache.


The shibas are coloured using Hojicha powder so as to minimize the use of artificial colouring.

For more information or to register, please refer to the link below:

https://artzbakingculinary.com/product/vegan-shiba-mitarashi-dango-macarons-teens-adults-parent-child-workshop-by-instructor-book-author-tan-phay-shing/


with love,

Phay Shing

Read More »

Monday 3 July 2023

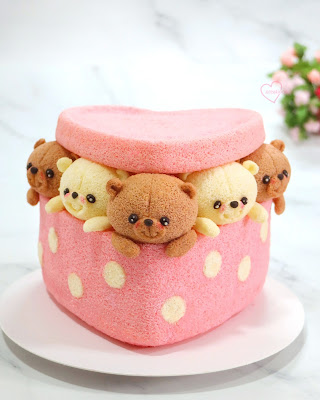
Bears-in-Box Heart Chiffon Cake


What's Sweeter Than a Bear-in-a-Box? A Bundle of Bears!💕I love making cute bears! This is another bear-in-box in a heart-shaped box! Hope this made you smile!

With love,

Susanne


Read More »

Hanami Dango Vegan Macaron Class

 I am pleased to announce that I am finally adding vegan macarons in my repertoire for classes!


I cover Aquafaba-based Italian meringue method macarons in this class. I will also be sharing how you can decorate your macarons using vegan royal icing and filling them with a vegan ganache base that can take on various flavours. The macaron shells are coloured using matcha powder and strawberry paste. 

Please click on the link below for more details or to register:

https://tottstore.com/classes/vegan-hanami-dango-macarons/


with love,

Phay Shing

Read More »