Hubby loves hamsters so I thought why not make some of these cute critters for his birthday :)
I had lots of fun making these and watching them come alive. It's a pity the oven chose to play punk while I was baking this tray of macarons (the other trays I baked for other requests were fine) so the shells ended up a little browned. I reduced the temperature after the initial baking time but the temperature took too long to drop.
For those of you who would like to make these cutesies, I have provided the template. Please acknowledge the source from here if you do use as I took time to create this template.
I used the reduced sugar recipe for the macaron shells here. Both regular and reduced sugar recipes can be found
here. You may refer to my
Creative Baking: Macarons book for a systematic presentation of the basics and complex shaped macarons. You may refer to my video tutorials for
macaron basics and
piping of complex shapes on the blog too.
For the benefit of those who want to give this bake a try, here are some details that will be helpful...
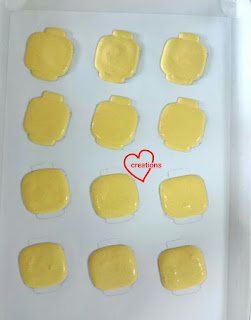
Divide the mass and meringue into 3 equal portions. Colour the masses white, straw yellow and brown.
White: white gel/powder
Straw yellow: yellow + tiny bit of orange + a drop of brown gel
Brown: Dutch processed cocoa powder + 2 drops orange + 1 drop yellow gel
When folding in the meringue for brown and white, fold until just combined before scooping out about 2 tbs of batter from each colour. Add a teeny bit of orange, brown and pink to the white batter to create beige batter. Add about 1/2 tsp of Dutch processed cocoa powder and a pinch of charcoal powder to the brown batter to create dark brown batter. Continue folding the white and brown batters until they have a lava-like consistency.
Use Wilton #7 or #8 piping tips for brown, white and straw yellow portions. Use Wilton #5 piping tip for beige and dark brown portions.
Pipe these portions before letting the shells dry partially until a sticky membrane forms.
Pipe on the rest of the details.
As these shells are quite large, bake at 140°C for the first 12 minutes, followed by 120°C for 6-7 minutes and 110°C for another 8-15 minutes or until the feet does not appear wet. Place oven rack at lowest or second lowest position. Use top and bottom heat only. The initial higher temperature is necessary to set the structure and avoid hollows within the shells. But to keep it at 140°C all the way will cause browning.
Freshly baked! A little browned because temperature remained at 130°C or above for the first 20 minutes! I only realised too late as I was busy.
Decorate the shells with superfine edible marker for the paws and nostrils. Use
royal icing for the eyes and sunflower seed.
I filled the shells with
whipped Earl grey white chocolate ganache and
salted caramel.
Cute and yums!
Checkout the yummy cross-section! Nice texture and no hollows in the shells!
One of the most common queries I get is how to get rid of hollows in macaron shells. There could a few factors or a combination of these factors that can cause the space between the top outermost layer which is formed during drying of the shells before baking and the fluffy cake-like interior.
- Baking temperature is too low during the initial baking time before internal structure has set. The oven has to be at 130-140°C during the initial 10-15 minutes (depending on size of macarons) of baking time. Use an oven thermometer to monitor the actual oven temperature at all times!
- Underbaked. This is related to the previous point. Underbaked shells have internal structures that are not fully set yet. So when you remove the tray of shells from the oven, the internal structure will collapse. Reduce the heat towards later half of baking time to ensure shells are baked through but not browned.
- Egg whites not beaten to soft peak before pouring in the syrup. If the egg whites are unable to hold a peak for a second before disappearing and the egg white bubbles still appear large instead of fine, the egg whites are not beaten long enough. The resulting meringue will not be stable.
- Italian meringue not beaten long enough. Make sure that the meringue is sufficiently cooled before you stop beating at high speed. This make take anywhere from 10-15 minutes depending on size of your batch. I usually blow a fan at the stand mixer to help it cool faster. Make sure that the meringue is at least body temperature before you stop beating.
- Didn't bang tray on the table after piping. Any trapped air bubbles that are not released in the batter will gather to form the air pocket under the outermost layer of the shell.
- Under-folded batter. Not enough air is knocked out of the batter.
I hope all these tips helps! Don't fret if you still get hollows now and then. I still do sometimes especially when the oven doesn't cooperate. Just try again :).
Blessed birthday to my dearest hubby 😘!
With lots of love,
Phay Shing


