Showing posts with label Sponge and pudding cake. Show all posts

Thursday, 10 September 2026

Grogu Yuzu Chiffon Cake with Nutella Pudding

 My friend requested for a Grogu cake for her daughter's birthday with yuzu chiffon filled with Nutella pudding as the choice of flavour because she loved the cake I made for her last year so much she wanted the same flavour again this year!


The hole in the chiffon cake in makes for a convenient pocket to fill with pudding!


Pudding is totally concealed in this design...


Even the party hat is filled with pudding!


A look at Grogu before being filled...


You may refer to the reel below for the detailed recipe and process of putting this creation together:
https://www.instagram.com/reel/DdIEvvPSdEe/?stkn=MTJpNWFnZHEwaTBzeQ==

Scale the recipe up according to your preference/parts. I provided the smallest unit

Yuzu chiffon (with yolks):
1 large egg, separated 
1/8 tsp cream of tartar
15-20g sugar (according to preference)
18g cake flour, sifted
15g yuzu tea*
10g oil
1/16 tsp salt

Yuzu chiffon (without yolks for less colouring in blue & white sponges):
1 large egg white
1/8 tsp cream of tartar
15-20g sugar
17g cake flour, sifted
20g yuzu tea*
10g oil
1/16 tsp salt

Colouring:
Cocoa powder
Pandan paste
Blue, white gel colouring 

* Blend equal parts by weight of yuzu jam & hot water.
 Let it sit for 15 min. Include as much rind as possible for stronger flavour. Sieve through fine sieve. I didn't use a fine enough sieve at first as I wanted to impart a stronger flavour with a little bite. The yuzu rind bits end up being stained darker green than the batter so you can see dark green specks of it on Grogu's head 🙈

Method for chiffon sponges:
1. Whisk together oil, yuzu tea, salt, flour & egg yolk (if using). Add colouring as desired
2. Beat egg whites with cream of tartar in another bowl till firm peaks, adding sugar gradually once egg whites are foamy
3. Fold 2. into 1. Pour/pipe into tin/lined tray/silicone mold
4. Bake in preheated oven until done. Temperature & time varies from oven to oven & depending on whether you are baking a thin sheet cake, in silicone molds or tall chiffon tin so use whatever works for yours. As a reference, 130-150C is what I use

Notes: You may brush sponge surface with a little yuzu tea for an extra boost in flavour & to keep it moist

Nutella pudding:
80g Milk (60g + 20g reserved as cold)
1g Agar
50g Nutella

Method for Nutella pudding: 
1. Whisk agar into 60g room temperature or cold milk in small saucepan. Let it sit for at least 5 min
2. Add Nutella & whisk until well combined. Heat mixture while whisking constantly until it boils. Continue boiling & whisking for another minute.
3. Remove from heat. Add remaining 20g cold milk & whisk until well combined. Skim off scum on surface if any. Cool slightly to about 65C before pouring into cavities.
4. Cool to room temperature before refrigerating for at least 30min.

Notes: You may use any fat content of milk, or even replace the cold milk added at the end with heavy cream. The higher the fat content, the creamier the texture. 

Black & pink parts:
5g neutral oil
5g icing sugar
5g cake flour
5g egg whites
Charcoal powder 
Pink gel colouring 

Method for black and pink parts:
1. Whisk all ingredients together till smooth. Add colouring as desired
2. Spread in a very thin layer on lined baking tray.
3. Bake at 140C for 6 min or till cooked through. Don't overbake

Notes: You may do this for the white flat parts as well if you don't want the hassle of baking a white chiffon sponge. I needed the white chiffon sponge for the hat bobble so I didn't use this method for the thin white dots for hat & eyes. You may also flavour this if you wish but it's not necessary if the parts are really small &/or thin

Glue:
Melted bloomed gelatin. Use 1:6 gelatin : water by weight

Thank God the birthday girl loved the cake this year too, both in terms of looks and taste!


with love,
Phay Shing
Read More »

Friday, 26 June 2026

Sugar-Free Gender Reveal Mango Pandan Coconut Sponge & Pudding Cake

 My friend requested for a sugar-free gender reveal cake and this was what I came up with!


Most gender reveal cakes involve cutting the cake and revealing either coloured sponges, buttercream or confetti sprinkles in the colour of the baby's gender. The content creator part of me wanted to film the reveal without having to destroy the cake so that I don't have to repair the cake/make another one after filming the reveal 🤭.

 That's why I came up with a simple reveal mechanism made of food-safe materials that I already have at home. I am surprised that this isn't the standard way reveal is done because it's so fun, dramatic, so simple to make, AND it doesn't destroy the cake!

The recipe I share can be made with regular white sugar although my friend requested for the use of sugar replacements omitting sugar altogether where possible. I made use of natural food sources as colouring where possible too! Such as the use of fresh red dragonfruit puree for making the hidden pink cake bites.

Pink cake bites in the shape of mini croissants and mini macarons

Cake composition:
- Red dragonfruit sugar-free chiffon cake bites with a little strawberry jelly
- Vanilla sugar-free chiffon cake bee
- Vanilla.pandan sugar-free chiffon cake sponge layers and white bubbles
- No-sugar-added mango pandan coconut pudding
- Fresh blueberries and red cherries as decorations


Here's a peek of the cake and hidden surprise before the cake topper is in place 


You may refer to my earlier blog post for the no-sugar-added mango pandan coconut pudding recipe. Here's the rest of the recipe for the various chiffon sponges. 

PINK/WHITE CHIFFON:
18g cake flour 
Pinch of salt
10g oil
20g liquid*

1 egg white (36-40g)
1/8 tsp cream of tartar
16g sugar of choice*

STRAWBERRY JELLY GLUE:
5g strawberry jam 
1 toothpick dip of strawberry emulsion
14g water
2g gelatin

VANILLA PANDAN CHIFFON LAYERS:
(makes two 9" cakes):
8 egg yolks
96g oil
60g pandan water**
60g milk
1/4 tsp salt
2 tsp vanilla extract 
164g cake flour

8 egg whites
1/2 tsp cream of tartar
140g sugar of choice*

* Liquid:
Pink: 20g sieved red dragonfruit puree. Replace 1/4-1/2 with water if prefer lighter pink. Add a tiny dip of strawberry emulsion for a hint of berry fragrance 

White: 10g pandan water** + 10g milk+ a few drops of vanilla extract+ a few drops white colouring

* Sugar of choice:
I used a blend of sugar replacements & prebiotic soluble fibres to replace white sugar. Not able to disclose type & ratios as it's class material

**Boil a few pandan leaves in 500g of water. Simmer for 10 min. Discard leaves 
I used bloomed & melted gelatin as glue for the fresh fruit & chiffon parts in a ratio of 1:6 for gelatin : water


Please see this reel for the process and method:


I will share the recipe for the bee, including a video tutorial for it in another post.


with love,

Phay Shing
Read More »

Thursday, 18 June 2026

No-Sugar-Added Mango Pandan Coconut Pudding

 This is so refreshing, delicious and simple I felt it had to be a blog post on its own instead of being part of my upcoming mango sponge and pudding cake!


Father's Day is just around the corner and I thought this is perfect for dads who like a sweet (but not too sweet) refreshing treat that isn't harmful for health. Of course sugar can be added for dads who love it really sweet. But my family finds it unnecessary to add sugar when you choose really sweet and ripe mangoes.

This recipe is an adaptation of the pudding layer in pandan kaya cakes so the texture is like a soft steamed kueh which is different from the usual gelatin-based mango puddings. This recipe is suitable for vegans too as it doesn't contain gelatin or eggs. 

Feel free to scale the recipe up or down according to the portion size you want.

Ingredients:
A) 
80g coconut milk
180g mango puree (blended without sieving)
50g pandan water*
2g agar powder (about 3/4 tsp)
A pinch of salt (optional)

B)
18g corn starch
100g pandan water*

* Put 3 pandan leaves cut into shorter strips in about 500g water. Bring to a boil & simmer for 10 min. Discard the leaves. Cool to room temperature before using

Method:
1. Bloom agar in water in A) for 5 min in a saucepan. Add the rest of the ingredients in A) into saucepan

2. Mix ingredients in B) in a jug. Set aside 

3. Bring 1. to boil, whisking constantly

4. Stir 2. until cornstarch is suspended again. Slowly pour in a thin stream into 3 while whisking constantly 

5. Keep cooking & whisking until pudding starts to boil again. Continue whisking & cooking for another minute before removing from heat. 

6. Sieve through a fine sieve before layering with sponge or pouring into molds. This is optional if you don't want the pudding to cool & set too quickly while you work. Refrigerate for at least 2 hours before unmolding or serving

Go and look for some really ripe mangoes and whip up this treat for your dad!

Here's the video of the process:


Pardon the lack of photos because the video and photo of the pudding was taken in a hurry as I worked concurrently on the main bake/ videos for the main bake.


With love,
Phay Shing
Read More »

Saturday, 30 August 2025

Sugar-Free Sunflower Gula Melaka Pandan Kaya Cake

I finally got around to making my mum's super belated birthday cake! Dad took much longer than expected to recover from his surgery so we had to postpone her celebration. Thank God all's good now. Presenting the gula melaka pandan kaya cake that I planned to make a few months ago with the design based on one of Mum's Nagomi Art paintings!


This is mum's painting. Doesn't it look like some professional art piece?

I did a "full-dress rehearsal" of the cake over here with a tulip themed Nagomi Art design as my reference if you are interested:

Cake composition:
- Sunflower chiffon cake inserts made using only Gula Melaka and prebiotic soluble fibres as the "sugar"
- Green and brown gula melaka pandan kaya pudding with gula melaka as the only "sugar"
- White chiffon sheet cake made using pandan water and no egg yolks to keep the cake white. A sugar replacement and prebiotic soluble fibres were the "sugar" in this cake

Just to share some works-in-progress photos:


Some photos of the cake at the restaurant where we had the celebration 


You may see the reel for the process of making this cake over here:

https://www.instagram.com/reel/DNnVY5XpCy5/?igsh=MXViYzQzZHZ3OTVodg==

I shared the sugared version of the recipe together with my Tulip roll cake reel so please refer to the captions of that reel if you need a reference recipe. 


Needless to say, everyone enjoyed the cake that was tasty but light and refreshing enough to be consumed after a sumptuous meal!


with lots of love,

Phay Shing

Read More »

Friday, 10 May 2024

Capybara Yuzu Chocolate Hazelnut Chiffon Cake

 My family loves capybaras and the multitude of capybara plushies at home are a source of inspiration for my capybara bakes😆. Here are some simple yuzu chocolate hazelnut chiffon cakes that I made for fun but decided to make it into a kids baking class material!


The sponge is yuzu flavoured and coloured brown with a little cocoa powder. The pudding in the middle is a delicious chocolate hazelnut pudding. The ears and facial features are not made out of fondant, marzipan or modelling chocolate, AND you don't have to make an extra item using more ingredients to make those too!


Find out the secret of the simple hack I use to transform a plain chiffon cake to my family's favourite creature from this class happening during the June school holidays! Please click on this link to register. 


with love,

Phay Shing
Read More »

Wednesday, 1 November 2023

Chiffon Cake Longevity Peaches (no artificial colouring added) on Pandan Kaya Cake

 I have been making longevity peach chiffon cakes for the past 9 years and this is the first time I decided to make it as naturally coloured as possible for my grandmother's 88th birthday. You may click on this link to see my past bakes that are longevity peach themed and made in various flavours like lychee rose and yuzu. Grandma likes to celebrate her birthday according to the lunar calender so the actual date we celebrate is not fixed each year. Because of this, I had to make the cake for her at a rather busy period so I kept things simple but yummy.

Here's this year's longevity peach cake for grandma!

The peaches sit on top of my signature pandan kaya cake!

Here's a better look at the peaches!


The peaches are almost naturally coloured, not 100% naturally coloured, because the bottled pandan paste I used for the leaves already has artificial green colouring added. In the past I had to use white colouring to make the peaches appear whiter instead of yellow, and used pink gel colouring to add on the pink. This time round I used a chiffon cake recipe adapted from Mimi that doesn't use any egg yolks to omit the use of artificial white colouring, and I used diluted fresh dragonfruit puree to colour the peaches pink naturally. The peaches were made a week in advance and frozen due to my busy schedule, but they still appeared and tasted as good as new!

You may refer to this post for my reduced sugar pandan kaya cake that is still tasty and refreshing at the same time. I increased the amount of sugar/gula melaka by about 20% for both the chiffon sponge and pudding to suit the tastebuds of my grandma and the whole clan of the extended family since this request was not a "siew-siew-siew-siew dai" (less-less-less-less sweet in colloquial Singapore) order 😆, but is still less sweet than commercially sold cakes in general. My cousin commented that it tastes better than Bengawan Solo's signature pandan kaya cake!

Chiffon cake longevity peaches (makes about 12-15 mini peaches):

Egg yolk batter
35g cake flour
Pinches of salt
10g caster sugar
15g vegetable oil (I used canola)
40g milk
1/4 tsp vanilla extract
1/8 tsp cocoa powder
1/4 tsp pandan paste

Meringue*
2 large egg whites (about 38-40g each egg white)
30g caster sugar
1/4 tsp cream of tartar

Decoration
Pink dragonfruit puree, sieved & diluted with water 
Water or simple syrup** 
Cake glue or melted marshmallow

* I split ingredients in half as the leaves & peach body have different baking time & temperature profiles

** Make simple syrup by dissolving sugar in hot water in 1:2 ratio. Using syrup instead of water helps to keep the sponge moist longer during storage

Steps:
1. Line a baking tray (or 2) with teflon sheet or parchment paper. Size of tray doesn't matter as we just need to spread the batter as thin a layer as possible for the leaves. Lightly grease heart shaped silicone molds with a little oil. You may use egg shells if you don't have the heart molds, and carve out the shape after baking. Wash and air dry eggshells thoroughly if using them. Preheat oven to 125C with fan on.

2. Make egg yolk batter. I know the name seems somewhat inappropriate because there is no egg yolk used but this is the same portion that is in all chiffon cake recipes where the yolk normally goes. In a mixing bowl, use an electric mixer to mix oil, milk, vanilla, salt and sugar together. Sift in flour and whisk until well combined. Divide into 2 equal portions. Add sifted cocoa powder and pandan paste to one portion, cover with cling wrap and set it aside. Cocoa powder is added to deepen the green colour and make it appear less neon bright.

3. Make one portion of meringue with one egg white portion of ingredients. In a clean metal bowl, beat egg white with cream of tartar until firm peaks, gradually adding sugar once the egg whites are foamy. Take your time to build up a stable, tight and glossy meringue at medium speed. Going high speed all the way creates large air bubbles and the meringue is not as stable.

4. Quickly but gently fold the meringue into the white egg yolk batter in 3 additions. Transfer into piping bag. Fill the mold until full.

5. Bake for 25-35 min. Increase temperature to 150-160C and bake for another 5 min. Cool completely before unmolding. Note that the baking profile is just a guideline and is dependent on mold size and oven so adjust accordingly.

6. Preheat oven to 170C with the fan on. 

7. Prepare another batch of meringue. Fold meringue into green egg yolk batter. Pour into lined baking tray and spread as thin a layer as possible.

8. Bake for 30 seconds. Turn off the oven fan and continue baking for 8-9 min or until done. Keep an eye on it as it can go from done to brown within a minute or less. Immediately flip onto fresh parchment paper and cool completely before cutting out the leaves with cookie cutter. You may use scissors/knife and a homemade template if you don't have an appropriate cutter.

9. Use scissors to trim off browned parts of the peach body. You may also use scissors or a small fruit knife to carve the shape if you used egg shells to bake.  Use the back of the knife to make an imprint in the middle of the peach.

10. Brush the tip of the peach with diluted dragonfruit puree. I didn't measure the dilution ratio as the exact measurement is not important. I go by the colour I get visually. You can always apply another coat if the colour is too faint, or add a little more puree to your paint. Don't use undiluted puree as the colour is too dark. Use some water to blend the pink colour towards the white parts of the peach. In the past I used a toothbrush spray to create the ombre pink effect but this method is much cleaner!

11. Glue the leaves onto the peach body using cake glue or melted marshmallow. Store in airtight condition in the fridge or freezer until ready to consume.

Here's the reel of the process of making the peaches!

https://www.instagram.com/reel/CzJF8h9y0VV/?igshid=MzRlODBiNWFlZA==

I had leftover pandan sponge and pudding so I assembled a few pandan kaya cupcakes. 

Looking cute!


I think I am going to stick with this method of making chiffon cake longevity peaches from now on with the exception of substituting the milk with some other liquids for flavour variation. I hope this post is helpful for those of you who want to create healthier versions of longevity peaches for your loved ones that minimizes artificial food colouring. You may use matcha powder for the leaves to make it fully naturally coloured but I wanted the peaches to match the flavour profile of the cake below. Maybe I shall try that next time! 


Update: I did an Instagram poll and majority are in favour of a longer, more detailed video tutorial so I made a youtube video version of it and you may see it here:

https://youtu.be/-qU4WdBn6DQ?si=6iTMFX7E4kkrj-wv


with lots of love,

Phay Shing

Read More »

Monday, 24 July 2023

Less Sweet Pandan Kaya Cake

This cake was tailor-made for my friend's mum's 70th birthday. How good was it? The birthday girl who has a long history of refusing cake because she doesn't like cream, butter or anything too sweet finished the slice given to her! The rest of the cake? Everyone else finished it within minutes despite being too full after a meal. It's tasty, refreshing & not too sweet. I decorated the cake with blueberry-apple marshmallow flowers & simple cocoa gula melaka chiffon basket weave ring.


Here's the review from my friend!

Those of you not familiar with the colloquial language of Singapore, siu-dai or siew-dai means less sweet. So I had the challenge of making a cake that is really less sweet but still tasty enough for the birthday girl and everyone else at the celebration.

Not many people make pandan chiffon cake the old school way from homemade pandan juice concentrate nowadays because it's a labour of love! I use a combination of homemade concentrate & bottled pandan paste to impart flavour & colour that my recipients love so much over the years.

I adapted the recipe from this basket weave cake I made for my mum a few years ago.

Pandan Chiffon Sponge

(makes two 7.5" round sponges)

A)

45g oil

70g pandan juice concentrate*

40g coconut milk

12g Gula Melaka, grated (coconut palm sugar)

1/4 tsp salt

1/2 tsp vanilla extract

1/2 tsp pandan paste 


B)

120g cake flour, sifted into large bowl


C)

6 egg yolks


D)

6 egg whites

1/2 tsp cream of tartar

72g caster sugar (use more if prefer sweeter & for more stable meringue)


Pandan Kaya pudding

E)

720g coconut milk

300g water^

60g clear pandan water*^

45g Gula Melaka, grated (use more & add caster sugar if prefer sweeter)

3/4 tsp vanilla

3/8 tsp pandan paste

3/8 tsp caramel essence (optional)

1/4 tsp salt

3/4 tsp green liquid colouring (optional)

2 tsp agar powder


F)

78g cornstarch

390g water^


* Blend about 25-30 mature pandan leaves with 120g of water. Strain juice & squeeze out as much liquid as you can from pulp. Let juice settle over 3 days in fridge. Separate clear water from concentrate. 

^ Traditional recipes use pandan water from water boiled with a few pandan leaves. Over here I just used what is usually discarded. It saves you the effort for one step!

Steps:

1) Line pans with parchment paper or teflon sheet. Preheat oven to 140-150C (no fan) with optional steam baking. Note that baking temperature and time is oven dependent so adjust accordingly.

2) Place A) in saucepan & heat until gula melaka is dissolved & mixture is 80C.

3) Pour 2) into B) & whisk until a dough forms.

4) Add C) 2 yolks at a time. Whisk until well combined after each addition.

5) Make meringue (D). Whip egg whites with cream of tartar until firm peaks form, adding sugar gradually once egg whites are foamy. Slowly build up your meringue using medium speed to avoid creating large air bubbles and to help with stability.

6) Fold meringue into 4) in 3 batches. I like to use the whisk to fold in the first two batches and finish off using a silicone spatula.

7) Fill pans until 80% full. Bake for 40 min or until done. 

8) Cool completely & unmold. Slice each cake horizontally for 4 pieces of sponge.

9) Mix F) in jug. Set aside.

10) Put E) in pot, whisk to disperse agar & set aside for 5 min. Bring to boil while whisking continuously. Continue simmering for 1 min while whisking. 

11) Whisk F) again to disperse cornstarch before pouring in a thin stream into 10) while whisking continuously. Continue cooking pudding for another 1-2 min. Remove from heat.

12) Assemble cake by alternating sponge and pudding layers within a cake ring or acetate sheet. Stir pudding mixture in pot to prevent it from setting during assembly. Refrigerate for at least 3 hours before unmolding. Neaten the pudding layers if need be by carefully cutting stray bits off.

See my Instagram reel for snippets of the process!

https://www.instagram.com/reel/CvE_U7PgJKl/?igshid=MzRlODBiNWFlZA==

Traditional pandan kaya cake is usually totally covered with the pudding and garnished with some desiccated coconut or finely grated fresh coconut. I kept the design clean and simple for this cake so I omitted the coconut and revealed the pudding and sponge layers as part of the aesthetics.

See how squishy my marshmallow flowers are in this post! I used some sugar-replacement to replace white sugar so it is overall a little more diabetic-friendly. Keep a lookout for my Deco Marshmallows book which will cover how to make marshmallow flowers made from lots of fresh fruit, as well as how to make them without white sugar too!


Do give this cake a try if you are looking for something that's tasty, refreshing and not too sweet for birthday celebrations! 


with love,

Phay Shing

Read More »

Monday, 10 January 2022

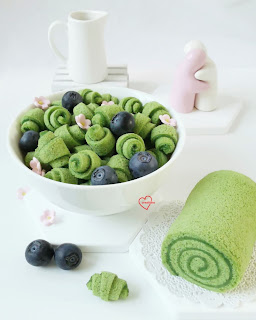
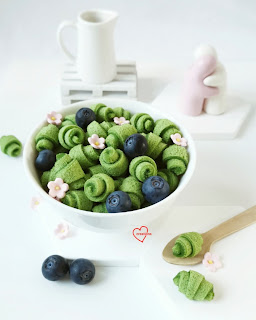
Pandan Kaya Chiffon Croissant Cereal

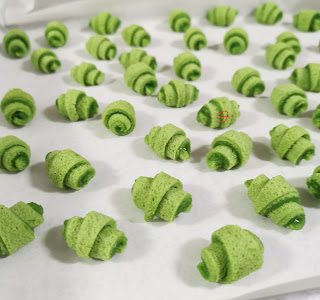
I don't usually follow trends but this idea in my head got me so excited I just had to try it out! Presenting my pandan kaya mini chiffon croissant cereal! 

 
I was excited because it is a combination of traditional pandan kaya cake in croissant form and miniaturised as a cereal treat. There's a cereal trend several months ago but I didn't follow it until I have a reason to present my bakes that way. Not only is this visually cute, the form factor of it in bite size and eaten with fresh blueberries makes it a refreshingly good and new way of enjoying pandan kaya cake. Only thing is, it is rather time consuming to assemble a bowl of it😂! You could speed things up by making bigger croissants than I did. I made them tiny enough that you can fit a few in your mouth comfortably with a couple of blueberries. The actual baking and making of the pudding layers is very fast so feel free to assemble in a way that suits your patience level and time best. This can also be made into swiss roll form or layered cake. 

I took the chance to test out Scoop Wholefood's pandan powder for making pandan chiffon cake. Something I had been procrastinating for some time. You may make pandan juice concentrate the traditional way if you wish by blending fresh leaves with a little water, sieving and settling the juice for 3 days, and then using the concentrate that settled. 

Pandan chiffon thin layer cake
Ingredients (makes one 10 x 12" and one 7x7"cake):
Egg yolk batter
2 egg yolks 
21g pandan juice concentrate from 1tbs (heaped) pandan powder and 3tbs water*
18g coconut milk 
14g any vegetable oil
38g cake flour
A pinch of salt
1/8-1/4 tsp pandan paste
1/4 tsp vanilla extract 

Meringue
2 egg whites
15g caster sugar
15g granulated gula melaka 
1/8 tsp cream of tartar

*to make pandan juice concentrate from pandan powder with insoluble fibers, rehydrate the powder with water and let it sit for half an hour. Sieve out the liquid and weigh out 21g for baking. 

Steps: 
1. Preheat oven to 170C. Line baking trays with teflon sheet or parchment paper. 

2. Prepare egg yolk batter. Whisk together egg yolks until pale and thick. Add oil and whisk until well combined. Add coconut milk, pandan juice concentrate and flavourings and whisk until combined. Add sifted flour and salt and whisk until no trace of flour is seen. 

3. Prepare meringue. Use electric mixer to beat egg whites with cream of tartar until firm peak or just reach stiff peaks, adding sugar gradually once egg whites are foamy. Use low speed to whip egg whites for a more stable meringue with smaller air bubbles. 

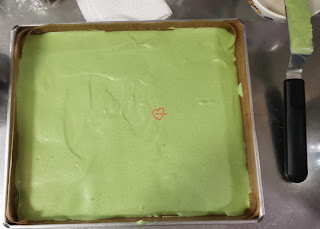
4. Quickly but gently fold meringue into egg yolk batter in 3 additions. Scoop out the batter onto prepared trays and spread it out in a thin layer using an offset spatula or bench scraper. 


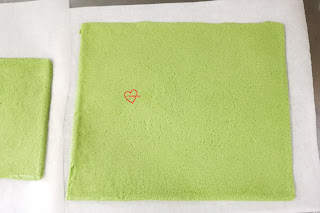
5. Place baking trays in oven and immediately lower to 150C and bake for 10-11min or until skewer comes out clean. Be careful not to overbake or you will have difficulty rolling the sponge without breaking it. 

6. Immediately remove from oven and flip onto fresh sheet of parchment. 


Roll the sponge into a tight roll to cool completely. In the meantime, prepare the pudding. 


Pandan kaya pudding 
A) 
100g coconut milk
5g pandan juice concentrate 
1/8 tsp pandan paste
1/8 tsp vanilla extract 
Pinch of salt
10g gula melaka
15g caster sugar (or to taste) 
75g Water
1/2 tsp agar powder

B) 
13g cornflour 
65g water

Steps:
1. Mix together ingredients in B) in a jug and set aside. 

2. Place all ingredients in A) in saucepan and bring to a boil while whisking. Make sure all agar powder is dissolved. Use medium heat. 

3. Stir contents in B) again. Pour into A) in a thin stream while whisking the contents in saucepan continuously. Continue cooking and whisking for a minute after it starts boiling again. Remove from heat. Do note that as the pudding cools, it will start to set so you will have to stir it now and then if you are not ready to assemble yet. 

Assembly
1. Unroll the cooled cakes. 

2. Spread a very thin layer of pudding on the cake and let it set for 20 min or until pudding is solid (doesn't stick onto your finger when you touch) but still soft before rolling. 


3. Cut triangles 2.5cm base by 7cm height or any preferred size. Layer cake and pudding really thin and use rolling pin gently roll flatter with pudding side down. 


Roll it up like a croissant by starting the roll from the base of the isosceles triangle, pudding side up. Leave it on a tray lined with parchment to set fully. 


You may have excess pudding. Just transfer into a jelly mould and refrigerate it. Enjoy it as a pudding treat. 

If you don't have the patience to make these minis, try cutting bigger triangles or simply make a swiss roll like the one I did below. 


The mini croissant cereal is really delicious when paired with juicy blueberries that are slightly sweet and tart, not too sour or strong tasting so that it doesn't overpower the pandan kaya flavour but rather, complements it.

Store the cake in fridge and consume within 3 days. 

Follow me on Instagram at phay_shing as I am more active there and post more stuff there than on Facebook and blog. 

With love, 

Phay Shing
Read More »

Saturday, 15 August 2020

Vegan Pandan Kaya Gula Melaka Cakelets

My friend requested for a vegan cake for her daughter's birthday. I gave some thought to select a flavour that is still yummy despite not using eggs or dairy. It is quite a new challenge for me as my favourite type of cake is leavened by meringues in the form of chiffon cakes. I decided to experiment and take the plunge, even though I was skeptical about the taste and texture of any sponge not leavened by meringues or loaded with butter or eggs. There was a happy accident along the way which I will elaborate later, and the resulting cake tastes beyond my expectations! Full of flavour and wonderful aroma, this is my bite sized version of a vegan pandan kaya cake that uses gula melaka as part of the sugar! 

And what was the happy accident? The sponge layers as you can see, is totally brown. When I prepared the batter, it was in a lovely shade of jade green from homemade pandan juice. The oven temperature went wonky a few minutes into baking and went into a high overshoot, toasting the coconut milk in the batter in the process although I did manage to bring down the temperature after about 13-15min into baking time. As the cake is a thin sheet cake, the cake became brown throughout. Is it dry you may ask. The cake is surprisingly moist and soft although it doesn't have the spongey nature of chiffons. The texture is more like a soft and moist muffin. I chose an easy reference recipe that involves mixing wet and dry ingredients, much like making a simple muffin. 

The pandan gula melaka pudding is more or less a variation of the same default recipe I use for my regular pandan kaya cake, which is vegan anyway. But I will share it here in detail for your convenience. 

Recipe for vegan pandan gula melaka sponge

Ingredients:

110g cake flour (plain flour in original recipe) 

1/2 tsp baking soda

1/8 tsp salt (1/4 tsp in original) 

40g caster sugar (75g in original) 

25g gula melaka, chopped (not in original) 

70g coconut milk 

50g pandan juice (blend as many pandan leaves as you want in some water and strain out the juice) 

1/2 tbs apple cider vinegar 

45g vegetable oil

1/2tsp vanilla extract


Steps:

1. Preheat oven to 160C (180C in original recipe) and line an 8x8" square tray with parchment. 

2. Melt gula melaka in coconut milk, set aside to cool. 

3. Sift flour, baking soda, white sugar and salt into mixing bowl. Whisk until combined. 

4. Add vinegar into coconut milk, set aside for 5 min. Add oil, pandan juice, vanilla and mix well. 

5. Pour wet into dry ingredients. Whisk until just combined. 

6. Pour into prepared baking tray and bake until golden brown. 

Now here is the thing. I didn't follow the baking temperature and time of the original recipe, which was 180C for 30 min. This step would vary from oven to oven as each oven behaves differently. I was baking pandan gula melaka chiffon sponge just before baking this so I had a tray of water at the base of the oven so mine is a steam bake instead of the original dry bake. I preheated to 180C on the temperature dial but actual temperature was about 150-160C for the first 5 min. Nothing appeared to be happening so I turned up the temperature dial by a little (my oven is an analog one) at the 5 min mark and went away for 5 min to have a quick bite. When I came back, the oven thermometer read 190C! I quickly turned the dial down and opened the oven door a little for a few seconds. It took a few minutes for the temperature to drop to 160-170C. I continued baking until total bake time was 25min instead of the suggested 30min because by then, the crust looked really browned. If you aren't sure what time and temperature profile to use, I would suggest following the original reference recipe but do keep an eye on your oven and how browned your cake appears. Even if the coconut milk didn't get toasted in the process, the cake will still be yummy! Just less aromatic. 

As you can see in the picture below, the batter is green but the sponge is browned throughout! But the aroma is really intense from the toasting of the coconut milk and sugars! 

Cut the sponge into squares or use round cookie cutters to cut out rounds, depending on how you want to assemble. A simple way is to use cupcake cases. I decided to do a fancier one using my silicone mould. 


Recipe for pandan gula melaka pudding

Ingredients:

A) 

240g coconut milk

120g pandan water (boil some pandan leaves in water) 

30g gula melaka, chopped 

30g caster sugar (may replace with gula melaka if you wish) 

1/4 tsp vanilla extract 

1/8 tsp pandan paste 

1/8 tsp salt

1/4 tsp liquid green food colouring 

1/8 tsp caramel essence (optional) 

1 tsp agar powder


B) 

26g cornflour 

130g pandan water


Steps :

1. Combine ingredients in B) in a jug and stir until cornflour is suspended in water. Set aside. 

2. Place all ingredients in A) in a saucepan and bring to a boil while stirring all the time. Keep stirring for another 1 min once the mixture is boiling. This is to ensure agar is totally dissolved. 

3. Bring heat to medium low. Stir B) again and pour in a continuous slow stream into the saucepan while stirring the saucepan continously. 

4. Keep stirring and bring the mixture to a boil using medium low heat. Continue stirring and boiling for a minute. 

5. Sieve the mixture to remove any large gula melaka bits or undissolved agar. The pudding is now ready to assemble with the sponge. Stir the pudding in the bowl now and then to prevent it from setting in the bowl. 


Assembly

There isn't  a fixed way to do this. Simply alternate layers of sponge and pudding and then refrigerate for a few hours. If you assembled in cupcake cases, you can leave it as it is. If you used moulds, you can carefully unmould at this point. I rolled the unmoulded cakelets in dessicated coconut for that extra texture when you bite into it.

The fancy silicone truncated cone mould is rather small so I used the smallest round cookie cutter I have to cut out the sponge. And this wasn't enough so I had to halve each round cutout horizontally so the sponge layer isn't too thick so it looks proportionate in the tiny mould. Needless to say, it was a challenge to work neatly and quickly 🤣

Messy assembly! 


My kids did a taste test and gave thumbs up for it! You don't miss the egg at all because it is so full of flavour and aroma! If you want an easy vegan cake that is yummy as well, give this a try! No electric mixer required! 


With love, 

Phay Shing

Read More »

Monday, 18 May 2020

Rainbow Pandan Kaya Cake

I made a pastel rainbow sponge and pudding cake in the past and this time, I am making it in pandan kaya flavour! Even the rainbow on top is made of alternating soft chiffon sponge and fragrant and smooth pudding!

I hope this view brightens your day in these dark days! 

You may ask how do I achieve the pandan kaya flavour without making the whole thing green?? I used pandan water, which is simply water boiled with many pandan leaves. The colour of the water is very pale green and it doesn't show up on the sponge or pudding especially since strong colours were requested. The pandan fragrance may be slightly muted since I didn't use concentrated pandan juice like I normally would. Despite that, the cake is still wonderfully refreshing and fragrant.

Needless to say, making rainbow cakes are tedious because of the colours involved. I baked 3 sponges in 3 separate rounds of baking the main cake because I only have one baking tin that is 6" with removeable base. You may bake the different colours in one or 2 rounds of baking if you have more than 1 tin.

Recipe for pandan coconut chiffon sponge (for 6"rainbow cake) 

I used a reduced egg yolk version because of the rainbow colours. Regular pandan kaya cakes should have more egg yolks in there. I didn't want to add too much colouring to overcome the yellowness of the yolks. You may refer to this post for my default pandan kaya cake recipe (I use stevia for diabetic friendly version but regular castor sugar regular recipe).

Ingredients:
Egg yolk batter
1 egg yolk
7g castor sugar
60g vegetable or coconut oil
30g coconut cream
30g pandan water
1 tsp coconut cream powder (optional but makes it more coconuty)
60g cake flour
1 tsp vanilla extract
1/8 tsp salt
Red, yellow and blue gel food colouring

Meringue*
1 x3 large egg whites
1/8 tsp x3 cream of tartar
18g x3 castor sugar

* the (x3) is because I needed to prepare the meringue separately for each colour because I bake them at separate times.

Steps:
1. Preheat oven to 140°C. You may wish to put a tray of water at base of oven but it is optional. Set rack to middle position.

2. Prepare egg yolk batter. Whisk yolk and sugar until pale and thick. Add oil and whisk until combined. Add coconut cream, pandan water, coconut cream powder, vanilla and salt and whisk until combined. Gradually add in sifted flour and whisk until no trace of flour is seen.

3. Divide egg yolk batter into 3 equal portions and colour with respective gel food colouring. Keep 2 of the 3 portions covered with cling wrap to prevent batter from drying out if you can't bake all 3 colours at once.

4. Prepare meringue. If you are able to bake all 3 colours at once, prepare the meringue using 3 egg whites instead of 1. Beat egg whites with cream of tartar until firm peaks form, gradually adding sugar once the egg whites are foamy.

5. Quickly but gently fold the meringue into the egg yolk batter. Pour the batter into the 6" pan and run a chopstick around to pop any air bubbles. Bake for 30 - 35min or until skewer comes out clean. Let the cake cool in the pan for 10 min before unmoulding by hand.

Store the baked cake in airtight condition if not assembling yet. The sponge for the rainbow on top can be made by baking thin layer cakes on a flat rectangle or square pan. Cut a strip out for red and yellow sponges. I also prepared extra sponge for anchoring the cake to the cakeboard as you can see later.

 Get ready acetate sheet and cakeboard before starting on the pudding. This is for the main cake. For the rainbow on top of the base cake, get ready round cookie cutters and line a baking tray with parchment or Teflon sheet.


Recipe for pandan coconut pudding
Ingredients (for each coloured layer) :
A)
240g coconut milk
130g pandan water
70g castor sugar
1/2 tsp vanilla extract
1/8 tsp salt
1 heaping tsp agar powder
Some food colouring **

B)
28g cornflour
130g pandan water

** I added pandan paste for the green layer

Steps:
1. Put ingredients in B) in a jug and stir to mix well. Set aside.

2. Put all ingredients in A) in a saucepan. We begin by making the green pudding first so start off by adding some pandan paste and a bit of yellow colouring. Heat on mediun heat while stirring constantly. Bring to a boil and continue boiling and stirring for a minute.

3. Stir contents in the jug before pouring in a thin stream into saucepan while stirring the mixture constantly. Continue heating and stirring until mixture comes to a boil again. Boil and stir for another minute. Remove from heat and assemble with cakes immediately.


Assembly
1. We assemble the rainbow on top of the cake and the main cake at the same time as the pudding sets quite quickly when cooled. Before making the green pudding, place the blue sponge on a baking tray and wrap the acetate sheet around it. I mark my acetate sheet at 1cm intervals to help me to gauge the level of sponge and pudding layers when I assemble. Place a 6cm diameter metal cookie cutter on lined baking tray. Place the yellow sponge cake inside the ring. Cut the sponge to appropriate size.

2. Make the green pudding. Carefully spoon some pudding in the space encircled by the yellow sponge on the baking tray. Refrigerate the tray while carefully ladelling the green pudding to cover the blue sponge for main cake until the same height as the sponge.

3. Carefully place yellow sponge layer over green pudding for main cake. Gently press the cake down so there are no air gaps between sponge and pudding layers.

4. Prepare orange pudding layer ingredients but don't start cooking yet. Check to see if the green pudding for the rainbow on top has set. Carefully remove the 6cm cookie cutter, leaving the yellow sponge and green pudding on the tray. Place the 10cm cookie cutter over the yellow sponge and green pudding. Place red sponge against the insides of the 10cm cookie cutter. Cut the strip of red sponge if necessary such that it fits nicely into the cookie cutter. Make sure the yellow and green parts of the rainbow lie in the middle of the red circle.

5. Make the orange pudding. Carefully spoon the pudding in the gap between the red and yellow sponge rings for rainbow on top of cake. Chill the tray in the fridge.

Quickly wipe away any accidental drips of the pudding. 

6. Ladle orange pudding over yellow sponge layer for the main cake until same height as sponge. Carefully place red sponge over orange pudding and press it down gently to get rid of air gaps.

Assembling main cake

7. Prepare purple pudding.  I baked extra sponge and cut out a small circle of it as an anchor for the last pudding layer because pudding will slide on the cakeboard. The sponge in contact with the cakeboard is to help anchor the whole cake. Ladle some purple pudding over the red sponge. Place the small circle cutout of sponge on top of the purple pudding. Cover with cling wrap. Refrigerate for at least 2 h or overnight.


8. Remove the concentric rings of sponge and pudding from fridge. Use a 2 cm cookie cutter to cut out the middle of green sponge. Carefully cut the concentric rainbow ring into half. Use one of the halves for decorating the base cake.

9. Remove the main rainbow cake from fridge. Remove cling wrap. Place cakeboard over the purple layer. Quickly but carefully flip the cake over such that the blue layer is on top now. Remove the acetate sheet.

I baked some white sheet chiffon cake for cutting out the clouds and lettering. I used skewers as dowels to anchor the rainbow on top to the cake below. The clouds and lettering were stuck on using melted gelatin instead of our usual melted marshmellow.

The clouds and lettering are all made of chiffon cake too! 

Thank God I managed to pull off a yummy and refreshing rainbow cake without the use of buttercream or fondant!

With love,
Phay Shing
Read More »

Thursday, 28 November 2019

Pikachu and Torchic Lychee Choux Pastry on Pandan Kaya Cake

My friend wanted me to do a Pokemon themed bake for her nephew's birthday but with pandan kaya cake as the cake base. She also wanted choux pastries for the characters and I told her some of the Pokemons are very good candidates as deco choux creations. Here it is 😊


I will focus on the choux pastry part as the recipe for the pandan kaya cake can be found in this post. I just replaced Stevia with caster sugar for the pandan chiffon and the pandan gula melaka pudding.

Detailed recipe for choux pastry batter and the craquelin (cookie dough) can be found in this post. As a rule of thumb, I try to colour the batter as close as possible to the same shade as the craquelin for creating various characters.

Craquelin on top of piped batter for Pokeball and the heads and bodies of Torchic and Pikachu 

The rest of the small body parts are made from piped choux pastry batter without the use of craquelin.


I love the look of this rainbow choux!

Freshly baked pastry cases

I used royal icing to decorate as well as join the parts together.

I had fun giving Pikachu various expressions! 

I provided lychee pastry cream lightened with non-dairy whipped cream in piping bags for my friend to fill just before the pastries are consumed at the party. The recipe can be found here.

"Are you also surprised that choux pastries can be made into someone like me? "

According to my friend, everyone at the party, the neighbouring tables of diners and the service staff at the restaurant had the same expression as the Pikachu above 🤣. I hope this bake brings a smile to your face too! After the initial surprise.

With love,
Phay Shing
Read More »

Thursday, 21 November 2019

'McDull in Animal Suit' Pandan Kaya Cake

I first came across McDull about a little more than 10 years ago, watching the original cartoon in Cantonese. It is not as widely known to younger kids nowadays probably because of the origin of this character, which epitomises how some kids grow up in Hong Kong. But anyway, I am glad to have a chance to make this lesser known character 😊

McDull donning various animal suits! 

My university classmate was the one who requested for this bake. Although peppermint dark chocolate was requested for the filling, the cake requested was pandan kaya cake.

I used this french method recipe for making the macaron shells as this is a small quantity bake and the batter is stable enough for dividing into so many colours. Just to share some photos of the process...

Piping McDull. Be sure to use piping tips that are of the right size for better shape retention. For really small parts like the eye patch and black panda parts, you may just cut a small hole in the piping bag 

Freshly baked shells. Check out the feet! 

I filled the macarons with firm peppermint dark chocolate ganache as some of tbem are going on a mini tower

Recipe for firm peppermint dark chocolate ganache
Ingredients:
90g 73.5% bitter dark chocolate couverture
10g unsalted butter
24g heavy cream
1/8tsp salt
1/2 tsp vanilla extract (optional)
1/2 tsp Kahlua coffee liqueur (optional)
1 tbs peppermint extract

Steps :
1. Place all ingredients except extracts and liqueur in a microwave safe bowl. Melt on mdium low power for 20 seconds and stir. Repeat as necessary until smooth and melted.

2. I like to whip my ganache to lighter consistency so I chill the ganache in freezer for 1 to 2 min and then whip with spatula. I repeat chilling and whipping until texture resembles buttercream.

3. Gradually add extracts and liqueur and mix well after each addition. Transfer into piping bag and fill the shells. Store assembled macarons in airtight container in the fridge for at least 24 h before consuming. This type of stiff ganache filled macarons can keep in fridge for two weeks.

I assembled the mini tower with extra pieces of round macaron shells and stiff royal icing 

The recipe I use for the pandan kaya cake is same as the one I used for my mum's birthday except that I used regular caster sugar instead of Stevia. I also used a 6 inch pan without the central tube to bake the 6 inch chiffon cake. The pandan kaya cake recipe can be found here.

Freshly baked 6" pandan chiffon cake slightly more earthy hue due to the gula melaka used. 

I added the words "Happy Birthday" using a separate gula melaka chiffon sponge with some cocoa powder added for a deeper brown colour.

Remember always store macaron cake toppers separately from the cake to prevent the cake from turning the macarons soggy.

With love,
Phay Shing
Read More »