Showing posts with label Lava. Show all posts

Thursday, 2 March 2017

Hedgehogs and Panda 3D Macarons with Chocolate Lava Filling

I have been toying with the idea of 3D hedgehog macarons with lava chocolate filling for quite a while but didn't have the chance to try it out. When I finally had the chance to play around with excess batter, here's what I came up with :)

Cute hedgehogs and an accidental panda! Checkout that lava ooze!

I could have made more 3D shells but I was exhausted at the end of working on a big batch of complicated macaron shells. That's why you see only four 3D macarons. The idea of a panda only came about post baking.

I used the reduced sugar macaron shell recipe for these shells. Both regular and reduced sugar recipes can be found here. I coloured the batter dark brown using Dutch processed cocoa powder and a pinch of charcoal powder. You may refer to this post for more details on points to take note about baking hemispherical macaron shells.

I piped the base shell and let it dry partially before piping on the pop-up features on the hedgehogs. Don't be shy to use a toothpick to nudge the batter where it's appropriate.

As you can see, I was using leftover batter.

Piping the spikes and ears on the hedgehogs

Remember to bake the shells until they are really dry. It makes it much easier to unmould them from the cakepop mould. Don't worry about the shells being too dry. Give it more time to mature with the filing and it should do fine. Baking time takes about 45 minutes for the shells, with the last 25-30 minutes at 100-110°C. Always start off baking at 140-150°C.

Freshly baked shells!

Facial features are added on using royal icing

Recipe for runny dark chocolate ganache
Ingredients (fills about 8 hemispherical macarons):
60g dark chocolate, chopped
60g full fat milk*
1/2 tsp vanilla bean paste
A pinch of fine sea salt

*You may reduce to 50-55g if you prefer the ganache to be firmer.

Steps:
1. Melt dark chocolate in microwave oven at medium power. Stir until smooth.

2. Heat milk in a small saucepan until it starts to bubble.

3. Gradually add milk into melted dark chocolate, stirring well in one direction after each addition.

4. Add salt and vanilla. Mix well.

5. Cover and refrigerate until ready to fill.

Runny dark chocolate ganache

The recipe for whipped dark chocolate ganache can be found here.

Creamy whipped dark chocolate ganache!

Assembly
1. Transfer both runny and whipped ganaches into separate piping bags.

2. Place hemispherical shells in cakepop mould. Fill the shells with one layer of whipped dark chocolate ganache (picture on the left).

3. Fill the center with runny ganache (middle picture).

4. Cover the runny ganache with a layer of whipped ganache (picture on the right).

5. Sandwich the bottom shell on. Refrigerate for a few minutes to firm up the whipped ganache before turning the macaron right way up.


Refrigerate for at least 24h in an airtight container before serving. Let the macarons sit at room temperature for 10-15 min before eating.

They look like they are saying hello!

Hubby and the kids loved this yummy stuff! Checkout the cross-section up close!

Oozy chocolate!

Be warned. It is really rich so you can't have more than one at a time!

With love,
Phay Shing


Read More »

Friday, 3 February 2017

Salted Egg Yolk Custard 3D Rooster, Ladybug & Watermelon Macarons

I just finished an extremely busy episode of macaron mania, completing three different requests concurrently in a single planned bake. I had some leftover batter of various colours and decided to play around with 3D hemispherical macaron shells again. And this was what I came up with! Roosters, a ladybug and a watermelon!


Guess what's the filling inside?

Runny salted egg yolk custard! Yums!

My last recent experiment with 3D shells by making ondeh-ondeh macarons and a cute turtle was so successful that I was game to try it again! I mentioned in that blog post that I was keen to try other trendy runny/lava fillings. I made runny salted egg yolk custard fillings before some time last year and the feedback was that it's really yummy so I thought why not make it again. The difference is, instead of using buttercream as the barrier layer between the shells and runny custard, I used whipped white chocolate ganache as the base.

I used the reduced sugar recipe for the macaron shells here. Both regular and reduced sugar recipes can be found here. You may refer to my Creative Baking: Macarons book for a systematic presentation of the basics and complex shaped macarons. You may refer to my video tutorials for macaron basics and piping of complex shapes on the blog too.

Piping on a hemispherical surface is a little tricky as the batter flows down the sides of the silicone cakepop mould due to gravity. The watermelon was the trickiest and it was my first attempt at piping tapered alternating stripes on a curved surface. Use a toothpick to pull the batter where necessary. Please refer to my first 3D macaron shell post for some notes on creating these odd shaped shells where I will highlight some difficulties you may face and how to overcome them.

For this experiment, I just piped hemispheres and a corresponding plain circle shell for each macaron...And decide what to make out of them after the bake. By this time I was exhausted from piping and baking the whole day already!

I reused the Pokeball template that I was using for one of the requests.

Other than the watermelon, I was not wondering what to turn each coloured macaron into. Since it's still the Chinese New Year period, I thought why not make more roosters. And so I started to decorate the yellow and white shells with stiff royal icing...

Add more icing sugar to the royal icing recipe until you get the right piping consistency where the icing is able to hold a stiff peak.

Here's a peek at the under side of a hemispherical shell. As you can see, it's quite a challenge to get the batter to flow evenly down the sides of the hemisphere.


I can't help but smile when I see these cute, cheerful creatures!


I tweaked the runny salted egg yolk recipe from the original post to make it slightly less runny here as it would be messy to eat. It's more like a thick lava consistency here. Keep in mind that the consistency of the custard should be the desired one at refrigerated temperatures.

I chose to use ganache instead of buttercream as it is easier to make and it stays firmer longer at room temperature in hot Singapore. I adapted the ganache from the low sugar version used in my ondeh-ondeh macarons.

The recipe for the salted egg yolk ganache and custard is just nice for 7 such hemispherical shells.

Begin by preparing the salted egg yolk puree. Steam 2 salted egg yolks for 9 minutes and mash while hot. Add 15g (1 tbs) of milk and mix well. Press the mixture through a sieve to remove the lumps. Divide the puree into two equal portions (about 24g each). Do add more salted egg yolks (and increase the milk correspondingly) if you would like a stronger flavour. I ran out of salted eggs at home at this point in time and didn't want to waste food for an experiment.

Recipe for lava salted egg yolk custard
Ingredients:
30g fresh milk (slightly warm)*
6g instant custard powder
1/4 tsp vanilla extract
1/16 tsp fine sea salt
24g salted egg yolk puree (or 1 egg yolk mashed with 7-8g milk. Use 2 salted egg yolks mashed with 15g milk for stronger flavour)

*Add 2-3g more milk if you want a runnier custard, less if you want it firmer.

Steps:
1. Dissolve salt in warm milk. Add custard powder and stir for a couple of minutes until smooth and slightly thickened. Add vanilla and mix well.

2. Add salted egg yolk puree in a few batches and mix well after each addition.

3. Refrigerate the custard with cling wrap touching the surface. Proceed to make the ganache.

Recipe for salted egg yolk ganache
Ingredients:
42g white chocolate, chopped
21g unsalted butter
21g vegetable shortening
26g heavy cream
1/16 tsp fine sea salt
1/2 tsp vanilla extract
24g salted egg yolk puree (use more for a stronger flavour, up to double the amount here)

Steps:
1. Place white chocolate, butter and vegetable shortening in a microwave-safe bowl. Heat for 20 seconds at medium power. Stir with a spatula. Repeat until mixture is smooth.

2. Place cream in a small saucepan. Heat until it starts to bubble. Pour the cream into the white chocolate mixture. Stir in one direction until smooth.

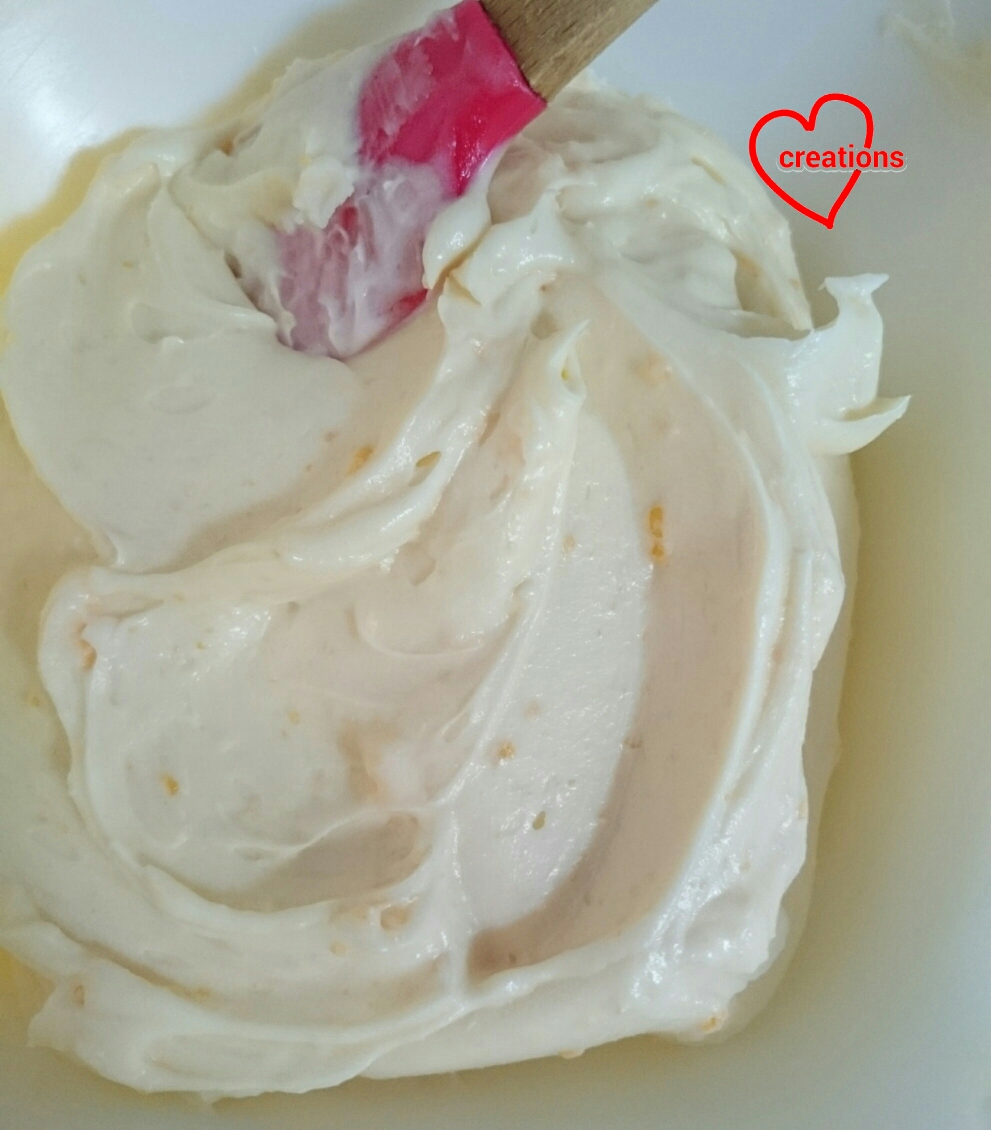
3. Add salt and vanilla and mix well. Freeze for 2 minutes and mix well with spatula. Repeat freezing and beating the mixture with spatula (or electric mixer at low speed for larger quantities) until mixture is smooth and creamy and able to hold a stiff peak. Don't worry if the mixture appears to separate in the beginning. It will come together in the end.

3. Add salted egg yolk puree in a few batches and mix well.

See the salted egg yolk bits?

Assembly
1. Transfer the custard and ganache into separate piping bags. Place the hemispherical shells in cakepop mould that was used to pipe the batter on.

2. Pipe ganache into hemispherical shell such that it coats the entire inner surface (first picture below).

3. Add the lava custard. (Second picture)

4. Pipe a layer of ganache to completely seal the runny custard. (Third picture)

5. Refrigerate for a few minutes to firm up the ganache. Pipe some ganache on the bottom shell. Sandwich the top and bottom shells together.

6. Refrigerate for at least 24h before serving. Do be patient as the macarons seriously taste better after maturing.


My kids love the 流沙 version of macarons! Something you get only in steamed buns which I have made on a number of occassions for my little ones before I was swamped with baking requests. Here's a peek at the yummy lava insides!


Pardon the pale colour as the camera didn't pick up the actual colour well. The taste is definitely unmistakably salted egg yolk custard!

Hubby had his cute portion too!

Nicer picture showing texture of the lava salted egg yolk custard

If you are a fan of anything lava salted egg yolk custard, do give this a try ;).

With lots of love,
Phay Shing


Read More »

Wednesday, 25 January 2017

Ondeh-Ondeh Macarons (3D Shells!)

Sometimes I get inspiration from nowhere and this is one occassion. I have been wanting to explore the possibilities that came with my discovery of making 3D macaron shells last year. I finally have the capacity and chance before getting really busy with planning for macaron classes (Yes! I am finally giving classes!) and making lots of macarons in February. Here's my version of ondeh-ondeh, macaron style 😉!

Checkout the oozy gula melaka filling and the cute turtle too!

A view from the side to see the hemispherical shells more clearly.

Both my kids loved the taste of these ondeh macarons and couldn't wait to get their hands on the turtle! I am really happy that this concept of incorporating runny fillings in 3D shells work and opens up the avenue of other trendy runny fillings that are perhaps not so sweet. For those of you who know me, I don't have a sweet tooth and therefore my bakes tend to be less sweet. I tried by best to reduce sugar in this recipe.

Knowing that the end product would be pretty sweet, I reduced sugar for both shell and ganache in an attempt to make it less cloyingly sweet. It's my first time incorporating dessicated coconut into the shells as well. It really makes the shells very fragrant with an added coconuty bite! As this was an experiment and I didn't have any macaron request pending at the moment, I used the French method to make a small quantity of macarons. My preferred Italian method would have wasted too much resources if this experiment failed.

I strongly recommend you to refer to this post for the basics of French macarons.

Recipe for ondeh-ondeh macaron shells
Ingredients (makes about 12 macarons, 24 shells):
40g egg whites (aged for a few days in fridge)
36g caster sugar (you may reduce but meringue will be less stable)
1/8 tsp cream of tartar (optional)
13g dessicated coconut, sifted once
30g superfine almond powder
50g icing sugar
6g rice flour*
1g cornflour*
1/16 tsp fine sea salt
1/2 tsp Pandan paste

*Replace with icing sugar for non-reduced sugar version.

Steps:
1. Sift almond, dessicated coconut, icing sugar, rice flour, cornflour and salt together. Set aside.

2. In a clean metal bowl, beat egg whites with cream of tartar until foamy with an electric mixer. Gradually add caster sugar and beat until stiff peaks form. Once stiff peaks are formed, scrape the meringue down from the sides of the bowl with a spatula and beat for several seconds more to ensure that the meringue is really stiff. Use medium speed to beat the meringue.

3. Add Pandan paste into meringue and briefly mix it in with mixer.

4. Scatter about a third of the dry sifted ingredients over the meringue. Gently fold in using a spatula. Repeat until all dry ingredients are added. Test the consistency of the batter. If it has not reached the slow moving lava-like stage, continue to fold. You may use more force to knock out more air in the batter. You may refer to this post for some video tutorials on macaron basics.

5. Transfer batter into piping bag fitted with a 6-7mm diameter round tip. If you are making regular macarons, simply pipe out the circles on tray lined with baking paper. You may use a circle template if you wish. I piped some bigger circles for the base shells of the 3D macarons.


In order to pipe the 3D shells, use an inverted silicone cakepop mould as the surface and pipe away!


You may have noticed that the surface of the shells appear rougher than usual. This could be due to the addition of the coconut.

6. Bang the tray on the table to release trapped air. Let the shells dry in an air-conditioned room or under a fan until the surface of the shells are dry to touch. When shells are almost dry, preheat the oven to 160°C and set oven rack to lowest position.

7. Place macarons in oven and turn down the temperature to 140°C. Use only top and bottom heat. Bake for 18-25 minutes or until feet appear dry. You may reduce the temperature to 115°C after 15-20 minutes of baking.

8. Cool the shells completely before peeling the baking sheet or silicone mould away from the shells.

Awesome feet!

The 3D shells were slightly browned at the base because I was multitasking with the kids when baking =.= And I forgot to eyeball the oven temperature


Really happy with the texture of the shells even though the surface is rough! Delicate and only slightly chewy. No hollows!


Use royal icing to decorate the turtle.

I had to smile when I see the smiley turtle :)

Steam about 2-3 tbs of dessicated coconut with 1/2 tbs of water sprinkled over it for about 10 minutes. Add a knotted Pandan leaf as well to add that fragrance if you wish. Set aside to cool. You may omit this if you prefer to leave the top surface of the macaron shells clean and free from toppings.


I piped a little royal icing on top of the shells to stick the steamed dessicated coconut on. You may use melted marshmellows as glue too if you don't want to mess around with royal icing.


The macarons are filled with a ring of Pandan caramel ganache and gula melaka caramel in the middle. My original Pandan caramel ganache recipe here would be too sweet for pairing with gula melaka so here's the reduced sugar version.

Prepare the gula melaka filling first. In actual ondeh-ondeh, the gula melaka centers are simply chopped up pieces of the sugar. But the centers turn runny when the ondeh-ondeh is boiled. In order to replicate this effect, I had to create a thick gula melaka syrup that has the consistency of honey when refrigerated. Here's a rough formula I came up with. You may have to adjust your boiling time to get the right consistency. If it's too thick, simply add water a little at a time. I included salt in it to counter the sweetness. You may choose to omit if you want to be a purist about it.

Recipe for gula melaka filling
Ingredients:
65g gula melaka, chopped
39g water
1/4 tsp salt
1 Pandan leaf, knotted

Steps,
1. Place all ingredients in a small saucepan and bring to a boil. Simmer for 2 minutes and let it cool to room temperature.

2. Discard Pandan leaf. Refrigerate the syrup for 10 minutes. Check the consistency. If it is too runny, transfer to saucepan and boil for a couple of minutes and bring to refrigerated temperature again. If it is too thick, add water 1/8 tsp at a time and stir until consistency is like honey.

Recipe for reduced-sugar Pandan caramel ganache
Ingredients:
56g white chocolate, chopped
28g unsalted butter
28g vegetable shortening
35g heavy cream
1/4 tsp fine sea salt
1/3 tsp Pandan paste
1/2 tsp caramel flavouring
1/4 tsp lemon juice (to balance out the sweetness)

Steps:
1. Place white chocolate, butter and shortening in a microwave-safe bowl. Heat for 20 seconds and stir with spatula. Repeat until everything is melted.

2. Place cream, Pandan paste, caramel flavouring and lemon juice in a small saucepan. Heat until the cream starts to bubble. Pour over the melted chocolate mixture. Stir until well combined.

3. Add salt and mix well.

4. Freeze for 2 minutes and use a spatula to mix well. Repeat freezing for 1-2 min and whipping the ganache until the texture is smooth and creamy. You may use an electric mixer for larger batches. Don't worry if the mixture appears to separate in the beginning. Just keep freezing and whipping up the mixture and it will all come together in the end.

This ganache on its own may taste weird but that's because it's supposed to be paired with something really sweet.

Assembly
Assembly for the regular macaron shells is straightforward. Pipe a ring of ganache and fill the center with gula melaka. Refrigerate at least 24h before serving. Leave the macarons at room temperature for 10-15 minutes before consuming.

Filling regular macaron shells.

In order to fill the 3D shells, begin by coating the insides of the hemisphere with ganache (first picture below). Fill the cavity with gula melaka (second picture). Cover the syrup portion with more ganache, such that the ganache completely "seals" in the syrup (third picture). Refrigerate the filled hemispheres for a few minutes to firm up the ganache. Use the cakepop mould to hold the shells in place. Pipe some ganache on the bottom shell (fourth picture) and sandwich the two shells together.


This has certainly been a fun experiment and great learning experience for me :). It's a bonus that it turned out yummy too!

Update: My friend who had one said it's very yummy! She couldn't wait for it to mature a day before eating it 😅.

The turtle finally gets eaten by my younger kid!

Yums!

I am very pleased that this cross-section captures the beautiful macaron texture, creamy ganache and oozy gula melaka center very well!

Hubby gave a thumbs up too! To my surprise, he commented that it's not overly sweet but in fact a very good rendition of ondeh-ondeh in the form of macarons! Hubby is one of my fiercest critics so do give this recipe a try if you are a fan of ondeh-ondeh :)

Checkout the Italian method version of Ondeh-Ondeh macarons over here!

With love,
Phay Shing


Read More »

Sunday, 29 May 2016

'Crab' Salted Egg yolk Chiffon with Salted egg yolk Lava


I made this 'Crab' Salted Egg yolk Chiffon with flowing Salted egg yolk lava for my dad's birthday, and also to try out for one of the cakes in the 2nd chiffon book, Deco Chiffon Cakes that I am working on right now. It's seriously good!! I make chiffon cakes day in and day out but I can tell you this is seriously good! I'm so in love with this flavour and the oozing custard, and also a big fan of the salted egg yolk lava croissant! My dear daddy loves crabs and salted egg yolk, so he inspired the design. The recipe/technique will be in the Deco Chiffon Cakes coming out soon this year though I really can't wait to share it with you.

And here's a sneak peak of the cute chiffon crab topper in the book! It crawled off my salted egg yolk chiffon onto my giant pineapple tart lol =p

With lots of love,
Susanne

Read More »

Wednesday, 25 February 2015

Keroppi Pandan Salted Egg Custard Steamed Buns (very runny naturally coloured 流沙包!!)

My kids are requesting for baos again! After a hiatus of a few months, I finally have time to return to my first love in the "baking" arena. In my quest to find the right balance of soft fluffy bao skin and really runny salted egg custard filling, I have tweaked the recipe or preparation conditions quite a few times. I usually succeed in getting fluffy and soft baos but the filling is rather thick and not as runny as the ones you get at restaurants although the taste is pretty close. I am glad to say that I think I have found the right balance this time and the kids agree that this is the best batch of liu sha baos I have made so far!


Here's a closer look at the awesome runniness and fluffiness...

And it remains runny even after freezing and resteaming!

All the colouring you see are from natural ingredients. Since the filling contains coconut milk, pandan flavoured bao skin compliments it very well.

My kids helped with preparing the pandan juice :)


Prepare pandan juice by blending about 20-25 pandan leaves in 100ml of water and squeezing out the juice from the pulp wrapped in a cloth coffee filter. Cutting the leaves, blending and squeezing out the juice is so simple that kids can help. You may choose to let the juice settle overnight and use the dark green portion that settled at the bottom but it is not absolutely necessary.

Recipe for liu sha filling
I mentioned in my previous liu sha bao post that I will attempt liu sha baos again with an increase in liquid content and decrease in solidifying agent to make the filling more runny.

Ingredients (makes 9 baos):
2 (or 3) salted egg yolks, cooked and mashed with fork
40g unsalted butter, softened
32g icing sugar
10g custard powder
30g milk powder
32g coconut milk

Steps:
1. Mix butter and sugar together until well combined. Add all other ingredients and mix well. Sieve the mixture to break up the big lumps of salted egg yolk as well as removing any bits that can't be broken up.

3. Chill in the fridge until firm, about 1h or overnight. Portion into individually cling wrapped balls of 17g and freeze it. This can be prepared a day ahead of time.

My kids sampled the leftover filling in the bowl and gave it a thumbs up!

Recipe for bao skin and assembly
The recipe for bao skin is similar to the one I have always used with a slight difference in proportion of dry and wet ingredients.

Ingredients:
160g Hong Kong bao flour
20g cornflour
25g caster sugar
A pinch of salt
1 tsp instant dry yeast
1/6 tsp baking powder dissolved in 1/2 tsp of water/pandan juice
1/16 tsp ammonia bicarbonate (optional)
90g pandan juice/water
11g vegetable shortening (You may replace with vegetable oil or butter. But I find the skin drier with vegetable oil and butter lends a noticeable flavour to the bao skin. If you prefer buttery skin, do use butter :)).
Any other required food colouring

*Use one-fifth to one-quarter of the recipe to make the dough for Keroppi's features. Or if you are lazy, simply colour some green dough white/pink/black with gel food colouring for the features.

Steps:
1. Mix the first 5 ingredients in a bowl. Add pandan juice (or water if you are making plain dough for Keroppi features) and mix with a wooden spoon until a dry dough forms.

2. Dissolve baking powder and ammonium bicarbonate in 1/2 tsp of water/pandan juice.

See how it bubbles!

Gradually add the baking powder mixture into the dough by kneading it in.

3. Pour the dough onto a non-stick mat and gradually knead in the shortening. Continue kneading for 15-20minutes or until the dough is smooth and elastic and passes the windowpane test. You may let a stand mixer or breadmaker help you with the kneading but I prefer doing it by hand as I can feel the dough taking shape.

4. Proof the dough in a large bowl/measuring jug covered with cling wrap until almost doubled in size. About 25-30 minutes in hot Singapore or about 3 hours in the fridge. Punch down the dough and knead a few times to expel the trapped air.

5. Portion out the dough and add any food colouring at this point. I prepared the pandan and plain dough separately. I found some powdered food colouring from plant sources. All natural!

Available at Cold Storage in Malaysia but sadly not seen in Singapore.

I used the pink powder to colour the dough for Keroppi's cheeks.
Portion out the dough in this manner:
Green dough: 30g each bao
White dough: 3g for each eye
Pink dough: 7g for all the cheeks
Black dough: 12-15g for all eyes and mouth

I actually didn't prepare the black dough but did the lazy way of painting on the black parts with charcoal powder dissolved in water after the baos were steamed. This is fine provided you don't accidentally smudge it. I have painted on black features in the middle of steaming the baos before using charcoal dissolved in egg yolk but this method may not be suitable for liu sha baos which are temperature and time sensitive during the steaming process.

Important note: keep any resting portions of dough wrapped in the fridge to avoid over-proofing as you are portioning, colouring and assembling.

I love the natural green hue!

6. Lightly flour your work surface with bao flour. Take a ball of green dough and flatten it. Place a frozen ball of filling in the middle and wrap it, pinch sealing the dough. Place the assembly seam side down on a piece of baking paper. Add on the features. In order to stick on the cheeks, pinch out a bit of pink dough and stick onto the bao. With a lightly floured finger, gently flatten the pink balls onto the bao surface as shown below.


7. Proof for about 35 minutes at room temperature (about 28°C in the kitchen in Singapore) before steaming at high heat for 6 minutes. Make sure that the water is at a roiling boil. Turn off the heat and let the baos rest in the covered wok/ steamer for 3 minutes before opening the cover. Do not over steam the baos as they may explode or the filling will not be as runny.

Baos are best eaten freshly steamed. If you are not consuming immediately, freeze the baos in ziplock bags after they have cooled completely. Resteam for 11-12 minutes without defrosting before consuming.

Not exactly the prettiest looking but we are yummy!

My kids had much fun eating these! Because the filling was so drippy, they pulled off the eyeballs and dipped in the filling to eat!

With lots of love,
Phay Shing


Read More »

Saturday, 29 November 2014

Koala, Panda & Bear Salted Egg Custard Steamed Buns (流沙包)

I almost decided to title this post "The three bears with Goldilocks inside". But then some would argue that koalas are marsupials, not bears. And there's no blonde girl inside the buns but golden custard :p. Here are my beary baos!


Check out the salted egg custard and fluffy bun!


I am still experimenting with the recipe and steaming times to get the right taste and consistency. This time round, the taste is close to what is commercially sold but can still do with more improvement in the "runnyness" department.

I omitted cornflour, reduced the amount of custard powder and increased the amount of coconut milk used in the hope that it will help to make the custard more runny. It seems like I still need to reduce the amount of custard powder used. I was right to omit the cornflour upon checking the ingredients list of commercially sold frozen liu sha baos.

The bao skin recipe is almost the same as the one I always use as it is simple, soft and fluffy. I added less water this time and used high heat to steam for a shorter time. From my previous bao experiment, I found that the dough can be stored in the fridge in between steps without affecting the taste of the bao if the first proofing is done with the dough in the fridge. A very necessary "step" for me especially when kids are home during the school hols and I still do activities with them, cook and do housework!

Recipe for the filling and bao skin is very similar to my guinea pig liu sha bao post.

Recipe for salted egg custard 
Ingredients (makes 9 baos):
2 salted egg yolks, cooked and mashed
40g unsalted butter, softened
32g icing sugar
15g custard powder (I will reduce to 10g in my next attempt)
30g milk powder
25g coconut milk (I will increase to 30g next time)

Steps:
1. Mix butter and sugar until well combined. Add all other ingredients and mix well. Pass the mixture through a fine sieve to make it smooth.

2. Chill in fridge for 30 minutes-1 hour until firm. Portion into balls of 16-17g each. I find it helpful to wrap them in cling wrap and freeze them until it is time to assemble.


Recipe for bao skin
Ingredients:
150g Hong Kong bao flour plus extra for dusting
28g cornflour
26g caster sugar
Pinch of salt
1 tsp dry yeast
1/6 tsp baking powder dissolved in 1/2 tsp of water

92g water
11g vegetable shortening

7g Milo powder
1/4 tsp charcoal powder
Some hot water

Steps:
1. Mix the first 5 ingredients together in a bowl. Make a well in the centre and pour water in. Use a wooden spoon to stir the mixture until a dry dough forms. Gradually add baking powder solution and continue kneading/ stirring the dough in the bowl.

2. Pour the dough onto a non stick mat and knead for about 5 minutes. Gradually knead in shortening and keep kneading until dough passes windowpane test. About 20 minutes. Alternatively, you may use a stand mixer or bread maker to knead.

3. Let the dough proof for 30 minutes or until double in size. I placed the dough in a measuring jug lined with cling wrap and refrigerated it. I monitored the rise of the dough now and then. Just nice, the dough rose to almost double in size when I was ready.

4. Knead the dough for a couple of minutes to expel trapped air.
Divide the dough accordingly:
15g-black
98g-grey
94g-brown
Remaining dough-white

Make a paste with Milo and charcoal by adding a bit of water. Colour the dough with the pastes. I was busy so I put the coloured dough back in the fridge to prevent it from over-proofing. Set aside 30g of dough for each bao, with extras for features.

5. Lightly dust your work surface and fingers with flour. Flatten a 30g ball of dough and place the frozen filling in the middle. Wrap it and pinch seal. Place the seal side down on a small piece of baking sheet. Add on the animal features. I just used my fingers, a bench scraper and toothpick as tools. I was trying out different ways of adding on the features to see which style is nicer.

Pandas!

Teddy bears!

Koalas! 

I was interrupted while working on the koalas so the bao surface is not as smooth as the other 2 batches.

6. Proof the assembled baos at room temperature for 45 minutes before steaming. There is no need to cover them while proofing. Towards the end of the second proofing, prepare the wok/ steamer for steaming. Steam on high heat for 6 minutes. Turn of the heat and leave the baos covered in the steamer/ wok for 3 minutes before removing them.

Enjoy them while they are hot! If you would like to store them, wait for the baos to cool down completely. Store in airtight container/zip lock bag and freeze it. Resteam for 12 minutes.

My little one with sweet tooth loves these beary much :).

Update: please refer to my next attempt. The filling is very runny and remains so even after freezing and resteaming! My kids think that this following batch of liu sha baos is the best I have made so far!

With lots of love,
Phay Shing


Read More »