Showing posts with label Coconut. Show all posts

Friday, 26 June 2026

Sugar-Free Gender Reveal Mango Pandan Coconut Sponge & Pudding Cake

 My friend requested for a sugar-free gender reveal cake and this was what I came up with!


Most gender reveal cakes involve cutting the cake and revealing either coloured sponges, buttercream or confetti sprinkles in the colour of the baby's gender. The content creator part of me wanted to film the reveal without having to destroy the cake so that I don't have to repair the cake/make another one after filming the reveal 🤭.

 That's why I came up with a simple reveal mechanism made of food-safe materials that I already have at home. I am surprised that this isn't the standard way reveal is done because it's so fun, dramatic, so simple to make, AND it doesn't destroy the cake!

The recipe I share can be made with regular white sugar although my friend requested for the use of sugar replacements omitting sugar altogether where possible. I made use of natural food sources as colouring where possible too! Such as the use of fresh red dragonfruit puree for making the hidden pink cake bites.

Pink cake bites in the shape of mini croissants and mini macarons

Cake composition:
- Red dragonfruit sugar-free chiffon cake bites with a little strawberry jelly
- Vanilla sugar-free chiffon cake bee
- Vanilla.pandan sugar-free chiffon cake sponge layers and white bubbles
- No-sugar-added mango pandan coconut pudding
- Fresh blueberries and red cherries as decorations


Here's a peek of the cake and hidden surprise before the cake topper is in place 


You may refer to my earlier blog post for the no-sugar-added mango pandan coconut pudding recipe. Here's the rest of the recipe for the various chiffon sponges. 

PINK/WHITE CHIFFON:
18g cake flour 
Pinch of salt
10g oil
20g liquid*

1 egg white (36-40g)
1/8 tsp cream of tartar
16g sugar of choice*

STRAWBERRY JELLY GLUE:
5g strawberry jam 
1 toothpick dip of strawberry emulsion
14g water
2g gelatin

VANILLA PANDAN CHIFFON LAYERS:
(makes two 9" cakes):
8 egg yolks
96g oil
60g pandan water**
60g milk
1/4 tsp salt
2 tsp vanilla extract 
164g cake flour

8 egg whites
1/2 tsp cream of tartar
140g sugar of choice*

* Liquid:
Pink: 20g sieved red dragonfruit puree. Replace 1/4-1/2 with water if prefer lighter pink. Add a tiny dip of strawberry emulsion for a hint of berry fragrance 

White: 10g pandan water** + 10g milk+ a few drops of vanilla extract+ a few drops white colouring

* Sugar of choice:
I used a blend of sugar replacements & prebiotic soluble fibres to replace white sugar. Not able to disclose type & ratios as it's class material

**Boil a few pandan leaves in 500g of water. Simmer for 10 min. Discard leaves 
I used bloomed & melted gelatin as glue for the fresh fruit & chiffon parts in a ratio of 1:6 for gelatin : water


Please see this reel for the process and method:


I will share the recipe for the bee, including a video tutorial for it in another post.


with love,

Phay Shing
Read More »

Saturday, 11 April 2026

"Rainbow sky with clouds" Painted Swiss Roll

 Inspired by the sunrise view from my kitchen window, I decided to make these impressive looking but deceptively easy painted Swiss rolls!


The paint used is from raw/fresh natural food sources, not from any bottled food colouring. The Swiss roll is dairy-free too!


Composition:
- Pandan coconut chiffon sponge
- Non-dairy whipped cream
- Blue pea flower pandan coconut jelly cloud inserts

This class is suitable for parent-child pairs or two adult pairs who are beginners at baking. Please refer to the link below for more class details or to sign up.

https://www.bakersgym.com/service-page/kids-class-painted-swiss-roll

with love,

Phay Shing

Read More »

Wednesday, 23 April 2025

"Green Eggs and Ham" Kid's Baking Class

 If you are familiar with Dr Seuss' stories, you will definitely be familiar with one of his classics, Green Eggs and Ham. This is my version of it and the whole thing is actually sweet instead of savoury, complete with runny "yolk" that can burst when you poke at it!


This will be a fun-filled class combining Science, Art and Culinary experience in a single session.

What's on the menu?
- Coconut gula melaka strawberry crepes as "ham"
- Coconut panna cotta as "egg whites"
- Spherified pandan gula melaka yoghurt as "green yolks"
 
Watch this reel to see the texture, the jiggles and oozy action!


Please click on this link to register.


with love,

Phay Shing


Read More »

Saturday, 14 September 2024

'Capybara in Teacup' Macaron

 I needed to make some blue hemispherical macaron shells for an epic project so I took the chance to play around with this for fun!


We have a teacup plush toy and one of the capybara plushies we have fit so nicely in it I simply had to make a mini macaron version of it! The capybara is a hand-shapeable filling. I made it gula melaka coconut flavoured with a pandan gula melaka coconut surprise inside. Here's what it looks like when you take a bite of it!


I couldn't bear to do the cut of the capybara so I made a plain round version of it to do the cut scene. Here's a peek at how I piped the hemispherical shell and how I made the capybara filling! 

https://www.instagram.com/reel/C_HIjKlSuhb/?igsh=MTlsanlvamkxbWtkdg==

I shared the coconut filling recipe in the captions of the reel. I can't share this low fat low sugar hand shapeable filling as of yet as I only discovered it recently and am using it as a class material. It's texture is similar to Orh Nee or Mont Blanc dessert and it's relatively neutral tasting so it can take on many flavours. It's temperature stable too so it won't melt in Singapore's tropical heat.


Stay tuned for the epic project that made use of the blue hemispheres! 


with love,

Phay Shing

Read More »

Tuesday, 18 June 2024

Merlion Kaya Macarons

 To celebrate Singapore's 59th birthday this year, I have decided to have a merlion macaron class with a flavour profile that is familiar to Singaporeans: kaya!


These macarons are flavoured pandan coconut so even eating them "kosong" (plain or without filling) is delicious! Much like eating a chewy version of kuih bangkit! I made sure the filling is flavourful but not too sweet by making the kaya jam from scratch and surrounding it with a beautiful blue pea coloured coconut white chocolate buttercream. My taste testers all unanimously agree this is delish and not too sweet!

Here's a sneak peek at the work behind making these in the reel:

Check-out the lovely feet on the shells!


Check-out the beautiful and delectable filling!

Awesome cross-section of the full macaron shells!

You will learn the basics of Swiss meringue method of making character macarons as well as the plain rounds so beginners may join this class too. I focus on the techniques you need to start as well as venture into making characters. 


The link below has more details about this class as well as registration info:

https://www.bakersgym.com/service-page/merlion-kaya-macarons?referral=service_list_widget

with love,

Phay Shing

Read More »

Tuesday, 21 March 2023

Eeyore Sugar-Free Ube Coconut Chiffon Dome Cakes

 I am almost done with draft 1 of Deco Marshmallows! But before I complete writing the last two recipes and create the respective templates for them, I decided to take a short break to satisfy my curiosity as well as test out the ube paste that I am going to use in one of the marshmallow entries. Having had success with the sugar-free chocolate Rilakkuma swiss roll, I am curious to know if it works for decorative chiffon cake characters as well. Here's the result of my experiment!


This is actually my second attempt. The first attempt was considered a fail for me although taste and texture wise was great. Why so?

I use Allulose and Alchemy fibre as my sugar replacements for sugar-free chiffon cakes. I explained my choice of sugar-replacements in my previous post and you can read about it. 

While this combination of sugar replacements produce chiffon cakes that have texture like the real deal, Allulose browns at a much lower temperature than sugar. If you are baking strong colours, earthy, brown or black colours, the browning of Allulose would not be as obvious. But browning will show up more obviously for pastels and tricky colours like blue and purple. This makes baking "naked chiffons" or character chiffons trickier if you don't want the cakes to appear brown at all.

Using coconut milk like I did for this bake doesn't help either as the cake tends to brown more easily than if water is used but I prefer not to compromise the taste for looks. I used steam baking and lower temperature to help to mitigate the browning.

Video of the process is on my Instagram:

https://www.instagram.com/reel/CqEyn-EgGdl/?igshid=YmMyMTA2M2Y=

Sugar free ube coconut Eeyore dome cakes (makes one 7x7" sheet cake + 4 domes baked in glass bowls*)

Egg yolk batter
2 egg yolks
5g Allulose
30g oil of choice 
30g coconut milk
1.5 tsp ube paste/extract**
45g cake flour
Pinches of salt
white gel coloring (as needed or optional)**
1 drop of purple gel coloring (optional)**
2-3 drops strawberry paste**
1 small toothpick dip of peach gel colouring**

Meringue
3 egg whites
22g Alchemy fibre
53g Allulose
1/4 tsp Cream of tartar/lemon juice

* I used glass bowls that are about 9cm in diameter at the top and 6.5cm in height. You may use any metal or silicone molds about the same size as well but do note that any markings using edible marker should match the colour of the batter or pipe by freehand.

** Use 2 tsp ube paste and omit all extra colouring and flavouring if you are making plain ube coconut cake without Eeyore design. Bake in 6" chiffon tin or in 10x12" tray for Swiss roll.

Steps:
1. Preheat oven to 150C with tray of water at base of oven. Line 7x7" tray with Teflon sheet or parchment paper. Trace out the snout on outer side of glass bowls with edible marker.

2. Make the egg yolk batter. Whisk egg yolks, salt and Allulose until pale and thick. Add oil and whisk until combined. Add coconut milk and whisk until combined. Gradually sift in cake flour and whisk until no trace of flour is seen. Add a little white gel colouring if you wish to make the batter base less yellow. 

3. Portion out 2 tsp of batter and add strawberry paste to colour it pink. Portion 2 tsp of batter and colour it peach coloured. Add ube paste to the remaining batter. Add purple gel colouring if desired.

4. Make the meringue. Whisk together Allulose and Alchemy fibre in a small bowl. In a clean metal bowl, beat egg whites with cream of tartar until firm (almost stiff) peaks, adding sugar-replacement mix gradually once egg whites are foamy.

5. Fold in 4 tbs of meringue into the each of the pink and peach batters. Fold in the rest of the meringue into purple ube batter. Fold in the meringue in two or three additions. Transfer purple and peach batter into piping bags with hole cut.

6. Pipe purple batter into glass bowls until it reaches the line marked by edible marker for the snout. Pipe the snout with peach batter. Fill up the whole glass bowl with more purple batter, leaving about 1cm unfilled. 

7. Pour the pink batter into the 7x7" tray and spread it to fill half (one side) of it. Fill the other half with purple batter.

8. Place all cakes into the oven. Reduce temperature to 140C. Bake for 10 minutes or until the sheet cake is baked through. Remove from oven and immediately flip it out onto a fresh sheet of parchment paper. Continue baking the dome cakes at 130C for another 15 minutes. Reduce temperature to 110C and bake for another 10 minutes or until skewer comes out clean. Please adjust baking temperature and time according to your oven. All temperatures mentioned in this post is as read by the oven thermometer.

9. Let the dome cakes cool completely before carefully unmolding by hand. Be gentle as chiffons are delicate! 

Extra details like the hair and eyes
10g butter
10g egg whites
10g cake flour
10g powdered erythritol (replace with icing sugar if you don't have. Although it won't be 100% sugar-free, this is negligible)
1g charcoal powder
1g cocoa powder (may replace with charcoal)

Steps:
1. Preheat oven to 150C and line a small tray with teflon sheet or parchment paper.

2. Whisk everything together until smooth. Transfer into a small piping bag with a small hole cut.

3. Pipe a blob with spikes for Eeyore's hair. I did this by freehand. Pipe a patch of batter about 6x6cm in area for the eyes. Batter doesn't have to be too thick. About 2mm thick will do.

4. Bake for 7-8 min or until it appears dry. 

5. Cool completely before carefully removing the hair and use a Wilton #12 tip to cut out the eyes.

Assembly
1. Use a knife to press a line down the front of Eeyore's face.

2. Use a tear drop shape cookie cutter to cut out the ears from the sheet cake. I made one out of metal can. Press the pink and purple cutouts together for each ear.

3. Melt some sugar-free chocolate (I used 100% cocoa with no sugar added from Pascha) and colour it black with charcoal powder or oil based black colouring, or use black chocolate chips. Paint on the nostrils, stitches and eyebrows with melted chocolate.

4. Glue on the hair and eyes with melted chocolate. 


I had to stop work here as it was night time and had other household things to deal with but took the chance to take a photo of the works-in-progress look.

5. Glue on the ears with melted marshmallows or cake glue. Use short pieces of wooden skewer to help to secure it in place if necessary but warn your recipients! 

As with all sugar-free bakes made with sugar replacements, eat in moderation as some people have digestive systems that are sensitive to them.


with love,

Phay Shing


Read More »

Tuesday, 1 November 2022

Angry Bird Hatchling Vanilla Caramel Coconut Plushiemallows

 This was a fun and hilarious birthday bake for my younger kid. Angry Bird hatchling marshmallows!


Here's a peek at the plushiemallows (the name I give my character marshmallows modelled after real plush toys) together with the actual plushies!

You can tell which is my kid's favourite by identifying the scruffiest looking plushie 😆

Here's a fun video I put together to show you how squishy they are!

https://www.instagram.com/reel/CjsYLJBgtRq/?igshid=NjZiMGI4OTY=

Marshmallows taste the best toasted in my opinion, because the caramelization of the exterior and transformation of the interior into moist gooey-ness brings a flavour explosion and textural contrast that non toasted marshmallows cannot achieve.

And so, I made another fun video of before and after toasting!

https://www.instagram.com/reel/Cj0DJspgO6o/?igshid=NjZiMGI4OTY=

I don't have a blowtorch at home so using the grill function of the oven takes some trial and error. A few seconds is all it takes to go from lightly browned to charred 😆.

Here's a side-by-side comparison of toasted and untoasted plushiemallows.


My apologies for not revealing much about the technical aspects of this bake as I am in the process of writing the next book in our Creative Baking series, Deco Marshmallows. These hatchlings are made using two techniques that I will share in the book. Templating technique and assembling various pieces to form a character.

Here's a peek at some of the small marshmallow parts made using templates before assembly:

Really excited about sharing the techniques as it will be really helpful for those of you who are artistically challenged and do better if you don't have to pipe everything by freehand, which is very much the status quo in the character marshmallows arena at the present.


with lots of love,

Phay Shing

Read More »

Friday, 29 July 2022

Sheep Yuzu Coconut Plushiemallow Class

 I am really excited to share a new technique for making character marshmallows or Plushiemallows as I would like to call them! The conventional way of making plushiemallows require some form of artistic ability as most of the piping is done by freehand. But I have discovered a way to use templates!


Here's a cut cross-section view of the plushiemallow!

Here's a video of it in squishy action!


More video of it in squishy action!


This class will be with Baker's Gym in later part of September. Please click on this link for class details and to register. I have been super busy so a little slower with blogging. Check out my Instagram at phay_shing to follow my baking activities in a more timely manner 🙂.


with love,

Phay Shing

Read More »

Friday, 1 April 2022

Bunny Pandan Coconut Gula Melaka Swiss Roll

This project has been on my waiting list for a while after I made the corgi swiss roll based on my 3D corgi design. Presenting my bunny swiss roll based on my 3D teacup bunny macarons and 3D bunny macaron designs!


Pandan coconut gula melaka chiffon sponge with the same flavour of diplomat cream and coconut agar jelly in the middle. 

To be honest, I had trouble taking photos of the roll cake together with the macarons because which ever angle you choose, something will aways look odd😅. I did a poll on Instagram and chose the one that was more popular as the cover photo.

I begin the project by making the templates for cookie cutter and patterned roll. I made my own cookie cutter based on the template design.

Coconut agar jelly

Ingredients (fills two 7x7" trays to about 2cm height):
500g coconut milk
500g coconut water (may replace with coconut milk if prefer richer jelly)
12g agar powder
pinch of salt
3 pandan leaves, knotted or cut into short strips
30g sugar (or to taste. Mine is considered very low sugar)

Steps:
1. Put coconut milk, coconut water, salt and sugar in saucepan. Scatter agar powder over and let it bloom for about 5 minutes. Try not to let the agar powder clump together.

2. Add pandan leaves and bring to a boil while stirring.

3. Once the coconut milk boils, keep boiling for another two minutes while stirring to ensure all agar powder is dissolved. 

4. Pour into trays and cool before refrigerating for at least 2hours or overnight. I lined my trays with teflon sheets but it isnt necessary.

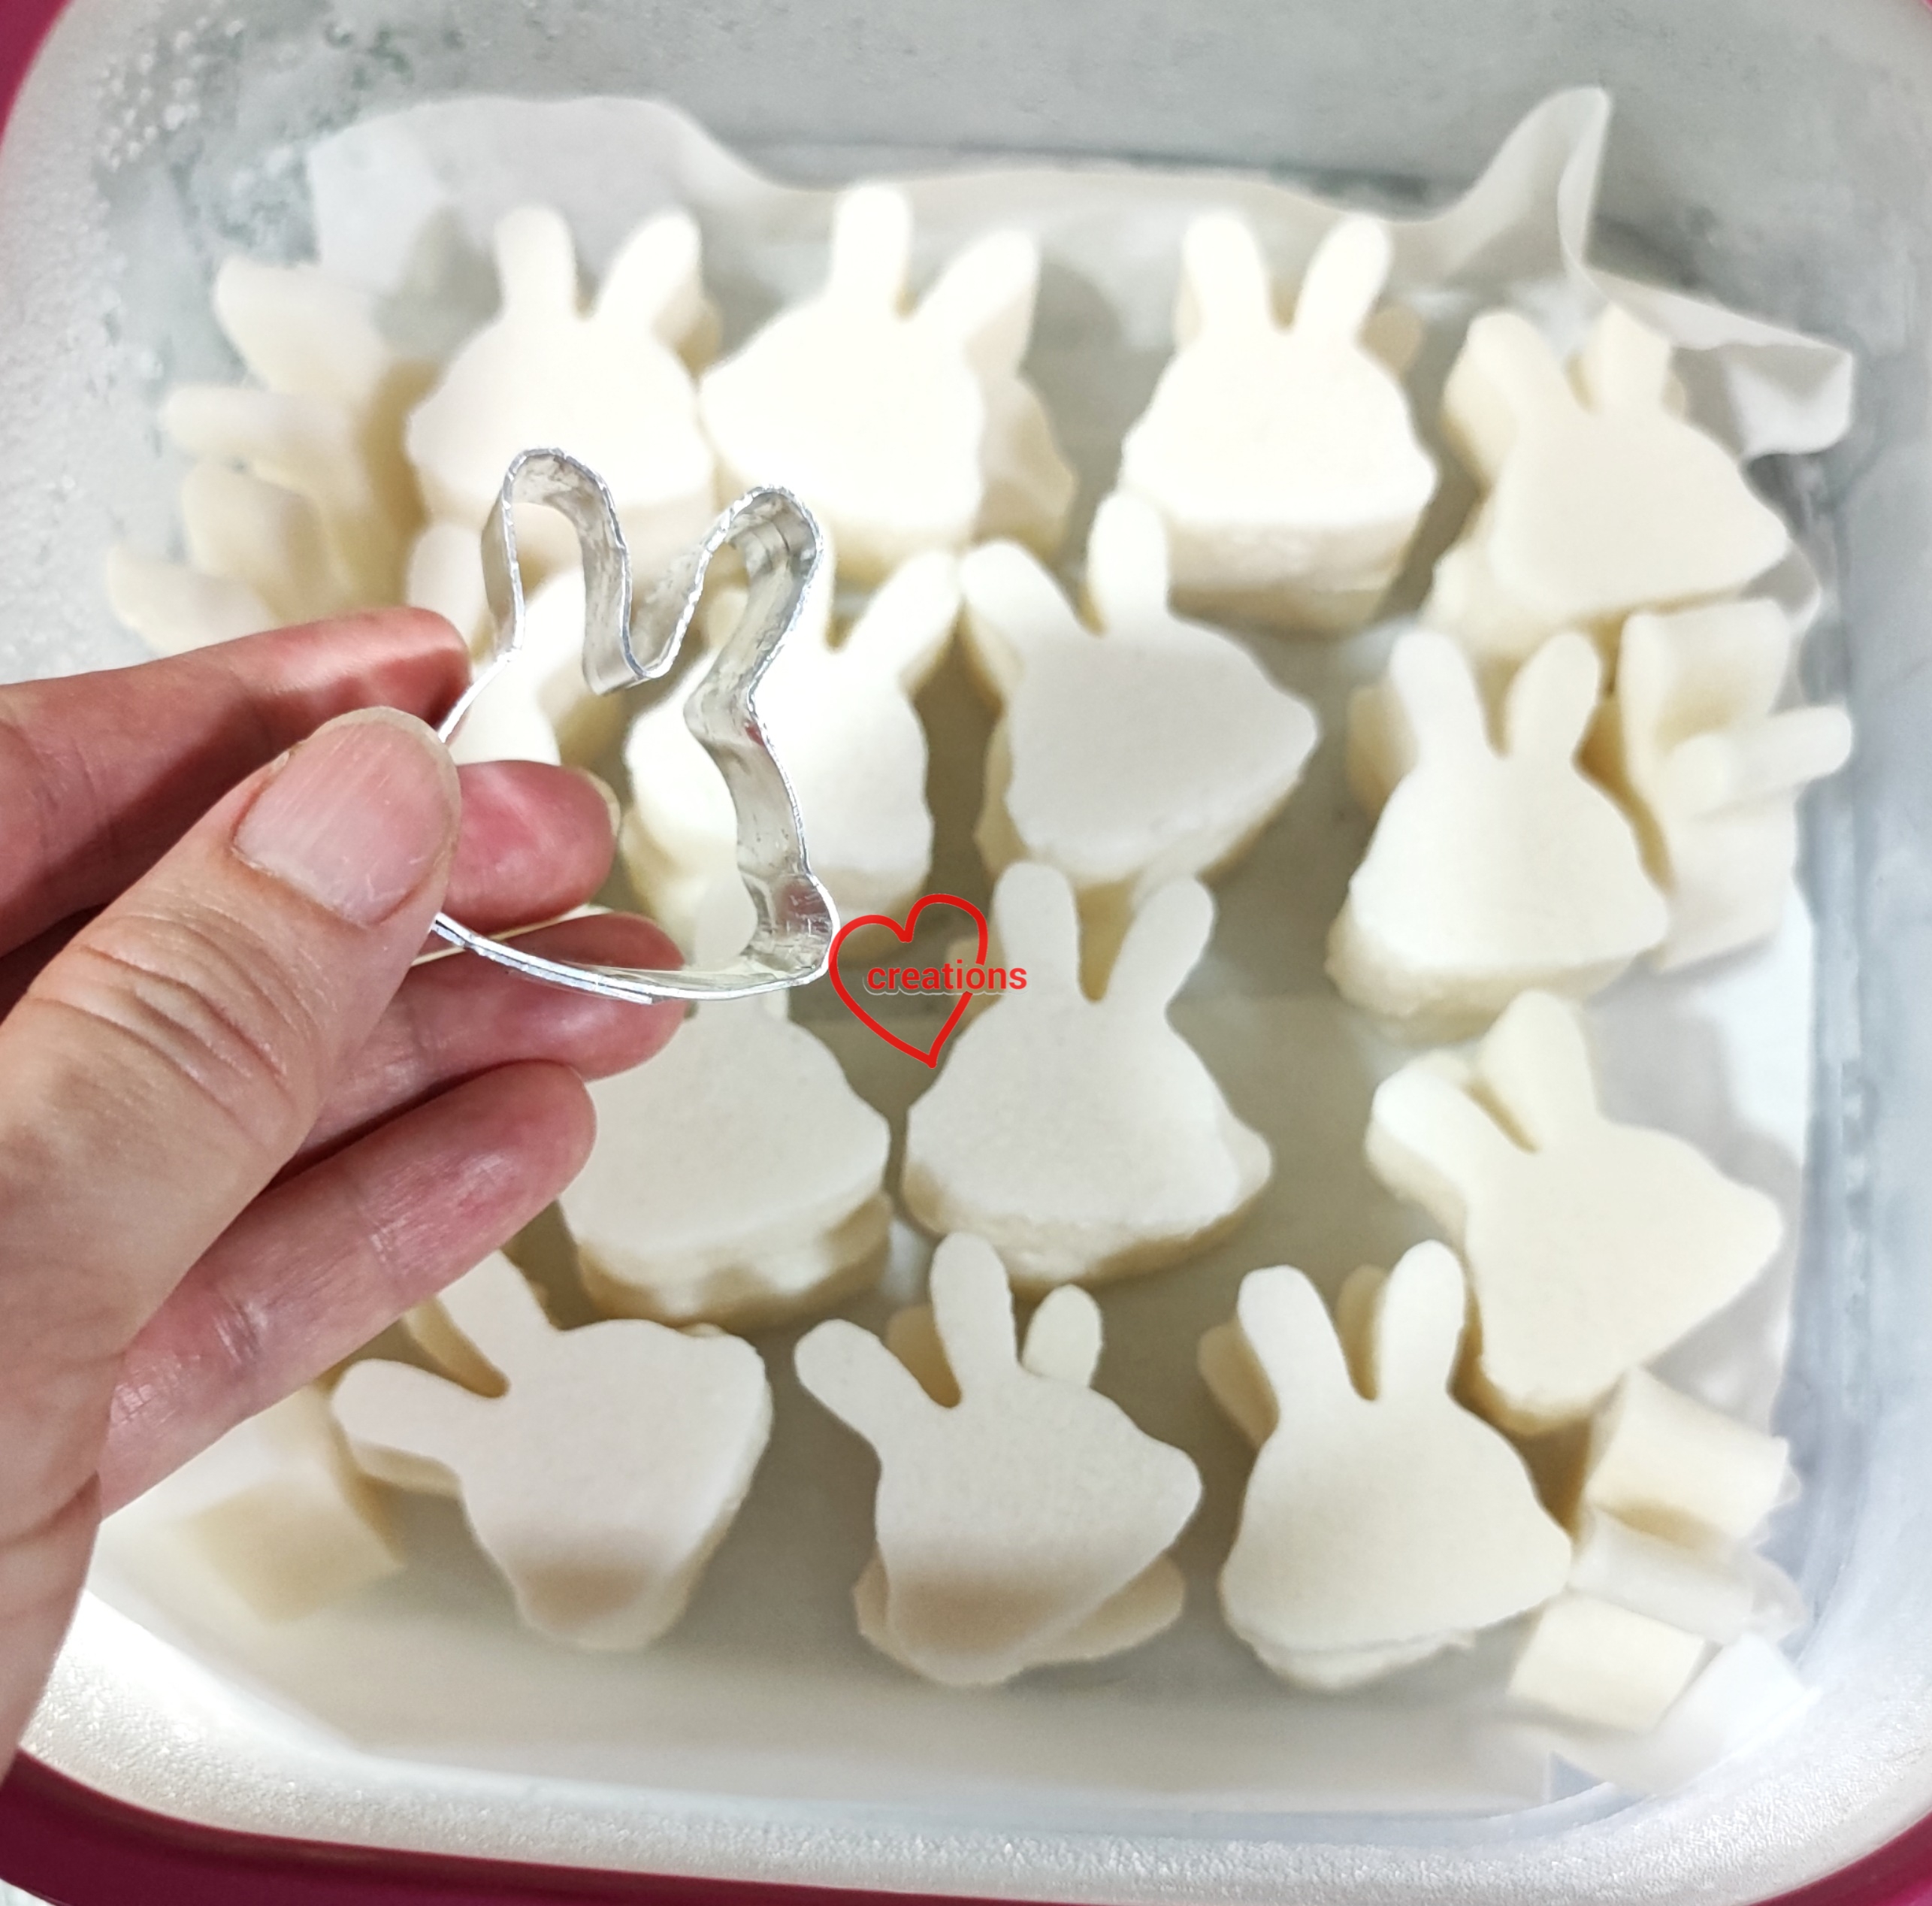
5. Unmould and use cookie cutter to cut out bunny head shape. Store cutouts in airtight container until ready to assemble.

Note that this portion or agar is more than what you need so feel free to halve the recipe. 


Pandan coconut diplomat cream

Ingredients:
200g coconut milk
10g pandan juice concentrate*
40g gula melaka, finely chopped
1/8 tsp salt
20g cornflour
2 egg yolks
15g unsalted butter
3/4 tsp pandan paste
70g whipping cream (you may use dairy, non-dairy or a combination of both. You may need to stabilize dairy cream with gelatin in hot weather. You may use more cream if you prefer lighter taste and texture.)

* This needs to be prepared in advance. Omit and use 1-1.5 tsp pandan paste instead if you do not want to use pandan juice concentrate. Blend pandan leaves with a little water. Squeeze out the pulp and sieve the extracted juice. Let it settle in fridge in a container/bowl for three days before using the dark green layer that settled to the bottom of the container/bowl.

Steps: 
1. Heat coconut milk, pandan juice concentrate, gula melaka, salt and pandan paste in a saucepan
until steaming hot (not boiling). In the mean time, whisk together egg yolks and cornflour in a heavy bowl or measuring jug.

2. Once coconut milk is hot, remove from heat and pour in a thin stream into egg yolk mixture while whisking the egg yolk mixture continuously. Pour everything back into saucepan. 

3. Cook the custard over medium-low heat while whisking continuously. Once it thickens, remove from heat and keep whisking until smooth. Place back on heat and cook until it thickens further, about another few minutes. Be careful not to use too high heat or it will become scrambled eggs. 

4. Remove from heat and add butter. Whisk until well combined. Transfer into mixing bowl. Press cling wrap on surface of pastry cream. Refrigerate for at least an hour or overnight.

5. When ready to assemble with sponge, lighten the pastry cream by whisking it briefly. Whip the whipping cream until stiff and fold into pastry cream to make diplomat cream. Transfer into piping bag.


I can't disclose the recipe for the chiffon sponge as I bought it from Keem Ooi. You may purchase it from her by dropping her a DM on Instagram (account name is keempossible_2). I tweaked her original recipe to include gula melaka, coconut milk and pandan juice concentrate.

Here's a peek at my pattern piping and the pattern reveal after baking!


Roll up the baked sponge while warm to cool completely before filling.


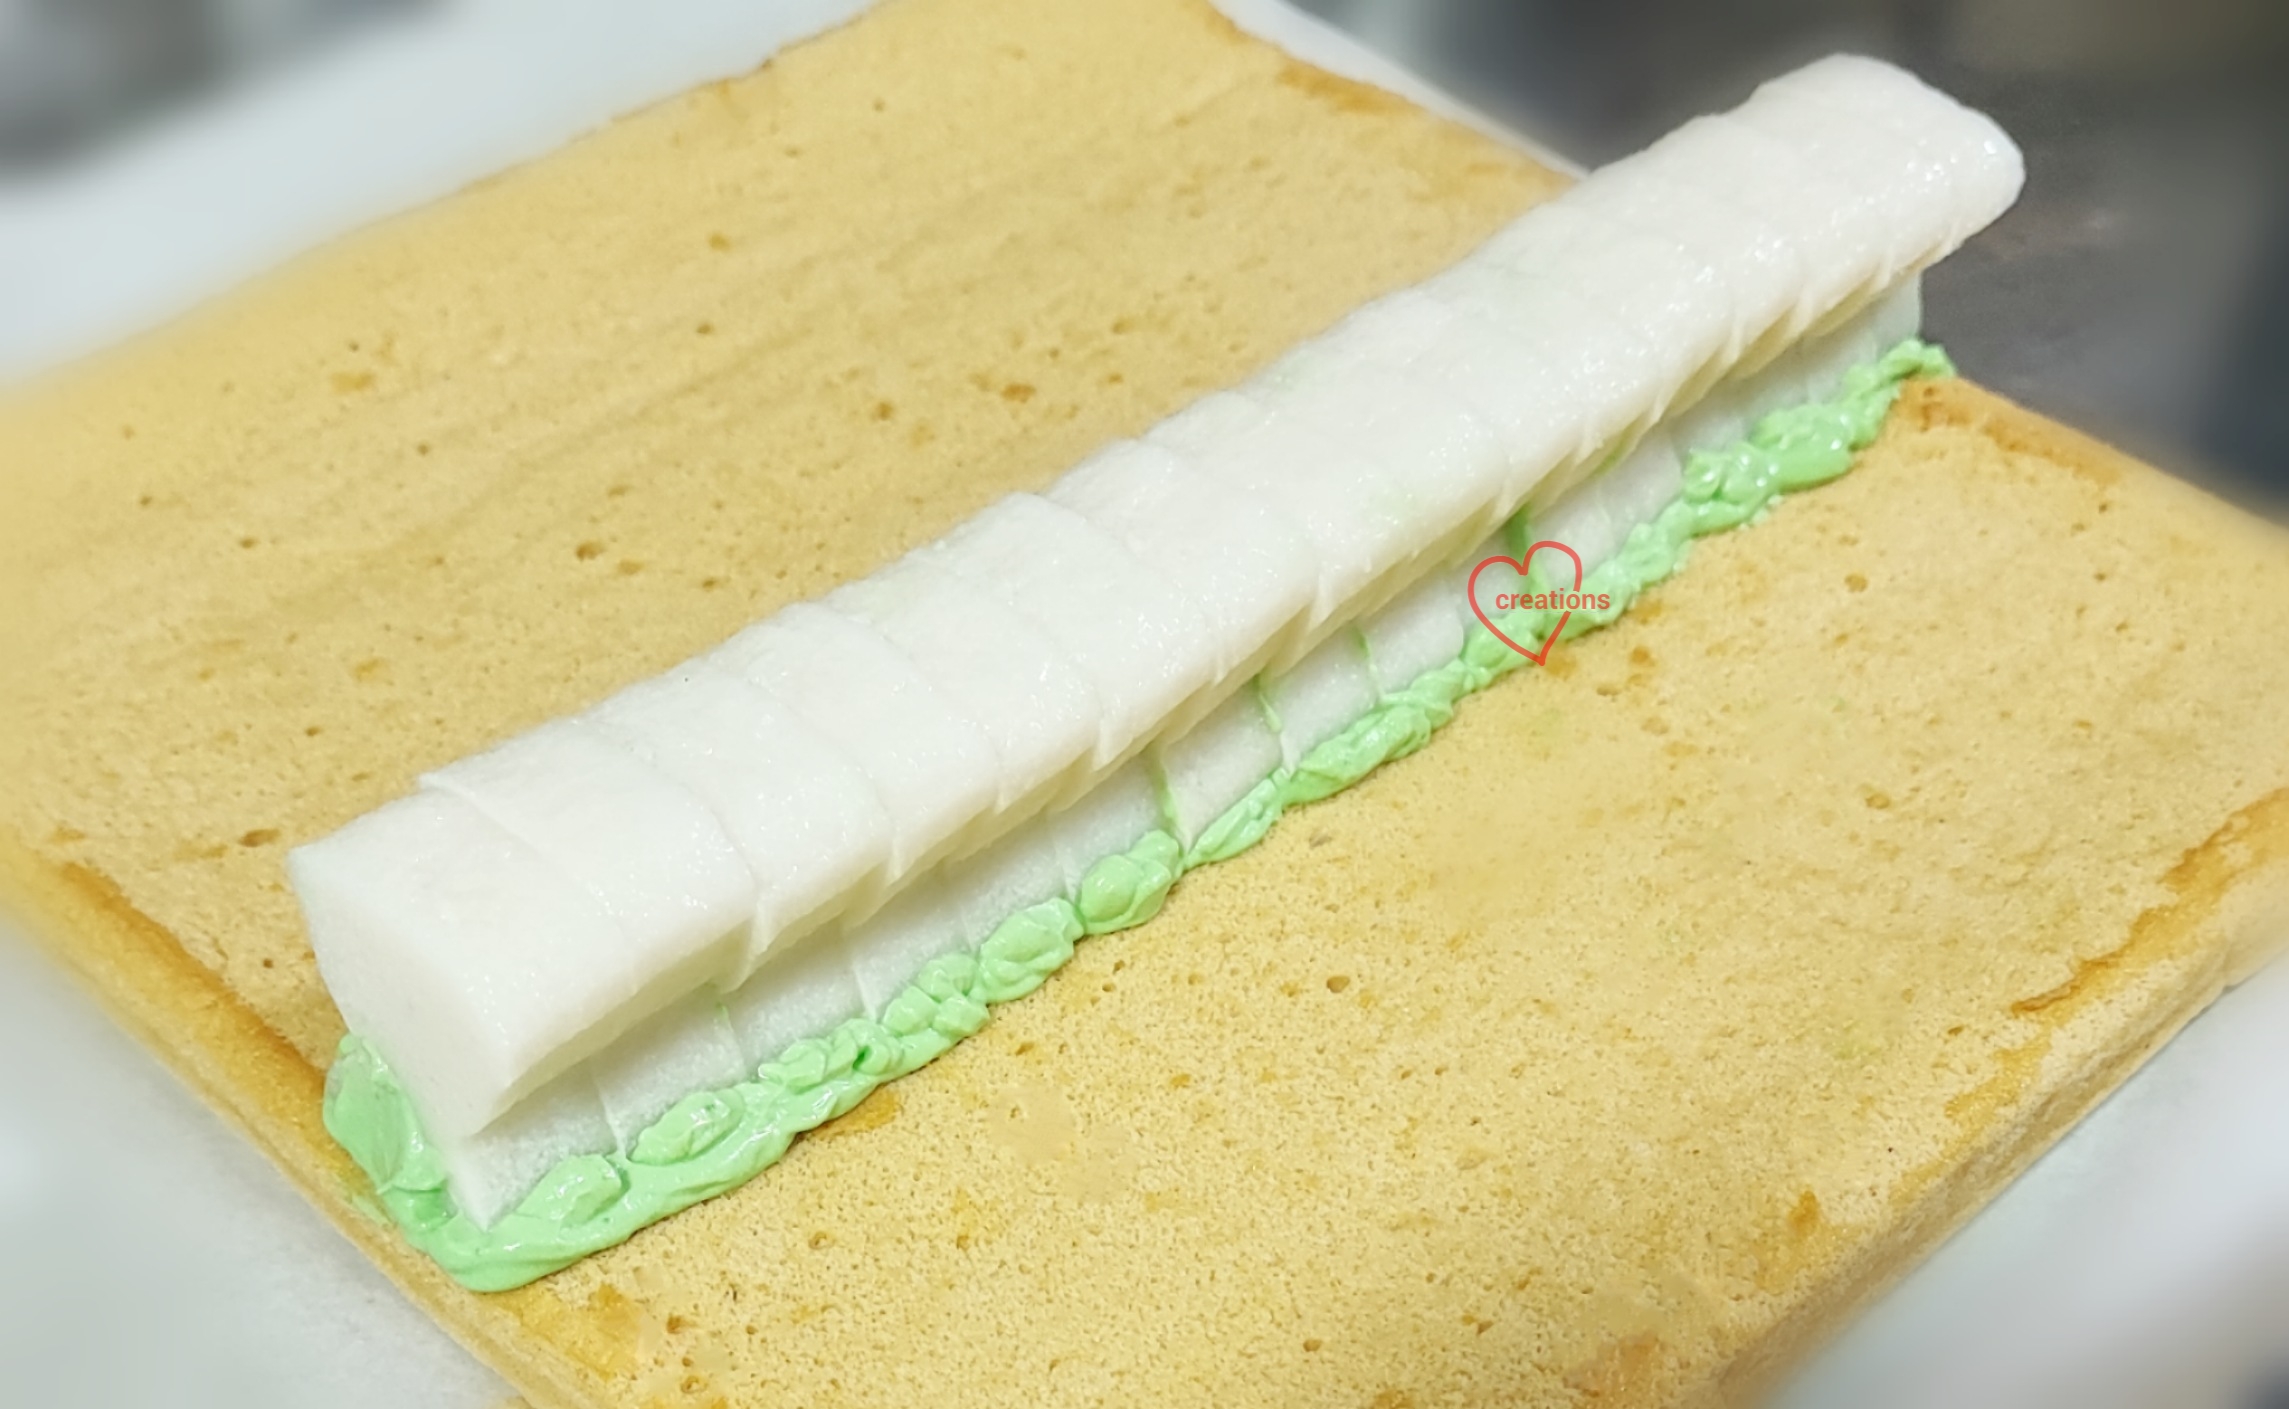
Apply the cream and line the bunny agar cutouts about 12cm from the start of the roll. 


Cover the agar cutouts with more cream and coat the sponge with a thin layer of cream before rolling. Refrigerate for at least an hour or overnight before adding in the details with edible paint. You can make the paint by using gel food colouring diluted with a little water.


Works in progress! I cover the portions I am not working on with cling wrap to minimize drying out of the sponge. This picture shows it all covered because I took a short break. 

I made this bunny swiss roll in time for Easter and a cute spring collaboration on Instagram too! Follow me on Instagram at phay_shing as I am most active there and not all my bakes will be featured in the blog in a timely manner.

with love,
Phay Shing
Read More »

Sunday, 13 March 2022

Nut-Free Rainbow Unicorn Macarons

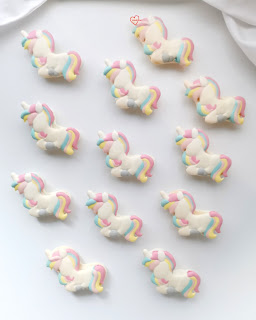
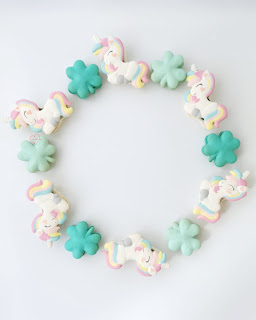
My friend requested for some nut-free rainbow unicorn macarons. Since St Patrick's Day is just around the corner, I threw in some shamrock and rainbow cloud macarons as well for photography! 


I made nut-free macarons before using a mix of rice flour and pumpkin seed flour, as well as cake flour. This time round I needed a pure white base so I can't use pumpkin seed. Wheat-based flour is a convenient alternative.  The last attempt of wheat flour-based macarons were made using french method. This time round I use swiss method.

Cake flour based nut-free macaron recipe
Ingredients (makes about 40 - 50 macarons) :
Mass
200g cake flour (low protein wheat flour) 
200g icing sugar (mine has cornstarch added) 
80g egg whites
1 tsp white powder colouring (optional) 
Gel food colouring 

Swiss Meringue 
145g caster sugar
40g icing sugar
110g egg whites 
1 tsp egg white powder (optional) 
1/2 tsp cream of tartar (optional) 

Steps:
1. Prepare template and line baking tray with parchment paper. 

2. Prepare the mass. Sift together dry ingredients in the mass. Add egg whites to form a thick paste. Cover with cling wrap and set aside. 

3. Make swiss meringue. Whisk together egg white powder, icing sugar and caster sugar.  Add the sugar mix and cream of tartar into egg whites in standmixer bowl (or clean metal mixing bowl if using handheld mixer). Set bowl over saucepan of water. Heat the water over low heat and whisk the egg whites with sugar mix until temperature reaches about 50C. Take your time to heat up the water to ensure all sugar is dissolved. 

4. Transfer to standmixer and whip on medium speed until firm peak. The meringue peak should be fairly straight with a small curl at the end when you slowly lift the beater. 

5. Fold in about a third of the meringue into the mass and mix well thoroughly. Fold in the rest of meringue until just combined. Split into the various rainbow colours and add the respective gel colouring. Fold until the consistency is correct. The batter should fall off the spatula in a continuous manner and any peaks of batter disappear in about 15 seconds. 

6. Transfer batter into piping bag and pipe the unicorns. Let the piped batter rest until it isn't sticky to touch at all.  Duration of resting depends on humidity. It can vary from 30min to 2 hours.


Piped batter. Takes about an hour to pipe a tray! 

7. Preheat oven to 165C and set oven rack to second lowest position. Once the tray is in, reduce temperature to 140C and bake for 10-12 min. Reduce temperature to 120C and bake for another 10-12 min or until feet doesn't appear wet. Cool completely before peeling parchment paper away from macaron shell. 

Freshly baked shells! 

I decorated the shells with black edible marker and peach coloured lustre dust. A little vodka is used to make paint with black marker for the light horn lines and with lustre dust for the heart shaped inner ear and cheek. 

Pandan coconut white chocolate buttercream
Ingredients:
75g unsalted butter
90g white chocolate (finely chopped or use chips) 
12g 100% dark chocolate couverture (may replace with white chocolate and/or butter if unavailable) 
38g coconut cream powder
1/4 tsp salt 
1 and 1/4 tsp pandan paste

Steps:
1. Place all ingredients in a heatproof bowl. Set over pot of freshly boiled water without the water touching the base of the bowl. Melt the chocolate and butter and mix well. 

2. Set aside in aircon room temperature for an hour to firm up. Alternatively, refrigerated for 10 to 15 min or until toothpaste consistency. You may choose to whip the mixture until it is lighter in texture. 

3. Transfer to piping bag and fill the macaron shells. Mature the filled macarons by storing in fridge in airtight container for at least 24 h before consuming. Let the container stay at room temperature for 20 min before opening and consuming the macarons. 

Filling the unicorns! 


Follow me on Instagram @phay_shing as I post my work more frequently there and not everything I do gets posted on the blog.


With love, 

Phay Shing

Read More »

Friday, 12 November 2021

Coconut Lollipop Roll Cake


Have you played cake dominoes before?
 
Sharing an easy way to make Rainbow Cake Lollipops by slicing!  

Everything is colored naturally using @suncorefood powders!
 
Lollipop Coconut Roll Cake
5 egg yolks 
30g superfine/caster sugar 
50g coconut oil 
75g coconut/full cream milk 
½ tsp vanilla extract 
70g all-purpose flour 
20g corn starch 
Pinch of salt 

5 egg whites
75g superfine/caster sugar
½ tsp lemon juice
 
@suncorefoods purple sweet potato with red beet, yellow safflower and blue spirulina for the colors

Whisk egg yolks with sugar, followed by coconut oil, milk and vanilla. Add in sifted dry ingredients and whisk till well combined. Divide the batter 3(plain): 1(purple) : 1 (blue) : 1(yellow). Add in supercolor powders and mix till desired colors.

In another clean mixing bowl, whisk egg whites with sugar till firm peaks. Divide the meringue 3: 1: 1: 1. Fold in the meringue to the above batters till well incorporated. Pour the plain batter into a 10-inch cake pan. Fill another 10-inch pan with the tricolor batter side-by-side. Bake at 160C for 16 mins.

Place the plain sheet cake on top of the tricolor sheet cake and roll up.

Slice to enjoy the cute lollipops! =)

Short video of the process here:


And here's another cute shot! =)

Sending lots of love!

Susanne

Read More »

Thursday, 15 July 2021

Sleepy Cat Deco Swiss Roll

I have tried various deco swiss roll recipes on and off eversince I made my first one in late 2013. But after seeing Keem's ( Instagram account: keempossible_2) amazing intricate patterned/painted chiffon cake work and seeing Melly (Instagram account : mellyeatsworld) replicate the technique flawlessly on her first try using Keem's recipe and technique, I was intrigued enough to purchase her video tutorial and give it a try myself. Verdict? It is the best so far! Previous attempts I often encountered the pattern being stuck to the parchment/Teflon sheet or the pattern not stuck to the base sponge as the texture differences is too great, or simply struggling to work fast enough on the patterns before the meringue breaks down. 


Here's my first attempt using Keem's recipe and technique that is different from what I tried previously! 


Sleepy cat swiss roll with coconut diplomat cream and pulut hitam jelly! I tried to make the cat head silhouette but the jelly was too soft to hold the shape well during rolling🤣. Here's the top view of the roll! 


Although it was a failed attempt at the pulut hitam jelly in cat head shape, I will record it here for reference. You can make a firm plain agar instead and it will work better. 

I created my own homemade cat head cutter using the disposable aluminium trays sold at supermarkets. 


You may refer to this post for the pulut hitam recipe and this post for the coconut diplomat cream recipe. I added 5g monkfruit sugar, 1g pandan powder (from Scoop wholefoods) and 16g unsalted butter to the diplomat cream and used 110g of non-dairy whipping cream. 

I made the pulut hitam agar by dissolving 1 packet (12g) of agar powder in 400g water with 40g sugar. I brought the liquid to a boil and kept stirring until agar powder and sugar is dissolved. I mixed in the pulut hitam (300g) with the agar base, pour it into a lined tray and chill until firm. I cut the jelly using the homemade cutter and chilled the cut pieces until assembly time. 

The diplomat cream can be made in advance too and kept in a piping bag. Keem shared a cream cheese based filling for her swiss roll. I decided to use my own filling as I didn't have cream cheese on hand. As the roll needs to stay at room temperature for some time while the painting is going on, the filling needs to be stable at room temperature so dairy whipped cream would not be suitable in Singapore's weather. I chose diplomat cream as it is light and stable at room temperature. 

I decided not to be too ambitious on my first try so the pattern only involved 4 colours, excluding the base. 


Piping on teflon sheet! I used a 10x12 inch tray instead of 9x11 inch as mentioned in the tutorial and it works fine too. 


Freshly baked patterned chiffon sponge! 


Preparing to roll the sponge with the filling! Note to self, the row of jelly should be placed about an inch towards the center of the roll. After this picture was taken, I piped more cream to cover the jelly before rolling. 


Rolled up swiss roll before chilling! 

I used a mixture of painting with diluted gel colouring and edible marker to add in the fine details and outlines. 

I couldn't resist taking photos with my sleepy cat macarons! The source of my inspiration for this swiss roll design! 


With love,

Phay Shing


Read More »