Wednesday, 10 May 2017

'uStiletto Massage Station' Earl Grey Lavender Macaron Carousel

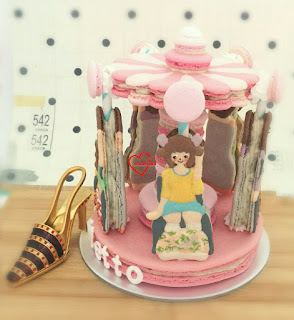
I feel honoured to be able to bake for an event for Osim. This post features one of my two baked items for the event --- a carousel to promote their uStiletto foot massager!



The other bake for Osim was high heel shoe cupcakes and you may see it in this post.

When I was given the task of designing a carousel to promote the three different designs of leg massager, I was stumped. I thought a carousel with just the leg massagers will look weird. And so, thank God that I had the inspiration to create a little massage station with ladies using the leg massagers under the umbrella of the carousel :).

That also means that the design of the carousel would be more complicated. The subjects woule be full body versions of ladies sitting on chairs using the massagers, and the carousel structure has to be taller. It took me longer than usual to come up with the templates for the subjects...

Template

I used the reduced-sugar macaron shell recipe. Both regular and reduced sugar recipes can be found here. You may refer to my Creative Baking: Macarons book for a systematic presentation of the basics and complex shaped macarons. You may refer to my video tutorials for macaron basics and piping of complex shapes on the blog too. You may refer to this post for the dimensions of the shells required to make the carousel and the respective baking times. I piped a scalloped roof like the one similar to the sheep macaron carousel as I think it's really pretty and it is very helpful for positioning the paper straws during the assembly. Checkout the sheep carousel post for detailed steps of assembly.

Just to share some photos of the baked shells...

Piping the shells

Freshly baked shells

Checkout the awesome feet!

Decorating the shells was a little unnerving because I had to ensure that the leg massagers look like the actual product! Thank God they are recognisable. *Phew*! I had to pipe/draw by freehand using royal icing or edible marker.

Decorated shells!

I filled the shells with a ring of lavender white chocolate on the outside and filled the middle with Earl Grey white chocolate. You may refer to this post for the recipe for the filling.

I brushed the bottom of the shells with Earl Grey Lavender sugar syrup to soften the shells a little. I didn't measure the amounts of the ingredients but just created a syrup that is flavoured with both teas. This technique of brushing syrup onto shells is not new as some professionals use this technique to speed up maturation process of the shells.

Brushing syrup onto the shell.

Piped filling on the shell

Assembled carousel structure. I think it looks beautiful on its own :)

Filling shells of the carousel subjects

Ladies on poles!

I cut the paper straws to the appropriate length before attaching the ladies onto the carousel structure with royal icing.

As usual I get the comment that the carousel is too pretty to eat :p. Here's a peek of the carousel at the event. Tucked away in top left corner of the picture.


With love,
Phay Shing


Read More »

Sunday, 7 May 2017

'Giant Burger' Chiffon Cake (Kaya and Dark Pearl Chocolate Chiffon)


I made this cute "Big mac" for my friend's son who loves burgers! The "buns" are made from Kaya Chiffon Cake, while the "beef patties" are made from Dark Pearl Chocolate Chiffon Cake. My "Big mac" is the American version that is very generous on the beef patties lol. The "fries" are also cut from chiffon cake =p.

I baked my Kaya Chiffon Cake in two 8-inch bowls (can be metal or glass) for the "buns", and a 8-inch tube pan (till only 1.5 cm thick) for the "bread" in between. This Kaya flavour is a new flavour which I experimented on previously and it was very well-received. Today's recipe is a modified version of my previous recipe (with more liquid and less sugar).

I sliced a Dark Pearl Chocolate Chiffon Cake, baked in an 8-inch tube pan, into two 2-cm thick layers for the "beef patties" using a Wilton cake leveler. I'm not so sure of the origin of the Japanese Dark Pearl Chocolate Chiffon Cake, except that it was in Aunty Yochana's blog for many years before it was popular among the bloggers. It is known for it's moist and rich taste. Mine is a slightly modified recipe with increased sweetness, and added vanilla extract.

I have shared the recipes below for what I used to make for this burger cake, but have also including measurements and baking conditions for a normal height chiffon cake in a tube pan, for those who want to try the yummy flavours to make a normal chiffon cake =).

Kaya Chiffon Cake (Two 8-inch bowls + 8-inch thick layer)
or (one normal 8-inch chiffon pan)

Egg yolk batter
5 egg yolks
20g castor sugar
68g coconut oil
56g nyonya kaya
24g coconut milk
2g vanilla extract
100g Prima cake flour
¼ tsp baking powder

Meringue
7 egg whites
68g castor sugar
¼ tsp cream of tartar

1. Preheat oven to 160°C. *Optional: I used steam baking, i.e. I placed a pan of water under the lowest rack before preheating – to control oven temperature, prevent cracks and for moister texture. 

2. Whisk egg yolks with sugar until light, fluffy and well-mixed.

3. Add in oil and mix well. Then add in kaya, coconut milk/water and vanilla extract and whisk till well-combined.

4. Whisk in sifted cake flour and baking powder, and mix till well-combined.

5. Prepare meringue:

In a grease-free, dry metal bowl, using electric mixer, whisk egg whites with cream of tartar till foamy. Gradually add in the castor sugar and whisk at high speed till firm peaks form, or just the point of stiff peak.

6. Gently fold meringue into egg yolk batter with a flexible spatula 1/3 at a time, till no streaks remain.

7. Pour the batter into two 8-inch bowls + 8-inch thick layer. Gently tap on counter top to remove air bubbles.
* or one ungreased 8-inch chiffon tube pan if you want to make normal chiffon cake

8. Baking conditions:

Bowls: 160°C for 15 min, 140°C for 30+ min, or until skewer inserted into centre of cake comes out clean. Thick layer chiffon cake: 160°C for 15 min, 140°C for 5-10 min.

8-inch tube pan: 160°C for 15 min, 140°C for 40 min, or until skewer inserted into centre of cake comes out clean.

**If you use steam baking, you may need to bake for a few more minutes. You may need to adjust the baking time, depending on your oven.

9. Invert pans to cool on a wire rack completely.

10. Unmould the chiffon cake by hand (see video tutorial ‘Hand unmoulding Chiffon cakes for a clean finishing’). 


Dark Pearl Chocolate Chiffon Cake (8-inch chiffon pan till 2/3 height)
or (7-inch chiffon pan normal height)

Egg yolk batter
3 egg yolks
36g vegetable/corn oil
66g milk
3g vanilla extract
78g dark chocolate
34g Prima cake flour, sifted
15g cocoa powder, sifted
¼ tsp baking powder
¼ tsp baking soda

Meringue
4 egg whites
1/4 tsp cream of tartar
56g castor sugar

1. Melt dark chocolate in a double boiler and stir till smooth. Set aside to cool a little.

2. Preheat oven to 160°C. *Optional: I used steam baking, i.e. I placed a pan of water under the lowest rack before preheating – to control oven temperature, prevent cracks and for moister texture.

3. Whisk egg yolks with oil, followed by the milk and vanilla extract. Whisk in the melted chocolate till mixture is smooth.

4. Sift together cake flour with cocoa powder, baking soda and baking powder. Add in the sifted dry ingredients to the egg yolk batter and mix till well-combined and no lumps.

5. Prepare meringue:

In a grease-free, dry metal bowl, using electric mixer, whisk egg whites with cream of tartar till foamy. Gradually add in the castor sugar and whisk at high speed till firm peaks form, or just the point of stiff peak.

6. Gently fold meringue into egg yolk batter with a flexible spatula 1/3 at a time, till no streaks remain.

7. Pour the batter into an ungreased 8-inch chiffon tube pan. Gently tap on counter top to remove air bubbles.

*8-inch pan will get 2/3 of normal height of a chiffon cake, just nice for my application. But to get a normal height chiffon cake, please use 7-inch pan.

8. Bake at 160°C for 15 min, 140°C for 40 min, or until skewer inserted into centre of cake comes out clean. **If you use steam baking, you may need to bake for a few more minutes. You may need to adjust the baking time, depending on your oven.

9. Invert pan to cool on a wire rack completely.

10. Unmould the chiffon cake by hand (see video tutorial ‘Hand unmoulding Chiffon cakes for a clean finishing’).

11. Slice the chiffon cake into 2 equal halves (around 2-cm thick) for 2 beef patties using a Wilton cake leveler.


In addition, I baked three 10-inch chiffon sheet cakes for cutting out the ingredients:-

Red (strawberry chiffon): for the Tomato – use circle cutter with gear


Yellow (vanilla chiffon): for the Cheese – cut out squares

Green (pandan chiffon): for the Lettuce – use a garrett or frill cutter


Assemble by stacking the layers into a hamburger using melted marshmallows or kaya or cream as glue!


For cute 'burger' chiffon cake pops, hop over to my previous post.

With lots of love,
Susanne


More fun chiffon creations here =)

Read More »

Friday, 5 May 2017

High Heels Matcha and Chocolate Cupcakes

I have the privilege of baking for an event for Osim to promote their new leg massager, uStiletto! This is the first of two blog posts for my bakes for the event. The first is high heel shoe cupcakes :). In time for Mother's Day bake idea too!


There are a few "firsts" for me for this bake. It is my first time attempting to make this design of cupcakes so it was a challenge to think of the design that is manageable for me. After all, I had to assemble 40 of these in a sitting. It's the first time I decided to explore an alternative type of sponge cake recipe instead of the usual chiffon, because I am thoroughly impressed with the taste and texture of the cake. I have also deviated from what everyone else does to make the sole of the shoes. You can do a Google search and you will find that Graham crackers are recommended for the sole part. I decided to bake macaron shells instead. You may use the crackers if you don't wish to face the challenge of baking macarons.

The sponge cake recipe is adapted from a chocolate lava cake recipe. When the chocolate lava cake is "overbaked" or cooked through until the center is no longer runny, it becomes a very soft, moist and dense but melts in your mouth cake. The recipe I use is so full of flavour that chocolate lovers will be in heaven with a mouthful of the cake! I took the challenge of adapting this chocolate cake recipe to make a Matcha version which uses white chocolate instead of dark chocolate. I am so happy that I got the desired texture and taste as well :). Do give the recipe a try if you prefer rich, moist cakes that still melt in your mouth because I know not everyone likes soft fluffy chiffon cakes.

Note: adjust baking time if you are making bigger cupcakes. I made mini ones.

Dark Chocolate Cake recipe
Ingredients (makes about twenty-four 3cm cupcakes):
180g dark chocolate couverture (or good quality dark chocolate, chopped)
150g unsalted butter
90g dark brown sugar (may replace with caster sugar but brown sugar adds more flavour)
3 large eggs
54g cake flour
6g Dutch processed cocoa powder (regular cocoa powder will do too)
1 tbs Kahlua coffee liqueur (optional but adds that extra oomph)
1/8 tsp fine sea salt

Steps:
1. Sift together flour, cocoa powder and salt in a bowl. Set aside. Preheat oven to 170℃ and set the rack to middle position.

2. Place chocolate and butter in a microwave safe bowl. Melt on medium power for a minute. Stir until smooth. Return to heat again for another 20 seconds if not fully melted and stir. Repeat as necessary until no lumps of chocolate is seen. Add coffee liqueur and mix well. Set aside.

3. Beat eggs and sugar on medium high speed for about 10 minutes using an electric mixer until ribbon stage. The mixture should have increased in volume by about 3 times.

Beaten eggs with brown sugar

4. Drizzle about 2 tbs of melted chocolate mixture over the beaten eggs and gently fold in with a spatula, taking care not to deflate the eggs if possible. Even if you do, the cake will still be delicious but more dense. Continue adding the melted chocolate and folding in until all is used up.

5. Gradually add in sifted flour mixture and fold in gently.

6. Spoon the batter into cupcake cases until about 80% full. Bake for 15-20 minutes or until skewer comes out clean. Even if it is underbaked, it will still be delicious and it will be your lava chocolate cake. Do note that I use a lower oven temperature than traditional lava cakes as I want the outside and insides to bake more evenly. Cool completely before decorating. Typical chocolate lava cake baking temperature is about 190-200℃.

Here's a peek at the insides of the sinfully rich chocolate cake! It looks dense but the texture is soft and melts in your mouth because of the low flour : liquid ratio. Using whole beaten eggs helps to make the cake softer.


Recipe for Matcha white chocolate cake
Ingredients (makes about sixteen 3cm cupcakes):
120g white chocolate couverture (or your favourite white chocolate for eating, chopped)
100g unsalted butter
20g caster sugar
2 large eggs
34g cake flour
10g Matcha powder (use bakeable one if you prefer the cake to retain it's green colour)
1/2 tsp vanilla extract
1/8 tsp fine sea salt

Steps:
Same as above except that you melt the white chocolate and butter differently. Use shorter bursts of 10-20 seconds of heating at medium power and stirring frequently to prevent the white chocolate from overheating. If your mixture turns hard and remains separated, you have overheated it.

I used much less sugar for the Matcha version as white chocolate is sweet by nature.

Here's a peek at the insides! Looks really moist! Exact same texture as the dark chocolate version but Matcha lovers will love this!


I baked some shells for the sole of the high heels using reduced sugar macaron recipe. Both regular and reduced sugar recipes can be found here. You may refer to my Creative Baking: Macarons book for a systematic presentation of the basics and complex shaped macarons. You may refer to my video tutorials for macaron basics and piping of complex shapes on the blog too.

Just to share some photos...

Piped shells

Freshly baked shells. Checkout the awesome feet!

I used some cylindrical shaped cream filled biscuits for the heels (Redondo). I used royal icing to glue the heels on. You may use melted chocolate or candy melts too.


Assembly of the cupcakes involve piping on vanilla Swiss meringue buttercream and decorating with sprinkles and some royal icing. Simply stick the end of the macaron into the cream. I used natural food colouring for pink colour.

Extra notes:
- I mounted the cupcakes onto small cakeboard for ease of handling.
- I used a little royal icing to stick the cupcake cases to the cakeboard.
- You may wish to use another empty cupcake case to encase the one you baked the cake in if the oil from the cake seeped through the first layer of cupcake case.

Here's a peek of the setup at the event!

You can guess from the picture what's the other item I baked for the event ;)

Thank God the cupcakes were well received!

Checkout my other bake for the event! A massage station macaron carousel!

With love,
Phay Shing

Read More »

Monday, 1 May 2017

Snorlax Ondeh-Ondeh Giant Macaron Cake Topper

This was a last minute request that I accomodated along with my Ondeh-Ondeh sheep macarons. Snorlax Ondeh-Ondeh cake topper!


As mentioned in my sheep macaron post, the surface of the shell is rougher due to the addition of dessicated coconut. But the taste of the macaron is awesome and I dare say, my Ondeh-Ondeh macaron recipe is one of the best macaron flavour that I have made.

This cake topper is about 10cm in size. Baking time for such large macaron shells is usually about 40-50 minutes, with the first 10-20 minutes at a higher baking temperature of 130-140℃. Reduce oven temperature to 110℃ after 15-20 minute mark onwards. Always use the lowest rack for baking to prevent browning.

Just to share some pictures of the process...

Piping top and bottom shells

Checkout the awesome feet on freshly baked shells!

Filling the macaron with Pandan caramel whipped white chocolate ganache and oozy Gula Melaka.


This is one big "Ondeh-Ondeh" for the birthday kid to enjoy!


With love,
Phay Shing


Read More »

Saturday, 29 April 2017

Paw Patrol 'Chase' Chiffon Cake


This is my humble attempt at a Paw Patrol 'Chase' Chiffon Cake for a dear mummy friend some time back! Thank God it was well-received and everyone said it looked like stuffed toy! For those who are not familiar, 'Chase' is the name of a police dog in the cartoon Paw Patrol. Very cute cartoon with pups sliding down a long slide round the tower each time there's a rescue mission.

For the base cake, I used the same recipe as my previous Chocolate-Orange Giraffe Chiffon Cake, except that I piped the orange batter on one side only to form the face. For the top cake, I used the same recipe as my previous Minions chiffon cake, with blue forming 2/3 and yellow 1/3 instead.

The ears were cut from excess chocolate batter baked as sheet cake - make 2 cuts using the same circle cutter. The nose was cut from a round cake pop baked in 5-cm cake pop mold (slice off 3 sides). Other details eg eyes were also cut from sheet cakes; you can also pipe them on using melted chocolate. I used melted marshmallows as glue (pop a few marshmallows with a sprinkle of water and microwave for 30 sec). I also used a Paw patrol badge cookie cutter from JB cookie cutters.

With lots of love,
Susanne


Some exciting news, Chinese version (繁体) of my Deco Chiffon Cakes is coming! It will be available in HK, Taiwan and Macau from May 2017!


This is taken from a page of the book, some of you may encounter problems in patterning chiffon cake batter or folding multiple colours. Deco Chiffon Cakes or 造型雪纺蛋糕 has a 6-page extended troubleshooting guide specially addressing these issues:


Links to the English versions:


Read More »

Wednesday, 26 April 2017

Red Velvet Cream Cheese and Gula Melaka Sponge & Pudding Dahlia Cupcakes

I have a request for a new flavour of sponge and pudding cake along with my tried and tested (and very well received!)  gula melaka flavour -- red velvet cream cheese sponge and pudding cake! The lady who requested for the cupcakes saw the ombre Dahlia cupcakes I made for my friend earlier this year and wanted the same design. I took the liberty of adding a little greens to the pretty flowers :)


I will focus on providing the recipe for red velvet cream cheese sponge and pudding cake in this post since it's a new recipe and a yummy one too! You may find the detailed recipe for the flowers in this post, the recipe for gula melaka sponge and pudding cake in this post and assembly of the cupcake here.

I omitted red colouring in my red velvet chiffon sponge cake recipe as I find it unnecessary.

Red velvet chiffon cake recipe
Ingredients (baked in 10x12" tray for making about twelve 44x35mm cupcakes):
3 Egg yolks
10g caster sugar
39g vegetable/canola oil
54g buttermilk
1 tsp vanilla extract
55g cake flour
10g (about 1.5tbs) Dutch processed cocoa powder*
1tsp baking powder
1/4 tsp fine sea salt

4 egg whites
1/4 tsp cream of tartar
55g caster sugar

Steps:
1. Line baking tray with baking sheet. Set oven rack to lowest or second lowest position. Preheat oven to 160℃.

2. Prepare egg yolk batter. Whisk egg yolk and sugar together until pale and thick. Add oil and whisk until well combined. Add buttermilk and vanilla extract and whisk until combined. Gradually sift in cake flour, cocoa powder, baking powder and salt. Whisk until no trace of flour is seen.

3. Prepare the meringue. In a clean metal bowl, beat egg whites with cream of tartar until firm peaks form, gradually adding in sugar once the egg whites are foamy.

4. Quickly but gently fold in the meringue into the egg yolk batter in three additions. Pour the batter into the tray. Gently tap the tray on the table to release air bubbles.

5. Bake for about 15 minutes or until skewer comes out clean. Remove from tray and cool with anothee baking sheet covering it.

Use a 4cm and 5cm round cookie cutter to cut out 2 circles for each of the cupcakes. Store cutouts in airtight container.


Recipe for cream cheese pudding
Ingredients:
A)
200g evaporated milk
125g water
62g sugar
1/8 tsp salt
1/2 vanilla extract
1/2 agar powder

B)
23g custard powder
125g water

C)
200g cream cheese, softened at room temperature
40g evaporated milk

Steps:
1. Blend softened cream cheese with 40g evaporated milk together until smooth. Set aside.

2. Place ingredients in B) in a jug and stir until custard powder is dissolved. Set aside.

3. Place all ingredients in A) in a saucepan and heat on medium heat while stirring. Bring to a boil. Stir B) again and pour into A). Continue stirring until mixture boils again. Keep stirring while still boiling for a minute more.

4. Add C) into the pudding mixture and mix well. Sieve the mixture and get ready for assembly.

Assembly
Alternate layers of cake and pudding inside the cupcake cases.

Chill the cakes for two hours or until the pudding has set.


Add on the Dahlia cupcake deco.


All done!


With love,
Phay Shing

Read More »

Sunday, 23 April 2017

Giant ‘Ice Cream’ Chiffon Cake (Giant Cupcake)


I made this cute Giant ‘Ice Cream’ entirely from chiffon sponge some time back for a little boy! It's like a Giant Cupcake from chiffon cake. Can you guess how I made it? Yes, it's made by joining a hemispherical Strawberry Yoghurt chiffon with a Vanilla Chocolate chiffon cake base!

Strawberry Yoghurt Chiffon Cake (ball cake pan, also can be used for normal 6-inch tube pan)

2 egg yolk
12g castor sugar
25g vegetable/corn oil
32g strawberry yoghurt drink
3g vanilla extract
1/3 tsp strawberry paste/emulco
38g Prima cake flour, sifted
A pinch of salt

Meringue
3 egg whites
1/4 tsp cream of tartar
27g castor sugar

1. Preheat oven to 160°C.
2. Beat egg yolks with sugar with whisk till pale and light before stirring in oil, strawberry yoghurt drink and vanilla extract.
3. Add in sieved flour and whisk till no trace of flour found.
4. Meringue: Beat the egg whites with ¼ tsp cream of tartar till firm peaks, mixing in caster sugar in 2 additions.
5. Fold in the meringue gently into the batter 1/3 at a time.
6. Pour the batter into the ball cake pan and gently tap the pan on table to remove air bubbles
7. Bake the cake for 15 min at 160°C then at 140°C for 25+ min, or until skewer comes out clean.
8. Invert immediately once out of the oven and leave to cool on cooling rack.
9. Unmould the chiffon cake by hand (‘Hand Unmoulding Chiffon Cake for a Clean Finishing’ video tutorial).

Chocolate Chiffon Cake (6-inch Unopan tube pan)
2 egg yolks
14g castor sugar
26g vegetable/corn oil
29g water
5 g vanilla extract
30g Prima cake flour
10g cocoa powder (alkalized)
¼ tsp baking powder

3 egg whites
30g sugar
1/4 tsp cream of tartar

1. Preheat oven to 160°C.
2. Beat egg yolks with sugar with whisk till pale yellow before stirring in oil, water and vanilla extract.
3. Add in sieved flour, cocoa and baking powder and whisk till no trace of flour found.
4. Meringue: Beat the egg whites with ¼ tsp cream of tartar till firm peaks, mixing in caster sugar in 2 additions.
5. Fold in the meringue gently into the batter 1/3 at a time.
6. Scoop the batter into the chiffon pan and gently tap the pan on table to remove air bubbles
7. Bake the cake for 15 min at 160°C then at 140°C for 25+ min, or until skewer comes out clean.
8. Invert immediately once out of the oven and leave to cool on cooling rack.
9. Unmould the chiffon cake by hand (‘Hand Unmoulding Chiffon Cake for a Clean Finishing’ video tutorial).
10. Make cuts at the side.

Fill the inside of the tube hole with a hidden surprise to support the hemispherical chiffon cake above. Join the two using melted marshmallows. Other details were cut out from sheet cakes and glued on similarly but you can also piped them on with melted chocolate. I made the strawberry from cake pop mold.

My second book Deco Chiffon Cakes has a Giant Chiffon Cupcake in Nutella flavour, with cute wavy 'icing' (pic below). There are picture tutorials of each step which you may find helpful.


Hope you will enjoy this fun creation, that is healthier than fondant versions :p

With lots of love,
Susanne


Read More »

Friday, 21 April 2017

Happy Cat Earl Grey Lavender Macaron Carousel

This is one cheerful carousel that will put a smile on your face :). Happy Cat carousel!


I made these cats recently and you may see them in this post.

I used the reduced-sugar macaron shell recipe. Both regular and reduced sugar recipes can be found here. You may refer to my Creative Baking: Macarons book for a systematic presentation of the basics and complex shaped macarons. You may refer to my video tutorials for macaron basics and piping of complex shapes on the blog too. You may refer to this post for the dimensions of the shells required to make the carousel and the respective baking times. I piped a scalloped roof like the one similar to the sheep macaron carousel as I think it's really pretty and it is very helpful for positioning the paper straws during the assembly. Checkout the sheep carousel post for detailed steps of assembly.

Just to share a couple of pictures of the process...

Piping the cats

Assembling the carousel!

I filled the carousel with Earl Grey lavender filling as requested. I added both dried lavender and Earl Grey together in the mix. This time round I did things a little differently. Non-refrigerated filling that uses shortening and white chocolate as the base may tend to be a little dry although they are firm enough to withstand storage and display in Singapore's warm climate without the objects sliding down the pole. The texture of the carousel pieces are more like delicate biscuits due to storage at room temperature after assembly. I was making some Ondeh-Ondeh and Pulut Hitam macarons at the same time as the carousel but required whipped white chocolate ganache as the base. I piped an outer ring of whipped white chocolate ganache for the macarons in the base and central pillar of the carousel, such that the macarons will still be structurally stable but yet have a softer bite. I also brushed the inner surface of the shells with some gula melaka syrup which I had on hand to soften the shells a little. Using whipped ganache for the whole carousel is not advisable in Singapore's climate as the filling will be too soft for the carousel to be structurally stable.

Piped a ring of whipped white chocolate ganache and filled the middle with Earl grey lavender white chocolate

With love,
Phay Shing
Read More »

Monday, 17 April 2017

Ondeh-Ondeh and Pulut Hitam Sheep Macarons (New recipe!)

I have the privilege of baking for Victoria's little girl's first month celebration. I am a fan of Victoria's bakes and am really happy and excited for this chance to bake for her! She requested for sheep macarons as the little one is her little lamb given by God, and her name is Love :)

Ondeh-Ondeh and Pulut Hitam flavours!

Victoria challenged me to make macarons with these two unique Asian flavours and I think I rose up to the challenge :p. I have made Ondeh-Ondeh macarons before but using the French method, and it was delicious! For a larger batch, Italian method would be better so this is the first time I adapted my original recipe for this method. Pulut Hitam (black glutinous rice) on the other hand was totally new. But I am so glad the experiment turned out fine!

In order to create macarons with these flavours, it is only fitting that I use some coconut to replace some almond meal in the macaron shells. The resulting shells are not as smooth looking as my regular macarons but they are so fragrant with a slightly chewy coconuty bite! The ratio of dessicated coconut: almond meal could do with some refinement but it's more for cosmetic purposes because the taste and texture is still awesome with my current recipe!

Note
Do scale the recipe accordingly as I was catering for a large batch of macarons. During this macaron mania, I catered for a few other smaller requests concurrently. My recipe is reduced sugar as well so if you don't want the hassle of using rice flour and corn flour, simply replace those items with icing sugar.

The sheep templates can be found in my Creative Baking: Macarons book.

Recipe for coconut macaron shells
Ingredients (makes about 65-75 macarons, 130-150 shells):
Mass
170g superfine almond meal
70g dessicated coconut, sifted (I would reduce to 60g next time)
10g coconut cream powder (you may replace with dessicated coconut. I added to enhance flavour)
4g cornflour
13g rice flour
233g icing sugar
1/8 tsp fine sea salt
100g egg whites, preferably aged
A few drops of colourless Pandan flavouring (optional)
1/2 tsp Dutch processed cocoa powder

Meringue
240g caster sugar
96g egg whites, preferably aged
88g water
1/4 tsp cream of tartar (optional)

Steps:
1. Prepare baking tray with template and baking paper over the template.

2. Prepare the mass. Sift almond, dessicated coconut, coconut cream powder, corn flour, rice flour, icing sugar and salt. You may choose not to use some of the dessicated coconut bits that are coarser or grind the dessicated coconut before sifting. Add egg whites and Pandan flavouring (if using). Mix well to form a thick paste.

3. Prepare the meringue. Place caster sugar and water in a small saucepan. Stir a little to wet the sugar thoroughly. Heat the sugar and water until 115℃ on the candy thermometer. In the meantime, beat the egg whites with cream of tartar until soft peaks form. Reduce mixer speed if necessary. Once the temperature is reached, increase the mixer speed to high and carefully pour the syrup into the egg whites in a thin stream. Keep beating on high speed for another 15 minutes or until cool (about body temperature).

4. Fold the meringue into the mass in two additions until the batter flows in a slow-moving lava-like way. You may refer to this post for video tutorials on how to fold the batter and how to test the consistency of the batter. Scoop out about 2-3 tbs of batter and add sifted cocoa powder. Mix well.

5. Transfer batter into piping bags and pipe away! Bang the tray on the table to release trapped air.

Piped shells

6. Dry the shells in air con room or under the fan until you are able to slide a finger across the shells without feeling any stickiness.

7. Bake in preheated oven at 140℃ on lowest rack for 10 minutes. Reduce temperature to 115℃ and bake for another 10-12 minutes or until the feet does not appear wet. Cool completely before carefully removing the baking paper away from the shells.

Freshly baked!

Checkout the awesome feet!

Fluffy, soft and chewy interior!

Victoria requested for no artificial colouring to be used at all so I coloured the pink parts of royal icing with a natural source of food colouring from PME.


The heart-shaped pendants were made by piping royal icing on baking paper with heart template under it. I dried the icing overnight and gently peel it off the baking sheet.


Charcoal powder was used to colour the icing black for the eyes. I used edible marker for the nose.

Decorated shells!

I made the black glutinous rice porridge and froze it earlier on ahead of this macaron mania. Do note that I omitted coconut milk (so as not to have an overpowering coconut flavour as the macaron shells already have coconut, and to improve the shelf life of the filled macarons) and reduced the amount of gula melaka in the porridge to cater for macarons.

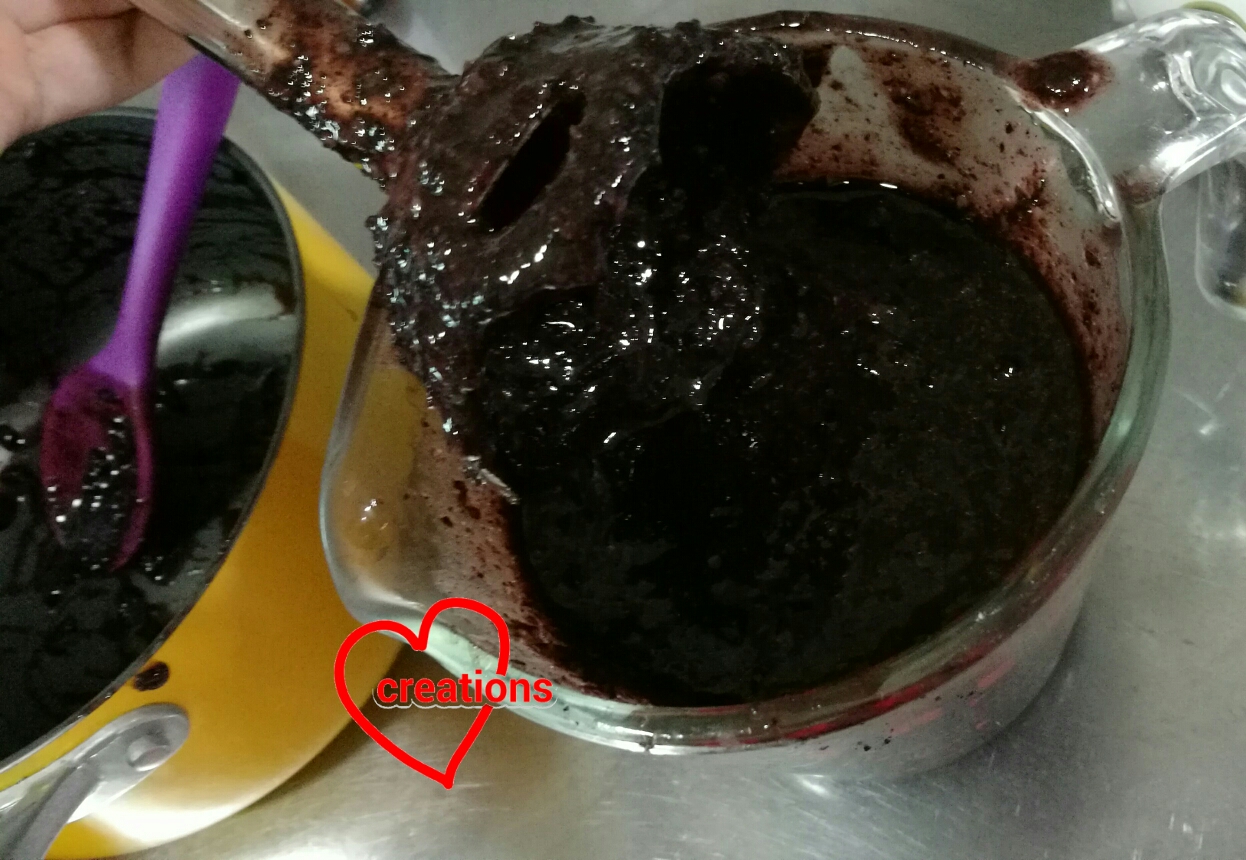
Recipe for black glutinous rice porridge
Ingredients:
150g black glutinous rice
750g water
3 Pandan leaves, knotted or cut into big pieces
75g gula melaka, chopped
1/2 tsp salt
1/8 tsp coconut flavouring (optional)

Steps:
1. Wash the rice and soak for 2hours. Drain the water and wash and drain again.
2. Place rice, water and Pandan leaves in a saucepan. Bring to boil and simmer for 15 minutes, stirring now and then. Remove Pandan leaves.
3. Add gula melaka , salt and coconut flavouring (if using). Stir until sugar dissolves.
4. Continue to simmer and stir until the porridge is thick.
5. Remove from heat and blend until as finely as you can. You may cool and freeze this porridge. Simply thaw when you want to use it.


I use a less sweet whipped white chocolate ganache as the base for these macarons. The ganache will taste weird on its own but paired with the sweet shells, it will be just right. The Ondeh-Ondeh filling is flavoured with extra Pandan paste and the pulut hitam filling has a substantial portion of the porridge added in.

Less-sweet whipped white chocolate ganache recipe
Ingredients:
168g White chocolate, chopped
84g Unsalted butter
84g Vegetable shortening
105g Heavy cream
3/4 tsp Fine sea salt
1.5 tsp Caramel flavouring (or vanilla extract if you prefer)
1 tsp lemon juice (to counter the sweetness)
1/2 tsp coconut flavouring

Steps:
1. Place white chocolate, shortening and butter in a microwave-safe bowl. Heat on medium power for 20 seconds and mix well. Repeat until mixture is smooth and melted.

2. Heat cream, lemon juice and flavourings in a small saucepan on low heat until it starts to bubble. Pour over melted chocolate. Mix well with spatula.

3. Add salt and mix well.

4. Freeze the mixing bowl with the ganache for 2 minutes. Mix well with spatula. Repeat until mixture starts firming up. You may switch to electric mixer and beat until creamy.

Whipped white chocolate ganache

Pandan caramel ganache
Add 1/2-1 tsp Pandan paste for every 200g or whipped white chocolate ganache

Pulut Hitam ganache
Use a ratio of 1:1 for whipped ganache : black glutinous rice porridge. I used a ratio of 2:1 for this batch and feel that the flavour is a little understated so you may want to increase the proportion of pulut hitam. Gradually add the porridge into the ganache and mix well.

Whipped Pulut Hitam ganache

Assembly
Pulut Hitam:
Pipe a ring of pulut hitam ganache. Fill the center with the porridge. Place top shell on.

Ondeh-Ondeh:
Pipe a ring of Pandan caramel ganache. Pipe a thin layer of ganache in the middle of the ring to coat the base shell. Fill the "well" with gula melaka syrup. Pipe some ganache over the syrup. Place top shell on.


These Asian flavoured macarons are truly yummy and fragrant! So give it a try if you are fans of Ondeh-Ondeh or pulut hitam!

Here's a sneak peek of the inside of the Ondeh-Ondeh macaron. Forgot to take photo of the pulut hitam one 😅.

Yummy!


With lots of love,
Phay Shing


Read More »