Showing posts with label Cupcakes. Show all posts

Wednesday, 6 April 2022

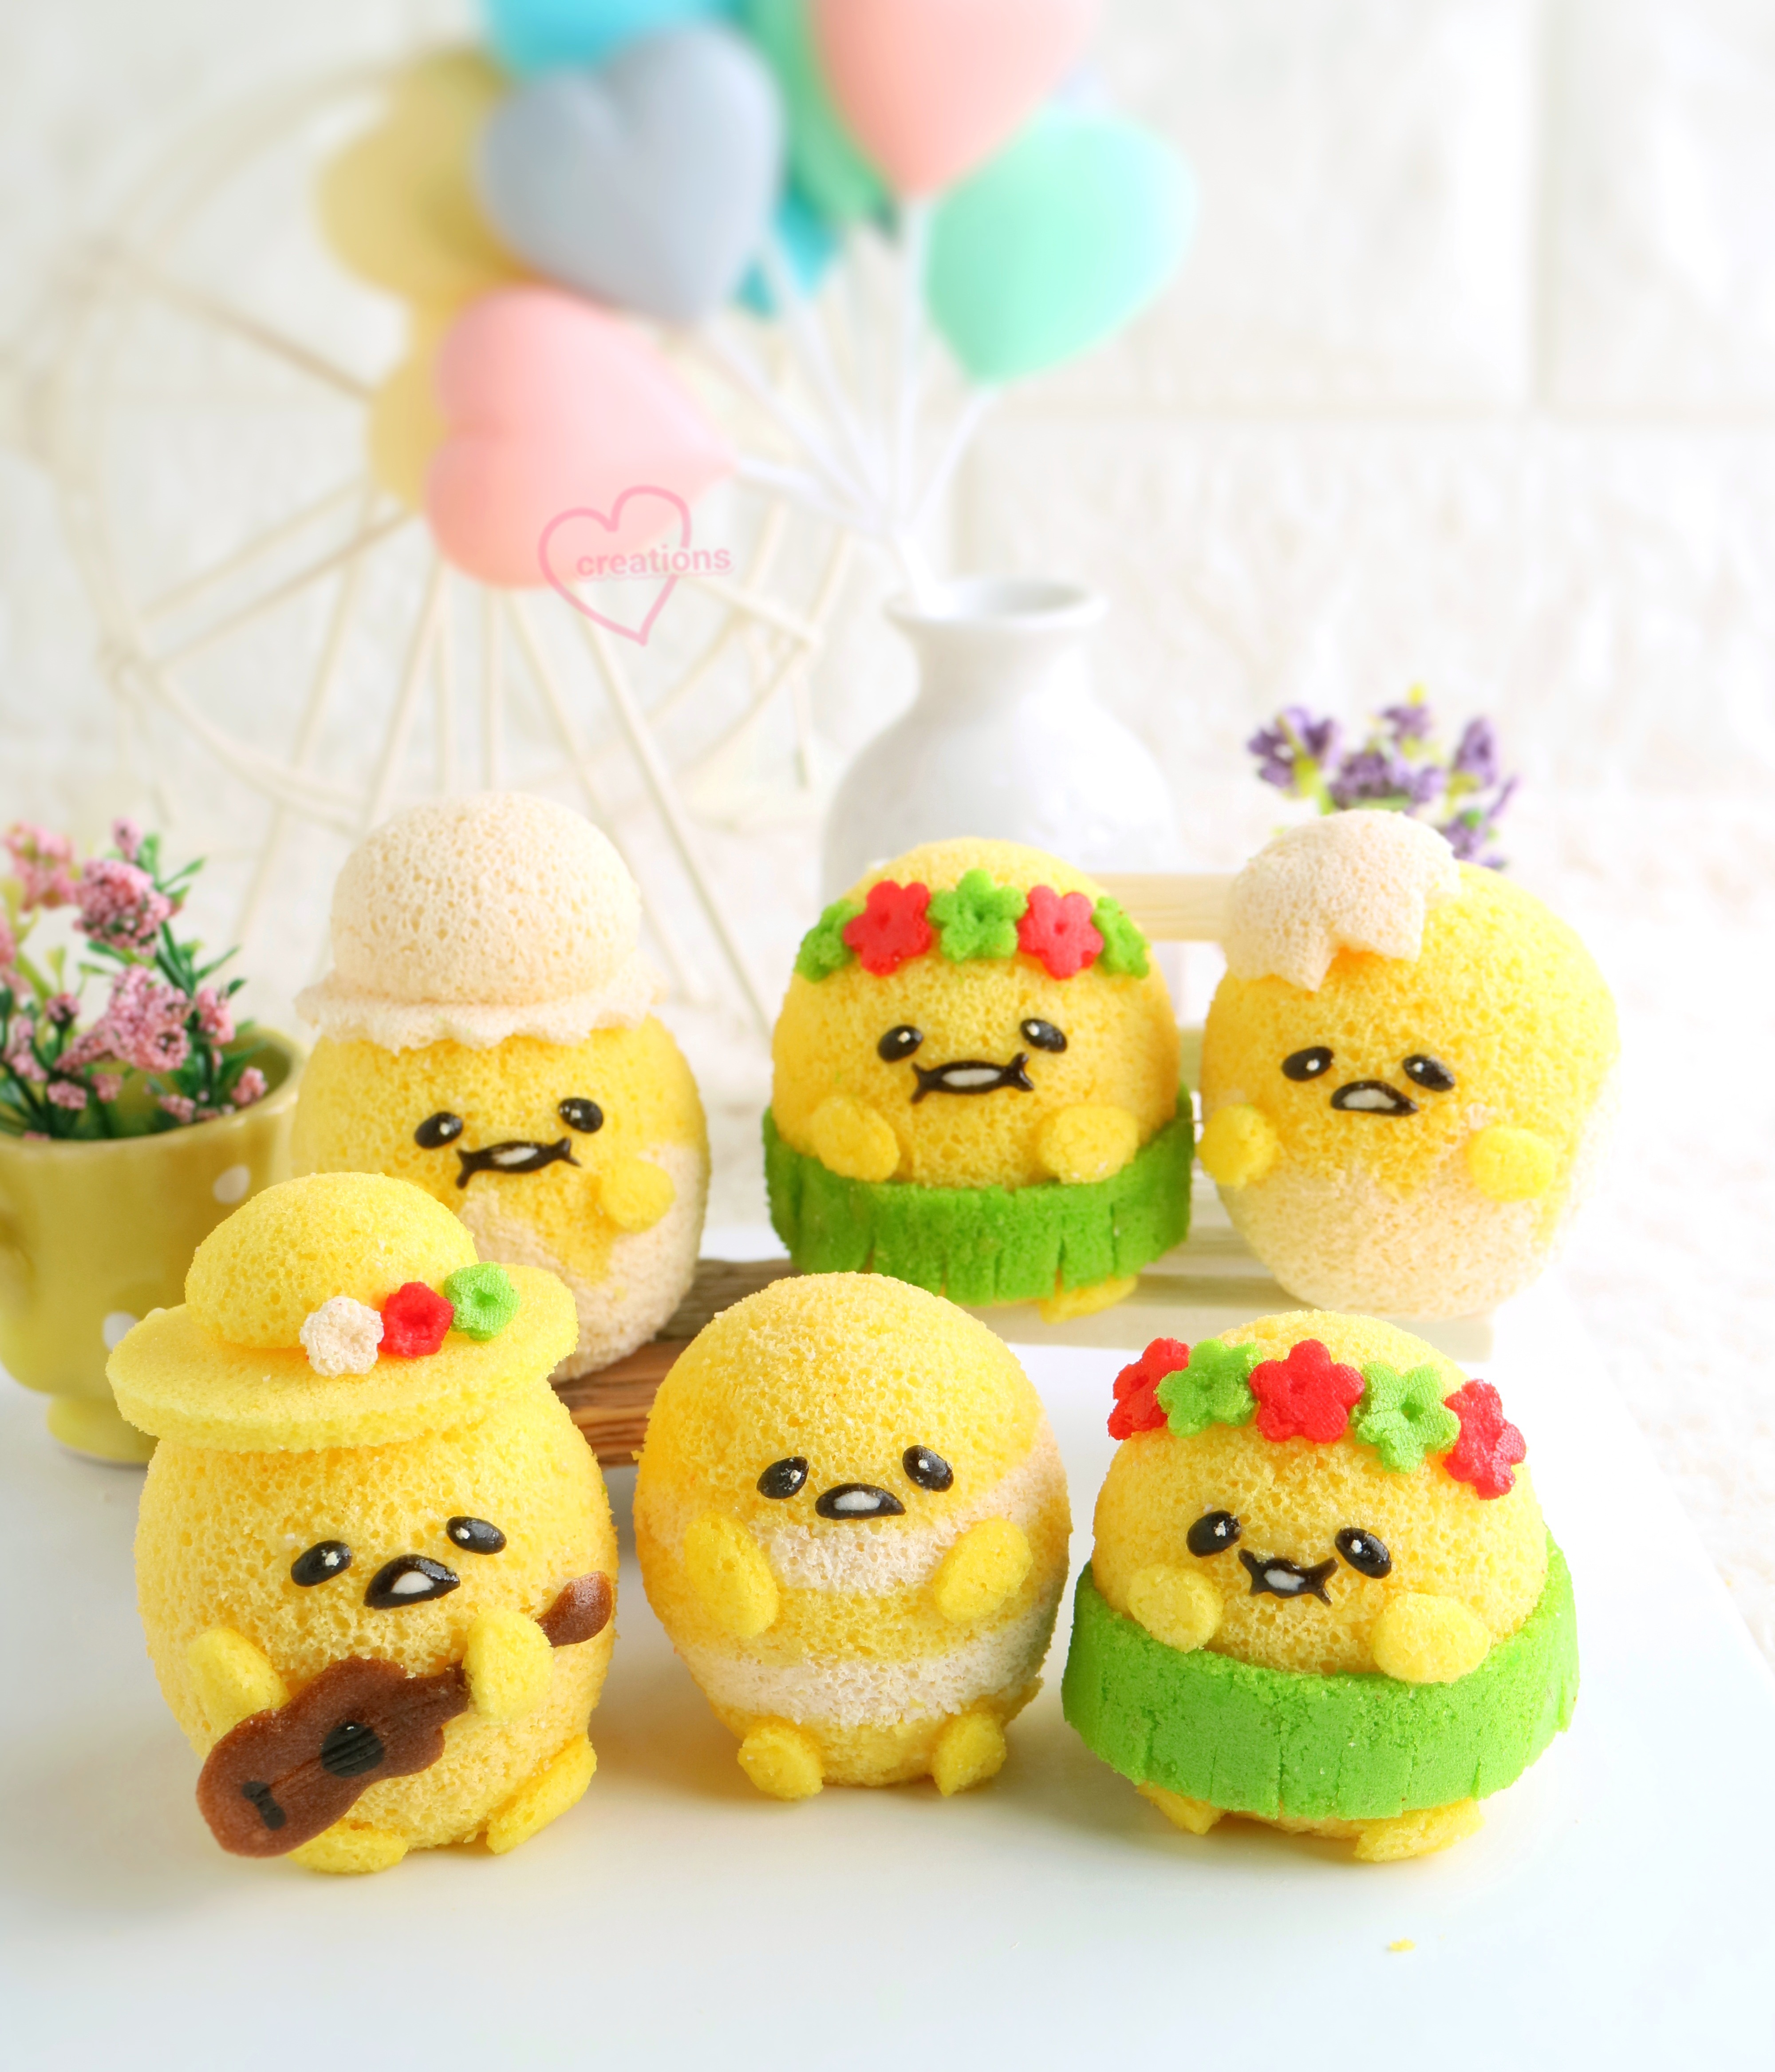
Gudetama Chiffon Egg Cakes


Cute Lemon Egg Cakes singing & dancing 🥰💃

Which is your favorite?❤️😛

Lemon Chiffon Egg Cakes🍋
1 egg yolk
10g vegetable oil
5g lemon juice
5g milk
1/4 tsp vanilla extract
15g all-purpose flour
¼ tsp lemon zest
¼ tsp lemon emulco (optional)

1 egg white
25g castor sugar
Few drops lemon juice

@suncorefoods yellow safflower for the color

Whisk egg yolks with oil, lemon juice, milk, vanilla, lemon zest. Add in sifted flour and whisk till well combined. Add in yellow safflower powder and mix till desired shade.

Whisk egg whites with sugar and lemon juice in a new bowl till firm peaks. Fold in the meringue till well incorporated.

Pour the batter into 6 drained egg shells till 2/3 full. Bake at 140C for 30 mins. Unmold when the cakes are fully cool. Decorate with melted chocolate, sheet cake and sprinkles.

Hope they made you smile!!❤️❤️🥰
 

Read More »

Monday, 20 July 2020

Nut-Free Bunny Macarons with Lychee Raspberry Rose Chiffon Cupcakes

Many people would love to have my macarons as part of birthday celebrations in school but have concerns about nut allergy. And so, I have experimented with another almond-flour substitution for these bunny macarons on lychee raspberry rose chiffon cupcakes.

Nut-free macarons on lychee chiffon cupcakes with lychee raspberry rose swiss meringue buttercream! 

In the past, I have made nut-free macarons using a combination of pumpkin seed flour and rice flour using both French method in this post, and the Swiss method in this post. An issue with this substitution is I needed to increase the ratio of icing sugar to almond flour substitution as pumpkin seed flour causes the batter to take a long time to dry, and just rice flour alone thickens the batter noticeably. This substitution is also gluten-free but not as easy to work with. Moreover, pumpkin seed leaves some visible specks in the batter and a light greenish hue, which is ok for deep, bright colours, but shows up obviously for plain white or pastels. The bunnies are white so using pumpkin seeds would have been problematic.

With the above reasons, I decided to try another nut substitution --- wheat flour. This is a rather common and cheap substitution but is obviously not gluten free. Since the requestor wanted cupcakes as well, gluten is not an issue. I chose cake flour as it has the lowest protein percentage. Less protein means a more delicate texture.

To my surprise the substitution works perfectly for my French method recipe that I like to use for teaching beginners. I didn't need to tweak the icing sugar to almond flour substitution ratio at all! Just substitute 1:1 ratio for almond flour : cake flour. The batter consistency is only slightly different from the standard almond based one.

Cake flour based nut-free macaron recipe
Ingredients:
Dry ingredients
110g icing sugar
90g cake flour

Meringue
80g egg whites
72g icing sugar
Pinches of salt (optional)
1/8 tsp cream of tartar (optional, for stabilising meringue)

Steps:
I don't want this to become a super long post 🤣 so please refer to this post for the steps. If you are already familiar with working with french method, then just do what you normally do.

Piped batter. You won't notice that this is nut-free if I don't tell you! 

I decorated the shells with black edible marker, peach coloured lustre dust and some store-bought sugar flowers which were glued on using royal icing

Recipe for lychee raspberry rose Swiss meringue buttercream 
Ingredients (for filling and frosting about 28 macarons and 44x35mm cupcakes) :
220g egg whites (about 6 eggs)
150g castor sugar
1/4 tsp salt
1/4 tsp cream of tartar (optional)
380g unsalted butter, cubed and softened but still cool to touch
2tsp freeze-dried raspberry powder
1 tbs freeze-dried lychee powder (omit if unavailable)
2 tsp rose syrup
2 drops of pink gel food colouring
70g lychee puree (reduced over low heat from 100g of strained blended canned lychees)

Steps:
1. Place egg whites, sugar, salt and cream of tartar (if using) in to a heatproof bowl set over a pot of simmering water without the water touching the base of the bowl. Whisk the contents until temperature reaches about 70°C as read by a candy thermometer. Do not stop whisking or the egg whites may become cooked lumps.

2. Using and electric mixer, beat on medium high speed until the meringue is stiff and cooled to room temperature.

3. Add butter about a tbs at a time and beat using the electric mixer until well combined. Do not panic if the mixture appears to curdle. Just keep gradually adding the butter and beating until all the butter is added. Continue beating at high speed for another 2 minutes until light and fluffy.

4. Add freeze dried raspberry and lychee powders and beat until combined. Add rose syrup and food colouring and beat until combined.

5. Gradually add lychee puree that has been concentrated by reducing it into the buttercream, mixing well each time with the mixer.

You may use it immediately to fill the macarons and frost the cupcakes or prepare this in advance and freeze it in airtight condition. Thaw it at room temperature and rewhip before filling the macarons or frosting the cupcakes.

I filled the macarons with some chopped lychees too for that refreshing burst of lychee flavour! 

Recipe for lychee rose chiffon cupcakes
Ingredients (makes about twenty-eight 44x35mm cupcakes) :
Egg yolk batter
5 egg yolks
10g castor sugar
70g canola or any vegetable oil
60g lychee puree
1 tsp rose syrup
10g heavy cream (or milk or puree)
1/2 tsp vanilla extract
1/2 tsp freeze dried lychee powder, (dissolved in puree. omit if unavailable)
112g cake flour
1/4 tsp salt

Meringue
6 egg whites
1/4 tsp cream of tartar
100g castor sugar

Steps:
1. Preheat ovem to 140C (as read by oven thermometer)  and place a tray of water at base of oven (optional but reduce baking time by 10 min if not using). Place cupcake cases on prepared tray.

2. Prepare egg yolk batter. Whisk egg yolks and sugar until pale and thick. Add oil and whisk until combined. Add all puree, cream, vanilla and rose syrup and whisk until combined. Gradually sift in flour and salt and whisk until no trace of flour is seen.

3. Prepare meringue. In a clean metal bowl, beat egg whites with cream of tartar until firm peaks form or just reach stiff peaks, gradually adding sugar once the egg whites are foamy.

4. Quickly but gently fold meringue into egg yolk batter in 3 batches. Transfer batter into large piping bag. Fill the cupcake cases until about 80% full.

5. Bake for 40 min. Reduce temperature to 130C and bake for another 10 minutes or until skewer comes out clean or tops of the cupcakes bounce up when lightly pressed. Note that oven baking temperature and time varies with ovens used as each oven behaves differently.

Let cupcakes cool completely before frosting it. I used a 1M piping tip to pipe a swirl of buttercream before inserting the macaron cake topper.

You can't help but smile at this sight 😊

Everyone loved how cute theae cupcakes were!

With love,
Phay Shing
Read More »

Thursday, 16 July 2020

BT21 Chiffon Cake (Giant Cupcake)


Which is your favourite BT21 and BTS character?🥰

BT21 made entirely from chiffon cake! 💕 This design is a Giant cupcake and I thought it was quite cool and symbolic that Van (the ARMY) in grey is the giant cupcake supports them all! =p

This is not my first BT21 creation. Check out my previous BT21 cake here!

BT21 is a collaboration between BTS and Line friends. Each BT21 character is inspired by a real-life BTS member =)

Kookie (bunny) - Jungkook
Chimmy (dog) - Jimin
Shooky (small cookie) - Suga
Koya (koala) - RM
Mang (horse) - J-Hope
RJ (alpaca) - Jin
Tata (heart alien) - V

Hope you like this creation! Stay safe!

With lots of love,
Susanne

Read More »

Thursday, 12 March 2020

Chiffon Cake 'Tea Cups' filled with Tea Chiffon Cakes


Can you tell which are cakes and which are real cups? 🧁🍵 

Giving away these cute chiffon cake "tea cups" filled with yummy chocolatey and hot cross bun-flavoured tea chiffon cakes on my Instagram, as part of a collaboration with T2 teas. The cute "tea cups" are inspired by a chick, cat and bunny. The teas and tea cups are part of a newly launched tea set from T2 teas! Check out the IG post for more details.

Hope they made you smile!

With lots of love,
Susanne

Read More »

Wednesday, 27 February 2019

Pandan Kaya Gula Melaka Flower Pot Cupcakes II

My friend loves my Pandan kaya Gula Melaka sponge and pudding cake as it's flavourful, fragrant, refreshing and not too sweet. She wanted the flower pot design I made three years ago for her birthday but in her preferred colours. It's great to revisit old designs again!


Revisiting old designs means that improvements or more convenient changes can be made as I gain more experience. So in this post I will share two tips that are helpful for this kind of bake.

I more or less stuck with the old recipe for the pandan kaya cake portion except that I replaced custard powder with cornflour for the pudding as it is usually available at all times in home kitchens. Use 1 tsp of vanilla extract instead of 1/4 tsp as custard powder is usually vanilla flavoured and replacing it with cornflour means a slight loss in that vanilla fragrance.

You may use the recipe from this post for making the ultra thin sheet cakes for making the flowers. Thinner sponge cakes make more realistic looking flower petals although there is a limit to how thin you can bake the sponge. How do you get it even thinner then? There is a simple trick you can do post-baking. I used to slice sheet cakes thinner petal by petal when the sponge turns out a little too thick for my liking. This works but it's slow and laborious. You can hasten the process by sandwiching the thin chiffon layer cake between two fresh sheets of parchment paper and then use a rolling pin to roll it flat. Don't be shy to use force to flatten the cake. I did the same trick for the pandan cake leaves.

I use the five-petaled flower cutters to cut out the small flowers.


I tried using small pill-shaped white sprinkles as the flower centers but realise that after storage, the moisture from the sponge cake and marshmellow glue will dissolve it, turning it translucent. So it's better to stick with my original whipped white chocolate ganache (heavy cream:white chocolate = 1:2) as the flower centers. You may also bake white chiffon cake and cut little circles out to stick in the middle but it will be super tedious as the flowers are small and numerous 😆.

Looking sweet and dainty!

All packed and ready to go!

I hope this post has been helpful! As usual, the cupcakes were very well received! Even my friend's mum who doesn't like cakes in general loved this and couldn't help having more!

With love,
Phay Shing
Read More »

Tuesday, 1 January 2019

Piggy Family Chiffon Cakepops (Bandung Chiffon Cake) – also an experiment comparing French, Swiss and Italian Meringue for Chiffon Cakes


My first post of the year! =) Here is my family of chiffon Piggies wishing everyone a Happy New Year!! And Happy Lunar New Year in advance!

The Piggy Chiffon Cakepops are Bandung-flavored (a new flavour) and no additional pink coloring needs to be added. We all loved it very much.

I also tested out the new Bandung Chiffon Cake flavour using 3 different types of meringue - French (the normal one, Swiss method and Italian method - using hot syrup). This was an experiment on my to-do list for a long time. 

Usually French meringue is used, where raw egg whites are whipped with cream of tartar and the gradual addition of sugar. However it is known to be not very stable. So I tested out the Swiss and Italian meringue (which are supposed to be more stable) to see its effects on the texture and volume of the cake, as well as pore structure and stability of final cake batter. 

For the experiment, I baked Bandung Chiffon Cake in three 6-inch tube pans, one for each method.  In all 3 methods, the amount of sugar and cream of tartar were kept constant (so that the cake would not be too sweet using the different techniques). Finally, I made the chiffon cake piggies using the best recipe, which ended up being still the French (normal meringue) method. 

VERDICT of experiment:

For the Swiss meringue, I dissolved the sugar with egg whites first at 65-70°C in a bowl above boiling water (not touching), and then adding cream of tartar and whipping up the whites quickly. The meringue was very glossy and a little more stable, but of lesser volume than the normal French meringue.


For the Italian meringue, I prepared hot sugar syrup (115°C) and then pour into egg whites while whipping it up. The Italian meringue was even more silky, but denser, and the final volume less than both the Swiss and French meringue.


To my surprise, AFTER the meringue was folded into the cake batter, there was little difference in the stability of the final cake batters. They all bubbled after a while sitting out. This means that the folding in of the egg yolk batter affected the stability of the meringue in all 3 methods. So the Swiss and Italian method of making meringue did not help chiffon batter to become more stable. They were also more cumbersome to make. And that is not all. There were great differences in the structure/texture of the cake.

Volume of French meringue was greatest (meringue was light and fluffy), followed by Swiss Meringue (fluffy but lower volume, due to addition of sugar at early stage) and then Italian meringue (meringue was very silky and shiny but the densest). 


Indeed this shows up the final cake structure where the normal chiffon cake by the French method (most RIGHT) is very light, airy and fluffy and rose the most, followed by the Swiss meringue method (MIDDLE, texture in between, a little like sponge cakes, still fluffy but not as light and airy), and lastly the Italian method (most LEFT) yielded the densest structure.

In all, the taste of the cake was similar, only the texture was of different softness and density.

So in conclusion, French method still yields the best texture, and Swiss method and Italian method didn’t really help the stability of the batter after folding. But in all it was a good experiment to get it off my chest finally =). 

Moving on, I used the French method of Bandung Chiffon Cake to make the chiffon cake Piggies. The exact same recipe was used earlier in the 6-inch tube pans.

VERDICT of Bandung Chiffon Cake Flavour:

We all loved the Bandung Chiffon Cake. I thought the flavour of Bandung was fragrant and just nice (usually I am not a big fan of rose syrup). But my hubby who likes Bandung prefers it to be stronger. If you like it to be stronger, you can add in rose essence (found in baking sections). My kids found it addictive even without the Rose essence. 

Here goes my recipe sharing! You can also use this recipe for a 6-inch tube pan =).

Bandung Chiffon Cake Piggies (using normal French meringue)
2 Egg yolks 
5g Castor sugar
27g Vegetable/corn oil
33g Bandung
40g Cake flour, sifted
1 tsp Rose essence (optional, do add if you like stronger Bandung flavour)

3 Egg whites
30g Castor sugar
Pinch of cream of tartar

Bandung, a popular Asian drink with evaporated milk flavoured with rose cordial syrup

1. Preheat oven to 140°C. Prepare a 5-cm cake pop mold or egg shells (2 cavity or egg shell each for 1 body) and a 3-cm cake pop mold for limbs (1 cavity can cut into 4 limbs).

2. Prepare egg yolk batter:

a. Whisk egg yolk with sugar using hand whisk.

b. Add in oil, and Bandung and mix well at each step.

c. Whisk in sifted cake flour and mix till no lumps are found.

4. Prepare meringue:

a. In a grease-free, dry metal bowl, using electric mixer, whisk egg whites with cream of tartar till frothy.

b. Add in castor sugar for meringue gradually and whisk at high speed till firm peaks form.

5. Gently fold in meringue into egg yolk batter 1/3 at a time.

6. Fill the cake pop molds (or egg shells). Bake for 25 min (for 5-cm cake pop) and 20 min (for 3-cm cake pop) or until skewer comes out clean. If you are using egg shells, bake for 35 min or so. Pour leftover batter into cupcake liners (around sheet cake thickness to cut out nose snouts later). These are also baked for around 20 min.

*individual oven conditions may vary so do please check with skewer inserted into centre of cakes to see if it comes out totally dry.

7. Allow the cakes to cool completely on wire rack before unmolding by hand.


8. Unmould by popping the cakes out from the mold or cracking the egg into small pieces using the back of a teaspoon.

9. Assemble the pig chiffon cake pops using melted marshmallow similar to Deco Chiffon Cake Basics (or you can refer to Pegasus Pusheen Chiffon Cake pops if you don’t have the book). This is made by popping some marshmallows with a sprinkle of water and microwaving on high for 30 seconds.

10. Both lying down and sitting up versions involve stacking 2 cake pops together but different ways, slightly adjacent (like my 3D panda in Deco Chiffon Cake Basics), or on top of each other (like my 3D Snowman Workshops). For the limbs, use a bubble tea straw to cut out mini limbs from the 3-cm cake pops and stick using melted marshmallow. The ears are cut the same way. You can pinch the straws to make them more pointed.

11. Similarly cut out the noses using straws and glue them on using melted marshmallows. I used yakult straws to punch out the nostrils.

12. Decorate the facial features with charcoal sheet cake cut outs (refer to Deco Chiffon Cake Basics for picture tutorials of all the techniques), or pipe on using melted chocolate.

Hope you found the experiment comparing the different meringue methods interesting and liked the Chiffon Cake Piggies and Bandung flavour!

Happy New Year and CNY in advance!

With lots of love,
Susanne


Super honored and thankful that these Bandung Chiffon Cake Piggy Family was featured on Channel 8 news 630pm and 10pm on 13th Jan! More here.


More picture tutorials are found in my cookbooks below, which are also available worldwide on Book depository:


Read More »

Tuesday, 11 September 2018

Sumikko Gurashi Steamed Japanese Cupcakes


I first made Mushipan, or Steamed Japanese Cupcakes almost 4 years back, before I started blogging. They are really simple and quick to make for a snack! Recently I was inspired to make them again after seeing some cute strawberry ones made by my lovely neighbour! <3 I thought they would be great for children's day too! =) I love Sumikko Gurashi, so I decided to make the cupcakes based on my favorite characters from there =). The base recipe I used was from Ari kitchen, a pretty youtuber =). I used soufflé cupcake liners.

Sumikko Gurashi Mushipan (makes 5 cupcakes)
150g Morinaga Pancake mix
82g egg
30g butter
45g castor sugar
45g plain yoghurt
45g milk
cocoa paste, charcoal powder, pandan paste, strawberry paste, food coloring of your choice
1 tsp cake flour

1. Whisk egg and sugar in a mixing bowl.

2. Add in yoghurt and milk until well mixed.

3. Sift in pancake mix powder and fold till well blended.

4. Stir in melted butter.

5. Divide the batter into the following: 3 tbsp (add few drops pandan paste), 6 tbsp (add few drops strawberry paste, 3 tbsp (a drop of blue food coloring), 1 tbsp (cocoa paste with ¼ tsp charcoal powder + 1 tsp cake flour), leave the rest plain. Spoon all into piping bags.

6. Spoon the batter into the cupcake liners (2 pink, 1 green, 1 blue and 1 plain) to around 2/3 full and tap to remove all bubbles.

7. Pipe the respective designs, eg the white polka dots over the pink, and the round patch over the blue batter. Lastly pipe on the facial features using the dark brown batter.

8. Steam the cupcake over preheated steamer for 15 mins. *Important: either wrap the lid with a cloth or tilt it with a chopstick so that the water does not ruin the cupcakes.

9. Use the leftover batter to pipe the limbs and ears on a piece of baking paper. Steam for 3 mins. Peel them off and place them onto the cupcakes.


Here’s the crumb shot! Nice and fluffy!


Hope you like them! <3


With lots of love,
Susanne


Read More »

Monday, 6 August 2018

Teh Tarik Graduation Bear Chiffon Mini Cakes with Macaron Hats

My friend requested for these graduation bears for a graduation event at the law faculty of Singapore Management University 😊


Teh Tarik chiffon mini cakes topped with graduation hat macarons!

The mini cakes were displayed along with a hundred macaron graduation hats. I posted the recipe for the macaron hats using italian method in my previous post. The hats will also appear in my upcoming Creative Baking: Macaron Basics book but French method is presented.

My friend preferred a flavour that is a little more unique and has a local flavour. We discussed a few options that can produce cakes that are naturally brownish in colour and finally settled on Teh Tarik. I wanted to create a cake that is not just tasting mildy of milk tea but something with body, fragrance, a good balance of flavours and texture. I did some research and found this post very helpful on making Teh Tarik at home. I didn't follow it exactly as I am making a cake and not a drink. Teh Tarik is traditionally made using black tea dust and condensed milk. Since sugar is used in making cake, I used evaporated milk instead of condensed milk as it is less sweet but still has similar wholesome milky flavour that is different from using fresh milk. Here's one of the recommended brands of tea dust that I used to brew the tea.


I tried to search for Teh Tarik chiffon cake recipe and couldn't find many references. The one I found over here has a mild flavour as it is just made from tea that is brewed. So in order to create a more intense flavour without adding more fluids into the cake batter (which would affect the consistency), I added some instant black tea powder and full cream milk powder to enhance both tea and milk flavour. Well I didn't have instant black tea powder on hand so I used Earl grey tea powder instead (Earl grey is black tea with bergamot).

Milk tea recipe
Note that this recipe is more for baking cake and not for drinking.

Ingredients:
160g evaporated milk
60g water
24g (4tbs) black tea dust

Steps:
1. Boil evaporated milk and water in a small saucepan. Place tea dust in a cup or bowl.

2. Pour boiled milk and water into cup of tea dust. Steep for 5 min.

3. Strain out the tea dust and let the tea cool. You won't be using all of the tea.

I will provide the chiffon cake recipe but I didn't bake it exactly this way as I doubled the recipe and broke it down into three batches for baking due to the different baking temperature and time required for different parts of the bear. But if you are baking as cupcakes or whole chiffon cakes, you may refer to the recipe below.

Teh tarik chiffon cake recipe
Ingredients (makes about one 17cm chiffon cake or about 3-4 bear mini cakes or about twenty 44x35mm cupcakes):
Egg yolk batter
A)
3 egg yolks
6g castor sugar
42g canola oil
B)
58g milk tea
3/4-1 tsp instant black tea powder (omit if you want lighter coloured cake and milder tea flavour)
18g full cream milk powder
1/4 tsp salt
1/2 tsp vanilla extract
C)
60g cake flour
1/2 tsp white powder colouring (optional. I added as the natural tea colour is rather dark)

Meringue
4 egg whites
1/4 tsp cream of tartar
60g castor sugar

Steps:
1. Prepare all the necessary tins, moulds, baking trays lined with parchment paper/silicone baking sheet. I used ice cube tray for the legs, baking tray lined with silicone baking sheet for baking the sheet cakes for arms, gown, ears and facial features, and glass bowls for the head and body. Preheat oven to 170℃ for sheet cake, 150℃ for baking cake batter in glass and silicone moulds, chiffon cake tins or cupcake cases. You may wish to place a tray at the base of the oven to create steam but that's optional. I prefer to use it.


2. Prepare egg yolk batter. In a small bowl, combine all ingredients in B) and mix well. Pass through a fine sieve to remove any lumps out.

3. In another mixing bowl, whisk egg yolks and sugar until pale and thick. Add oil gradually and whisk until well combined. Gradually add B) and whisk until well combined.

4. Gradually sift in C) and whisk until no trace of flour is seen.

5. Prepare meringue. In a clean metal bowl, beat egg whites with cream of tartar until firm peaks form, adding in sugar gradually once egg whites is foamy.

6. Fold meringue into egg yolk batter in three batches until no meringue is seen. Pour into prepared trays or tins. Gently run a chopstick through the batter to pop any air bubbles.

7. Bake the cake. This part will vary widely depending on which receptacle you are baking the cakes in. Thin sheet cakes should bake at higher temperature of 160-170℃ for a short time of 9-11min. Cupcakes or cakes baked in the bowls bake for about 30-40 min at lower temperature. I bake at 140℃ for the first 15 min then reduce to 130℃ and bake for the rest of the way. For whole chiffons baking time could be 50-55min. But do note that this range of temperature and time will vary from oven to oven so only use it as a gauge. Use a skewer to test for doneness.

8. Whole sheet cakes have to be unmoulded immediately, the other cakes should be cooled completely before unmoulding. Chiffon tin should be inverted too cool.

I couldn't resist playing with the unmoulded portions after four rounds of baking although I planned to assemble the next day. Why four rounds you may ask...I baked another round without tea for the purple portions of the gown.

I was going..."so cute!" Even though it's just a naked bear without face

I used circle cookie cutters of various sizes or a small fruit knife to cut out parts for the ears, arms and gown, and glued the parts together using melted marshmellows. I used wooden skewers to secure the head and arms to the body. Brush the surface of the sponge with simple syrup to prevent it from drying out.

Here's a bear at the party along with the macaron graduation hats!


Just a note, do not store macarons with chiffon cake as the macarons will turn soggy fast. Assemble it at the party venue for display.

Thank God that my friend said both the macarons and cakes were very well received!

With love,
Phay Shing

Read More »

Monday, 28 May 2018

Peppermint Chocolate and Red Velvet Cream Cheese Mini Chiffon Cupcakes

My friend requested for 70 mini cupcakes to give out to his colleagues. A couple of flavours were suggested and I gave my own take to what peppermint chocolate and red velvet cream cheese cupcakes should look and taste like :)

Cooked dough chiffon cupcakes topped with frosting, sprinkles and mini macarons!

I began the bake by making lots of plain heart macarons and chocolate round macarons.

Piped hearts!

I drizzled some melted dark chocolate over the chocolate shells.


You may refer to any of the recipes on the blog for the macaron shells. To be honest I am really busy now that's why I am not providing the macaron recipe 😅. The focus on this post is in the chiffon cupcakes and frosting too.

I used cooked dough method for both flavours of cupcakes as they are both chocolate based. Blooming the cocoa powder in hot oil will help bring out the chocolate flavour of the cocoa powder more.

Mint chocolate cupcakes
Ingredients (makes about 40 38x28mm cupcakes):
4 egg yolks
56g vegetable oil/ canola oil
56g milk
1 tsp vanilla extract
1.5 tsp Kahlua coffee liqueur (optional)
1 tsp peppermint extract
26g Dutch processed cocoa powder
52g cake flour
1/8 tsp salt
1/3 tsp baking soda

5 egg whites
1/4 tsp cream of tartar
80g caster sugar

Steps:
1. Preheat oven to 140℃. Set oven rack to second lowest position. Place a tray of water at the base of oven (optional).

2. Prepare egg yolk batter. Sift together flour, salt, cocoa powder and baking soda. Heat oil in a small saucepan until 90℃ (this temperature is higher than what I suggested earlier as I find that the cocoa flavour is more awake with higher temperature) or when you start seeing swirl lines in the oil. Pour the oil into the flour mixture. Whisk until well combined and let it sit for a few minutes for the cocoa powder to bloom.

3. Mix together milk, vanilla, coffee liqueur and peppermint extract. Gradually add milk mixture into egg yolk batter and whisk until combined after each addition. Add one egg yolk at a time and whisk until well combined.

4. Prepare merinuge. In a clean metal bowl, use an electric mixer to beat egg whites with cream of tartar until firm peaks form, gradually adding caster sugar once the egg whites are foamy.

5. Quickly but gently fold in meringue into egg yolk batter in three additions. Fill the cupcake cases until about 80% full.

6. Bake at 140℃ for the first 10 min then 130℃ for the next 25-35min or until skewer comes out clean. Use a shorter baking time if using higher temperature and no steam. Cool completely before frosting.

Peppermint white chocolate ganache
Ingredients:
300g white compound chocolate chips
60g unsalted butter
98g heavy cream
1/2 tsp salt
1 tbs peppermint extract
A few drops of liquid green food colouring

Steps:
1. Place all ingredients except peppermint and colouring in a microwave safe bowl or double boiler. Melt over medium-low power for 20 seconds and mix well. Repeat until chocolate is melted and smooth.

2. Chill in freezer for 2 min and mix well with spatula. Repeat freezing and mixing until you are able to whip the ganache to cream-like texture.

3. Gradually add peppermint extract and mix well. Add green colouring a drop at a time until desired shade. Mix well with each addition.

Transfer after into piping bag fitted with an open star tip and pipe a swirl on the cupcake.


 Add sprinkles if you wish. Fill the macarons with the same filling before placing them on top of the cupcakes.

Red velvet cupcakes
Ingredients (makes about 40-45):
4 egg yolks
52g vegetable oil
72g buttermilk (or 65g milk and 7g lemon juice mixed together)
1.5 tsp vanilla extract
72g cake flour
13g Dutch processed cocoa powder
1 and 1/3 tsp baking powder
1/4 tsp salt
1 tsp red gel food colouring

5 egg whites
1/4 tsp cream of tartar
85g caster sugar

Steps:
Same as mint chocolate cupcakes. Sift baking powder with flour and add red gel colouring to buttermilk.

Freshly baked!

Cream cheese white chocolate frosting 
I love this recipe because it's not too sugar overloaded like the traditional cream cheese frosting recipe and yet it's firm enough to pipe and hold it's shape. Increase the proportion of white chocolate if you have a sweet tooth.

Ingredients:
240g cream cheese, room temperature
120g unsalted butter
120g white compound chocolate chips
4 tsp vanilla bean paste
1/2 tsp salt

Steps:
1. Melt butter and white chocolate together using microwave of double boiling method.

2. Chill the melted mixture in the freezer for 2 min and then mix well with spatula. Repeat freezing and mixing until you are able to beat the ganache until creamy.

3. In a other bowl, beat cream cheese until fluffy with electric mixer. Add whipped white chocolate ganache and continue beating with electric mixer.

4. Add salt and vanilla and beat until well combined.

My friend fedback that the cupcakes were yummy!

With love,
Phay Shing


Read More »

Thursday, 17 May 2018

'Graduating Potted Cacti' Chocolate Macarons and Chiffon Cupcakes

My friend had a rather unique request for graduation themed macaron/cupcake bake that incorporates plants for a friend who finally completed her ACCA. That's how this bunch of smiley potted cacti wearing graduation caps came about :)


The bake consists of macarons filled with dark chocolate ganache on top of chocolate chiffon cake covered with dark chocolate ganache and crushed oreo cookies. Even the little graduation hats are made of macarons!

I used the reduced sugar recipe for the macaron shells here. Both regular and reduced sugar recipes can be found here. You may refer to my Creative Baking: Macarons book for a systematic presentation of the basics and complex shaped macarons. You may refer to my video tutorials for macaron basics and piping of complex shapes on the blog too.

Just to share some pictures of the process...


Piping the cacti

Piping little squares for the hats

Decorated shells. Checkout the awesome feet!

See how tiny these hats are! I can't provide too much details here because the hats will appear in my upcoming Creative Baking: Macaron Basics book!

The macarons were filled with a firm dark chocolate ganache.


Please refer to this post on how I made the chocolate chiffon cupcakes. I used the exact same recipe.

The cupcakes were topped with a softer ganache than the macaron filling. I made about 120g of soft ganache, using a ratio of 1.5:1 for dark chocolate:cream. I added 30g of crushed oreos into the ganache and topped up the surface with more crushed oreos. This quantity is enough to fill about 18 cupcakes.

Coating the cupcakes with Oreo and dark chocolate ganache 

Thank God it was really well received in terms of looks and taste!

With love,
Phay Shing

Read More »

Thursday, 1 March 2018

Flower Pot Chocolate Chiffon Cupcakes (Cooked dough method)

I have a friend who suggested that blooming cocoa powder before baking chocolate chiffon cake would make the chocolate flavour more intense, without resorting to using the coffee trick that many bakers use. I must admit that it was the first time I came across this and I looked up Rose Levy Beranbaum's recipe book and studied the chocolate cake recipes. All of them...And I mean ALL required the cocoa powder to be mixed with boiling hot water before mixing into the cake batter. I did more research from the internet and was enlightened. Here's a good article on how, why and when you should bloom cocoa powder whenever you bake with it.

I already consistently get great reviews from recipients of my chocolate chiffon cakes in terms of taste. I have always relied on the use of some coffee liqueur, good quality vanilla bean paste and a bit of fruity alcohol to compliment the chocolate flavour from the cocoa powder. You can imagine my curiosity and excitement when I learnt about blooming cocoa powder!

I wasn't too keen on using hot water to bloom cocoa powder as I prefer to use ingredients that impart flavour to the final product. And therefore, a logical choice was to use the cooked dough method of making chiffon cakes. Hot oil can also be used to bloom cocoa powder. Cooked dough method also helps to keep the cake retain more moisture as the flour cooked with hot oil is able to absorb more water.

Sorry for the long intro 😅. I feel it is necessary. Presenting my humble looking but yummy bake! Flower pot chocolate chiffon cupcakes with dark chocolate ganache!

Flowers and ladybugs are made from macarons

Recipe for cooked dough chocolate chiffon cupcake
Ingredients (makes about twenty 35x44mm cupcakes):
3 egg yolks
42g canola oil
45g milk
1.5 tsp vanilla extract/ bean paste
1/4 tsp Kahlua coffee liqueur
20g Dutch processed cocoa powder
1/4 tsp baking soda
1/8 tsp salt
32g cake flour

4 egg whites
1/4 tsp cream of tartar
60g caster sugar

Steps:
1. Preheat oven to 140℃. Set oven rack to lowest or second lowest position. Place a tray or a few bowls of water at the base of the oven to create steam (optional).

2. Sift cocoa powder, flour, salt and baking soda into a large mixing bowl.

3. Heat oil to 70℃ in a small saucepan (or until you start seeing swirl lines in the oil but not boiling). Pour the hot oil into the flour mixture. Whisk until smooth. Let the mixture sit for 4-5 minutes for the cocoa powder to bloom.

4. Add milk, vanilla and coffee liqueur gradually. Whisk until well combined after each addition. Mixture will become thick. Use an electric mixer if you find it easier.

5. Add in one egg yolk at a time. Whisk until well combined after each addition.

6. Prepare the meringue. In a clean metal bowl, beat egg whites with cream of tartar until firm peaks form, gradually adding in the sugar once the egg whites are foamy.

7. Quickly but gently fold the meringue into the egg yolk batter in three additions. Fill the cupcake cases until about 70-80% full. Gently tap on table to release trapped air bubbles.

8. Bake for 40min or until skewer comes out clean.

Cool completely before frosting.

Recipe for dark chocolate ganache for frosting cake

Recipe for dark chocolate ganache for frosting cake has a lower ratio of chocolate to cream as it need not be as firm as the filling for macarons. I use a ratio of 3:2 for chocolate : cream.

Ingredients:
75g dark chocolate, chopped
10g unsalted butter
50g heavy cream
1 tsp vanilla extract
1/16 tsp salt

Steps:
1. Combine all ingredients into a small saucepan. Heat over low heat while stirring constantly with a spatula. Do not boil. Once chocolate has melted completely and mixture is smooth, remove from heat.

2. Let the ganache stand at room temperature to cool down and firm up a little for about 30 minutes. You may refrigerate for a while to speed things up. Once the ganache is about toothpaste consistency, you may frost the cupcakes using piping bag or spatula.

3. Sprinkle with chocolate rasp if you wish.

Yums!

I filled the macarons with dark chocolate ganache and raspberry white chocolate ganache. You may find the links for the macaron and filling recipe from here. I made these flowers and ladybugs concurrently with my rose macarons.


Thank God that these were very well received!

With love,
Phay Shing

Read More »

Tuesday, 20 February 2018

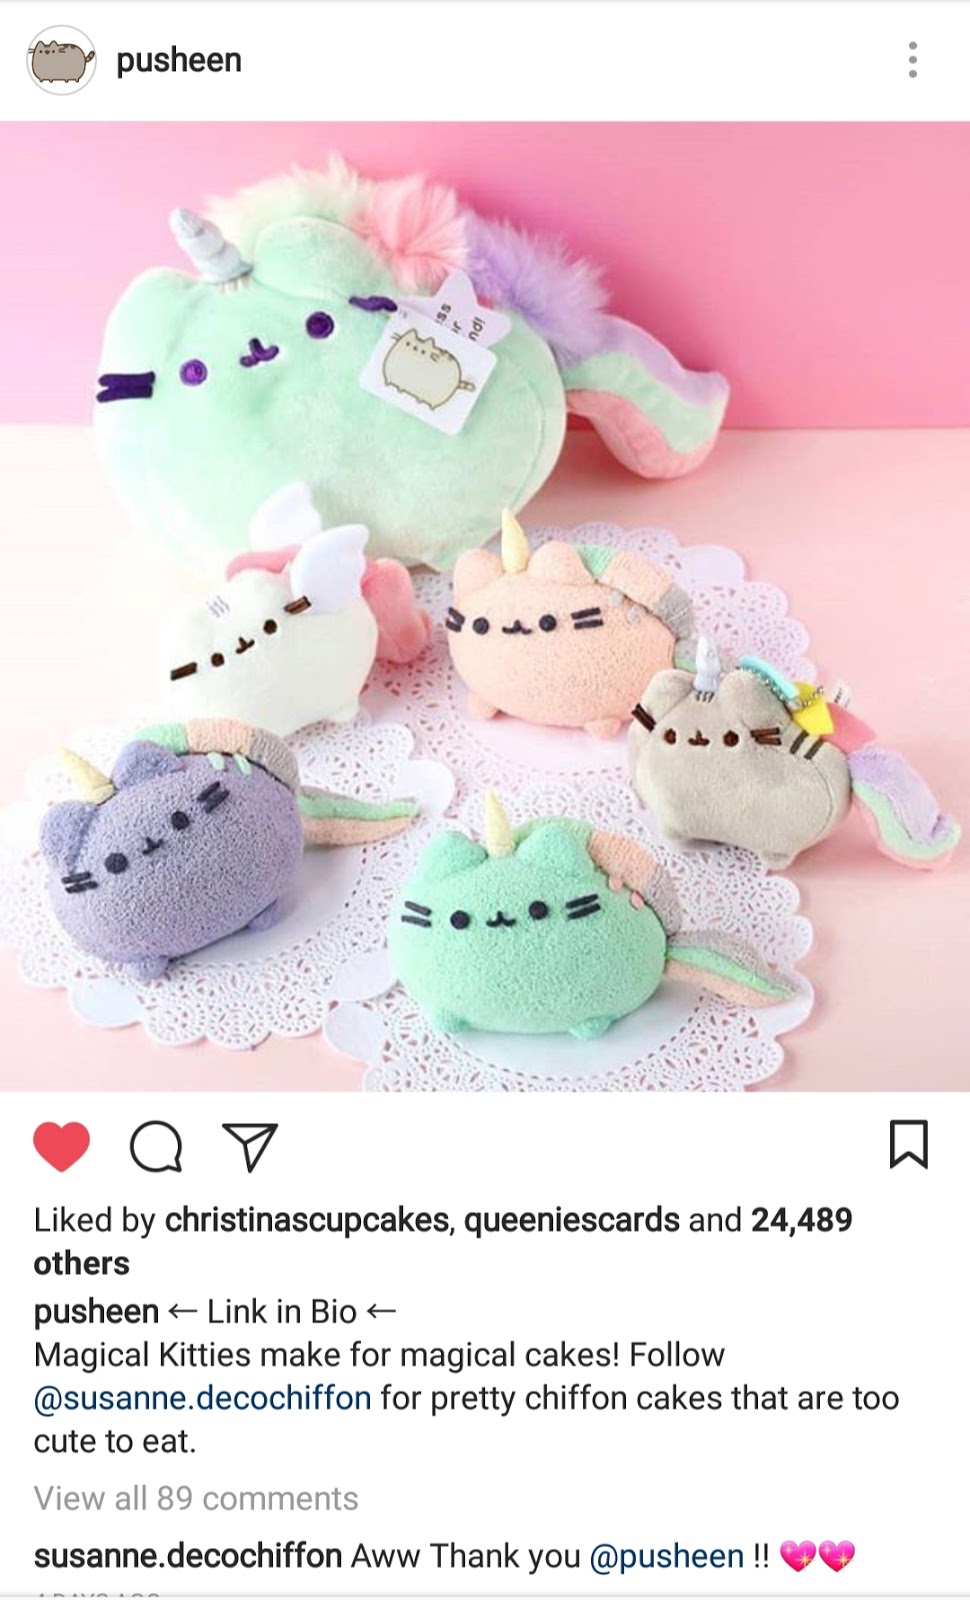
Pastel Pusheenicorns Chiffon Cakes


Can you spot the cakes among plushies? =p

Who loves Pusheenicorns and pastel colours?

Excited to be collaborating with Pusheen to design some cakes for their new pastel series! I will be sharing more on how to make the small Pusheen cakes in my upcoming posts! =)

Hope you had a blessed and good Lunar New year break!

Best wishes,
Susanne

Honored to be featued by Pusheen's official Instagram and FB accounts! 


Happy CNY! Honored to be featured on Instagram's official account!


Answer: The cakes are the pink, purple and mint! From the pastel pusheenicorns series =)


Read More »

Wednesday, 14 February 2018

'Kumquat Pot' Chiffon Cupcake


Wishing everyone a 大吉大利 with this little 'Kumquat Pot' Chiffon Cupcake I made from mandarin orange chiffon sometime back! Recipe from 'Ji' Mandarin orange chiffon cake from my 2nd cookbook Deco Chiffon Cakes.

Have a great holiday!! And a blesssed time of reunion with your loved ones!

新年快乐!阿够够旺旺过好年!


Best wishes,
Susanne


Another good news to share, the Chinese edition of Deco Chiffon Cake Basics is just on book depository!


Read More »