Monday 31 May 2021

We Bare Bears on Pulut Hitam (Black Glutinous Rice) Cake

My friend requested for a We Bare Bears themed birthday cake for her son's 10th birthday. She wanted the bears to be made out of chocolate macarons, but the cake with an Asian flavour of pulut hitam. So here's what I came up with! 


I used the Swiss meringue method for the macarons. Due to my busy schedule in May, I baked the macarons along with some naturally coloured dinosaur macarons. And froze the undecorated macaron shells. 

Sharing some photos of the process... 

Piped batter. I always prepare an extra set in case of butter fingers damaging the macarons. 

Baked shells are decorated with edible markers and royal icing

The macarons are filled with a ring of vanilla white chocolate buttercream and dark chocolate ganache in the middle. You may refer to this post for vanilla white chocolate buttercream. Just omit the fruit jam and add vanilla bean paste/extract. 


Here's the assembled product, looking very much like a goofy version of the Beatles' Abbey Road crosswalk 🤣. 


Quite a few people have expressed interest in my recipe for the cake. Although I have made pulut hitam chiffon sponge numerous times in the past, this is the first time I am pairing it with coconut diplomat cream and more generous helpings of bubur pulut hitam (black glutinous rice porridge). I must say this is the best pairing so far, compared with my plain chiffon sponge or sponge and pudding versions. I made the coconut diplomat cream less sweet and slightly savoury to complement the sweet black glutinous rice porridge. When all 3 elements (sponge , cream and porridge) are eaten in one bite, it is really heavenly with the burst of flavours and textures. This whole cake can be made totally dairy free too, which I have done. 

To begin, prepare bubur pulut hitam the way you like it according to your preference, but with less coconut milk/coconut cream than you would normally use. If you are clueless, you may refer to this post for how I make mine. I like to use gula melaka (coconut palm sugar) as the sweetener and some pandan leaves for added aroma. You may prepare this in advance, blend it and freeze in packets of 200 to 300g. Make sure it is thawed and at room temperature when using it to make the chiffon sponge. 

You may refer to this post for the chiffon sponge recipe. You may bake it in a chiffon tin, tin with removeable base or as a sheet cake to make swiss roll. Adjust baking temperature and time according to your oven and type /size of cake you are baking. For this request, I baked in a 17cm chiffon tin with another sheet cake to cut circles to cover the hole in the middle. I used caster sugar in the meringue of the chiffon cake batter instead of granulated coconut palm sugar as suggested in my reference recipe as I wanted the cake to be as black as possible without too much brownish tinge to match the zebra crossing macaron. 

Coconut diplomat cream
Ingredients :
220g coconut milk
20g cornflour 
5g Coconut cream powder (optional but I added for extra coconut flavour) 
1/8 tsp salt
25g caster sugar or gula melaka (omit, use less or more according to taste. I omitted because I pair with non dairy whipping cream which is presweetened. Use gula melaka if you want that added flavour and don't mind the brown colour). 
2 egg yolks 
1/2 tsp vanilla extract 
100g whip topping (or dairy whipping cream if you wish*) 

* dairy whipping cream needs to be sweetened and stabilized if you are using. To do so, heat dairy whipping cream with some sugar to dissolve the sugar. Don't bring to a boil. In the meantime, bloom 1 sheet (2g) gelatin in ice water. Melt the gelatin in warm cream and press cling wrap on surface. Chill until firm or overnight. Use electric heating mixer to whip until firm /stiff peak before using. For non-dairy whipping cream, simply whip until firm/stiff peak with electric mixer. 

Steps:
1. Place egg yolks, salt, cornflour, coconut cream powder (if using) and sugar (if using) in a heavy bowl or heavy glass measuring jug. Whisk until well combined. 

2. In the meantime, heat coconut milk with vanilla extract until steaming but not boiling. Pour warm milk in a thin stream into egg yolk mixture while whisking the egg yolk mixture continously. This is to temper the egg yolks. Pour everything back into saucepan. 

3. Heat the mixture over medium-low heat while whisking continuously. Be careful to watch the consistency. Once it starts to thicken, remove from heat and whisk continuously until smooth. Place saucepan back on heat and continue stirring and cooking until the custard is able to hold a firm peak. 

4. Transfer custard into a bowl and press cling wrap on the surface. Refrigerate overnight or at least 1 h. 

5. Prepare whipped cream of choice. Remove custard from fridge and use a spatula to whip it briefly to loosen it. Fold in the whipped cream. Transfer into piping bag for assembly. 

You may assemble it as a swiss roll by coating the sheet cake with diplomat cream and piping/spooning generous amount of porridge in the middle before rolling. Make sure you cook to porridge until quite thick if you are doing thia version. 

For the layered cake version like mine, slice your sponge into 3 layers with a serrated knife. You may assemble without an acetate sheet if you don't have one. Just pipe neat dollops of cream around the circumference of the sponge cakes for an equally aesthetically pleasing look. Fill the space between sponge layers with generous helping of the porridge and some cream. Here is a photo of how I did it. 


You may fold a little blended porridge into the diplomat cream if you wish to increase the black glutinous rice profile but I was going for aesthetics that matches the zebra crossing that the bears are on. 

I topped off the cake with more coconut diplomat cream and bubur pulut hitam. 


Notice that some of my instructions are vague and with many suggested variations in this recipe as I would encourage you to adjust according to your taste preference and presentation style preference. If you are a fan of bubur pulut hitam like I am, this is THE CAKE to eat! But make sure all 3 elements are in the right proportions and start off by making the best bubur pulut hitam. 


With love,

Phay Shing 

Read More »

Wednesday 26 May 2021

Bunny Choux Pastries in Macaron Teacups

Here is my contribution to a mental health awareness collaboration hosted by 2 very talented bakers on Instagram @petite.meringue and @macanomnom!

Choux pastry bunnies in macaron teacups, filled with strawberry diplomat cream and with a message that says "You are enough"! 

I had the inspiration from wristbands with messages that hubby bought from Zox. I took part in this collab not as a mental health sufferer, but as a caregiver to hubby who has been suffering from depression for a few years. 


Most healthy people go through times of self-doubt, myself included. But depression sufferers are hammered with the feeling that they are not good enough all the time and they don't have the capacity to think otherwise without external help. Hubby discovered some wristbands from Zox with messages on them and found them helpful as concrete, visual reminders. Some of these messages are Christian based like "Have faith", funny ones like "Pobody's Nerfect" but there are also generic ones like "You are enough", which I have chosen as the message I want to share. By the way, I am not paid by Zox for advertising nor do we agree with all the messages on the range of wristbands they offer. Do look through their range if you are interested and pick those that are helpful for you 😊. 

From a caregiver's perspective, supporting a loved one with mental health condition requires me to firstly take care of myself. Baking is a creative outlet for me that has helped me a lot mentally and emotionally. That's why my bakes are mostly cute and whimsical or sweet and serene. 

I originally wanted to match the colours on the wristband with the bake but while preparing the macaron batter, I decided that I prefer pastel shades. So instead of galaxy themed looking, it became more mermaid themed looking😂. It didn't quite turn out the way I wanted, with the bake and wristband matching, but it did turn out quite me. I like cute stuff with a softer look. I also like "breaking the norm" when it comes to baking so I mixed 2 genres of bakes in this creation and presented them both in non traditional ways.

I used the Swiss meringue method to make the macaron teacups along with another project concurrently. The hemispherical shells are piped on an inverted silicone hemisphere mould. 

As you can see, I piped too much batter for some hemispheres and had to scrape away the excess. Well pobody's nerfect😆! 

You may refer to this post for the choux pastry recipe. I coloured the craquelin and choux pastry batter with some white powder colouring to create the cream colour. Royal icing was used to decorate the bunny. 

I love the endearing look on the bunny's face! 

The words were written with a fine tipped edible black marker and the teacup parts were decorated and assembled with royal icing. 

I filled the teacups with vanilla diplomat cream with some strawberry paste added for the pink colour and some strawberry flavour. 

Recipe for vanilla (with optional strawberry) diplomat cream
Ingredients:
2 egg yolks
25g caster sugar (adjust according to taste. This amount is already less sweet. Add more if you have a sweet tooth.) 
1/8 tsp salt 
20g cornflour
200g milk
1 tsp vanilla extract/ paste
15g unsalted butter
80-130g whip topping (non-dairy) or lightly sweetened and stabilized dairy whipped cream*
Strawberry paste/emulco (add a little at a time until desired pastel pink colour achieved) 

* bloom 1 sheet (2g) gelatin in ice water. In the meantime, heat dairy cream until steaming but not boiling, add sugar to taste and dissolve it. Melt bloomed gelatin in warmed dairy cream. Pour into a bowl, press cling wrap on the surface and chill overnight or until firm. Whip with electric mixer until firm or stiff peak before using. Non-dairy whipping creams are pre-sweetened and stabilized so no sugar and gelatin need to be added. Simply whip until stiff peak. 

Steps:
1. Whisk together egg yolks, cornflour, sugar and salt in a heavy bowl or heavy glass measuring jug. Set aside. 

2. Heat milk with vanilla until it starts to steam but not boiling. Remove from heat and pour into egg yolk mixture in a thin stream while whisking the egg yolk mixture continously. 

3. Pour the mixture back into saucepan and heat over medium-low heat while stirring continuously. Keep an eye on the mixture as it will thicken suddenly. Take it off the heat and whisk continously to prevent lumps from forming. Put the saucepan back on heat and continue whisking and cooking until desored consistency is reached. Cook longer if you prefer firmer, shorter if you prefer runnier custard. Note that if you want to be able to pipe swirls with the cream, cook until it is able to hold a firm peak (peak with a curl at the end) in the saucepan. 

4. Remove from heat and stir in the butter. Transfer into another bowl and press cling wrap onto the surface of the custard to prevent a skin from forming. Refrigerate for at least 1hour or overnight. 

5. Whip whipping cream according to whether you are using dairy or non dairy. Use less whipped cream if you prefer a richer tasting diplomat cream, more if you prefer a lighter texture of cream. 

6. Loosen the custard by whipping briefly with a spatula. Fold in whipped cream. This is vanilla diplomat cream. You may add strawberry paste a little at a time to achieve a mildly strawberry flavoured, sweet pastel pink cream. 

7. Transfer into piping bag and keep refrigerated until ready to fill the macarons/choux pastries. This cream can store in the fridge for up to a week at 3-4°C. I used a 1M piping tip to pipe the swirls of diplomat cream in the macaron teacups. 

A peek at what the cross-section of a teacup looks like! My kids got to eat this creation 😊. 


The phrase "you are enough" is applicable for everyone, regardless of whether you have depression or not. We would be a lot more mentally healthy if we are able to show compassion to ourselves. We are often our harshest critic, so be mindful of the criticisms in our head. Striving to be better or improve need not involve being harsh with ourselves. It is a fine balance. But once you achieve it, you can remain at peace with yourself, be passionate and joyful about what you pursue, excel to the best of your abilities, yet embracing any mistakes or imperfections in your journey. 

With lots of love,

Phay Shing


Read More »

Tuesday 25 May 2021

Bear-in-a-Box Chiffon Cake


Here's my little Bear-in-a-box coming to give everyone a beary big HUG!❤❤ 

 Stay safe and take care! We can do it together 💪💪 

Sorry for the slow posts. Been a bit swamped with kids and home-based learning. Glad that it is a holiday tomorrow =p.
 
See the texture and box assembly here

Take care everyone! 

Love, Susanne


Read More »

Tuesday 18 May 2021

Animal Choux Pastry Truck

It has been a while since I tackled a challenging choux pastry creation. Presenting my version of animal choux pastry truck where everything except the sand is made out of choux pastry! 

And because it was for a birthday boy, the name was included in choux pastry as well! 


The various animals were made out of mini choux au craquelin where the piped batter is around 2cm and the craquelin is around 2.5cm in diameter. 

Before baking

After baking. I was testing out a blue powder colouring and didn't use it for creating any animals. 

You may refer to this post for the basic choux batter and craquelin recipe. As these are small choux buns, they were baked at high temperature for a shorter time to prevent excess browning. The small animal parts were made with choux batter as far as possible, and the fine details were added on using royal icing

Looking at the squad of them makes me smile 😊. 

The truck was made using a similar technique that I used to make the choo choo choux train last year. You may refer to this post to see how I baked thin, flat choux pieces, box-shaped pieces and the wheels. 

Assembled choux truck! 


I prepared some chocolate diplomat cream to fill the truck and animals when it is time to serve. Feel free to adjust the amount of cocoa powder and chocolate couverture according to taste. What I suggested in the reference recipe is rather rich as I use valrhona cocoa powder so I actually reduced the amount of cocoa powder and couverture for this animal truck request. 

I hope this creation puts a smile on your face during this trying period! We are facing a lockdown of sorts in Singapore with schools closed and no dining out allowed. Stay safe everyone! 


With love,

Phay Shing


Read More »

Saturday 15 May 2021

Popit Chiffon Cake


Which is cake and which is toy? =p 

Pop It Chiffon Cake, requested by my kids! 💓

If you have a primary kid, chances are you would have heard of this new fidget toy craze. It somewhat mimics a bubble wrap, and helps to provide sensory input and help focus for young children. Regardless of whether they need the regulation or not, kids all love bubble wrap don't they? =)  

The two above belong to my girls. And just for fun, I had a Pop It Competition with my kids over Mother's day =p. It is somewhat nice to understand my kids more and bond with them. 

Check out the video here. Watch with the sound on! The popping sound is actually quite cute and therapeutic =).

By the way, the cake is not baked from a mold but assembled from plain cake =).

Stay safe everyone hugs

With love,

Susanne


Read More »

Monday 10 May 2021

Naturally Coloured Dark Chocolate Macarons

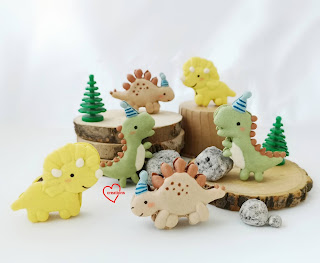
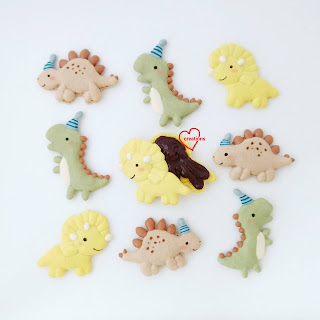
While I have the natural sources of food colouring, I might as well use it 😊. I have made this dinosaur design a few times over the past one plus year but never using almost purely natural sources of food colouring. So I am happy to say that I have managed to capture their whimsical nature using natural colours as well! 


A little blue and chocolate brown gel food colouring is added to enhance the blue and darker brown colours. Everything else is 100% natural from blue pea flower, spirulina, pandan, cocoa and tuemeric powders. The first 3 powders were bought from Scoop. 


I used the Swiss meringue method for the macaron shells, and baked it together in the same batch as We Bare Bears for my friend (stay tuned for that post in the weeks to come!) 


Piped batter! 

You may refer to this post on how I managed to reduce the appearance of specks on the shell surface when using the natural food powders from Scoop. 

Freshly baked shells! Visibly less specks on the shells as compared to my Sumikko Gurashi attempt! 

I decorated the shells with edible markers and lustre dust, and filled them with dark chocolate ganache


Here is another look at all the designs of dinos being filled! 


These were individually packed to be given away as gifts at a birthday party. 


With love,

Phay Shing 

Read More »

Thursday 6 May 2021

100% Naturally Coloured, Refined Sugar-Free 'Roses in a basket' Hojicha Cake

This was a bake that I had to make earlier because my mum decided to celebrate her birthday earlier to coincide with Mother's Day. Presenting my diabetic-friendly, 100% naturally coloured and flavoured basket of roses in the form of Hojicha chiffon cake! 


I made 4 different types of chiffon sponges :  hojicha for brown, black sesame and a little charcoal for grey, pink dragonfruit for pink and matcha for green. The hojicha sponges were alternated with hojicha diplomat cream and crunchy chocolate balls. Only monkfruit sugar was used as a sweetner in this whole bake so it is relatively diabetic friendly. 

This isn't tbe first time I am making a "basket of flowers" chiffon cake. I made my first one in 2015 and it appears in a similar form in our first chiffon cake book. Subsequently I made such cakes over the years with different flavours and fillings. 

As I had to reshuffle my schedule for this bake, I decided to prebake the flowers and leaves, and freeze them. So it was quite an experiment for me. I was fully prepared that fresh pink dragonfruit colour would fade from baking and freezing but it didn't do so noticeably! Just look at that lovely natural pink colours of the egg yolk batters! 


Baked and assembled roses that I froze in airtight condition. 

I made some vines as well but decided not to use them. 

Matcha and pink dragonfruit chiffon sheet cakes
Ingredients (makes 3 very thin 10 x 12" cakes):

Do note that the batter for this portion doesn't cover the entire surface of the lined baking tray. We just want to get as thin a layer as possible so you may use any tray size that is approximately what I used. 

Egg yolk batter
1 egg yolk
5g monkfruit sugar (or caster sugar) 
30g vegetable oil / canola oil
1/4 tsp vanilla extract
A pinch of salt
40g cake flour, sifted

10g pink dragonfruit puree, sieved
10g diluted pink dragonfruit puree, sieved ( I used 4g dragonfruit and 6g water) 
10g matcha paste (dissolve 1 tsp Matcha powder in 13g  boiling water, cool and sieve) 

Meringue (ingredients to be divided if oven cannot fit all 3 trays in at once) 
3 egg whites 
1/8 tsp cream of tartar (added to help stabilize meringue) 
36g monkfruit sugar (or caster sugar) 
1/2 tsp cornflour (added to help stabilize meringue) 

Steps:
1. Preheat oven to 175C, top and bottom heat only. Set oven rack to middle or second lower position. Line baking trays with teflon sheet or parchment paper. 

2. Prepare egg yolk batter for dark pink, light pink and green batters. Whisk egg yolk and sugar together until pale. Add oil and whisk until combined. Add salt and vanilla and whisk until combined. Add sifted cake flour and whisk until no trace of flour is seen. 

3. Divide into 3 equal portions. Add pink dragonfruit puree for dark pink, diluted dragonfruit puree for light pink, and matcha paste for green. Whisk until well combined. 

4. Prepare meringue. I made 1 egg white portion worth each colour to bake separately. In a clean metal bowl, beat egg whites with cream of tartar until foamy. Gradually add sugar and cornflour and beat until firm peaks or just reach stiff peaks. Fold meringue into egg yolk batters quickly but gently in 2 additions. 

5. Spread the batter in a thin layer on limed baking tray. Bake until done. This may take around 7-9 minutes depending on your oven so keep a close watch or it will brown fast. 

6. Immediately flip it onto a fresh parchment paper and cool completely before cutting out the cake with cookie/fondant cutters and assembling

Method of assembly for the roses can be found in our very first book, Creative Baking: Chiffon Cakes. The leaves were made by using a fondant rose leaf cutter to cut out the shapes, as well as make the imprint of the veins. I used 3cm and 4cm diameter round cutters for the roses. 

I was in a hurry making and cutting out the hojicha and black sesame cakes so I didn't get to take photos of those. I bought the hojicha powder from Redman. 


Recipe for Hojicha chiffon cake
Ingredients (makes one 6" cake) :
Egg yolk batter
2 egg yolks
5g monkfruit sugar (or caster sugar) 
28g canola or vegetable oil
27g Hojicha paste (Dissolve 2-3 tsp of hojicha powder in 26g boiling hot water. Sieve when cooled. I used about 5g powder) 
1/2 tsp vanilla extract 
A pinch of salt
40g cake flour

Meringue 
3 egg whites
1/8 tsp cream of tartar
45g monkfruit sugar (or caster sugar) 
1/2 tsp cornflour 

Steps:
Same as above except I alternated adding sifted flour and hojicha paste to the egg yolk batter. Preheat oven to 160C and reduce to 140C to bake for 50 min, reduce to 130C and bake for another 20 min. I placed a tray of water at the base of the oven and used the second lower rack for baking. I used a 6" round tin with removeable base but you may use a regular chiffon tin if you don't have one. 

Note that baking temperature and time is oven dependent and you may use your own temperature baking conditions that works for you. The temperatures I specify is as read by oven thermometer, not the temperature set on the oven. I use top and bottom heat only, no fan. 

Black sesame chiffon sheet cake (adapted from Nasilemak Lover
Ingredients (makes about two 10x12", or one 10x12" and two 7x7" sheet cakes) :

Do note that number or trays or tray sizes is dependent on what you have and how many rounds of baking you are willing to do. Like the flowers and leaves, you want to aim for really thin sheets if possible. 

Egg yolk batter
3 egg yolks
5g monkfruit sugar (or castor sugar) 
35g oil
35g milk or water (or mix of both) 
52g cake flour
20g black sesame powder
1/2 tsp vanilla extract
A pinch of salt
1/4 tsp charcoal powder (optional, for colouring) 

Meringue
3 egg whites
1/8 tsp cream of tartar 
45g monkfruit sugar (or castor sugar) 
1/2 tsp cornflour 

Steps: 
Same as pink and green sheet cakes. You may need to bake longer if the sheets here are slightly thicker, like what happened for mine. 

Cut into strips just before assembling the basket weave. Method of assembling the basket weave is similar to what you would do using fondant or buttercream for basket weave cakes. 

Hojicha diplomat cream 
I filled the hojicha cake with this in the hidden portions as this is a much darker brown colour and less firm. I wanted a lighter brown on the outside that is firmer. 

Ingredients:
2 egg yolks
200g milk (I used 150g full fat milk and 50g water for a less rich cream) 
5g hojicha powder 
40g monkfruit sugar (or castor sugar) 
20g cornflour 
Pinches of salt
15g unsalted butter
1/2 tsp vanilla extract
120-140g stabilized whipped cream*

* Bloom a sheet of gelatin (or 2g powder gelatin) in ice water, add it to hot but not boiling heavy cream ( at least 35% fat) and whisk till dissolved. Press cling wrap onto surface of cream and refrigerate overnight or until firm. Whip until firm peaks when ready to add to pastry cream. 

Steps:
1. In a heavy glass measuring jug or bowl, whisk together cornflour, egg yolks, salt, sugar, hojicha powder. In the meantime, heat milk and vanilla in a saucepan until milk starts to steam (not boiling). 

2. Pour hot milk in a thin stream into egg yolk mixture while whisking the yolk mixture continuously. Pour everything back into saucepan. 

3. Heat egg yolk mixture over low heat while whisking continuously until it thickens. Remove from heat and continue whisking until smooth. Return to heat and switch to spatula and stir continuously, cooking until it thickens further to be able to hold a firm peak. Remove from heat. 

4. Add butter and mix until well combined. Transfer into a bowl and press cling wrap on the surface to prevent a skin from forming. Refrigerate for at least 1h or overnight until firm. 

5. When ready to assemble, loosen the pastry cream by whipping it briefly with a spatula. Add stabilized whipped cream by folding it in. Transfer to piping bag with a hole cut. 

Light hojicha diplomat cream
This cream is firmer and lighter in colour, but less flavourful. 

Ingredients :
30g hojicha diplomat cream
70g whip topping (non-dairy whipping cream) 
1 tsp hojicha powder

Steps :
1. Whip non-dairy whipping cream until stiff. You may use stabilized double cream but I chose something that is weather friendly for tropical Singapore. I envy those of you who don't have to work in 30C hot kitchens! 

2. Add hojicha powder into whipped cream and beat it briefly to mix well. 

3. Fold in diplomat cream into whipped cream. Transfer into piping bag with a hole cut.
 
Assembly
Items :
6"  hojicha chiffon cake
Hojicha diplomat creams (both light and dark) 
Crunchy chocolate toppings 
Acetate sheet
8" round cakeboard
Black sesame sheet chiffon cake
Pink dragonfruit roses
Matcha leaves
Cake glue or melted marshmellows
Long metal ruler 
Small fruit knife (for cutting out basket weave pieces) 
Cutting board
Long serrated knife / cake leveller

Steps:
1. Cut the hojicha cake horizontally into 3 slices using a long serrated knife or cake leveller. I used a ruler, toothpicks (to mark the height) and serrated knife to cut into 3 slices of equal thickness. 

2. Place a slice of hojicha cake on cakeboard, using a little diplomat cream to stick it down. Wrap it with acetate sheet and secure the acetate sheet with tape. 

3. Pipe a ring against acetate sheet using the light diplomat cream. Fill the middle with the dark diplomat cream and crunchy chocolate toppings like picture below. 


4. Carefully layer on another hojicha chiffon sponge. Repeat adding cream, crunchy chocolate toppings and the last hojicha sponge. 

5. Cover the top with cling wrap and refrigerate for at least 2h or overnight. In the mean time you can make the roses and leaves if you haven't done so, or the black sesame basket weave pieces.

6. Carefully remove acetate sheet. Glue on the basket weave using cake glue or melted marshmellows. Glue on the roses and leaves. Store cake in fridge in airtight condition until ready to serve. 

Here is a top view of the cake! 


You may wish to make some of these components if you find the whole bake overwhelming. E. G. Just make the diplomat cream and bake the hojicha/ black sesame cake in the form of sheet cake and make a swiss roll. Just as delicious!! 

Here's a peek at a slice of the cake! 


Everyone took a bite of the cake and exclaimed that it is really good! My parents said I have to make this for subsequent family birthdays this year. My brother said the balance of flavours and textures is just right!  I have to thank hubby for suggesting adding the crunchy chocolate balls because it really made a difference. No one could tell that this whole cake (other than the crunchy chocolate balls) were made without using refined white sugar but so packed full of flavour that is well balanced. They couldn't tell that this was an experimental cake that I have never made before too so really thank God that it was very well received! 

With lots of love,

Phay Shing

Read More »