Thursday, 7 September 2017

Miffy and Flowers Snowskin Mooncake


My family loves snowskin mooncakes. I've had 3 mooncake playdates with little kids so far! The kids love playing "playdoh" with them =). I made these simple Miffy and normal 3D flowers snowskin mooncake together with the kids. I used the Redman brand reduced sugar white lotus paste from Phoon Huat for the filling, an all-time favorite. A lighter colour paste will help the mooncakes to look cleaner on the outside for light coloured skin. I also used olive oil to replace shortening for healthier mooncakes. They keep soft slightly shorter than those with shortening (around 3-4 days airtight). After that, we found that bringing them to room temperature will make the mooncakes soft again. Here's the recipe I used, adapted from Baking taitai and Phay shing's CAM session.

Snowskin Mooncake (makes 17 of 50g mooncakes)

150g cooked glutinous rice flour (kou fien)
180g icing sugar
35g olive oil (choose a light-colored and low-odor type)
190g water
500g lotus paste

Extra kou fien for dusting

1. Sift cooked glutinous rice flour and icing sugar together in a mixing bowl and stir well.

2. Combine water and olive oil in another bowl.

3. Add the liquid mixture gradually into the flour mixture (do not pour all at once). Use a spatula or gloves to mix until a smooth dough is formed.

*For multicolour, I divided the dough into 3 and added 1/2 tsp strawberry paste, 1/2 durian paste and the plain dough plain. For one colour, you may add the flavouring/colour directly to the liquid mixture.

4. Cover with cling wrap and let the dough rest for 15 minutes. 

5. Divide the snowskin dough into 20g for each mooncake (for my small 50g moulds).

6. Divide each lotus paste into 30g lotus paste per portion for each mooncake filling.

7. Pair the white lotus paste with the snowskin:
- Dust the mooncake moulds.
- Wrap each portion of filling with a portion of snowskin.
- Press into mooncake mould firmly.
- Push out (letting go at the same time) and chill before serving.

*For Miffy, after wrapping a portion of filling with the snowskin, I rolled into a ball instead of pushing into the plunger. The ears used 1/2 the lotus paste and 1/2 the snowskin.


We had lots of fun making them!

With lots of love,
Susanne =)

Read More »

Wednesday, 6 September 2017

Cute Doggie Lychee Rose Chiffon Cupcakes

There is a lucky Bichon Frise whose owner decided to throw a birthday party for him. Here's some lychee rose chiffon cupcakes topped with Bichon Frise macarons filled with lychee rose Swiss Meringue Buttercream!

This doggie loves playing with balls as you can guess ;)

This is another bake that went along to the party with my cute hotdog pull-apart buns.

I used the reduced sugar recipe for the macaron shells here. Both regular and reduced sugar recipes can be found here. You may refer to my Creative Baking: Macarons book for a systematic presentation of the basics and complex shaped macarons. You may refer to my video tutorials for macaron basics and piping of complex shapes on the blog too.

Just to share some photos of macaron making...

Baked shells...I tried to make the details of the ears and "moustache" using layering of macaron batter. 

Facial features were added on using royal icing (eyes and nose) and edible marker (tongue)

The lychee rose Swiss Meringue buttercream recipe can be found here so I will not repeat it in this post. It is used to fill the macarons and to top the lychee rose chiffon cupcakes.

Recipe for lychee rose chiffon cupcakes
Ingredients (makes seventeen 44x35mm cupcakes):
3 egg yolks
5g caster sugar
45g coconut or vegetable oil
50g lychee puree
1/4 tsp rose water
1/4 tsp lychee flavouring (optional)
1tsp vanilla extract
A pinch of salt
62g cake flour

4 egg whites
1/4 tsp cream of tartar
50g caster sugar

Steps:
1. Preheat oven to 140℃ and set oven rack to second lowest position. Place a tray of water at the base of the oven (optional).

2. Prepare egg yolk batter. Whisk egg yolks and sugar until pale and thick. Add oil and whisk until well combined. Add puree and flavourings and mix well. Gradually sift in flour and salt and whisk until no trace of flour is seen.

3. Prepare the meringue. In a clean metal bowl, beat egg whites with cream of tartar until firm peaks form, gradually adding sugar along the way.

4. Gently but quickly fold the meringue into egg yolk batter in three additions. Fill the cupcake cases until about 80% full. Gently tap the cases on the table to release trapped air bubbles.

5. Bake for 35-40 min or until skewer comes out clean. Cool completely before decorating.

I added a thin blue layer chiffon cake (stuck on using melted marshmellows) before adding a dollop of lychee rose Swiss meringue buttercream.

Decorating the cupcakes

All packed and ready to party!

There were 16 cupcakes decorated with the doggies so my kids got to sample the extra cupcake. Here's a peek at the lovely soft sponge texture!

Yums!

The cakes can be kept refrigerated in airtight condition for a few days.

With love,
Phay Shing

Read More »

Sunday, 3 September 2017

Hello Kitty Chiffon Cake


It's been a long time since I made Hello Kitty! I made it at the start of my baking journey almost 4 years back for my own daughter's birthday =). One of my earliest experiments with Deco Chiffon characters. Since then I made a doll version and also a mini figurine version for friends. This Hello Kitty Chiffon Cake is for a dear friend's birthday. She's visiting from oveaseas and loves Hello Kitty =). I love Hello Kitty too!

I have shared how to make a chiffon cake Hello Kitty face cake and cake pops previously. I combined it with a bowl cake for the body this time to make a simple full body Hello Kitty.

Thank God cake was very well-received, tasty and texture was light and moist.

With lots of love,
Susanne


My 3rd book Deco Chiffon Cake Basics is open for preorders! The structure and focus is different from my 1st two books. It's focus is on Basic Techniques of Deco Chiffon Cakes, with more step-by-step pictures for each technique that will be clearer for beginners. Hope you will find it helpful!


Read More »

Friday, 1 September 2017

Pull-Apart Cute Hotdog Buns

Sometimes inspiration comes from nowhere and gets me all excited thinking about it. This is one of those ;)


I am sure you have seen cute hotdog buns whereby the sausage is in the doggie's mouth. I was really excited when I envisioned making mini hotdog buns with the doggies hugging the sausage and appear a little like they are chewing on one end of the sausage! So even though my schedule was full and I had extra personal stuff to handle at home, I just had to try this out. This was an optional bake for a cute doggie's birthday party as I was really busy and not too familiar with pull-apart buns at the moment. But I am really glad that it turned out fairly well although there's room for improvement. Keep a lookout for more bakes for this lucky canine!

The recipe for pull-apart buns is adapted from Victoria's killer toast recipe. I have used it for my first pull-apart buns for sale that were very well received and I am told, still stayed yummy despite some of them being frozen for a few weeks and steamed before consuming.

Recipe for cute mini hotdog pull-apart buns
Ingredients (makes 12 buns in 7" or 8" square tray):
Dough
260g bread flour
3/4 tsp instant dry yeast
1tsp (2g) salt
20g caster sugar (more if you prefer sweeter bun)
180g one egg plus top up the rest with milk
30g unsalted butter
12 mini sausages, rinsed and pat dry with paper towel

Decoration
20g White compound chocolate
5g Vegetable shortening or butter
1/8 tsp Charcoal powder

Steps:
1. Combine all ingredients for the dough together except butter. Cover the mixing bowl with cling wrap and let the mixture rest for 10 minutes. This is to help the flour absorb more moisture but it is optional. Knead until the dough is smooth. About 5-8 minutes. Add butter and knead until the dough passes the windowpane test (another 15 minutes or so).

2. Place the kneaded dough in a bowl loosely covered with cling wrap. Let the dough proof for about 25 minutes at room temperature (27-28℃ in hot Singapore).

3. Punch down the dough to release trapped air bubbles. Divide the dough into 33g portions for the body of the dogs and plain hotdog bun designs. You will have extra dough which is used for forming the ears and limbs of the dogs.

4. Form an oval shape for each ball of dough that is slightly larger than the sausage. Use a pair of scissors to make a vertical slit to insert the sausage into the dough. For the dogs, make the slit nearer the lower portion of the dough as you want to leave some space for dogs' face. For plain buns, make the slit in the middle. Place the buns with sausages into the baking tray lined with baking paper.

5. Form the ears and limbs using the extra dough. Use a toothpick to help to attach the parts firmly to the body. I apologise for not taking photos of this step as I was in a hurry to complete assembly. You may refer to this post on how to use toothpick to secure the parts.

6. Loosely cover the assembled buns with cling wrap and proof until double in size, about 45min to 1.5h depending on temperature conditions.

Assembled buns!

7. Towards end of proofing time, set oven rack to second lowest position and preheat at 170℃. Bake the buns for 30-35 min or until they sound hollow when tapped. Cool in the tray for 5 min before taking the buns out and cool on cooling rack.

8. Melt compound white chocolate with shortening using double boiling method or microwave oven. Be careful not to overheat. Pipe on the snout of the dogs. Add charcoal to the white chocolate and pipe the eyes and nose. If you would like to toast or steam the buns before eating, please remove the chocolate portions as they will melt and become runny...Unless you don't mind seeing a Halloween version of the doggies after reheating :p

If you happen to consume the buns within a few hours after decorating, you can consider using sliced cheese for the snout instead. Use an oval cookie cutter to cut out ovals for the snout and then add on the nose and eyes using cocoa powder or charcoal dissolved in a little water to make a paint. I was concerned about food safety so I used white chocolate instead.


These buns can stay soft for a few days. Enjoy!

With love,
Phay Shing


Read More »

Thursday, 31 August 2017

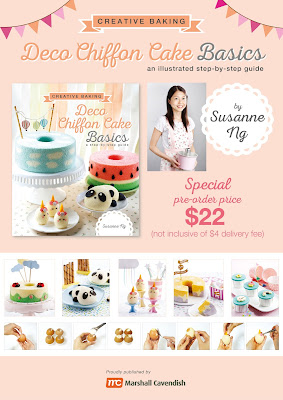
Creative Baking: Deco Chiffon Cake Basics with Marshall Cavendish (Chiffon book 3)


*(20/11/17) First print run sold out in 1.5 months!! Thank you and thank God!!

(12/10/17) Good news! Deco Chiffon Cake Basics is finally available at all major bookstores in Singapore, Malaysia, Indonesia and Thailand! It's also the first book to be in all Malaysia Popular!

Book availability:

Book depository/Amazon UK:     Book depository/ Amazon

Kindle / ebook:                          Kindle

Singapore:    Popular, Kinokuniya, Times, Naiise, Kinokuniya (online store)

Malaysia:     Popular, Kinokuniya, Naiise, Kinokuniya (online store), mphonline

Indonesia:          Periplus, Books & Beyond, Kinokuniya, Periplus (online store)

Thailand:           Asiabooks, Kinokuniya

Other Online stores:                   Localbooks online (Free shipping in SG & ships internationally)

*Cookbook giveaway on my instagram @susanne.decochiffon and fb - closed 15/10/16. Winners have been announced.


Simplified Chinese Edition <造型雪纺蛋糕 创作基础> available (1/3/18) in bookstores!! 


New features

(26/6/18) So honored to be on Good Morning America! 

(15/6/18) On Food Network! My Spongebob hidden inside a Pineapple chiffon cake! 


(2/5/18) So honored to be featured on @Tastemade! 


(1/4/18) Deco Chiffon Cakes featured in French magazine "Pâtisserie et Cake design"!


(15/2/18) Happy CNY! Honored to be featured on Instagram's official account!


(7/2/18) Honored to be featured on Morning Express on Channel 8 TV!
Catch the show here.


(31/1/17) Featured on Russian NTV! Watch the catch-up TV here.


Media features of my Deco Chiffon Cakes worldwide: 
US Mashable, Italy, Japan, China, Canada, Daily Mail UK, Korea Naver, Arabia, Taiwan, among others

(13/11/17) Top 10 Non-fiction Bestsellers in Kinokuniya!

(13/11/17) Bestsellers in Periplus (Indonesia) and Naiise (Malaysia/SG)!! 


(1/11/17) Rated Bestseller in Kinokuniya. Thanks for your support! <3


(5/11/17) Updated: Reviews/encouraging comments! So thankful for them!


(4/10/17) Honored to be on YES93.3! I shared about the new Basics cookbook and we had a challenge! Catch the facebook live here.


(28/9/17) Featured on Korea's major site Naver!


(18/9/17) Honored to be interviewed by Radio channel JIA88.3 FM on my cakes. Catch their facebook live here.

****

This Basics book is different from the first two Chiffon cake books in that it is centered around the Basics techniques (around 14) of Deco Chiffon Cakes. There are detailed step-by-step pictures for every recipe (e.g. bottom panel in the poster). The additional step pictures are also accompanied with special Deco/Troubleshooting tips for tricky steps in the recipe.

Hopefully this will help bakers and especially beginners alike master the Basic key techniques of Deco Chiffon Cakes. Here is the book cover!


Thank you Prima flour, Chew's eggs and Phoon huat for your generous sponsorship of the premium ingredients used in Deco Chiffon Cake Basics!


Thank God and thank all of you for your continued love and support! I am very grateful.

With lots of love,
Susanne

My other Deco Chiffon cake books
Book II: Creative baking: Deco Chiffon Cakes


Book I: Creative baking: Chiffon Cakes


Read More »

Wednesday, 30 August 2017

Tsum Tsum Winnie the Pooh, Piglet & Tigger Earl Grey Macarons

My friend wanted to surprise her sister with a Winnie the Pooh themed birthday treat so she requested for some Pooh themed macarons :)

Pooh, Piglet and Tigger!

She wanted to bring the macarons to an island resort where she would spring the surprise on her sister. So I had to make sure that the macarons are not too fragile (therefore the choice of Tsum Tsum designs) and contain fillings that can survive a boat ride. I have highlighted in this post the various pointers about creating macarons that are meant to survive longer (and possibly slightly bumpy) transportation and storage out of fridge so I will not repeat it here.

I used the reduced sugar recipe for the macaron shells here. Both regular and reduced sugar recipes can be found here. You may refer to my Creative Baking: Macarons book for a systematic presentation of the basics and complex shaped macarons. You may refer to my video tutorials for macaron basics and piping of complex shapes on the blog too.

Just to share some photos of the process...

Piping the shells!

Freshly baked shells and beginning to decorate with royal icing and edible marker. Check out the feet on the shells too!


I filled the macarons with Earl Grey white chocolate ganache.


I hope these cuties brightened up your day just as they did for me as I worked on them :).

With love,
Phay Shing

Read More »

Saturday, 26 August 2017

Domo Chocolate Chiffon Cake


Happy birthday to my dearest mummy! Made a Domo chiffon cake for my mummy this year. Last year was Pikachu during the Pokemon-go craze hehe. How one year flies! I'm so thankful to my dear mummy for her love and support all these years. For those who don't know, Domo is the adorable furry mascot of Japan's NHK. My kids thought it was a giant chocolate bar and were elated!

I baked a Reduced Sugar Chocolate Chiffon Cake recipe in a rectangular baking pan. This recipe was previously developed specially for my health concious friend. It tastes yummy and balanced without being overly sweet so it great for the elderly like my mum. The recipe in the above link is also shared for a 18-cm tube pan, so you can use it to bake a normal chiffon cake as well. Similar to the Airplane Chiffon Cake in my first book, Creative baking: Chiffon Cakes, you do not need to grease the pan. If you didn't underbake or overbake it, it should peel off easily.

Here's having fun cutting the cake lol =p. I actually posted this on my Instagram story while cutting the cake!


With lots of love,
Susanne


Some exciting news, my 3rd book Deco Chiffon Cake Basics is open for preorders! The structure and focus is different from my 1st two books. It's focus is on Basic Techniques of Deco Chiffon Cakes, with more step-by-step pictures for each technique that will be clearer for beginners. Hope you will find it helpful!


Read More »

Thursday, 24 August 2017

Sakura Heart Macarons

Here is another Teacher's Day bake that I prepared. Sakura Heart macarons!


These dainty treats are made with dried Sakura flowers and dried Sakura flower powder that my Japanese friend bought from Japan. The dried flowers can be found in baking specialty shops in Singapore but I have not seen the lovely pink powder sold anywhere here. The powder tastes exactly like the dried flowers, salty and full of sakura flavour.

The day before baking the macaron shells, I washed the flowers thoroughly to remove excess salt on them. I try to open up the petals gently and lay them flat on paper towel to dry. I oven dried at 50℃ with the fan on for a few hours to make sure that the flowers are thoroughly dried.

Washed and dried flowers

I used the reduced sugar recipe for the macaron shells here. Both regular and reduced sugar recipes can be found here. You may refer to my Creative Baking: Macarons book for a systematic presentation of the basics and complex shaped macarons. You may refer to my video tutorials for macaron basics and piping of complex shapes on the blog too.

Just to share some pictures of the process..

You may refer to this video tutorial on how to pipe the perfect heart shapes:

In order to attach the flowers to the shells, let the shells partially dry until a sticky membrane forms. Gently stick the flower on. I dabbed a little Sakura powder on the shells at this stage as well.

Adding flowers and sakura powder

Freshly baked shells! Checkout the awesome feet!

As these are to be given away as gifts, I filled them with sakura white chocolate ganache that fan be safely kept out of the fridge for a few days at cool room temperature. If you are unable to get hold of sakura powder, you may use sakura jam or tea to infuse the flavour into the filling.

Sakura white chocolate ganache
Ingredients (fills about 35 macarons):
110g white chocolate, chopped (I use vanilla bean white chocolate)
15g vegetable shortening
15g unsalted butter
30g heavy cream
2 tsp Sakura flower powder
1/8 tsp fine sea salt
1/2 tsp vanilla bean paste

Steps:
1. Place white chocolate, shortening and butter in a microwave-safe bowl. Heat at medium power for 20 seconds and mix with spatula. Repeat until fully melted.

2. Heat cream in a small saucepan until it starts to bubble. Pour over melted chocolate and mix well.

3. Add salt and vanilla and mix well. Freeze for 2 minutes and mix well with spatula. Repeat freezing and mixing and start beating with spatula when mixture firms up. Keep beating until mixture is light and fluffy like buttercream.


4. Add sakura powder and mix well.


Earthy pink coloured ganache!

5. Transfer ganache to piping bag and pipe onto shells.


Refrigerate at least 24h in airtight container in the fridge before eating. Let the macarons sit at room temperature for 10min before consuming.

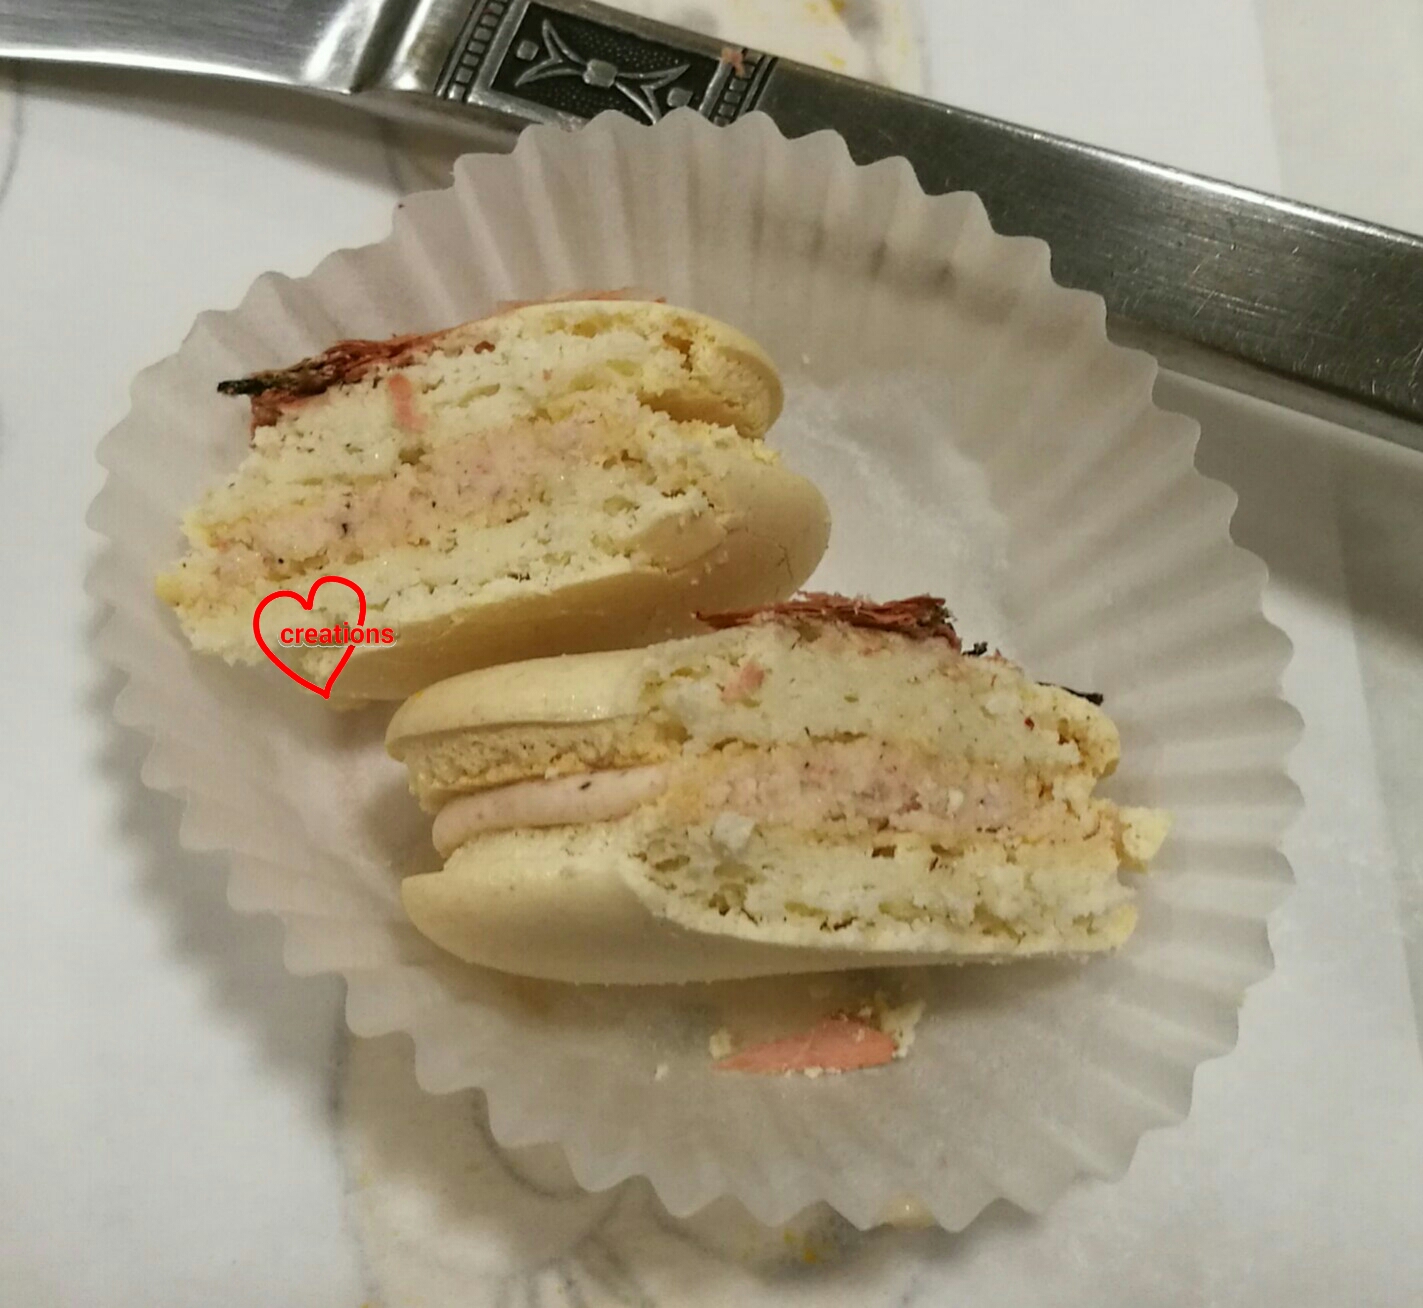
Here's a sneak peak at the insides :)

Yums!


With love,
Phay Shing

Read More »

Monday, 21 August 2017

Orange Chocolate Sunflower Shortbread Cookies

Want to bake something simple yet yummy and impressive looking for Teacher's Day? Why not try making these lovely sunflower shortbread cookies :). They smell and taste lovely too!


I love shortbread cookies because they are simple to make (no special equipment or technique involved) using few ingredients. The original recipe just uses icing sugar, butter and plain flour in a very easy to remember ratio of 1:2:3 by weight, and therefore very easily adaptable for scaling the quantity and various flavours.

The baking part is easy. It is the rest of the craft portion that may be more time consuming. So feel free to improvise the design :).

Ingredients (makes about 50-55 4cm sunflowers):
Orange dough
50g icing sugar
100g unsalted butter
150g plain flour
1/8 tsp sea salt
Zest of 2 oranges (orange part only)
1/8 tsp orange paste/emulco (optional)
A drop of lemon paste (optional)
A few drops of Queen's natural yellow food colouring (optional)

Chocolate dough
20g icing sugar
40g unsalted butter
55g plain flour
5g Cocoa powder (I used Dutch processed cocoa powder)
A pinch of salt
1/4 tsp vanilla bean paste (optional)

Decorative items
Royal icing*
Cake pop sticks/ wooden skewers (cut to about 5-6cm)
Styrofoam board (cut to fit inside cupcake case)
Green coloured paper (cut to leaf shapes)
Green shredded paper
Large cupcake cases (about 5cm at the base)

* The icing consistency should be less runny than the recipe link I provided. To do so, add a bit more icing sugar until the icing is able to form peaks that can hold for 20 seconds.

Orange zest! The key to awesome tasting orange cookies!

Steps:
1. The method of making the dough differs depending on whether you are using electric mixer or not. I will describe both over here. Resulting texture may be lighter for the electric mixer version but both are still yummy.

A) Without electric mixer:
Sift together flour, icing sugar, salt and cocoa powder (for chocolate) or orange zest (for orange). Add small pieces of butter into flour mixture and use your finger tips to rub the butter into the flour and knead until mixture resembles breadcrumbs. Add flavouring/colouring and knead the mixture until a ball of dough forms.

B) With electric mixer:
Cream icing sugar, salt and softened butter with mixer until creamy and well combined. Add flavouring/colouring and orange zest (for orange) and mix well. Add flour and cocoa powder (for chocolate) and fold in with a spatula until a ball of dough forms. Use your fingers towards the end if necessary.

Divide each coloured dough into two or three portions. The reason for dividing the dough is this, Singapore is really warm so the dough softens quite fast at room temperature. It is easier to work with a firm but pliable dough. At any one point the dough becomes too soft, simply re-roll, freeze it and take the other frozen batch out of the freezer to work with so there is no in between waiting time for the dough to firm up again.

Coloured and flavoured dough

2. Roll each ball of dough to thickness of 4mm between two baking sheets. Freeze the dough until firm. The dough can keep in the freezer for a few months in airtight condition.

3. Prepare a small portion of cornflour or plain flour for dusting. Use a Daisy (or any flower cutter you have) fondant cutter to cut out the orange base flowers. Dust the surface of the dough and spread a thin coat of flour on the dough before cutting out the shapes. Let the dough soften a little before cutting otherwise it will crumble. Place the cut-outs on a baking tray lined with baking paper, about 2-3cm apart from each other. Dust the cookie cutter with flour if necessary but knock off the excess flour as much as possible.


Cookie cutouts

4. Use a small knife to make imprints on the petals if you wish (optional). Make criss cross patterns on the brown portion using the knife as well. If you find that the dough sticks to the knife, dust and coat the brown portion with a teeny bit of flour before making the imprint. This is also optional if you are feeling lazy.


5. If you feel really hardworking, you may add on a little darker yellow highlight on the petals near the flower centers. Dissolve a little golden yellow gel food colouring in water and use a fine paint brush to paint on the highlights. I am providing these options for details just in case you want to make more realistic looking flowers but these steps are just cosmetic.


6. Refrigerate the whole tray of cutouts until firm. In the meantime, preheat the oven to 150℃ and set the rack to second lowest position.

7.  Bake for 12-15 min or until the base of the cookies show telltale signs of being browned.  This is perhaps the trickiest part. It is safer to underbake, check the cookies and return them to the oven to bake longer for a few more minutes than to overbake them at the start. But don't worry, they still look pretty and taste yummy even when slightly browned. Keep a close watch on the browning towards end of baking time.

Freshly baked sunflowers!

8. Cool the cookies on the tray. Place the cookies on paper towels for an hour or even overnight to absorb excess oil from the base of the flowers. You may place the whole tray of cookies in jumbo ziplock bag to keep it in airtight condition.

9. Flip the cookies over such that the base is facing upwards. Prepare royal icing and cake pop sticks. Pipe a generous dollop of icing at the center of the flower base and insert a cake pop stick as shown below.


Leave the icing to dry in aircon room or under a fan for at least a few hours until fully hardened. Cookies won't turn soft if they are thoroughly baked through.

10. Cut pieces of styrofoam such that it can fit into the large cupcake cases. Cut leaves of appropriate size too.

This is to show the rough sizes of the styrofoam

11. Insert three flowers into the styrofoam block. You may find it easier to poke holes using a toothpick/wooden skewer first before inserting if you are using cake pop sticks. Carefully place the flower block into the cupcake case. Insert leaves and shredded paper as you wish.

Depending on how you want to pack, you may place in airtight container large enough to fit the whole assembly. I didn't have that so I packed them in large cookie bags but I had to make a more rigid barrier around the flowers to protect them. I also placed the base of the cupcake cake on a rigid piece of plastic. You may use small round cakeboard for this purpose but I didn't have them on hand too. The rigid barrier around the flowers and piece of plastic under the cupcake case are transparent so they aren't very visible as you can see here...


These cookies can keep for a month in airtight condition in a cool and dry place.

Inspired to try :)? Feel free to adjust accordingly to what you can manage. You can even do away with the flower pot idea and simply place each flower on pretty paper cupcake cases and pack a few in a box. Go on and bless your teachers or loved ones ;)

With love,
Phay Shing


Read More »