A pair of grandparents wanted to bless their grand daughter with a birthday bake that provides and opportunity for them to share about God. So they requested for Noah's ark themed cake. Here is my cookie version of Noah's ark, on top of a fruits n cream cake!
I made the ark out of a no-spread cookie recipe, naturally coloured with dark brown sugar and coconut sugar. The animals are made out of shortbread cookies with minimal royal icing used. Even the little horns, spots on the giraffe and the tiny doves are made out of shortbread!
I experimented with creating little rainbows out of green kiwi, mango and strawberry to insert into the cream layers. But that proved to be very challenging 😅. I think if I ever want to attempt something similar again, I will do it with just 2 types of fruits. I wanted to try making the rainbows because it is part of the Noah's ark story, signifying God's promise never to destroy the earth by flood again.
I used my default vanilla chiffon recipe for the fruits n cream cake. Inside the cake is filled with fresh thai mango pieces and homemade mango compote cooked with a dash of yuzu juice concentrate.
Be prepared for a long post as this bake consists of quite a few components.
No-spread cookie recipe
Ingredients:
Brown dough
114g unsalted butter
50g dark brown sugar
50g coconut palm sugar
50g egg, lightly beaten
250g plain flour
48g cornflour
3/8 tsp salt
1 tsp vanilla extract
Pink dough
18g unsalted butter
16g caster sugar
8g egg, lightly beatened
40g plain flour
8g cornflour
Pinch of salt
1/8 tsp vanilla
Pink gel colouring
Steps :
1. Preheat oven to 170C for baking small parts like letters of name and 180C for larger pieces.
2. Cream butter and sugar but not till fluffy. You want to minimize bubbles in dough.
3. Add egg a bit at a time and mix well. Add vanilla and mix well. Add gel colouring if using and mix well.
4. Sift together cornflour, plain flour and salt in another bowl. Add sifted flours into butter mixture. Fold the flour in until just combined.
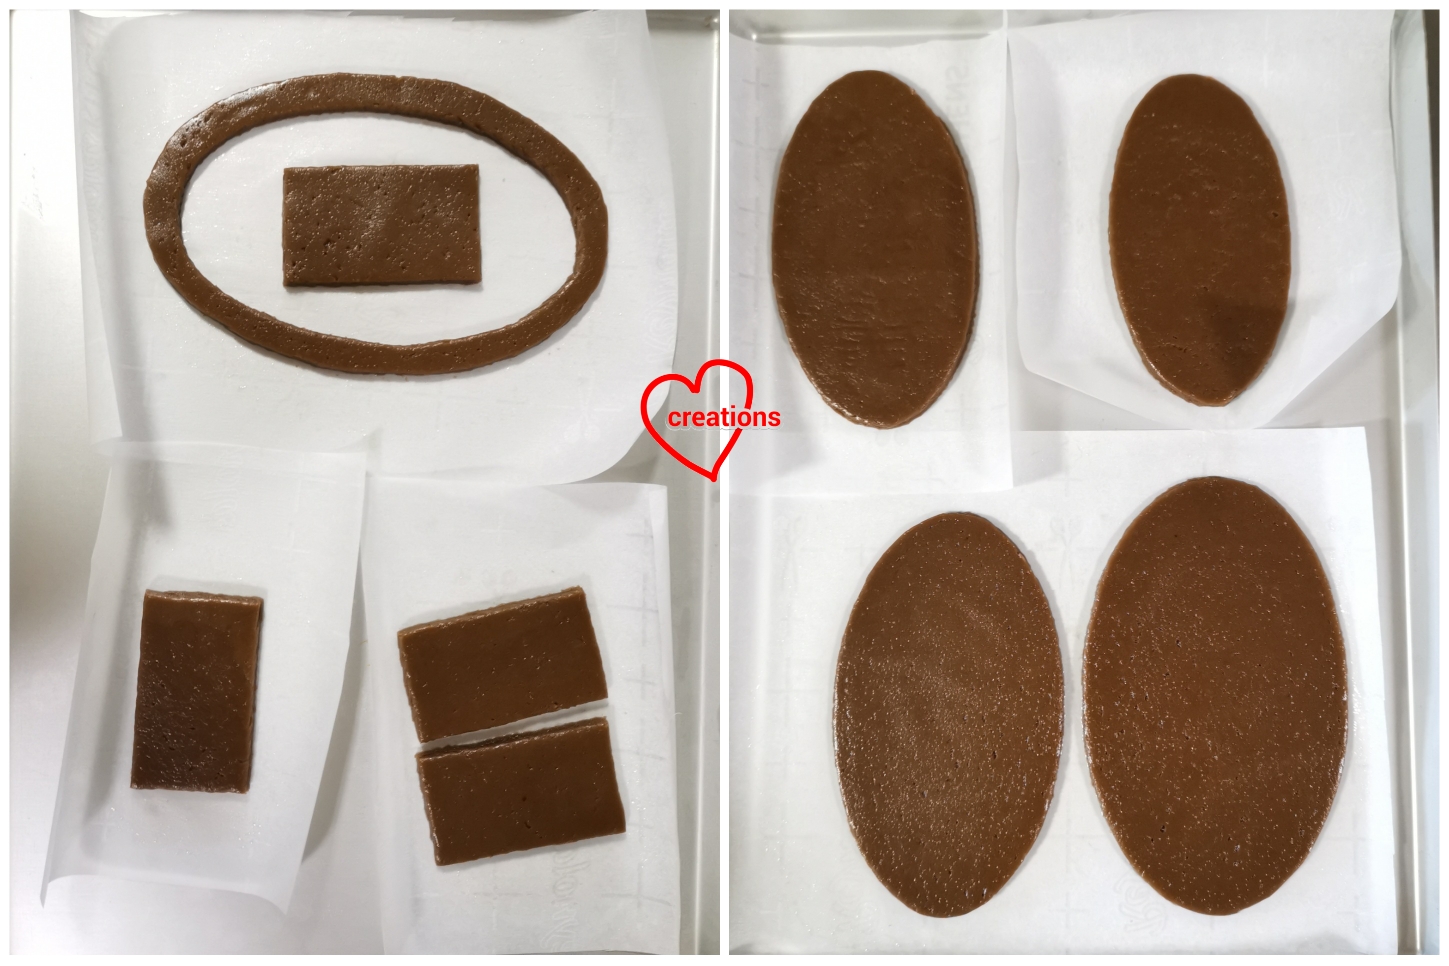
5. Roll the dough between parchment paper until about 6mm thick. Use cookie cutters or a small knife and template to carve out the shapes required. I remove the excess dough instead of the cutouts so that it retains its shape. You may place the cookies quite close together as they don't spread in the oven.
6. Bake smaller parts for around 10 to 12 min. Lower baking temperature for larger parts after the first 12 min to 160C and bake until done, about 20min.
I assembled the ark using royal icing coloured in a similar shade to the cookie. You may refer to
this post for the royal icing recipe. Use a zester to file the sides of the cookie so that the various parts join seamlessly.
Animal Shortbread cookie recipe
Ingredients :
50g icing sugar
100g unsalted butter
130g plain flour
20g cornflour
1/8 tsp salt
1 tsp vanilla extract
Gel food colouring and natural food colours like cocoa powder and charcoal powder
Steps :
1. Preheat oven to 150C for larger parts, 140C for smaller parts.
2. Cream butter, salt and sugar until combined but not till fluffy.
3. Add vanilla and mix until well combined.
4. Sift together cornflour and plain flour. Add into creamed butter and sugar. Fold in the flour until ball of dough forms.
5. Divide dough into portions and colour them with gel or natural colouring.
6. Shape using fingers and fondant tools and place on parchment. Freeze the tray(s) of shaped cooke dough for at least 10 min before baking.
7. For larger parts, bake at 150C for first 10 min, lower to 130C and bake for another 10-15min . For the tiny doves, elephant ears, bake at 140C for 10 min then at 130C for another 2 min. Cool conpletely before storing or assembling.
Tenporarily storing overnight before assembling
8. Assemble by joining the parts with royal icing. You may gently scrape the cookie with a butter knife to get the crumbs to cover the seams a little. Use royal icing to add in the mane, eyes and mouth.
Let the icing dry completely before storing in airtight container.
I glued the animals to the ark using the same brown coloured royal icing.
I added in the flood waters using stiff royal icing and glued on the name in the waves.

The recipe for the vanilla chiffon can be found in
this post. I baked a 17cm (7 inch) chiffon and a 7x7 inch sheet cake. I love how tall and fluffy the chiffon cake is!
Slice horizontally into 3 layers with a serrated knife. Store in airtight container until ready to assemble.
Prepare mango compote by cooking mango puree with a little sugar, a pinch of salt and a small dash of yuzu juice until reduced and thick. Refrigerate until ready to assemble.
Slice all the fruit and place on paper towel to absorb excess water. Refrigerate overnight.
I used a combination of dairy and non-dairy cream to get a more stable filling that still tastes good.
Stabilized whipping cream with non-dairy cream
Ingredients:
150g whipping cream (dairy cream)
2 gelatin sheets, bloomed in ice water
180g whip topping (non-dairy whipping cream)
1 tsp vanilla extract
Steps:
1. Heat whipping cream until steaming (not boiling). Add bloomed gelatin and whisk until melted.
2. Press cling wrap on surface of cream and refrigerate overnight.
3. Beat chilled whip topping with vanilla extract using electric mixer until stiff peaks form. Set aside.
4. Beat dairy cream set by gelatin with electric mixer until firm peaks form. Fold into whipped non-dairy cream until well combined.
Assembly
1. Add a little whipped cream onto cakeboars and place first layer of chiffon cake on it. I cover the hole with a separate cake cutout. Wrap the cake with acetate sheet to facilitate assembly. Coat the sponge with some mango compote
2. Add a thin layer of whipped cream and arrange the fruits around circumference and in the middle. Drizzle some compote on top of the mango slices in the middle.
3. Cover fruits with more cream and smooth it out with a teaspoon.
4. Drizzle some compote on top of the smoothened cream. Carefully place the next layer of cake on top and gently press it down. Repeat layering with cream, fruits and another sponge on top. Refrigerate for at least 2 hours before carefully removing the acetate sheet.
Insert some dowels and glue a cakeboard on top using royal icing as a platform to put the cookie cake topper on. Keep cake refrigerated until ready to serve.
Thank God it was very well received!
With love,
Phay Shing


No comments:
Post a Comment