Saturday 29 April 2017

Paw Patrol 'Chase' Chiffon Cake


This is my humble attempt at a Paw Patrol 'Chase' Chiffon Cake for a dear mummy friend some time back! Thank God it was well-received and everyone said it looked like stuffed toy! For those who are not familiar, 'Chase' is the name of a police dog in the cartoon Paw Patrol. Very cute cartoon with pups sliding down a long slide round the tower each time there's a rescue mission.

For the base cake, I used the same recipe as my previous Chocolate-Orange Giraffe Chiffon Cake, except that I piped the orange batter on one side only to form the face. For the top cake, I used the same recipe as my previous Minions chiffon cake, with blue forming 2/3 and yellow 1/3 instead.

The ears were cut from excess chocolate batter baked as sheet cake - make 2 cuts using the same circle cutter. The nose was cut from a round cake pop baked in 5-cm cake pop mold (slice off 3 sides). Other details eg eyes were also cut from sheet cakes; you can also pipe them on using melted chocolate. I used melted marshmallows as glue (pop a few marshmallows with a sprinkle of water and microwave for 30 sec). I also used a Paw patrol badge cookie cutter from JB cookie cutters.

With lots of love,
Susanne


Some exciting news, Chinese version (繁体) of my Deco Chiffon Cakes is coming! It will be available in HK, Taiwan and Macau from May 2017!


This is taken from a page of the book, some of you may encounter problems in patterning chiffon cake batter or folding multiple colours. Deco Chiffon Cakes or 造型雪纺蛋糕 has a 6-page extended troubleshooting guide specially addressing these issues:


Links to the English versions:


Read More »

Wednesday 26 April 2017

Red Velvet Cream Cheese and Gula Melaka Sponge & Pudding Dahlia Cupcakes

I have a request for a new flavour of sponge and pudding cake along with my tried and tested (and very well received!)  gula melaka flavour -- red velvet cream cheese sponge and pudding cake! The lady who requested for the cupcakes saw the ombre Dahlia cupcakes I made for my friend earlier this year and wanted the same design. I took the liberty of adding a little greens to the pretty flowers :)


I will focus on providing the recipe for red velvet cream cheese sponge and pudding cake in this post since it's a new recipe and a yummy one too! You may find the detailed recipe for the flowers in this post, the recipe for gula melaka sponge and pudding cake in this post and assembly of the cupcake here.

I omitted red colouring in my red velvet chiffon sponge cake recipe as I find it unnecessary.

Red velvet chiffon cake recipe
Ingredients (baked in 10x12" tray for making about twelve 44x35mm cupcakes):
3 Egg yolks
10g caster sugar
39g vegetable/canola oil
54g buttermilk
1 tsp vanilla extract
55g cake flour
10g (about 1.5tbs) Dutch processed cocoa powder*
1tsp baking powder
1/4 tsp fine sea salt

4 egg whites
1/4 tsp cream of tartar
55g caster sugar

Steps:
1. Line baking tray with baking sheet. Set oven rack to lowest or second lowest position. Preheat oven to 160℃.

2. Prepare egg yolk batter. Whisk egg yolk and sugar together until pale and thick. Add oil and whisk until well combined. Add buttermilk and vanilla extract and whisk until combined. Gradually sift in cake flour, cocoa powder, baking powder and salt. Whisk until no trace of flour is seen.

3. Prepare the meringue. In a clean metal bowl, beat egg whites with cream of tartar until firm peaks form, gradually adding in sugar once the egg whites are foamy.

4. Quickly but gently fold in the meringue into the egg yolk batter in three additions. Pour the batter into the tray. Gently tap the tray on the table to release air bubbles.

5. Bake for about 15 minutes or until skewer comes out clean. Remove from tray and cool with anothee baking sheet covering it.

Use a 4cm and 5cm round cookie cutter to cut out 2 circles for each of the cupcakes. Store cutouts in airtight container.


Recipe for cream cheese pudding
Ingredients:
A)
200g evaporated milk
125g water
62g sugar
1/8 tsp salt
1/2 vanilla extract
1/2 agar powder

B)
23g custard powder
125g water

C)
200g cream cheese, softened at room temperature
40g evaporated milk

Steps:
1. Blend softened cream cheese with 40g evaporated milk together until smooth. Set aside.

2. Place ingredients in B) in a jug and stir until custard powder is dissolved. Set aside.

3. Place all ingredients in A) in a saucepan and heat on medium heat while stirring. Bring to a boil. Stir B) again and pour into A). Continue stirring until mixture boils again. Keep stirring while still boiling for a minute more.

4. Add C) into the pudding mixture and mix well. Sieve the mixture and get ready for assembly.

Assembly
Alternate layers of cake and pudding inside the cupcake cases.

Chill the cakes for two hours or until the pudding has set.


Add on the Dahlia cupcake deco.


All done!


With love,
Phay Shing

Read More »

Sunday 23 April 2017

Giant ‘Ice Cream’ Chiffon Cake (Giant Cupcake)


I made this cute Giant ‘Ice Cream’ entirely from chiffon sponge some time back for a little boy! It's like a Giant Cupcake from chiffon cake. Can you guess how I made it? Yes, it's made by joining a hemispherical Strawberry Yoghurt chiffon with a Vanilla Chocolate chiffon cake base!

Strawberry Yoghurt Chiffon Cake (ball cake pan, also can be used for normal 6-inch tube pan)

2 egg yolk
12g castor sugar
25g vegetable/corn oil
32g strawberry yoghurt drink
3g vanilla extract
1/3 tsp strawberry paste/emulco
38g Prima cake flour, sifted
A pinch of salt

Meringue
3 egg whites
1/4 tsp cream of tartar
27g castor sugar

1. Preheat oven to 160°C.
2. Beat egg yolks with sugar with whisk till pale and light before stirring in oil, strawberry yoghurt drink and vanilla extract.
3. Add in sieved flour and whisk till no trace of flour found.
4. Meringue: Beat the egg whites with ¼ tsp cream of tartar till firm peaks, mixing in caster sugar in 2 additions.
5. Fold in the meringue gently into the batter 1/3 at a time.
6. Pour the batter into the ball cake pan and gently tap the pan on table to remove air bubbles
7. Bake the cake for 15 min at 160°C then at 140°C for 25+ min, or until skewer comes out clean.
8. Invert immediately once out of the oven and leave to cool on cooling rack.
9. Unmould the chiffon cake by hand (‘Hand Unmoulding Chiffon Cake for a Clean Finishing’ video tutorial).

Chocolate Chiffon Cake (6-inch Unopan tube pan)
2 egg yolks
14g castor sugar
26g vegetable/corn oil
29g water
5 g vanilla extract
30g Prima cake flour
10g cocoa powder (alkalized)
¼ tsp baking powder

3 egg whites
30g sugar
1/4 tsp cream of tartar

1. Preheat oven to 160°C.
2. Beat egg yolks with sugar with whisk till pale yellow before stirring in oil, water and vanilla extract.
3. Add in sieved flour, cocoa and baking powder and whisk till no trace of flour found.
4. Meringue: Beat the egg whites with ¼ tsp cream of tartar till firm peaks, mixing in caster sugar in 2 additions.
5. Fold in the meringue gently into the batter 1/3 at a time.
6. Scoop the batter into the chiffon pan and gently tap the pan on table to remove air bubbles
7. Bake the cake for 15 min at 160°C then at 140°C for 25+ min, or until skewer comes out clean.
8. Invert immediately once out of the oven and leave to cool on cooling rack.
9. Unmould the chiffon cake by hand (‘Hand Unmoulding Chiffon Cake for a Clean Finishing’ video tutorial).
10. Make cuts at the side.

Fill the inside of the tube hole with a hidden surprise to support the hemispherical chiffon cake above. Join the two using melted marshmallows. Other details were cut out from sheet cakes and glued on similarly but you can also piped them on with melted chocolate. I made the strawberry from cake pop mold.

My second book Deco Chiffon Cakes has a Giant Chiffon Cupcake in Nutella flavour, with cute wavy 'icing' (pic below). There are picture tutorials of each step which you may find helpful.


Hope you will enjoy this fun creation, that is healthier than fondant versions :p

With lots of love,
Susanne


Read More »

Friday 21 April 2017

Happy Cat Earl Grey Lavender Macaron Carousel

This is one cheerful carousel that will put a smile on your face :). Happy Cat carousel!


I made these cats recently and you may see them in this post.

I used the reduced-sugar macaron shell recipe. Both regular and reduced sugar recipes can be found here. You may refer to my Creative Baking: Macarons book for a systematic presentation of the basics and complex shaped macarons. You may refer to my video tutorials for macaron basics and piping of complex shapes on the blog too. You may refer to this post for the dimensions of the shells required to make the carousel and the respective baking times. I piped a scalloped roof like the one similar to the sheep macaron carousel as I think it's really pretty and it is very helpful for positioning the paper straws during the assembly. Checkout the sheep carousel post for detailed steps of assembly.

Just to share a couple of pictures of the process...

Piping the cats

Assembling the carousel!

I filled the carousel with Earl Grey lavender filling as requested. I added both dried lavender and Earl Grey together in the mix. This time round I did things a little differently. Non-refrigerated filling that uses shortening and white chocolate as the base may tend to be a little dry although they are firm enough to withstand storage and display in Singapore's warm climate without the objects sliding down the pole. The texture of the carousel pieces are more like delicate biscuits due to storage at room temperature after assembly. I was making some Ondeh-Ondeh and Pulut Hitam macarons at the same time as the carousel but required whipped white chocolate ganache as the base. I piped an outer ring of whipped white chocolate ganache for the macarons in the base and central pillar of the carousel, such that the macarons will still be structurally stable but yet have a softer bite. I also brushed the inner surface of the shells with some gula melaka syrup which I had on hand to soften the shells a little. Using whipped ganache for the whole carousel is not advisable in Singapore's climate as the filling will be too soft for the carousel to be structurally stable.

Piped a ring of whipped white chocolate ganache and filled the middle with Earl grey lavender white chocolate

With love,
Phay Shing
Read More »

Monday 17 April 2017

Ondeh-Ondeh and Pulut Hitam Sheep Macarons (New recipe!)

I have the privilege of baking for Victoria's little girl's first month celebration. I am a fan of Victoria's bakes and am really happy and excited for this chance to bake for her! She requested for sheep macarons as the little one is her little lamb given by God, and her name is Love :)

Ondeh-Ondeh and Pulut Hitam flavours!

Victoria challenged me to make macarons with these two unique Asian flavours and I think I rose up to the challenge :p. I have made Ondeh-Ondeh macarons before but using the French method, and it was delicious! For a larger batch, Italian method would be better so this is the first time I adapted my original recipe for this method. Pulut Hitam (black glutinous rice) on the other hand was totally new. But I am so glad the experiment turned out fine!

In order to create macarons with these flavours, it is only fitting that I use some coconut to replace some almond meal in the macaron shells. The resulting shells are not as smooth looking as my regular macarons but they are so fragrant with a slightly chewy coconuty bite! The ratio of dessicated coconut: almond meal could do with some refinement but it's more for cosmetic purposes because the taste and texture is still awesome with my current recipe!

Note
Do scale the recipe accordingly as I was catering for a large batch of macarons. During this macaron mania, I catered for a few other smaller requests concurrently. My recipe is reduced sugar as well so if you don't want the hassle of using rice flour and corn flour, simply replace those items with icing sugar.

The sheep templates can be found in my Creative Baking: Macarons book.

Recipe for coconut macaron shells
Ingredients (makes about 65-75 macarons, 130-150 shells):
Mass
170g superfine almond meal
70g dessicated coconut, sifted (I would reduce to 60g next time)
10g coconut cream powder (you may replace with dessicated coconut. I added to enhance flavour)
4g cornflour
13g rice flour
233g icing sugar
1/8 tsp fine sea salt
100g egg whites, preferably aged
A few drops of colourless Pandan flavouring (optional)
1/2 tsp Dutch processed cocoa powder

Meringue
240g caster sugar
96g egg whites, preferably aged
88g water
1/4 tsp cream of tartar (optional)

Steps:
1. Prepare baking tray with template and baking paper over the template.

2. Prepare the mass. Sift almond, dessicated coconut, coconut cream powder, corn flour, rice flour, icing sugar and salt. You may choose not to use some of the dessicated coconut bits that are coarser or grind the dessicated coconut before sifting. Add egg whites and Pandan flavouring (if using). Mix well to form a thick paste.

3. Prepare the meringue. Place caster sugar and water in a small saucepan. Stir a little to wet the sugar thoroughly. Heat the sugar and water until 115℃ on the candy thermometer. In the meantime, beat the egg whites with cream of tartar until soft peaks form. Reduce mixer speed if necessary. Once the temperature is reached, increase the mixer speed to high and carefully pour the syrup into the egg whites in a thin stream. Keep beating on high speed for another 15 minutes or until cool (about body temperature).

4. Fold the meringue into the mass in two additions until the batter flows in a slow-moving lava-like way. You may refer to this post for video tutorials on how to fold the batter and how to test the consistency of the batter. Scoop out about 2-3 tbs of batter and add sifted cocoa powder. Mix well.

5. Transfer batter into piping bags and pipe away! Bang the tray on the table to release trapped air.

Piped shells

6. Dry the shells in air con room or under the fan until you are able to slide a finger across the shells without feeling any stickiness.

7. Bake in preheated oven at 140℃ on lowest rack for 10 minutes. Reduce temperature to 115℃ and bake for another 10-12 minutes or until the feet does not appear wet. Cool completely before carefully removing the baking paper away from the shells.

Freshly baked!

Checkout the awesome feet!

Fluffy, soft and chewy interior!

Victoria requested for no artificial colouring to be used at all so I coloured the pink parts of royal icing with a natural source of food colouring from PME.


The heart-shaped pendants were made by piping royal icing on baking paper with heart template under it. I dried the icing overnight and gently peel it off the baking sheet.


Charcoal powder was used to colour the icing black for the eyes. I used edible marker for the nose.

Decorated shells!

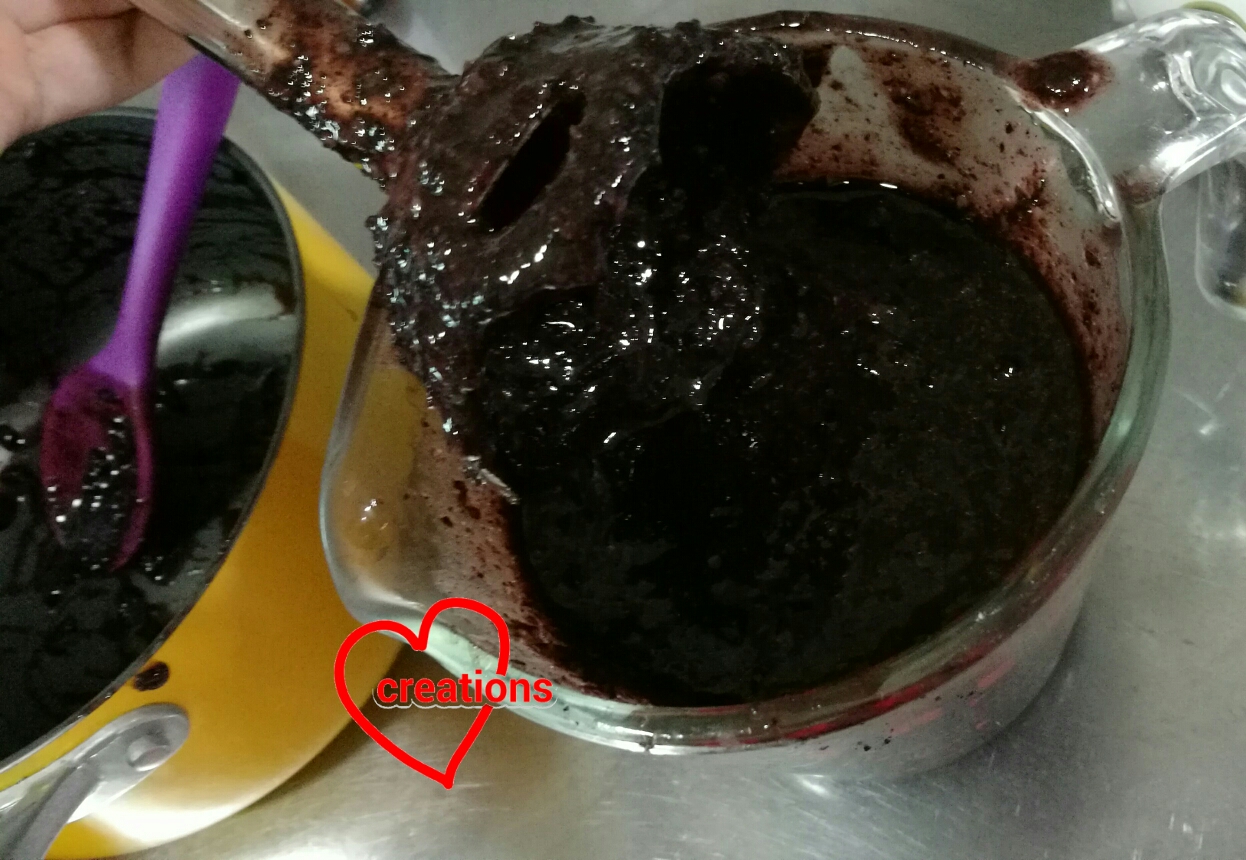
I made the black glutinous rice porridge and froze it earlier on ahead of this macaron mania. Do note that I omitted coconut milk (so as not to have an overpowering coconut flavour as the macaron shells already have coconut, and to improve the shelf life of the filled macarons) and reduced the amount of gula melaka in the porridge to cater for macarons.

Recipe for black glutinous rice porridge
Ingredients:
150g black glutinous rice
750g water
3 Pandan leaves, knotted or cut into big pieces
75g gula melaka, chopped
1/2 tsp salt
1/8 tsp coconut flavouring (optional)

Steps:
1. Wash the rice and soak for 2hours. Drain the water and wash and drain again.
2. Place rice, water and Pandan leaves in a saucepan. Bring to boil and simmer for 15 minutes, stirring now and then. Remove Pandan leaves.
3. Add gula melaka , salt and coconut flavouring (if using). Stir until sugar dissolves.
4. Continue to simmer and stir until the porridge is thick.
5. Remove from heat and blend until as finely as you can. You may cool and freeze this porridge. Simply thaw when you want to use it.


I use a less sweet whipped white chocolate ganache as the base for these macarons. The ganache will taste weird on its own but paired with the sweet shells, it will be just right. The Ondeh-Ondeh filling is flavoured with extra Pandan paste and the pulut hitam filling has a substantial portion of the porridge added in.

Less-sweet whipped white chocolate ganache recipe
Ingredients:
168g White chocolate, chopped
84g Unsalted butter
84g Vegetable shortening
105g Heavy cream
3/4 tsp Fine sea salt
1.5 tsp Caramel flavouring (or vanilla extract if you prefer)
1 tsp lemon juice (to counter the sweetness)
1/2 tsp coconut flavouring

Steps:
1. Place white chocolate, shortening and butter in a microwave-safe bowl. Heat on medium power for 20 seconds and mix well. Repeat until mixture is smooth and melted.

2. Heat cream, lemon juice and flavourings in a small saucepan on low heat until it starts to bubble. Pour over melted chocolate. Mix well with spatula.

3. Add salt and mix well.

4. Freeze the mixing bowl with the ganache for 2 minutes. Mix well with spatula. Repeat until mixture starts firming up. You may switch to electric mixer and beat until creamy.

Whipped white chocolate ganache

Pandan caramel ganache
Add 1/2-1 tsp Pandan paste for every 200g or whipped white chocolate ganache

Pulut Hitam ganache
Use a ratio of 1:1 for whipped ganache : black glutinous rice porridge. I used a ratio of 2:1 for this batch and feel that the flavour is a little understated so you may want to increase the proportion of pulut hitam. Gradually add the porridge into the ganache and mix well.

Whipped Pulut Hitam ganache

Assembly
Pulut Hitam:
Pipe a ring of pulut hitam ganache. Fill the center with the porridge. Place top shell on.

Ondeh-Ondeh:
Pipe a ring of Pandan caramel ganache. Pipe a thin layer of ganache in the middle of the ring to coat the base shell. Fill the "well" with gula melaka syrup. Pipe some ganache over the syrup. Place top shell on.


These Asian flavoured macarons are truly yummy and fragrant! So give it a try if you are fans of Ondeh-Ondeh or pulut hitam!

Here's a sneak peek of the inside of the Ondeh-Ondeh macaron. Forgot to take photo of the pulut hitam one 😅.

Yummy!


With lots of love,
Phay Shing


Read More »

Sunday 16 April 2017

Sweet ‘Lamb’ Cloud pasture-Rainbow Chiffon Cake


I’m very privileged to make this cake for my dear friend Victoria’s baby’s full month celebration. Super happy for her! While making this cake (and such a coincidence as this was Good Friday and Easter week), I was also greatly ministered to and reminded of God’s love for us in giving his only Son Jesus (who died on the cross and rose again) so that we could be reconciled to God.

There was much love in making this cake too. The top tier is a new creation: cloud sky chiffon cake with green pasture! I have shared the recipe for the cloud sky chiffon cake previously. This has added complexity of adding green waves under the cloud-dotted sky. The base tier is a Rainbow chiffon cake, but with 4 colours to fit the 'sunny' colour scheme of the cake. And lastly the 'lamb' figurine on top of a ‘hill’ assembled from small chiffon cake pops.

Cloud-Sky with wavy green pasture

Cloud-Sky with Wavy Green pasture Chiffon Cake (8-inch tube pan)
Egg yolk batter
6 egg yolks
40 g castor sugar
79 g vegetable/corn oil
76 + 5 + 5 g water
10 vanilla extract
120 g Prima cake flour, sifted
1 tsp blue pea flower extract (40 blue pea flowers in 10g hot water)
Blue gel food colouring
½ tsp pandan paste

Meringue
8 egg whites
1/2 tsp cream of tartar
90 g castor sugar

1. Preheat oven to 160°C. Prepare a tray of water under the lowest rack for steambaking. *Optional but helps to increase moisture and control oven temperature for ogura-like texture.

2. Beat egg yolks with sugar with whisk till pale and light before stirring in oil, water, and vanilla extract.

3. Add in sieved flour and whisk till no trace of flour found. Divide the batter ½ (for blue), ¼ (for cloud), ¼ (for green pasture). To the 1/2 portion, add blue pea flower extract and a dip of blue gel food colouring (optional but brightens up the colour). To the first ¼ portion, add 5 g water. To the second ¼ portion, add 5 g water + pandan paste.

4. Meringue: Using an electric mixer, beat the egg whites with ¼ tsp cream of tartar till frothy. Add in half the castor sugar for meringue and whip till soft peaks. Add in all the castor sugar and whip till firm peaks form or just to the point of reaching stiff peak.
*Firm peaks give finer, softer texture, especially with steam baking.

5. Divide the meringue ½ and ¼ and ¼ for each coloured batter. Gently quickly fold in the meringue into respective batter in 3 additions.

6. Spoon the plain batter in cloud-like blobs at the base and sides of the pan, then fill the surrounding spaces with blue pea flower batter. Repeat till the pan is half full. Then deposit mounds of blue batter to make waves (picture tutorial for waves in Creative baking: Chiffon Cakes). Fill the rest of the pan with pandan batter till 2-cm from the brim.

7. Bake the chiffon cake for 15 min at 160°C, then 150°C for 10 min and then 140°C for 25+ min, or until skewer inserted into centre of cake comes out clean.

8. Invert the chiffon cake once removed from oven and allow to cool completely.

9. Unmould the chiffon cake by hand (‘Hand Unmoulding Chiffon Cake for a Clean Finishing’ video tutorial).


4-colour Rainbow Chiffon Cake

I used recipe for my Tri-colour chiffon cake from here. Picture tutorial spooning the batter is found in Creative baking: Chiffon Cakes.


Lamb Chiffon Cake Pop

I baked plain chiffon cake in an egg shell for the body. For the ‘curly’ hair, I used a flower cutter to cut out the shape from chiffon cake from cake pop molds, and assembled together using melted marshmallows. Picture tutorial of sheep chiffon cake pops also found in Deco Chiffon Cakes (2nd chiffon book).


The hill is from baking pandan chiffon cake in a small glass bowl. Other details eg flowers and letters were cut from chiffon sheet cake and pasted on using melted marshmallows.


Thankful everything was well-received! Blessed Easter to all!!

With lots of love,
Susanne

Read More »

Wednesday 12 April 2017

Cat and Sheep Vanilla and Chocolate Macarons

I couldn't resist having fun with these macarons in the midst of a busy period where I perhaps have accomodated too many last minute small quantity requests. Presenting my cute cat and sheep macarons :)

Don't they look like they are on a date where the cat is really happy whereas the sheep is too cold to smile :p


I used the reduced sugar recipe for the macaron shells here. Both regular and reduced sugar recipes can be found here. You may refer to my Creative Baking: Macarons book for a systematic presentation of the basics and complex shaped macarons. You may refer to my video tutorials for macaron basics and piping of complex shapes on the blog too. Templates and steps for making the sheep can be found in Creative Baking: Macarons.

Just to share some photos of the process...

Piping the cat

Decorated shells! I decorated with royal icing and edible marker.

Chocolate and vanilla flavours were requested so I filled the shells with Dark Chocolate ganache or vanilla Swiss meringue buttercream.


More friends have decided to join them!

Have a happy and great week ahead! Don't forget to have a little fun in the midst of busyness ;)

With love,
Phay Shing


Read More »

Sunday 9 April 2017

'Emoji Milk and Merry' Yuzu Chiffon Cake


Are you feeling like this relaxed after a long weekend? =)

This emoji rabbit and dog are 'Milk' and 'Merry' from an app called 'Between'. To be honest, I wasn't aware of them until I got this request. My friend wanted to surprise her boyfriend with this cake for his birthday!! So sweet right?

The base is a yummy yuzu chiffon cake, one of my favorite flavors!!

Yuzu Chiffon Cake (9-inch tube pan)

6 egg yolks (I used 60g eggs with shell)
36g castor sugar
78 g vegetable/corn oil
118g hot water
3.75 tbsp yuzu marmalade or honey citron tea
120g Prima cake flour
Pinch of salt

8 egg whites
¼ tsp cream of tartar
70g castor sugar

1. Make yuzu tea by stirring in 3 ¾ tbsp of yuzu marmalade in 118g hot water. Filter the tea to remove the bits. Leave to cool.


2. Preheat oven to 160°C. Prepare a shallow pan of water under the lowest rack (optional). *I use steam baking to control oven heat and for moister texture but it is optional.

3. Beat egg yolks with sugar with whisk till pale and light before stirring in oil and yuzu tea.

4. Add in sieved flour and salt in 2 additions and whisk till no trace of flour found.

5. Prepare meringue:

a. In a grease-free, dry metal bowl, using electric mixer, whisk egg whites with cream of tartar till frothy.

b. Add in ½ castor sugar for meringue and whisk at high speed till soft peaks form.

c. Add in rest of the castor sugar for meringue and whisk till firm peaks form, or just to the point of reaching stiff peaks.

6. Gently fold meringue into egg yolk batter 1/3 at a time.

7. Fill the chiffon pan leaving 2.5 cm from the top, gently tap to remove air bubbles.

8. Bake at 160°C for 15 min, 150°C for 10 min, 140°C for 20 min, 130°C for 15 min, or until skewer inserted into centre of cake comes out clean.
*This is what I used, but it is just a guide as individual internal oven temperatures vary.

9. Allow to cool completely on wire rack inverted.

10. Gently unmould by hand after cake has completely cooled (see video tutorial).


*For the green patch, I spooned out 8 tsp of egg yolk batter and added green food coloring (I used PME natural green). Then I folded 16 tbsp meringue into the green batter. I spooned it at the base of the pan before adding the yuzu batter.

*You can use the same recipe for a 7-inch tube pan, by dividing all ingredients by two.


For Milk and Merry, I baked chiffon cake in a glass bowl for head, 5-cm cake pop mold for body, and using swissrolls (sliced into 2) for the limbs.


Blessed week ahead!

With love,
Susanne


More loving creations here:


Read More »

Friday 7 April 2017

Brown Sugar Killer Toast Pull-Apart Buns (Gospel message included!)

I have a request for pull-apart buns later part of June but since I haven't baked bread for ages due to the many requests for macarons, cakes and cookies, I decided to do some practice bakes. I have always marvelled at the softness of the killer-toast recipe recommended by Victoria Bakes and decided to give it a try. Do check out Victoria's blog post for the original recipe! The buns really are able to stay soft for a few days!

With Good Friday and Easter coming up, I thought it would be good to reflect on what the Gospel message (good news about Jesus) mean. Here's my simple drawing taken from Matthiasmedia's "Two ways to live", with its simple illustration to show God's salvation plan and the choice all of us have to make, and some "hot cross buns". In summary, God the loving ruler of the world didn't let us rebel forever because separation from God leads to death. God in His love for us provided Jesus to take our punishment for our rebellion by dying in our place and brought forgiveness (that's why we celebrate Good Friday). Jesus was raised to life (therefore we celebrate Easter) and now gives new life to those who believe in Him.


The buns here are slightly underbaked as I was still trying to optimize the baking conditions when I adapted her recipe from loaf to pull-apart buns. Do follow Victoria's recommendations for loaves. The proofing time and baking conditions I wrote in the recipe here is recommended by Kerry Tan, an experienced artisan bread baker. I seeked her advise after I baked these buns so do follow her advise as I blogged here.


Close-up view

Ingredients (makes 9 pull-apart buns in 7x7"baking tray):
260g bread flour
180g 1 egg + full fat milk
30g dark brown sugar (I will increase to 40g in the future)
3g instant dry yeast
3g fine sea salt
30g unsalted butter

Steps:
1. Mix all ingredients together (except butter). Let the mixture sit for 10-15minutes with cling wrap covering the bowl. This step of letting the dough rest is optional but allows time for the flour to absorb more moisture.

2. Knead until smooth then gradually knead in the butter. Continue kneading until the dough passes the windowpane test. I prefer hand-kneading to machine kneading as I like to have a feel of the dough. It takes about 20-25 minutes to knead by hand.

3. Victoria recommends skipping bulk fermentation of the whole batch of freshly kneaded dough but I went on to let it proof anyway but not really double in size. Kerry recommends doing this step as it will improve the structure of the bread. Proof for about 20 minutes in Singapore's hot kitchen of 28℃ cling wrap loosely covering the top of the proofing bowl.

4. Gently knead the dough to expel trapped gas. Divide the dough into 9 equal balls (about 50g each).

5. Line the baking tray with baking paper. Place the balls of dough into the baking tray and cover loosely with cling wrap. Proof for about 40 minutes or until about 2x in size.

6. While proofing, preheat oven to 180℃ and set the rack to lowest position.

7. Place the baking tray into the oven. Bake for about 40 minutes or until done. Tent the buns with aluminum foil at about 15 minutes into baking time to prevent browning. If you would like the buns to brown normally, omit the tenting. The buns are done when it makes a hollow sound when tapped lightly.

8. Let the buns cool in the tray for 5 minutes before carefully lifting them out from the tray onto a cooling rack to cool. I was careless in the transfer and damaged the buns a little =.=

Freshly baked buns!

I dissolved some Dutch processed cocoa powder in water to make a paste and piped out the drawings on the cooled buns. You may use melted compound chocolate to draw too.

Do give the recipe a try and I guarantee you will be enjoying good homebaked super soft buns for a few days!

With lots of love,
Phay Shing


Read More »

Sunday 2 April 2017

Reduced-sugar Lychee and Earl Grey Penguin Chiffon Cupcakes (cooked dough method)

A friend requested for some penguin cupcakes for her birthday because she loves these adorable creatures. As only 8 cupcakes were requested, I have the freedom to be more meticulous about the design. Here are some of the cupcakes, both 2D and 3D versions!

All parts are made of 100% Chiffon sponge!

My friend requested for reduced sugar as her elderly relatives are eating the cupcakes too. I thought of revisiting the cooked dough method of making chiffon cakes as sugar is often omitted in the egg yolk batter and a lower flour:liquid ratio can be used in making the sponge without compromising the structure (thus softer cake). This is possible because cooked wheat flour is able to absorb more moisture.

Although the title of this post says "Earl Grey" and "Lychee" as the primary flavours, there's more to it than just Earl Grey and Lychee. The Earl Grey cupcake includes lavender and honey as well, to add body to the flavour and aroma to the cupcake. You should smell the cakes before you eat it :p! I added some rose water to the lychee cupcake to enhance the fruity flavour of lychee too. In order to ensure that maximum lychee flavour is extracted from the fruit, I pureed some canned lychees (without syrup), sieved it and let it stand in the fridge overnight. I scooped away the top clear layer of liquid and use only the concentrated "debris" at the bottom of the bowl.

I prepared some Earl Grey lavender honey milk tea before baking. Begin by heating 30g of milk with 10g (1/2 tbs) of honey until it starts to bubble and honey is dissolved. Pour the hot milk into a small bowl with 1 Earl grey teabag and 1/2 tsp of dried lavender flowers. Steep for 10min and squeeze the milk out of the teabag. Reserve the teabag for use later.

Making Earl grey lavender honey milk tea.

Recipe for reduced sugar Earl grey chiffon cupcakes and lychee chiffon cupcakes
Ingredients (makes five 65x45mm cupcakes for each flavour):

Note that you may omit splitting the half made batter and double the ingredients marked with * if you are making either lychee or Earl grey cupcakes (10 pieces)

Main egg yolk batter
2 egg yolks, lightly beaten
14g vegetable)/canola oil
14g unsalted butter
36g cake flour
1/8 tsp fine sea salt

Lychee*
18g lychee puree
1/4 tsp lychee flavouring (optional)
1/4 tsp rose water
1/4 tsp vanilla extract

Earl grey*
18g Earl grey lavender honey milk tea
1g Earl grey tea powder (optional)
1/2 teabag Earl grey tea leaves (use 1 bag worth if you don't have Earl grey tea powder)
1 tsp vanilla extract
1/16 tsp baking soda (to neutralize acidity of tea and honey)

Meringue
3 egg whites
1/5 tsp cream of tartar
35g caster sugar

Steps:
1. Preheat oven to 160℃. Place tray of water at bottom of oven (optional). Set rack to second lowest position.

2. Sift together flour and salt. Set aside. Heat oil and butter in a small saucepan at low heat until butter has just melted. Pour flour all in at once and mix until well combined with a spatula.


3. Gradually add egg yolk and mix well. Divide the batter into two equal portions.

4. Add all the ingredients in the * portion to the respective bowls gradually and mix well after each addition. (Top picture below).

5. Prepare the meringue. In a clean metal bowl, beat egg whites with cream of tartar with electric mixer until firm peaks form, gradually adding in sugar once the egg whites appear foamy.

6. Divide meringue into two. Fold the meringue into the respective egg yolk batter in three additions quickly but gently (bottom picture below).


7. Fill the cupcake cases until about 80% full. Gently tap on the table to remove air bubbles. Put into oven and reduce the temperature to 135℃ and bake for 35-40 min or until toothpick comes out clean.

Here's a peek at the super soft interior of the cupcakes! The cakes are so very fragrant and flavourful!

The 2D cupcakes were decorated with thin layered vanilla sheet cakes. The 3D ones were made from cakes baked in eggshells, one for the head and one for the body. The little parts are all made from chiffon sheet cakes. All parts are stuck on using melted marshmellows.

Just to share some pictures of the process...

Behind the scenes stuff you don't see...all the tiny body parts including the eyes!

I inserted a skewer that runs from the head all the way down to the cupcake to secure the cake topper onto the cupcake base.

Half assembled penguins!

Looking cute all packed in the box!

The 3D cupcakes were rather tall so I had to combine two cupcake boxes to make one tall box to house the two 3D cupcakes.

My friend was delighted to see the cute creatures delivered to her! Not only was she pleased with the looks, feedback was they are really yummy too!

With love,
Phay Shing
Read More »