Sunday 30 July 2017

#OneNationTogether 'Singapore Flag' Raspberry Jello-Milk Chiffon Cake (with Video tutorial!)


*Video tutorial up! (1/8/17):


Last year, I shared an easy and yummy way to transform our humble chiffon cake into a Singapore flag! I really liked the theme of ‘Togetherness’ this year, so this is my humble take at the interweaving arms inspired by this year’s ‘One Nation Together’ theme! As the logo was 2D, this is my interpretation of how it looks like with overlapping interweaving arms.

I used Raspberry Jello to impart yummy flavour and colour to the chiffon cake and a special reduced egg yolk recipe to obtain whiter cake naturally without needing to add extra icing colorings for the chiffon cake.

Here’s my creation from last year using a smaller 6-inch tube pan. I heard it was forwarded around on whatsapp as a National day greeting when I had people coming to ask me if I had made it =p.


There are different jello flavours that are pinkish in colour, eg Strawberry and Cherry in addition to Raspberry. Many people have asked me if they can replace the flavour. Yes you can, however, I have tried all the different flavours and I like the Raspberry’s tangy flavour the best! Another finding I had was that if I passed the jello powder through a sieve before mixing into the egg yolk mixture, I had more uniform pinkish red batter without any red specks, hence the nice uniform colour. And again, thanks Michelle for first introducing the idea of jello/jelly powder into cakes. 1 whole egg is used instead of egg yolks to get a whiter base cake. The recipe is for a 7-inch tube pan with excess sheet cake for cutting out the arms and the Singapore shape. This year's recipe is also modified with added vanilla extract for even more fragrance =).


This chiffon cake is also made using my new love, LG's award winning NeoChef Smart Inverter Microwave Oven! Many people have asked me what oven I use to bake my chiffon cakes =). Good news is you don’t need a huge built-in oven to make pretty cakes! The LG NeoChef is an all-in-one microwave oven, with Smart Inverter technology for even oven heat that is really important for chiffon cakes not to deflate. I also love the minimalist, glossy tampered glass front that is so pretty I can’t help peer into my oven while it is baking. Another feature I really like is its Anti-Bacterial EasyClean coating which makes cleaning the microwave interior simple and straightforward. Those who bake know that cleaning the oven can be quite a hassle! 

Hope you will like my humble #OneNationTogether ‘Singapore Flag’ Raspberry Jello-Milk Chiffon Cake creation!

‘Singapore flag’ Raspberry Jello-Milk Chiffon Cake (7-inch tube pan + 6-inch sheet cake)
1 whole egg
33g castor sugar
65g vegetable/corn oil
80g milk
3g vanilla extract
100g Prima cake flour
Pinch of salt
26 g sifted raspberry jello (for ½ cake batter) + ¼ tsp baking powder
7 egg whites
70g castor sugar
¼ tsp cream of tartar

1. Preheat oven to 160°C. *Optional: I used steam baking, i.e. I placed a pan of water under the lowest rack before preheating – to control oven temperature, prevent cracks and for moister texture.

2. Whisk whole egg with sugar until light, fluffy and well-mixed.

3. Add in oil and mix well. Then add in milk and whisk till well-combined.

4. Whisk in sifted cake flour, a pinch of salt and mix till well-combined.

5. Divide the batter into two (approx 28 tsp or 9 tbsp). To one portion, add 26 g sifted jello powder and ¼ tsp baking powder. Whisk well till well-combined and uniform. Leave the remaining batter untouched for the creamy white batter.

6. Prepare meringue:

a. In a grease-free, dry metal bowl, using electric mixer, whisk egg whites with cream of tartar till frothy.

b. Add in ½ castor sugar for meringue and whisk at high speed till soft peaks form.

c. Add in rest of the castor sugar for meringue and whisk till firm peaks form, or just the point of stiff peak. Firm peaks give finer, softer texture.

7. Divide the meringue into two (approximately 56 tbsp). Gently fold in meringue gently into respective red and creamy white egg yolk batter 1/3 at a time.

8. Gently scoop the red batter into an ungreased 7-inch chiffon tube pan, till 40-45%, level the batter and then spoon the creamy white batter over gently, till the tube pan is 80-85% full. Gently tap on counter top to remove air bubbles.

9. Bake at 160°C for 15 min, 140°C for 31+ min, or until skewer inserted into centre of cake comes out clean. **If you use steam baking, you may need to bake for a few more minutes.

10. Invert pan to cool on a wire rack completely.

11. Unmould the chiffon cake by hand (see video tutorial ‘Hand unmoulding Chiffon cakes for a clean finishing’). 

Sheet cake

You may pour the excess red and creamy white batter side-by-side onto a 6-inch baking pan.

Bake at 160°C for 15 min, and then flip onto a new piece of baking paper and cover with another piece to cool completely.

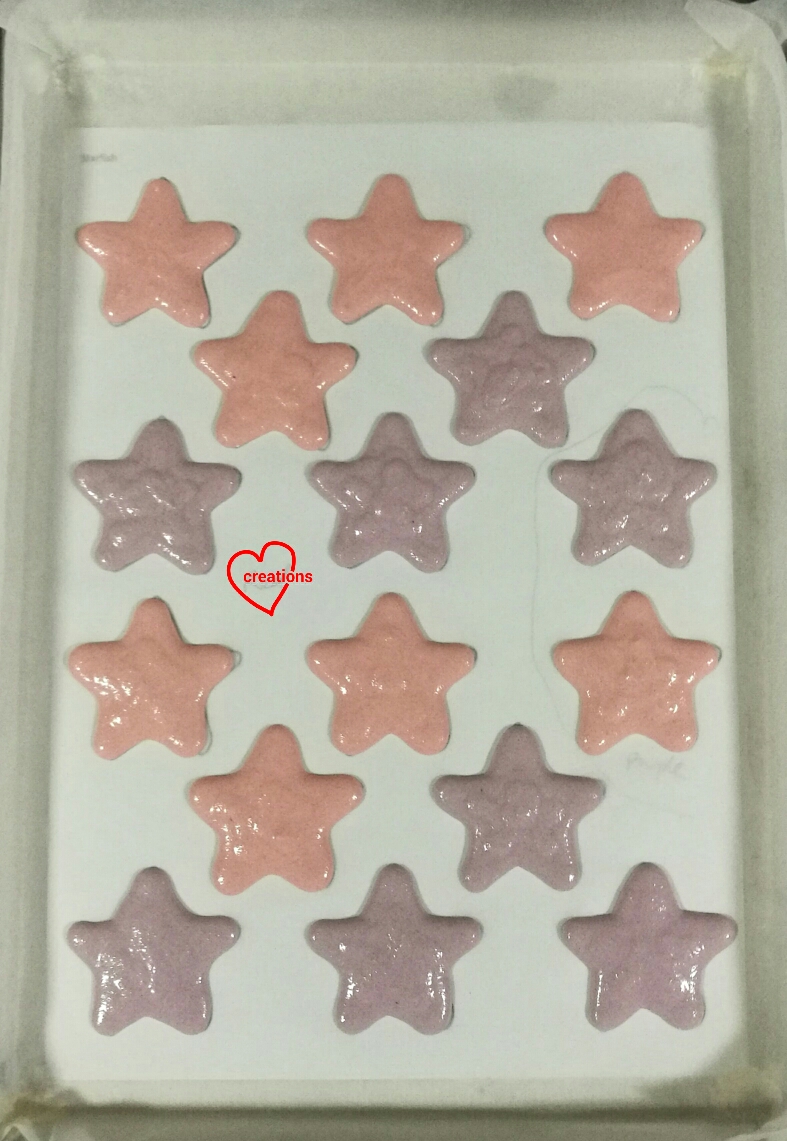
I cut the ‘moon’ for the flag by making two cuts 1-cm apart on the white sheet cake. For the stars, I used a 1-cm star plunger.

The interlocking arms were cut using knife. 

Decoration

To decorate, melt some marshmallows by sprinkling some water onto a few marshmallows in a heat-proof bowl, and then popping in into the microwave for 30 s. This makes the ‘glue’ to stick the cake cut-outs.

Hope you will enjoy this yummy treat for National day!

Made with lots of love,
Susanne

FYI there is the LG Red Fair promotion till 15 Aug, which includes the NeoChef convection oven too - free glass lock container (worth $80) with each purchase :)


Read More »

Wednesday 26 July 2017

Video Tutorial for Piping Unicorn Macaron Shells

I have yet another request for unicorn carousel. Since unicorns are fashionable now, I thought why not make a video tutorial on how to pipe the shells since I have made unicorn macarons many times before. I decided to draw the eyes closed with eyelashes this time, since this is the in thing now :p.


I used the reduced sugar recipe for the macaron shells here. Both regular and reduced sugar recipes can be found here. You may refer to my Creative Baking: Macarons book for a systematic presentation of the basics and complex shaped macarons. You may refer to my video tutorials for macaron basics and piping of complex shapes on the blog too.

Here's the video tutorial!


I hope you found it helpful!

With love,
Phay Shing
Read More »

Monday 24 July 2017

Mermaid Themed Macarons II (Swiss method)

I have another request for mermaid macarons along with seashells and starfish. But it's assorted flavours this time.


You may refer to this post for my first set of mermaid themed macarons.

I made these using my usual reduced sugar Italian method recipe but something happened and I needed to rebake the starfish so I took the chance to try out Swiss method. The "accident" was quite hilarious and I was fortunate it happened to the starfish and not to the mermaids which were a lot more time consuming to pipe. I was trying to speed up drying of royal icing decorations on the starfish using my oven but I forgot to check the temperature setting which was left at 200℃ from baking the previous night's dinner. When I realised something was wrong, the stars have charred! They looked so much like cartoon characters after an explosion that I had to laugh! Baking boo-boos do happen :p.

Since it was only a small batch that needed rebaking, I took the chance to use the Swiss method which I have been wanting to try but had no time for. The Swiss method is similar to the French method, except that you partially cook the egg whites. It is more stable than the French method and good for making small batches. I have posted another Swiss method recipe which I used to make my first ferris wheel. I am going to share my first attempt at Swiss method here which was more successful than my second attempt with another recipe which I adapted from here.

Swiss method macaron shell recipe
Ingredients (makes 12-15 macarons):
42g egg whites
42g caster sugar
56g superfine almond meal
38g icing sugar (with cornflour already added)
Gel food colouring (if using)

Steps:
1. Prepare baking trays with template and baking paper over it. Sift together almond and icing sugar. Set aside. I divided the powder mixture into two as I was making two colours of batter.

2. Whisk caster sugar and egg whites together over a pot of simmering water until all the sugar has dissolved and temperature is 45-50℃. Remove from heat.

3. Beat the egg whites at medium speed using an electric mixer until stiff peaks form. Divide the meringue into two. Use some meringue to stick the baking paper down to tray.

Note that the meringue should still be smooth but peaks are upright.

4. Add gel colouring to the meringue and gently fold in to mix the colour in.


5. Scatter the powder mixture over the meringue and fold in. You may choose to scatter a few times or all at once.


6. Keep folding until batter is smooth and is able to flow off the spatula in an almost continuous manner. Please refer to this video for the correct consistency.


7. Transfer into piping bag fitted with piping tip of desired size. Pipe away! You may refer to this post on how to pipe complex shapes and a more systematic presentation from my Creative Baking: Macarons book.

Piping stars!

8. Some suggest that you don't need to rest macaron shells baked using Swiss method. Simply bang the tray on the table after piping and bake in preheated oven at 130℃. I didn't have the guts to try it so I still went ahead and dried in aircon room until dry to touch before baking in preheated oven. I preheated to 150℃ but turned the temperature down to 130℃ once the tray is in. Set oven rack to lowest rack. Bake for about 20 min or until feet no longer appears wet. Cool completely before removing baking sheet away from shell.

Checkout the feet!

Nice fluffy interior with no hollows!

However, I find that I am unable to get a really smooth shell surface with this method without risking over folding.

I filled the shells with dark chocolate ganache, mango white chocolate ganache or strawberry white chocolate ganache. Find out how I made the edible pearls from here.

Dark Chocolate ganache filling

Mango white chocolate filling with white chocolate pearls

Strawberry white chocolate filling

Since it was my first try, I had to do a taste test as well. Freshly baked shells didn't seem as delicate (slightly chewy) but after maturing with filling for a day, the texture was perfect. Here's a peek at the insides!


You may want to give Swiss method a try if you would like to work with small batches but want something more stable than the French method. There are people who swear by the Swiss method whereas some have difficulty mastering it. For me, it's an option if I want to work with small batches. On macaron mania days when I have to work with multiple colours and large batches, I still prefer to stick with Italian method.

With love,
Phay Shing


Read More »

Sunday 23 July 2017

3D Minions Chef Chiffon Cake


Haven't made Minions for a long time. This Minions Chef is made entirely from chiffon for a dear friend's son! The yellow is from vanilla lemon chiffon cake, while the plain and black are from vanilla and charcoal chiffon cakes respectively. I really liked the theme of "chef" because it reflects my own love for making cakes! You can see my previous post on 3D Minions cake for more details. I used a similar recipe, except that I substituted the blue with plain batter and charcoal batter, and added lemon zest for the yellow batter. Thankful the chiffon cake was well-received by the little kids!

With lots of love,
Susanne


*Creative baking cookbooks now available at Naiise in Singapore and Malaysia! 

Read More »

Monday 17 July 2017

Cookies n Cream Macaron Ferris Wheel (complete with moving parts!)

This is a bake that's not requested by anyone but I had the idea since a year ago. I took my time to mull over it and finally worked out how to make it work. Presenting possibly the world's first ferris wheel made entirely out of macarons!

Pardon the poor quality of photo as I was in a hurry when I took this.

Checkout the ferris wheel in motion!

I kept the design simple as I wasn't sure it would work. Future ferris wheels could have cute animals or characters sitting in the cabins and other customizations for birthday boy/girl.

I took the chance to practice Swiss meringue method of making macarons too. You have seen both Italian and French methods on this blog but not Swiss method. Let me take the chance to share it with you here. I was a little ambitious and did a reduced sugar version which you need not follow if you prefer to keep the recipe simple. I also used some natural food colouring to reduce the use of artificial colouring.

My recipe is adapted from Broma bakery method which uses an extremely easy to remember ratio of all ingredients, which is egg whites : caster sugar : icing sugar : almond meal is 1:1:1:1 by weight.

This is my second attempt at Swiss method and I regretted attempting something that was suggested by some people sharing in a macaron group, not to whip the Swiss meringue to stiff peaks but firm peaks only. My shells took really long to dry and I was losing patience so some of them turned out with no feet (the pink cabins). My first attempt dried much faster but I was using a different recipe. Having said that, the shells have no hollows at all and the meringue is more stable than French method as it is partially cooked. The texture if the shells were delicate to bite too. Both French and Swiss method are great if you are making a smaller quantity of macarons and/or working with one, two or three colours. Italian method is still my favourite when working with multicoloured large batches.

Recipe for Swiss method macaron shells
Ingredients:
100g almond meal (preferably superfine)
90g icing sugar
2g cornflour*
8g rice flour*
100g egg whites
95g caster sugar (use 100g if following Broma bakery's recipe)
1/4 tsp fine sea salt
1/4 tsp cream of tartar (optional)
1/4 tsp white powder food colouring (optional)
1/4 tsp cherry blossom powder (optional)
1/4 tsp purple sweet potato powder (optional)
Tiny drop of pink and purple gel food colouring

* Replace with icing sugar if you wish.

Steps:
1. Sift almond, icing sugar, rice flour, corn flour and white powder together. Divide the powder mixture into ratio of 6:1:1 for white:pink:purple. Add sifted cherry blossom and purple sweet potato. Mix well and set aside.


2. Place egg whites, caster sugar, salt and cream of tartar in a metal bowl that can be placed over the mouth of a saucepan without the base of the bowl touching the water in the pan. Whisk the egg whites over simmering water in the saucepan until all the sugar has dissolved and temperature is 45-50℃. Remove from heat. Use an electric mixer to beat on medium speed until stiff peaks form. The meringue should be smooth and not lumpy but the peaks should be really stiff. Divide the meringue into ratio of 6:1:1 for white:pink:purple. Add gel colouring to the meringue and mix well gently with a spatula.

3. Scatter the dry ingredients over the meringue. Use a spatula to fold until batter flows off the spatula in an almost continuous manner and not in blobs. Please refer to this video tutorial for the consistency you should get.

4. Transfer the batter into piping bags fitted with Wilton #10 for white colour and #7 for pink and purple. Pipe on baking trays lined with baking paper and template under it. I apologise for not being able to share the templates at this point in time. Please refer to this for video tutorials on how to pipe complex shapes. You may refer to my Creative Baking: Macarons book for a more systematic description of the techniques too.

Piping the main frame of the ferris wheel. This is the most challenging part as it requires really steady hands and patience.

Piping the supporting structures

Piping small round stoppers

Piping the cabins and center circles of supports. I decided to use one unfilled macaron shell for cabins as I wasn't sure if the structure would support filled macarons which are a lot heavier. The pink and purple shells have mild flavour of their own so it's great to eat as a cookie on its own.

5. Bang the trays on the table to release trapped air bubbles. Use a toothpick to pop any stubborn bubbles. Dry the shells in aircon room or under a fan until dry to touch. Some suggest that no drying time is required but I prefer to do so. If the meringue is stiff enough, the drying time shouldn't take too long.

6. While waiting for shells to dry, you may preheat the oven to 160℃ and set the rack to lowest position. When shells are put into oven to bake, immediately turn the temperature down to 140℃. Bake for 10 min. Reduce temperature to 110℃ and bake until the feet no longer appear wet. Note that the small round stoppers are baked for only 10 minutes. Bigger pieces take anywhere from 25-30 minutes. Cool completely before carefully peeling the baking sheet away from the shells.

Freshly baked shells!

I decorated the shells with some royal icing.

As the structure has to be displayed at warm Singapore room temperature, the filling has to be firm enough at 27-28℃. I have come up with a recipe for non-refrigerated cookies n cream that's yummy. It can be used for macaron carousels and macaron pops too.

Recipe for non-refrigerated cookies n cream filling
Ingredients:
120g white chocolate, chopped (I used vanilla bean white chocolate)
25g vegetable shortening
30g Oreo cookie, without cream and finely chopped
1/4 tsp vanilla bean paste
1/8 tsp fine sea salt

Steps:
1. Place shortening and chocolate in microwave safe bowl. Melt at medium power for bursts of 10 seconds, stirring in between each heating cycle until mixture is smooth. Do not overheat.

2. Add salt and vanilla and mix well.

3. Fold in chopped cookies.

4. Transfer to piping bag and carefully pipe onto the main ferris wheel frame and supporting structures.


Assembly
I have given this baby much thought so I am unable to share too much details at this point in time. Perhaps after a few ferris wheels later. What I can reveal is, just like the macaron carousels, the weight bearing structures need to be given time for the royal icing (glue for all the parts) to fully set before doing the full assembly so some patience is needed.

As macarons are delicate in nature, some reinforcements are needed. I have done so with a few concealed reinforcement supports (easily available from baking supply stores).

Perhaps the tricky or “ingenious” part about this whole thing is how the hinges are created. I used materials that can be easily found in baking supply shops so it's not as difficult as you think :).

And just when you think "Woohoo! The ferris wheel works! It spins so beautifully!" You may wonder, "How am I going to transport the whole thing without the structure collapsing when we encounter a hump on the road??" I figured out a simple edible solution to lock the ferris wheel such that it doesn't rotate until you remove the locking mechanism.

My friend said this is such a timely creation as she was about to attend a friend's baby shower. I did the simplest customization I could since it was quite last minute, by writing the baby's name on the ferris wheel with edible marker.

All ready to go to the party!

The ferris wheel survived the trip to the party without anything collapsing. The kids had fun spinning the wheel (and it didn't collapse too!) and were shocked that this toy is actually edible!

You can't imagine how excited and happy I was to hear that as this whole thing was experimental! Thank God for providing the inspiration right down to the nitty gritty mechanics! I think this experiment also opens up an avenue for different macaron structures with moving parts that work. Hopefully I will rise up to the challenge for future requests. Are you game enough to let me make a customized ferris wheel for you ;) ?


With love and lots of inspiration from God,
Phay Shing

Read More »

Sunday 16 July 2017

'Shopkins Soda Pop!'-inspired Chiffon Cake (Strawberry yoghurt-Vanilla Chiffon)


Haven't posted Shopkins for a while since my last Shopkins Ice-cream Chiffon Cake! This is inspired by the cute "Soda Pop!" from Shopkins, from my friend's girl =).

I had fun making the cute "Pop!" from chiffon cake! The chiffon cake is a two-tone Strawberry yoghurt-Vanilla Chiffon Cake using the same recipe as here. I kind of made it sloping by tilting the pan a bit haha. Thank God it worked out well =).

Have a blessed week ahead!

With lots of love,
Susanne


*New updates in Deco Chiffon Cakes page
*Creative baking cookbooks now available at Naiise in Malaysia! 

Read More »

Thursday 13 July 2017

Mango Chiffon Cupcakes with Vanilla Bean Swiss Meringue Buttercream & Mango Jelly

Simple bakes like this one is a joy to bake :). You have seen many fancier items from me but I like making simple things too! My friend requested for mango chiffon cupcakes with vanilla cream for her son's birthday celebration in school. I took the liberty of adding a simple mango jelly deco and chocolate rice sprinkles.

Mango chiffon cupcakes with vanilla bean Swiss meringue buttercream and mango jelly!

Recipe for mango chiffon cupcakes
Ingredients (makes about twenty-four 35x44mm cupcakes):
5 egg yolks
70g canola/vegetable oil
86g mango puree
100g cake flour
1/8 tsp salt
1 tsp vanilla extract
1/4 tsp mango flavouring (optional)

7 egg whites
1/3 tsp cream of tartar
105g caster sugar

Steps:
1. Preheat oven to 160℃. Prepare a tray of water at base of oven (optional). Set oven rack to second lowest position.

2. Prepare egg yolk batter. Whisk egg yolks until pale and thick. Add oil ane whisk until combined. Add puree, extract and flavouring. Mix well. Gradually sift in flour and salt and whisk until no trace of flour is seen.

3. Prepare meringue. In a clean metal bowl, use an electric mixer to beat egg whites with cream of tartar until firm peaks form, gradually adding in caster sugar along the way.

Just a note: notice that all the caster sugar is in the meringue and none in egg yolk batter. This is to help stabilize the meringue more and lend it a finer texture with smaller air bubbles.

4. Quickly but gently fold the meringue into the egg yolk batter in three additions. Carefully spoon the batter into cupcake cases until about 80% full. Tap the case on the table and place on baking tray.

5. Put the cupcakes in the oven and turn the temperature down to 135℃. Bake for 40-45 minutes or until skewer comes out clean. Note that baking time is shorter if no water is placed at the bottom of oven. Cool completely before storing or decorating.

You may find the recipe for reduced-sugar vanilla Swiss meringue buttercream over here. You may prepare in advance and freeze it in ziplock bag. Simply thaw at room temperature and rewhip before using.

Recipe for mango jelly
Ingredients:
100g Mango puree
120g Water
40g Milk
40g Sugar (add more or less according to sweetness of mangoes and to taste)
2 tsp Agar powder

Steps:
1. Place all ingredients except puree in saucepan. Stir and bring to a boil, until agar powder dissolves.

2. Add puree and continue to stir until mixture boils again.

3. Pour into mould or tray until about 7-8mm thick layer of jelly. Refrigerate for 1h or until firm. You may prepare this the day before if you wish.

4. Carefully unmould the jelly onto baking sheet. Use a small heart shaped cookie cutter to cut out the hearts.


Use a open star times nozzle to pipe buttercream swirls onto the cupcake. Sprinkle some chocolate rice.


Top it up with the mango heart jelly and you are done :). The cakes can store in the fridge for a few days. Let it come to room temperature before serving as the cream will be hard.

All packed for party!

Here's a peek at the moist, soft and sponge interior.

My friend decorated the cupcakes with cute Pokemon themed flags. And kindly shared the photo with me.


Thank God it was very well received. I made extra to let my neighbour and my kids try. They all loved it too!

With love,
Phay Shing


Read More »

Monday 10 July 2017

PJ Masks Strawberry Cream Cheese Macarons (new filling recipe!)

Besides requesting for PJ Mask themed macarons, I was asked to fill the macarons with something that is kiddy, not too sweet and not dark chocolate based. Here's my version of strawberry cream cheese macarons with a small dollop of homemade strawberry jam!


I used the reduced sugar recipe for the macaron shells here. Both regular and reduced sugar recipes can be found here. You may refer to my Creative Baking: Macarons book for a systematic presentation of the basics and complex shaped macarons. You may refer to my video tutorials for macaron basics and piping of complex shapes on the blog too.

Just to share some photos of making the shells...


Piping shells

Freshly baked shells!

I decorated the shells with edible marker and royal icing.


Strawberry jam and cream cheese recipe
Ingredients (fills about 40 macarons):
Strawberry jam
30g strawberry puree
1 tsp lemon juice
15g caster sugar
A pinch of salt

Strawberry cream cheese
60g cream cheese (softened at room temperature)
30g unsalted butter (room temperature)
30g vanilla bean white chocolate*
1/2 tsp strawberry emulco/paste/emulsion
1/2 tsp vanilla extract
1/8 tsp salt

*You may use any brand of your favourite white chocolate for eating. I have discovered this a couple of months ago. Really yummy and easy to work with compared to couverture.

Steps:
1. Prepare strawberry puree by blending and sieving fresh strawberries.

2. Combine all ingredients for the jam in a small saucepan and cook over low heat until mixture thickens. Set aside to cool.

3. Beat softened butter and cream cheese together until pale and fluffy.

4. Melt white chocolate over double boiler or in microwave oven. Be careful not to overheat. Let the melted chocolate cool a little while stirring it to prevent it from solidifying.

5. Slowly pour the melted chocolate into the cream cheese mixture and mix well with electric mixer. Add salt and mix well. Don't panic if your mixture appears to separate. Chill the whole bowl in the freezer for a couple of minutes and beat again with the mixer. Repeat this until you get a nice homogeneous texture.

Cream cheese white chocolate base.

6. Add strawberry puree a tbs at a time beat with electric mixer.


7. Add strawberry emulsion and vanilla extract. Mix well again


Transfer cream cheese filling into piping bag and pipe onto the bottom shells. Add a bit of strawberry jam in the middle and sandwich with top shell. Store assembled shells in fridge for at least 24h before serving.

Filling the shells!

This filling is not too sweet, rich yet fluffy and slightly tart.

I am happy to find another less sweet macaron filling base other than my usual white chocolate ganache or Swiss meringue buttercream. You may pair the cream cheese base with other fruity, tea, caramel or chocolate flavours too!

With love,
Phay Shing
Read More »