When my friend knew that I was baking for other people, she wanted a bake from me too, especially after seeing my post on the Ombre Matcha White Chocolate Hearts. So I decided to use up my remaining ingredients from the weekend bake to make a cake for her, with lots of Matcha white choc thrown in. She likes dogs and has an absolutely cute one at home so I made a doggie cake for her :).

This cake is the result of a failed swiss roll. Can you believe it? It is the first time I baked a really thick layer cake and wondered if it could be rolled. Now I know I better not try :p. The cake cracked despite my efforts to make slits on the cake surface to aid with the rolling. All my chiffon layer cakes have been very bendy and thin so far. I guess we learn best from our mistakes. A valuable lesson I learnt about how to salvage a cracked swiss roll too :).
I adapted my recipe from Ochikeron. That could also be partly why the swiss roll cracked as I did some major substitution to incorporate red bean flavor in the cake. I should have stuck with my regular Azuki chiffon recipe that has always been very bendy despite sitting out for a long time. Nevertheless, the cake texture is still very nice, soft and wonderful as a layered cake.
Ingredients:
Egg yolk batter
1 egg yolk
30g caster sugar
20ml + 25 ml canola oil
25g red bean paste, sieved to remove skins
35g water
1/4 tsp vanilla essence
67g cake flour
1/4 tsp baking powder
A few drops of liquid red food coloring (optional)
Pattern
Meringue
2 egg whites
1/8 tsp cream of tartar
(should have added about 15g of caster sugar to stabilize the meringue structure but didn't)
Black
1/4 tsp cake flour
1/4 tsp charcoal
1tsp egg yolk batter
3 tbs meringue
Brown
3/8 tsp cake flour
1/8 tsp cocoa powder
1 tsp egg yolk batter
3 tbs meringue
White
1/2 tsp cake flour
1 tsp egg yolk batter
3 tbs meringue
A few drops of white gel food coloring
Green
3/8 tsp Matcha powder
3/8 tsp cake flour
3 tsp egg yolk batter
9 tbs meringue
Main batter meringue
4 egg whites
1/4 tsp cream of tartar
30g caster sugar
Syrup
2 tsp caster sugar
20ml hot water
1/2 tsp Matcha powder
Red bean cream
200ml whipping cream
2 tbs icing sugar
Some canned Azuki beans
Steps:
1. Cut silicone baking sheet to fit pan size (10 x 10") and place stencil under baking sheet. I find that using silicone baking sheet results in a smoother surfaced cake. Paper baking sheets tend to leave wrinkles on the surface of the cake. I drew my own stencil as pictures of doggies online are not as cute as the stuffed toy we have at home ;).

2. Grease the silicone baking sheet with oil so that the patterns don't stick to the sheet. Preheat the oven to 170 degrees Celsius.
3. Prepare the egg yolk batter. Use an electric mixer to beat egg yolk, sugar, 20ml of oil until white. Add water, red bean paste, 25ml of oil and vanilla essence and mix well. Sift in flour and baking powder and mix well.
4. In 4 small bowls, mix well all of the ingredients of the different colors except for meringue. In a clean grease free metal bowl, beat 2 egg whites until foamy and add cream of tartar. Beat until soft peaks form and add sugar gradually until stiff peaks form. Gently but quickly fold in the meringue into all the colored batters. Transfer the batters into piping bags fitted with small round tips (I used wilton #3 and #5 tips)
5. Start with the black outline of the doggie and bake for 30 seconds. pipe in the white body, brown ears, green footprints and stripes and bake for another 1.5 minutes. Bake for 30 seconds more if the batter is still not dry.

6. Add a few drops of liquid red food coloring into the egg yolk batter and mix well.
7. Prepare the meringue for the main batter following the steps in 4. Fold in 1/3 of the meringue into the egg yolk batter and mix well. Quickly but gently fold in the rest of the meringue in two batches. Slowly pour the batter into the pan and drop the pan a few times on the table top to release any trapped air bubbles.
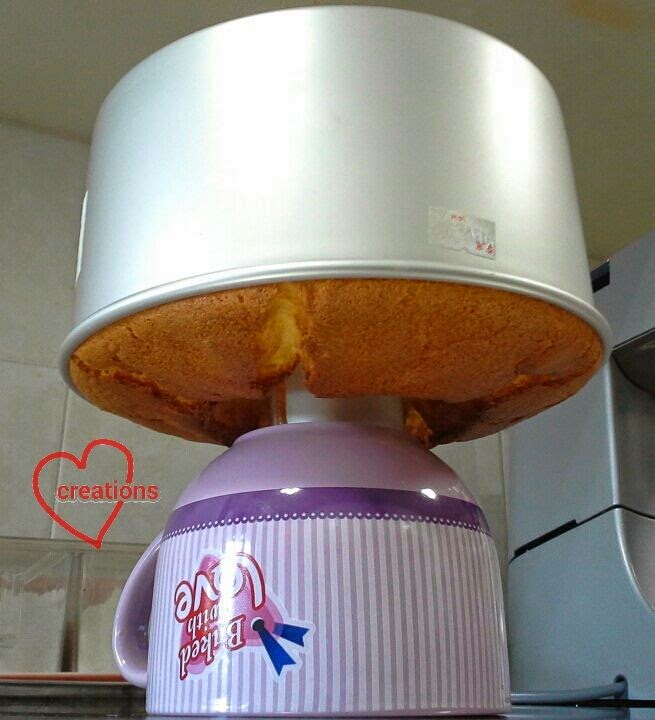
8. Bake for 14 minutes. Cut around the pan sides, cover with baking sheet and flip the tray upside down. Leave the cake on wire rack to cool with another sheet covering it.


I salvaged whatever I could of my cracked swiss roll and made it into a 3-layered red bean cream cake with cream and matcha white chocolate hearts decorating the sides of the cake. So relieved that I could still give something presentable to my friend :P.

My friend and her colleagues loved the cake, especially the red bean and green tea chocolates combination. The cake was not too sweet and the sponge was nice and fluffy :). She has kindly taken some photos of the cut-up cake for me.

With love,
Phay Shing
Read More »
I adapted my recipe from Ochikeron. That could also be partly why the swiss roll cracked as I did some major substitution to incorporate red bean flavor in the cake. I should have stuck with my regular Azuki chiffon recipe that has always been very bendy despite sitting out for a long time. Nevertheless, the cake texture is still very nice, soft and wonderful as a layered cake.
Ingredients:
Egg yolk batter
1 egg yolk
30g caster sugar
20ml + 25 ml canola oil
25g red bean paste, sieved to remove skins
35g water
1/4 tsp vanilla essence
67g cake flour
1/4 tsp baking powder
A few drops of liquid red food coloring (optional)
Pattern
Meringue
2 egg whites
1/8 tsp cream of tartar
(should have added about 15g of caster sugar to stabilize the meringue structure but didn't)
Black
1/4 tsp cake flour
1/4 tsp charcoal
1tsp egg yolk batter
3 tbs meringue
Brown
3/8 tsp cake flour
1/8 tsp cocoa powder
1 tsp egg yolk batter
3 tbs meringue
White
1/2 tsp cake flour
1 tsp egg yolk batter
3 tbs meringue
A few drops of white gel food coloring
Green
3/8 tsp Matcha powder
3/8 tsp cake flour
3 tsp egg yolk batter
9 tbs meringue
Main batter meringue
4 egg whites
1/4 tsp cream of tartar
30g caster sugar
Syrup
2 tsp caster sugar
20ml hot water
1/2 tsp Matcha powder
Red bean cream
200ml whipping cream
2 tbs icing sugar
Some canned Azuki beans
Steps:
1. Cut silicone baking sheet to fit pan size (10 x 10") and place stencil under baking sheet. I find that using silicone baking sheet results in a smoother surfaced cake. Paper baking sheets tend to leave wrinkles on the surface of the cake. I drew my own stencil as pictures of doggies online are not as cute as the stuffed toy we have at home ;).
2. Grease the silicone baking sheet with oil so that the patterns don't stick to the sheet. Preheat the oven to 170 degrees Celsius.
3. Prepare the egg yolk batter. Use an electric mixer to beat egg yolk, sugar, 20ml of oil until white. Add water, red bean paste, 25ml of oil and vanilla essence and mix well. Sift in flour and baking powder and mix well.
4. In 4 small bowls, mix well all of the ingredients of the different colors except for meringue. In a clean grease free metal bowl, beat 2 egg whites until foamy and add cream of tartar. Beat until soft peaks form and add sugar gradually until stiff peaks form. Gently but quickly fold in the meringue into all the colored batters. Transfer the batters into piping bags fitted with small round tips (I used wilton #3 and #5 tips)
5. Start with the black outline of the doggie and bake for 30 seconds. pipe in the white body, brown ears, green footprints and stripes and bake for another 1.5 minutes. Bake for 30 seconds more if the batter is still not dry.
6. Add a few drops of liquid red food coloring into the egg yolk batter and mix well.
7. Prepare the meringue for the main batter following the steps in 4. Fold in 1/3 of the meringue into the egg yolk batter and mix well. Quickly but gently fold in the rest of the meringue in two batches. Slowly pour the batter into the pan and drop the pan a few times on the table top to release any trapped air bubbles.
8. Bake for 14 minutes. Cut around the pan sides, cover with baking sheet and flip the tray upside down. Leave the cake on wire rack to cool with another sheet covering it.
So glad that the patterns came out beautifully!
My cake turned out rather thick possibly because I used really large eggs. If you are making it swiss roll style, prepare the syrup (sugar, hot water and matcha powder) and brush it on the surface of the cake before filling with cream and rolling it.
9. Prepare the red bean cream by whipping cold whipping cream with electric mixer until it thickens. Add sugar and whip until firm peaks form. Fold in some Azuki bean paste (I used about 4-5 tbs. You may add more or less according to your taste) a bit at a time. For the swiss roll I just lined the cream with red bean paste instead of folding it in. After the roll cracked, I just mixed the bean paste into the cream and added to the layered cake.I salvaged whatever I could of my cracked swiss roll and made it into a 3-layered red bean cream cake with cream and matcha white chocolate hearts decorating the sides of the cake. So relieved that I could still give something presentable to my friend :P.
My friend and her colleagues loved the cake, especially the red bean and green tea chocolates combination. The cake was not too sweet and the sponge was nice and fluffy :). She has kindly taken some photos of the cut-up cake for me.
With love,
Phay Shing


