Pages

Tuesday, 29 March 2022

Kangaroo Mum and Joey Milo Coffee Chocolate Macaron Class

 This is the second of my Mother's Day themed macaron class featuring the use of royal icing transfers to simplify a macaron bake . Kangaroo mum and joey Milo coffee chocolate macarons! I really love this flavour combination of logcake when I made it last Christmas and decided to create a macaron version of it. I try not to use artificial food colours whenever possible and use flavours that the colouring ingredient provides.


The special technique I want to focus is the use of royal icing transfers in complex character macarons. It really simplifies the piping by reducing number of coloured batter to make and the number of layers you have to account for when piping the batter.

Click on this link for details of the class and to register.


with love,

Phay Shing


Brown sugar Sushi platter chiffon cake


Brown sugar Sushi platter chiffon cake!
Which is your favourite "Sushi"?

Recipe 
Brown sugar Wood grain chiffon cake 
3 egg yolks 
25g brown sugar 
30g vegetable oil 
35g water 
45g cake flour 
@suncorefoods vermillion annatto (1/4 tsp) and matcha powder (1/4 tsp) 
3 egg whites 
30g castor sugar 
1/4 tsp cream of tartar 

Whisk egg yolks with brown sugar, followed by oil and water. Add in sifted flour and whisk till well combined. Remove 5 tsp batter and add a vermillion and matcha powder to make dark brown batter.
In another mixing bowl, whisk egg whites with sugar till firm peaks. Transfer 10 tbsp meringue into dark brown batter, and the remaining meringue into brown sugar batter. Fold well and pipe dark brown wood grains onto the tube pan. Fill spaces with brown sugar batter. Bake in a 7” cake pan at 140C for 1hr. 
Hope this made you smile!  

With love, 
Susanne 

Wednesday, 23 March 2022

Koala Mum and Joey Matcha Black Sesame Macaron Class

 Some macaron designs require many layers of batter to create some definition on the subject. This means that it takes a long time to create everything out of macaron batter. In order to simplify the process, we can use royal icing for some details like the heart flowers in these 😊.


This creation also uses 3 macaron shells per macaron to create a more 3D effect.

This class is the first of two of my Mother's Day themed macaron classes . I chose matcha black sesame as the flavour for this creation as matcha and black sesame are great for mum's health.

This class that features the use of royal icing transfers is up for registration with Artz Baking and Culinary Studio. Please click on this link for more details and to register.


With love,

Phay Shing

Sunday, 20 March 2022

Cute Animals Bento Chiffon Cake Class


*New Class* 
Cute Animals Bento Chiffon Cakes!💕 

Join me to learn how to make these cuties in March!🥰 

You will learn how to bake these cute animals chiffon cake toppers as well as pastel bento chiffon cakes. 

Link to join is here

You can see a short video more about what you will learn here

See you! 

Love, 
Susanne 

Saturday, 19 March 2022

Elmo and Cookie Monster Chocolate Drip Cake

I made this Elmo and Cookie Monster chocolate drip cake a few months ago but didn't get around to posting it. 


You may have noticed that I seldom place macarons directly on cakes as they turn soft and soggy in no time due to moisture released from the chiffon sponge, fresh cream and fresh fruits. But since this type of cake is totally  frosted with a higher fat content type of frosting (ganache), it is pretty safe to place the macarons directly on the cake. But for large macaron cake toppers like this one, I had to use cakepop sticks to secure it into the cake. 

I baked chocolate chip cookies as cake decoration too! I used this recipe for the cookies. 

Besides the cake, I made a batch of loose macarons as well of Elmo and Cookie Monster. I used my default Swiss meringue method recipe for the macarons. 

The chocolate drip cake and macaron filling recipe can be found here, except that I use dairy whipping cream and dairy milk instead of non-dairy options. 

Just to share some pictures of the process... 

Piped batter of Elmo and Cookie Monster heads


Piped batter for the giant macaron cake topper! I always make duplicates just in case. 

Views of the decorated macaron shells! I used edible marker and royal icing to add in the details. 


With love,

Phay Shing 

Monday, 14 March 2022

Watermelon Roll Cake


A slice of sweet and delicious watermelon? 🍉  Watermelon Chiffon Roll Cake!🥰 

Recipe and tutorial below: 


Ingredients 
6 egg yolks 
30g castor sugar 
60g vegetable oil 
60g milk 
1.5 tsp vanilla extract 
90g cake flour 
Black sesame seeds 

6 egg whites 
70g castor sugar 
1/4 tsp cream of tartar 

@suncorefoods red radish and orange vermillion (for red), yellow safflower and blue spirulina (for green) for the colors 

Whisk egg yolks with sugar, followed by oil, milk and vanilla. Add in flour and whisk till well combined. Divide the batter into 3 for green, red and plain. Add in supercolor powders and mix till desired colors. Further divide the green batter into 2 and add a pinch of blue powder for darker green. 

In another mixing bowl, whisk egg whites with sugar till firm peaks. Divide the meringue similar to above. Fold in the meringue to the above batters. 

Pipe alternating green and dark green lines in a quarter sheet pan and lightly marble the batter. Bake at 160C for 16 mins. Pour red batter into 4 round cupcake liners, sprinkling black sesame seeds, and bake at 160C for 25+ mins. Pour the plain batter into another sheet pan and bake for 16 mins. 

Assembly: Stack the the plain sheet cake on top of the green watermelon sheet cake, applying marshmallow glue in between. Place the red cupcakes in a row on the white sheet cake with more glue. Roll up and chill. Slice to enjoy the cute watermelon slices! =) Decorate with more seeds if desired. Enjoy! =) 

With lots of love, 
Susanne 


Sunday, 13 March 2022

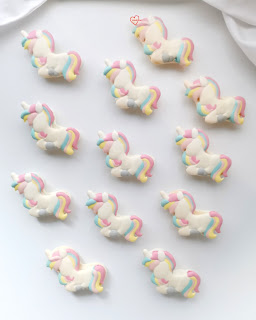
Nut-Free Rainbow Unicorn Macarons

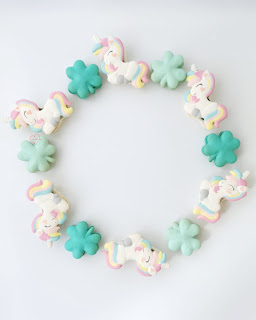
My friend requested for some nut-free rainbow unicorn macarons. Since St Patrick's Day is just around the corner, I threw in some shamrock and rainbow cloud macarons as well for photography! 


I made nut-free macarons before using a mix of rice flour and pumpkin seed flour, as well as cake flour. This time round I needed a pure white base so I can't use pumpkin seed. Wheat-based flour is a convenient alternative.  The last attempt of wheat flour-based macarons were made using french method. This time round I use swiss method.

Cake flour based nut-free macaron recipe
Ingredients (makes about 40 - 50 macarons) :
Mass
200g cake flour (low protein wheat flour) 
200g icing sugar (mine has cornstarch added) 
80g egg whites
1 tsp white powder colouring (optional) 
Gel food colouring 

Swiss Meringue 
145g caster sugar
40g icing sugar
110g egg whites 
1 tsp egg white powder (optional) 
1/2 tsp cream of tartar (optional) 

Steps:
1. Prepare template and line baking tray with parchment paper. 

2. Prepare the mass. Sift together dry ingredients in the mass. Add egg whites to form a thick paste. Cover with cling wrap and set aside. 

3. Make swiss meringue. Whisk together egg white powder, icing sugar and caster sugar.  Add the sugar mix and cream of tartar into egg whites in standmixer bowl (or clean metal mixing bowl if using handheld mixer). Set bowl over saucepan of water. Heat the water over low heat and whisk the egg whites with sugar mix until temperature reaches about 50C. Take your time to heat up the water to ensure all sugar is dissolved. 

4. Transfer to standmixer and whip on medium speed until firm peak. The meringue peak should be fairly straight with a small curl at the end when you slowly lift the beater. 

5. Fold in about a third of the meringue into the mass and mix well thoroughly. Fold in the rest of meringue until just combined. Split into the various rainbow colours and add the respective gel colouring. Fold until the consistency is correct. The batter should fall off the spatula in a continuous manner and any peaks of batter disappear in about 15 seconds. 

6. Transfer batter into piping bag and pipe the unicorns. Let the piped batter rest until it isn't sticky to touch at all.  Duration of resting depends on humidity. It can vary from 30min to 2 hours.


Piped batter. Takes about an hour to pipe a tray! 

7. Preheat oven to 165C and set oven rack to second lowest position. Once the tray is in, reduce temperature to 140C and bake for 10-12 min. Reduce temperature to 120C and bake for another 10-12 min or until feet doesn't appear wet. Cool completely before peeling parchment paper away from macaron shell. 

Freshly baked shells! 

I decorated the shells with black edible marker and peach coloured lustre dust. A little vodka is used to make paint with black marker for the light horn lines and with lustre dust for the heart shaped inner ear and cheek. 

Pandan coconut white chocolate buttercream
Ingredients:
75g unsalted butter
90g white chocolate (finely chopped or use chips) 
12g 100% dark chocolate couverture (may replace with white chocolate and/or butter if unavailable) 
38g coconut cream powder
1/4 tsp salt 
1 and 1/4 tsp pandan paste

Steps:
1. Place all ingredients in a heatproof bowl. Set over pot of freshly boiled water without the water touching the base of the bowl. Melt the chocolate and butter and mix well. 

2. Set aside in aircon room temperature for an hour to firm up. Alternatively, refrigerated for 10 to 15 min or until toothpaste consistency. You may choose to whip the mixture until it is lighter in texture. 

3. Transfer to piping bag and fill the macaron shells. Mature the filled macarons by storing in fridge in airtight container for at least 24 h before consuming. Let the container stay at room temperature for 20 min before opening and consuming the macarons. 

Filling the unicorns! 


Follow me on Instagram @phay_shing as I post my work more frequently there and not everything I do gets posted on the blog.


With love, 

Phay Shing

Wednesday, 9 March 2022

3D Bunny Mocha Macaron Class

I have made cat and corgi macarons in 3D form. I thought why not make some 3D bunnies too! 


This 3D bunny mocha macarons class is with Artz Baking and Culinary studio. Please click on this link for more details or to register. 

 
I decided to include more variations in the 3D design for different postures. 


Swiss meringue method will be taught including how to split the batter into 3 different colours, how to pipe characters and decorate with edible marker and royal icing. A simple mocha ganache will be taught. 

I hope these cheerful bunnies put a smile on your face as they did to mine 😊. 


With love, 

Phay Shing 
Monday, 7 March 2022

Rainbow Angel Food Cake


(Recipe) Rainbow Angel food cake using natural coloring from @suncorefoods!
My first time trying out deco-angel food cake. Very glad it worked out! Texture is light and airy.

Rainbow Angel Food Cake
1 cup cake flour (120g)
¾ cup caster sugar (150g)
½ tsp (2g) salt

10 egg whites (360g)
1/3 cup caster sugar (150g)
1.5 tsp cream of tartar 96g)
2 tsp vanilla extract (10g)

@suncorefoods cerise prickly pear, yellow safflower, blue spirulina, jade matcha, ebony carrot for the rainbow colors

Pulse cake flour with ¾ cup caster sugar and salt till fine and powdery.
In a clean mixing bowl, whisk egg whites with cream of tartar till frothy. Add in ¾ cup caster sugar gradually and whisk till firm peaks. Beat in vanilla extract till just combined.
Fold the powdery dry mixture into the meringue in 3 additions. Before the mixture is completely folded, divide the mixture into 5 and fold in the rainbow color powders (I used blue and yellow to make green).

Pipe rainbow colored batter into a 6” square tube pan, as well as heart-shaped and round baking cups to make the ‘lollipops’. Bake the tube pan at 150C for 50+min and the cupcakes for 18min. Pour leftover yellow batter into cake pop molds to bake the ‘unicorn’ (18 mins).
Assemble the rainbow angel cake using marshmallow glue. Enjoy! =)

With love,
Susanne

Tuesday, 1 March 2022

Animal S'mores Class

 I am finally venturing into having character marshmallows as class material! I have stayed away from making marshmallows because to me, they were nothing more than candies with single flavour and texture profile. But when it comes to marshmallows as part of S'mores, it is a different thing altogether! When eaten freshly toasted, S'mores are an explosion of flavours, textures and aroma! The lightly spiced sweet and salty soft Graham cracker, topped with rich chocolate, followed by sweet toasted marshmallows that are crisp and caramelised on the outside, soft and gooey on the inside.... Mmmm-Mmmm!! I am not a fan of sweets but this is really good and addictive!


The second picture shows before and after toasting the S'mores. The caramel flavour is more intense when it is this browned! 

We will be making all the components of S'mores from scratch. The cracker, chocolate layer and animal marshmallows. Marshmallows typically takes some time to set and require a bed of cornstarch and/or powdered sugar as base for piping and dusting. The marshmallows in this class will be piped directly on the chocolate covered cracker and on a bed of cornstarch. We won't be toasting the S'mores in class as it needs an overnight set before toasting. Enjoy it at home when you are ready to eat them! 

Here are more pictures of the animal S'mores that I made where the marshmallows have not been toasted yet.


Please click on this link for more information or to register for this class happening in April. 

Please click on this link for the re-run of this class on 7th May.


Wirh love, 

Phay Shing