Pages

Saturday 31 December 2022

Christmas Present Chiffon Entremet

Christmas Present Entremet!🎁❤️ 

Components: 
Mint Chiffon Cake 
Raspberry Compote 
Dark Chocolate Mousse 
Feuilletine Crunch 

Watch the assembly tutorial here


I love my new Kenwood Cooking Chef XL! I use it to weigh ingredients as I add them, cook the fruit compote, as well as melt chocolate with its auto programs! It was my best Christmas present ever! 😍

Wishing everyone a Merry Christmas and a Happy New Year!💕
 

With love,

Susanne

Tuesday 27 December 2022

Giraffe Macaron Swing on Fruits n Cream Cake

 I don't usually take requests in December as it is a busy month for me. At most I will accept one request. Someone wanted a giraffe swing with elephant and dog in it, on top of a fruits & cream cake. Here it is!


I used my default Swiss meringue method recipe with separated egg whites for the macaron pieces. As the swing is a structure that needed to bear weight, I made the fillings firm enough even at Singapore's indoor room temperature without air-conditioning. The macaron shells are filled with a stiff mango passionfruit ganache and dark chocolate-butter filling.

Mango passionfruit stiff ganache
80g white chocolate, finely chopped or use chips 
20g unsalted butter
1/8 tsp salt
30g warm water
20g freeze dried mango powder*
20g freeze dried passionfruit powder*

*You may use fresh fruit but you need to reduce it over low heat until thick.

Steps:
1. Mix freeze-dried fruit powders in warm water until you form a paste. Set aside.

2. Melt chocolate, butter and salt. Set aside to firm up. Use spatula or electric mixer if you wish, to whip until it looks like buttercream.

3. Add fruit paste into white chocolate mixture in a few additions.


Dark chocolate filling
You may use ganache but I wanted something really firm to support the weight plus movement of the swing.

100g dark chocolate
50g butter
1/8 tsp salt
1/2 tsp vanilla

Steps:
1. Place everything in heatproof bowl and melt over double boiler. Alternatively you may use microwave.

2. Set aside to firm up. If your environment is very cold, I would suggest using ganache or this will become too hard to work with when set.


I used my default vanilla chiffon sponge recipe but baked in two 7"x1.5" round pans lined at the base and sliced each one horizontally into two to get four layers of sponges. Baking profile was 150C for 15 min, 140C for 15 min, followed by 130C for 20min with steam baking. Note that every oven is different so adjust accordingly.

Requester wanted the cake covered in cream so I prepared more cream for it. Feel free to use your favourite Chantilly cream recipe that can hold up in your climate. I live in hot and humid Singapore so stabilizers are needed. You may use gelatin as stabilizer but I go for what was easy, tastes good and it works!

Whipped cream
250g Whip topping (non-dairy whipping cream)
200g double cream (high fat dairy cream)
1 tsp vanilla extract

Note: Non-dairy creams are pre sweetened so there is no need to add sugar. Please add sugar if you are using dairy cream only.

Steps:
1. Whip whip topping until really stiff peaks with vanilla extract.

2. In another bowl, whisk double cream until it is just able to form a hint of soft peaks. Don't over whisk!

3. Fold Whip topping into double cream in a few additions.

Your resulting cream should be relatively smooth and able to hold its shape at aircon temperatures and briefly for 10min in hot kitchen.

I went for simple, slightly rustic and elegant design for the cake, with the exterior showing a hint of what's inside. The sponges were brushed with simple syrup (1:1 water:sugar)  before slathering on the cream.

Mango, Korean strawberries and green kiwi as fruits in the cake.


Watch the swing in action over here:

https://www.instagram.com/reel/CmRCT-9AwGC/?igshid=NTdlMDg3MTY=


with love,

Phay Shing 

Friday 23 December 2022

Christmas Tree Surprise 'Log' Cake


Posting some of my backlogs as I was away in Dec. Here is a Christmas "log" cake with a Christmas tree surprise! Piping tutorial here.

With love,

Susanne

Tuesday 20 December 2022

Chocolate Hazelnut Praline Log Cake

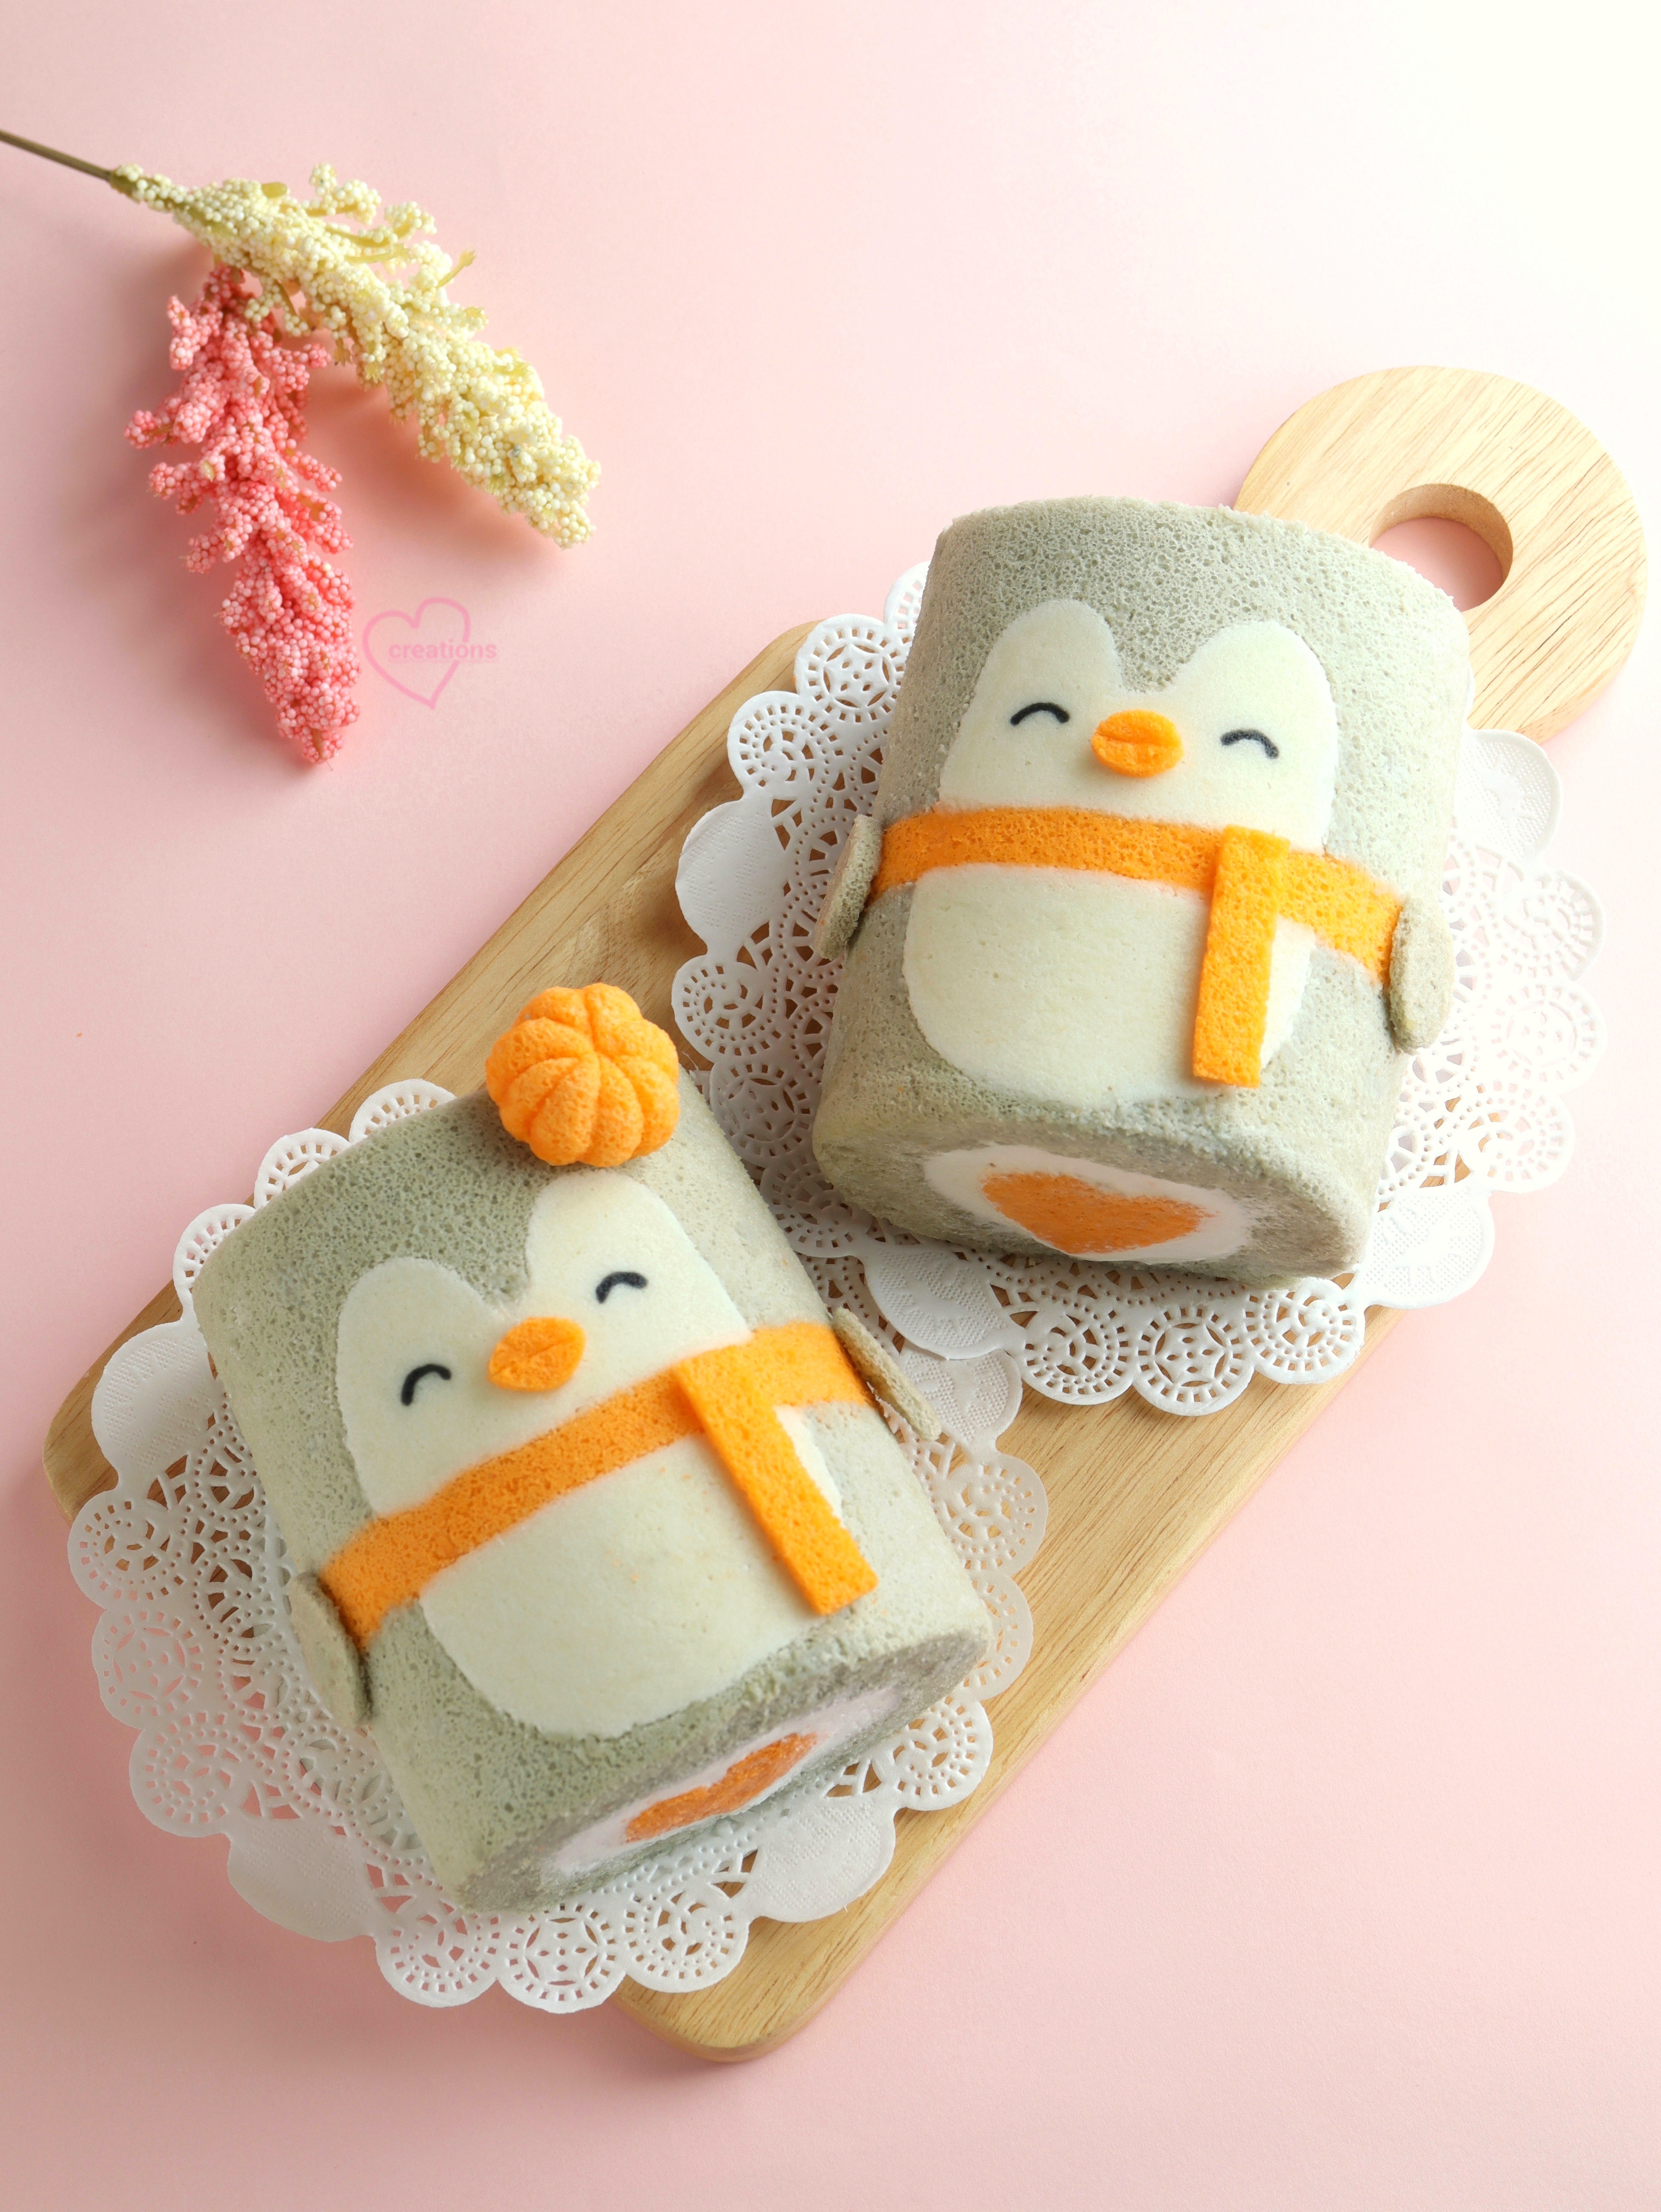
 I am very excited to have my first partnership with Ninja Kitchen Singapore to introduce their Ninja Foodi Power Blender Ultimate System! It is really timely to be receiving their system near Christmas as I intend to make chocolate hazelnut praline log cakes for my family and friends!  


Bear with me as this will be a long post because the log cake consist of four different components, excluding my sugar-free snowman marshmallow decorations.

The four components of the log cake: chocolate hazelnut chiffon cake, hazelnut feuilletine crunch, hazelnut praline diplomat cream and dark chocolate ganache 

I used the blender system to make three items essential for the bake: hazelnut flour, finely chopped hazelnut and hazelnut praline paste. Toasted hazelnuts are used for all hazelnut related items in the cake as it is more aromatic.

Finely chopped hazelnut, hazelnut flour and hazelnut praline paste 

I love the fact that the blender is easy to use and clean! You may use my promo code: PSCB402 to enjoy $150 off original price of $499! Visit Ninja Kitchen Singapore's website if you would like to make the purchase.

Some items in the log cake can be prepared in advance to make the bake easier. Make sure you plan ahead of time the sequence of making the components as you want to make sure everything is ready when you assemble. I will be sharing the recipes in the order that you should be preparing. The portions suggested in this post is enough for two log cakes so scale ingredient portions accordingly.

The source of my inspiration and reference recipes for some components of the log cake are taken from here and here.


HAZELNUT FLOUR & FINELY CHOPPED HAZELNUT 

Ingredients:
150g blanched whole hazelnuts*

* Toast a total of 330-350g hazelnuts for the whole bake but you will only use a portion of it as flour and chopped nuts.

Steps:
1. Preheat oven to 160C fan/175C top and bottom heat only. Line large baking tray with parchment paper/Teflon sheet/silicone mat.

2. Bake hazelnuts in a single layer for 10 min or until lightly browned and aromatic. Adjust temperature and time accordingly as each oven is different.

3. Cool completely before using coffee grinder or blender to pulse the toasted nuts (about 120-150g) a few times until you have a good mix of finely chopped pieces and flour. Do not run the blender for too long or it may become a paste. Split the batch of hazelnuts into two if your blender/grinder is small. I used the Coffee & Spice Grinder of the Ninja Foodi Power Blender Ultimate System for this.

4. Use a sieve to sift the flour from the chopped pieces. I didn't use my superfine sieve for this as I want my chopped nuts portion to contain only chopped bits without the flour. The flour portion may not be superfine here but it is OK as an addition in the log cake. You may use a fine sieve to sift the coarse flour if you want superfine flour.

Prepare the flour and chopped nuts ahead of time. Store airtight in cool dry place if using within a week. Store in fridge or freezer for longer storage.


HAZELNUT PRALINE PASTE

Ingredients:
180g toasted hazelnuts (see above for toasting)
120g sugar
25g water
1/4 tsp salt
1 tbs (12g) oil of choice (I used peanut)

Steps:
1. Make caramel by heating sugar and water in a light coloured, heavy bottomed saucepan. Do not stir the syrup. Gently swirl the saucepan to mix evenly if need be. The darker the caramel colour, the deeper the flavour but be careful not to burn it! Once you have achieved a deep amber colour, remove from heat and pour the caramel onto baking tray lined with Teflon sheet/silicone mat.

2. Let the caramel cool completely before breaking it up into shards. You may use your hands or use a knife to chop it up. 

3. Put the caramel shards, toasted hazelnuts, salt and oil into blender. Blend until you get a paste. I used the Power Smoothie Bowl to make the paste. It is up to your personal preference to blend until it is completely smooth or still retains some coarse bits. I prefer my praline paste to have a little bite so I didn't blend until it is completely smooth.

Hazelnut praline is typically made by stirring the caramel and toasted nuts together before pouring it out onto the tray. I skipped this step to simplify the process as it is not necessary here. You only need to coat the hazelnuts with caramel if you are making praline shards.

Prepare the praline paste ahead of time. Store the praline paste in an airtight container at a cool and dry place until use if you are using it within the next couple of days. Store in the fridge for two-three weeks or in the freezer for longer storage.


You may refer to my Instagram reel to see how I made the hazelnut flour, chopped hazelnut and hazelnut praline paste:


HAZELNUT PRALINE DIPLOMAT CREAM

Ingredients:
2 large egg yolks (62-65g eggs with shells on)
15-18g cornstarch/cornflour (use more if you prefer a thicker cream)
20g sugar*
Pinches of salt
240g milk
10g unsalted butter, softened
40g hazelnut praline paste 
1/2-1 tsp vanilla bean paste/extract
100g double cream/heavy cream/ non-dairy whipping cream (I used a combination of 25g double cream and 75g non-dairy whipping cream)**

* I used Allulose, a sugar replacement, so that the bake is slightly more diabetic friendly. You may use regular sugar and also adjust according to taste. I made the cream less sweet to suit the taste buds of my recipients.

** You may use your preferred choice of whipping cream. I used a combination to get the stability of non-dairy whipping cream in tropical climate like Singapore, and great milky taste of double cream. Be careful not to over whip dairy creams. You may want to add some sugar and stabilize with gelatin if using dairy cream only. I loosened cold double cream with a hand whisk before folding in non-dairy cream what was whipped until stiff. Non-dairy creams are pre-sweetened so I didn't add any sugar.

Steps:
1. Make the pastry cream. Heat milk in a saucepan until steaming hot but not boiling. In the meantime, whisk together egg yolks, sugar, salt and cornstarch in a heavy bowl until smooth.

2. Once milk is hot, pour in a thin stream into egg yolk mixture while whisking the egg yolk mix continuously. Pour everything back into saucepan and cook over medium-low heat while whisking continuously.  Pay attention to the custard as it will start to thicken suddenly. If it thickens up too fast, just remove from heat and keep whisking until smooth before putting it back on the stove. Continue cooking and whisking until mixture just starts to bubble. Cook for another 1 min while whisking continuously. 

3. Remove from heat. Add vanilla, praline paste and butter, one item at a time, whisking after each addition. 

4. Pour into a tray/bowl. Press cling wrap onto surface of pastry cream. Refrigerate for at least 2 hours or overnight. You may prepare the pastry cream a day in advance.

5. When it is time to assemble the log cake before you make the hazelnut feuilletine crunch, make the diplomat cream. To do so, take the pastry cream from fridge and loosen it by briefly whisking until smooth. Prepare whipped cream of choice. Fold into loosened pastry cream in three additions. Keep bowl of diplomat cream covered and refrigerated while you make the hazelnut feuilletine crunch.


DARK CHOCOLATE GANACHE

Ingredients:
125g heavy/double cream (I used a combination)
150g 54% dark chocolate couverture
15g unsalted butter, room temperature and softened
Pinches of salt
10g light corn syrup (optional)

Steps:
1. Heat dark chocolate using double boiling or microwave oven until slightly softened (not necessarily melted). Set aside.

2. Heat cream, corn syrup and salt in a saucepan until it just starts to bubble. Pour over chocolate and let it sit for a minute. Gently stir in one direction with spatula until chocolate is melted and smooth.

3. Add butter and stir until well mixed. Set aside to firm up at cool room temperature. 

You may prepare this a day in advance or while waiting for the Swiss roll to firm up in the freezer. I prefer to make this a day in advance to avoid having too many things to do on the day of baking and assembling the log cake. It is safe to store the ganache overnight at cool room temperature in airtight condition. Store the ganache in fridge if you need longer storage but it has to come to room temperature and have a toothpaste consistency before you can use it to coat the log cake.


CHOCOLATE HAZELNUT CHIFFON SPONGE 

This sponge is mild flavoured as the rest of the components are rich and strong flavoured. The hazelnut flour addition serves more to affect the texture rather than taste so you won't taste much of it, much like how a little almond flour is used to replace wheat flour in many cakes in traditional pastry making. Some hazelnut flour is generated in the process of getting finely chopped nuts out of the blender system so we might as well put it into good use!

Ingredients (makes two 10x12" sheet cakes):
Egg yolk batter
6 egg yolks (62-65g eggs with shells on)
20g Dutch processed cocoa powder *
64g boiling water
64g cake flour
1/4 tsp baking soda
16g hazelnut flour (replace with cake flour for regular cakes)
54 oil (I used canola)
1 tsp vanilla extract
1 tsp Kahlua coffee liqueur (may replace with vanilla)
Pinches of salt

Meringue**
6 egg whites
90g sugar***
1/2 tsp cream of tartar

* You may use regular cocoa powder. If so, increase baking soda to 1/2 tsp. Note that the chocolate flavour is mild for this cake as I did not want the chocolate (especially from the ganache) to overpower the hazelnut flavour. If you prefer it more chocolatey you may coat the sponge with a thin layer of dark chocolate ganache before layering on the hazelnut feuilletine crunch and diplomat cream.

** If your oven cannot fit two trays, divide the ingredients into two. Make the egg yolk batter for two trays worth but make the meringue for one tray portion only when you are about to bake it.

*** I used a combination of 10g caster sugar and 35g Allulose to make it a bit more diabetic friendly.

Steps:
1. Preheat oven to 165C fan/180C top and bottom heat only. Set oven rack to middle position. Line baking trays with parchment paper or Teflon sheet. 

2. Dissolve cocoa powder in boiling water to form a thin paste. Once cooled, add extract/coffee liqueur and salt. Mix well. Set aside.

3. Prepare egg yolk batter. Whisk egg yolks until pale and thick. Add oil and whisk until smooth. Add chocolate paste and whisk until combined. 

4. In a small bowl, sift cake flour and baking soda together with a fine sieve. Add hazelnut flour and whisk together. Sift flour mix into egg yolk batter using a coarse sieve and whisk until well combined. 

5. Make meringue. In a clean metal bowl, beat egg whites with cream of tartar until firm peaks or just reach stiff peaks, gradually adding in sugar once egg whites are foamy.

6. Quickly but gently fold meringue into egg yolk batter in three additions. Pour batter into prepared trays and smooth the batter using a bench scraper or spatula.

7. Bake for 12-14 min or until skewer comes out clean. Immediately flip the cake out onto fresh sheet of parchment paper/Teflon sheet and roll up to cool completely. You may use Teflon sheet if you prefer the sponge not to have wrinkle lines. The wrinkles won't be visible anyway because it is going to be covered by the ganache.

Prepare the hazelnut feuilletine crunch while waiting for the sponge to cool.


HAZELNUT FEUILLETINE CRUNCH

Ingredients:
75g double cream/heavy cream (I used a combination)
150g white chocolate couverture
150g hazelnut praline paste
60g feuilletine
60g finely chopped toasted hazelnuts

Steps:
Make sure you have the chocolate hazelnut sponge and hazelnut praline diplomat cream ready before you make the feuilletine crunch.

1. Melt white chocolate and cream over double boiler. Stir until smooth. Be careful not to overheat! Using a thick glass bowl over hot (not boiling) water helps to control the heat a little. Do not let the water touch the bottom of the bowl.

2. Warm up the hazelnut praline paste in microwave oven for 10 seconds at medium to medium-high powder. Add to melted chocolate. Stir until smooth.

3. Add feuilletine and chopped nuts. Stir until well mixed. If the mixture firms up too much at this point, reheat gently over double-boiler to spreadable consistency.


ASSEMBLY
Items to prepare:
6 x 9" cakeboards
Cake decorations/ornaments
Snow powder (optional)
Chocolate hazelnut chiffon sponges
Hazelnut feuilletine crunch
Hazelnut praline diplomat cream
Dark chocolate ganache

1. Unroll sponge. Spread a thin layer of dark chocolate ganache (optional and only if you prefer it more chocolatey. I didn't add this layer). Spread a thin layer of hazelnut feuilletine crunch, leaving about half an inch border around uncovered.


2. Spread a layer of hazelnut praline diplomat cream over the feuilletine crunch. Make sure the cream is thinner around the edges of the sponge.


3. Roll it up into a tight roll, using a bench scraper or long metal ruler to help you tighten the roll (see reel below). Freeze for 1 hour. You may prepare the dark chocolate ganache at this point if you haven't done so.

4. Remove Swiss roll from freezer and cut the ends off with a serrated knife. Reserve the cut-off pieces. 

5. Apply a small amount of ganache on a 6 x 9" cakeboard. I added a little diplomat cream as well but it's optional. Carefully place the Swiss roll on the cakeboard. Coat the Swiss roll surface with dark chocolate ganache using a small spatula.


6. Attach the cut-off pieces of Swiss roll onto the main roll cake and coat with ganache. Use the small spatula to make bark lines on the surface. You may use a fork if you wish, just like I did in the previous years.


7. Add any plastic cake ornaments, or in my case, snowman marshmallows as well. Finish off with a light dusting of snow powder if you wish. Store the cake in fridge for up to a week, in the freezer for longer storage. 


You may refer to this second reel to see the process of making the log cake out of the hazelnut items.

https://www.instagram.com/reel/CmY49RsArbF/?igshid=NTdlMDg3MTY=

Any leftover cream, ganache, praline and chopped nuts can be mixed together and frozen to make a delicious hazelnut praline chocolate ice-cream! But if you want this to happen, make sure you make double portion of diplomat cream! Add a little melted bloomed gelatin as well to keep it less icy in texture.

I made double portion of diplomat cream!


with lots of love,

Phay Shing

Wednesday 14 December 2022

MARIGOLD PEEL FRESH Yuzu Chiffon Cake


 Can you tell which is cake and which is real juice? 

Patterned Yuzu Chiffon Cake modelled after my favourite MARIGOLD PEEL FRESH Select Yuzu juice! 

Tutorial video here

Yuzu Chiffon cake batter 
64g MARIGOLD PEEL FRESH Select Yuzu juice 
5 egg yolks 
60g vegetable oil 
90g cake flour 
6 egg whites 
100g castor sugar 
½ tsp cream of tartar 

With love, 

Susanne 

Monday 12 December 2022

Diabetic-Friendly Snowman Marshmallows (Piping Video Tutorial)

 This was an experiment that I have been procrastinating. So glad I took time out to give it a try even though my schedule is really full. Presenting my diabetic-friendly snowman marshmallows that will register close to zero on the glycemic index! (If you don't count the cornstarch in the dusting, it is zero GI).


I used Allulose and no inverted sugar when making these. Allulose is a sugar replacement that has chemical properties similar to regular sugar in candy making as it goes through the different stages as it is heated up like regular sugar (e.g. soft ball, hard ball etc) , but does not spike blood sugar levels at all. It is a relatively new sugar replacement and not as widely available as Maltitol and Erythritol. It is also expensive, which is why I was hesitant to buy some to try.

How's the texture and taste as compared to marshmallows made using regular sugar? Texture wise is pretty much spot on although I still need to tweak the ingredient ratios when I try again. But as with all sugar replacements, Allulose has its own distinctive flavour that takes some getting used to. It will be good to use ingredients with strong flavours in bakes if using allulose to mask that taste. Working with sugar replacements is not as easy and straightforward as working with regular sugar too, that's why the need for me to experiment again.

I will be including the recipe in my upcoming Deco Marshmallows book so I can't share it here. But I have made a piping video tutorial so you may use it as a reference if you wish! You may also use the reference for piping meringue cookies!

https://www.instagram.com/reel/CmBrm7dgiW_/?igshid=NTdlMDg3MTY=


with love,

Phay Shing

Sunday 4 December 2022

Gingerbread Cookies (Piping video tutorial)

 It's a privilege to be part of a team sharing Christmas joy through the form of cookie box giveaways! Each of us lovingly prepare different cookie flavours to put together something for the eyes and mouth to feast on. I chose to make gingerbread cookies 😊, something I am familiar with and used to make around the start of my baking journey.


As I had to make at least 300 individually wrapped pieces with limited time, I had to be careful to choose designs that are quick and easy to decorate, yet elegant and pretty. 

You may refer to this post for my gingerbread cookie recipe. I tweaked the royal icing recipe to include 2 tsp of light corn syrup but it's optional. The dough as well as baked cookies freeze very well so you can make ahead of time. Iced cookies can also store for a month or more at room temperature in airtight condition. Just look at how long gingerbread houses on display can last out in the open 😉.

Please see my Instagram post for the video tutorial. I make use of sprinkles to add some bling or cute details. 

https://www.instagram.com/p/ClmwRcRSJeL/?igshid=NTdlMDg3MTY=


with love,

Phay Shing

Monday 28 November 2022

Pandan Vanilla Christmas Tree Marshmallows (Video tutorial)

Busy as I am, I needed to get this out of my system! Presenting my Pandan vanilla Christmas tree marshmallows filled with Meiji's Apollo strawberry chocolate candy!


You may make these without the candy if you wish! 

Pandan vanilla marshmallow
Ingredients (makes about 40 trees):
57g egg whites
150g caster sugar
62g light corn syrup
1/8 tsp salt
3/4 tsp pandan paste
1/4 tsp vanilla extract
45g water
7-8g fish gelatin (200 bloom)
28g ice water

I am not including much details or the steps here as this is likely to be an entry in my upcoming Deco Marshmallows book. 

Please refer to the video below for the tutorial and some tips!

https://www.instagram.com/reel/Clhr9UBADAW/?igshid=NTdlMDg3MTY=


with love,

Phay Shing

Snowman Yule Log Chiffon Cake Class


*New Class* Do you want to build a SNOWMAN with me?⛄️🥰 
Make a log cake with a cute twist this year!😃 


Techniques you will learn:  
White cake recipe 
Patterning chiffon cake into Snowman 
Chiffon swiss roll 
2 fillings: Cream cheese & non-dairy Chantilly cream filling 
Fruits filling and assembling Snowman with cute winter hat 

Sign up here

Happening on Dec 10th, 9-11am GMT+8 (Dec 9th, 8-10pm EST), with unlimited streaming after the class, workbook and private FB group! =) 

With lots of love, 
Susanne  

Thursday 24 November 2022

Pineapple Bunny Choux Pastry in Macaron Teacup Class

 Let's welcome the Year of the Rabbit in 2023 with these cute Choux Pastry Bunnies in Macaron Teacups!


Filled with sweet and tangy pineapple jam and pineapple diplomat cream!


This class for learning two genres of bakes, macarons and choux pastries, will happen in January 2023. Please click on this link for more information on class details or to register .


with love,

Phay Shing

Tuesday 22 November 2022

Egg Chiffon Cakes Tutorial


Eggshell Chiffon Cake Baking Tutorial!🥰 

Watch the tutorial here

I often get questions on these cute chiffon cake egg characters, so I thought to share some tips: 

- Drain the egg contents by making a small hole on the tip of the egg. 
- Fill to 2/3 of the height is enough. 

Egg chiffon cakes are super bouncy because of their high surface to volume ratio☺️ Hope you liked it! =)❤️ 

With love, 

Susanne


Tuesday 15 November 2022

Sugar-Free Lemon Butter Cake with Mascarpone Whipped Cream and Lemon Curd

This is a baby Yoda- lemony- (partially), sugar free part 2 bake for hubby's birthday! 


Please see my previous post for part 1 for sugar-free lemon bar with baby Yoda grapes.

Baby Yoda is made out of kiwi this time!

Please visit Melly's Instagram page for the tutorial on how to make baby Yoda out of kiwi @mellyeatsworld.

Here's a peek at a slice of the cake!

This lemon cake is made of a dense and rich tasting lemon butter sponge that is full of lemon flavour but has a melt in your mouth texture, sugar-free lemon curd, and mascarpone whipped cream. I brushed the sponge with mixture of honey and lemon juice to add moisture and more lemon flavour.

I adapted Hanbit Cho's lemon cake recipe for this bake.  You may find his detailed recipe and video tutorial on youtube over here. I tweaked it by including egg separation method to include a meringue component in the batter, as well as adding a little more lemon juice. I replaced half of the sugar with erythritol. You may use Hanbit's recipe as it is too but I was going for something like Mrs SK Ng's butter cake where both creaming method and meringues are used, but with the weight of eggs similar to Hanbit's recipe.

Lemon butter sponge
Ingredients (makes two thick 6" layers):
152g unsalted butter, softened (around 20-22C)
50g castor sugar (I used erythritol)
A pinch of salt
24g honey
4 egg yolks* (large, room temperature)
34g finely ground almond powder
136g cake flour
3/4-1 tsp baking powder
8g lemon zest
35g lemon juice
1 tsp vanilla extract

Meringue
2 egg whites* (large)
60g castor sugar (I replaced 15g with erythritol, may replace all with sugar replacements for totally sugar-free version)
1/8 tsp cream of tartar (optional)

* Total weight of egg yolks plus egg whites used about 152g.

Steps:
1. Preheat oven to 165C. Line two 6" round pans with parchment paper at the base. I didn't have two identical pans that size so I used the paper cases for panettone.

2. Sift together almond, cake flour and baking powder, set aside.

3. Beat softened butter with electric mixer until loosened. Add sugar and salt and beat until light and fluffy. Add honey and beat until well combined.

4. Add one egg yolk and beat with electric mixer until well combined. Add a third of the sifted dry ingredients and beat until well combined.

5. Add the rest of the egg yolks one at a time, beating until well combined before adding more. Add in rest of dry ingredients and beat until just combined.

6. Add lemon juice, zest and vanilla and beat until well combined. 

7. Divide batter between two pans and bake for 25-30 min or until skewer comes out clean. Cool for 5 minutes before unmolding from pan.

For the cake assembly, I sliced each layer horizontally into two.

Lemon curd
Ingredients:
3 egg yolks
100g lemon juice (about 2 large lemons)
80g sugar of choice (I used erythritol for sugar-free option)
100g unsalted butter, cut into small cubes at room temperature
Zest of 1 lemon

Steps:
1. In a heatproof bowl, whisk together sugar and egg yolks until smooth. Add lemon juice and mix well.

2. Double-boil egg mixture and whisk until temperature reaches 80C. 

3.Sieve mixture if you wish. Add softened butter one cube at a time, mixing until well combined after each addition with a spatula.

4. Add lemon zest and mix well. Use it immediately or to store, keep in airtight container with cling wrap touching the surface in the fridge for up to a week or freezer for up to a month. 

Mascarpone whipped cream
Note that conventional mascarpone whipped cream has sugar added and non-dairy whipped cream is not used. I use some non-dairy whipping cream for added stability in tropical Singapore. It is also pre-sweetened and has stabilizer added so I didn't add sugar. I used double cream instead of regular dairy whipping cream for a milkier taste and better stability.

Ingredients:
100g Whip topping (non-dairy whipping cream)
50g Mascarpone cheese
150g double cream (45% fat)
1.5 tsp vanilla extract

Steps:
1. Whip non-dairy cream until stiff peaks. Set aside.

2. Whisk Mascarpone cheese until loosened.

3. Add double cream and vanilla to loosened cheese and whisk until well combined. Do not overmix. Once the mixture is smooth and creamy, stop whisking in with the hand whisk.

4. Fold in non-dairy whipped cream in 3 additions with a spatula. 

5. Keep refrigerated airtight until use or transfer to piping bag and use straight away.

I folded in lemon curd into some of the mascarpone whipped cream and added a little yellow gel colouring for piping the dots around the cake.


Assembly

Get ready all the above and prepare a syrup made from honey and lemon juice with 1:1 ratio for brushing the sponge. You may refer to the reel on how I assemble the cake. Feel free to pipe it and decorate anyway you like! Hubby loves a mouth puckering lemon bake so adjust the ratio of mascarpone whipped cream and lemon curd on the cake to your preference. The sponge is sweet (but not overly so), mascarpone whipped cream mildly sweet and the curd is really sour. I kept the piping bags that are not in use in the fridge, and chill the cake in the fridge whenever necessary while working as Singapore is warm.

https://www.instagram.com/reel/Cksz3KsAV82/?igshid=YmMyMTA2M2Y=

Refrigerate cake and best consumed within a week.


with lots of love,

Phay Shing


Monday 14 November 2022

Bubble Tea Cheesecake Push Pops


Made these bubble tea cheesecake push pops, following my previous Rainbow cheesecake push pops

Watch the making here

Hope they made you smile! 

With love, 

Susanne 


Monday 7 November 2022

Sugar-Free Lemon Bars with Baby Yoda Grapes

Hubby was craving for something lemony so I made sugar-free lemon bars for a simple birthday bake for him! A super early birthday bake because year-end schedule looks set to be really busy!

He's a Star Wars fan so I took the chance to decorate the plain bars with a healthier but cute topper, baby Yoda grapes!

Aren't they cute?

Many thanks to Melly for sharing her tutorial on how to assemble these. Do check out her Instagram account @mellyeatsworld to see her amazing work!

I adapted the lemon bar recipe from Sally's blog post over here.

I made a few changes to the recipe:
1. Used erythritol instead of white sugar for a sugar-free bake. Note that erythritol tends to leave an "icy" mouth feel so feel free to use other types of sugar if you wish.
2. Added lemon zest in the shortbread and lemon custard.
3. Reduced amount of sugar
4. Replaced plain flour with cake flour for a more tender bite.

I also used half recipe as my glass tray was 10x7".

Sugar-free lemon bars
Ingredients (makes one 10x7"tray):
Shortbread
115g unsalted butter
45g erythritol (or replace with regular castor sugar)
1/4 tsp salt
1 tsp vanilla bean paste
132g cake flour (or plain flour)
1/2 lemon zest

Lemon filling
180g erythritol (or castor sugar)
3 large eggs (65g or more with shell on)
120g lemon juice (about 2 large lemons)
1.5 lemon zest
23g cake flour

1. Preheat oven to 160C. Line bottom and sides of glass tray with parchment paper large enough to leave an overhang over the edges.
2. Make shortbread crust. Mix melted butter, sugar, vanilla, salt and zest in a bowl. Add flour and stir to combine. Press into pan. Bake 20 min or until edges lightly browned. Poke shallow holes over top of warm crust using fork.


3. Make lemon filling. Sift together zest, sugar and flour. Whisk in warm eggs (around 40C, helps to dissolve sugar), then lemon juice until combined.
4. Pour filling over warm crust. Bake for 18-22min or until center no longer jiggles. Cool completely before refrigerating for 2 hours or overnight. 


5. Once cooled, lift parchment off pan using overhang on the sides. Cut off the uneven edges. Dust with powdered sugar (I used a sugar-free option) and cut into squares before serving.

Hubby couldn't stop snacking on the cut off pieces as I was still working 😆.


If you are a fan of lemon, do give this simple bake a try !


with lots of love,

Phay Shing

Tuesday 1 November 2022

Angry Bird Hatchling Vanilla Caramel Coconut Plushiemallows

 This was a fun and hilarious birthday bake for my younger kid. Angry Bird hatchling marshmallows!


Here's a peek at the plushiemallows (the name I give my character marshmallows modelled after real plush toys) together with the actual plushies!

You can tell which is my kid's favourite by identifying the scruffiest looking plushie 😆

Here's a fun video I put together to show you how squishy they are!

https://www.instagram.com/reel/CjsYLJBgtRq/?igshid=NjZiMGI4OTY=

Marshmallows taste the best toasted in my opinion, because the caramelization of the exterior and transformation of the interior into moist gooey-ness brings a flavour explosion and textural contrast that non toasted marshmallows cannot achieve.

And so, I made another fun video of before and after toasting!

https://www.instagram.com/reel/Cj0DJspgO6o/?igshid=NjZiMGI4OTY=

I don't have a blowtorch at home so using the grill function of the oven takes some trial and error. A few seconds is all it takes to go from lightly browned to charred 😆.

Here's a side-by-side comparison of toasted and untoasted plushiemallows.


My apologies for not revealing much about the technical aspects of this bake as I am in the process of writing the next book in our Creative Baking series, Deco Marshmallows. These hatchlings are made using two techniques that I will share in the book. Templating technique and assembling various pieces to form a character.

Here's a peek at some of the small marshmallow parts made using templates before assembly:

Really excited about sharing the techniques as it will be really helpful for those of you who are artistically challenged and do better if you don't have to pipe everything by freehand, which is very much the status quo in the character marshmallows arena at the present.


with lots of love,

Phay Shing

Autumn Fall Penguin Roll Cakes


Do these penguins look snuggly? Watch the making video reel here. I am making these adorable Autumn Fall Penguin Chiffon Roll Cakes with a Heart Surprise and Pumpkin hat for hands-on class at Baker's brew! 🥰 

Hope you like them! 

With love, 

Susanne 


Wednesday 26 October 2022

3D Pumpkin Macarons

This is the second in my series of Fall/Halloween themed macarons and it is 3D! 


Each pumpkin is filled with pumpkin spice latte ganache, non-dairy whipped cream, Biscoff crumbs and Malteser. 

I used my default Swiss meringue method recipe for macaron shells and adapted the ganache recipe from Marina. I used decaf coffee instead of espresso to make it kid-friendly, and included the pumpkin spice in the ganache.

The video tutorials for this creation is in two parts. Please see the captions in the videos for details.

Part 1: Piping and assembling 3D pumpkin macaron


Part 2: Filling 3D pumpkin macaron


Here's another look at my macaron creations, 2D and 3D, together!


with love,

Phay Shing

Tuesday 25 October 2022

Candy Corn and Pumpkins Chiffon Cake Pops


*Recipe* The happiest Candy Corn and Pumpkin Chiffon Cake Pops!🥰 

Flavored with LorAnn Oils Pumpkin Spice Bakery Emulsion, these treats are bursting with bold pumpkin flavor and the sweet spices of fall!💕✨️ 

Recipe (Recipe video reel here
3 egg yolks 
15g castor sugar (4 tsp) 
30g oil (2 tbsp) 
50g milk (3 ¼ tbsp) 
1.5 tsp LorAnn Oils Pumpkin Spice Bakery Emulsion, product of the USA 
57g cake flour, sifted (1/2 cup) 
LorAnn Oils Liquid Gel Food Coloring 

3 egg whites 
60g castor sugar (0.3 cup) 
1/4 tsp cream of tartar 

Steps  on Lorann Oils website =) 

Hope these bring a smile to your faces!❤️🥰 

With love,
Susanne

Monday 24 October 2022

Halloween Biscoff Pumpkin Spice Latte Macarons

 This is the first of two Fall/Halloween themed macarons that I made with video tutorials and for this design, templates as well!

Cheeky ghosts and scared kitty in scary pumpkin!

The tutorials are broken up into part 1 for batter piping and part 2 for post-baking decoration and filling. Please credit me if you share your work on social media. My apologies for putting this up late because it was rather impromptu 😅. The macarons were made from leftover batter for my display pieces for a cat macaron class.

Photo taken after class!

I only realised that the colours are so very Fall/Halloween as I was preparing for the class. Otherwise I wouldn't have shared this so late!

Here are the templates!


Please resize them to fit A4 size for each page. You may omit the eyes on the cat if you find it challenging to include it in batter piping.

I used my default Swiss meringue method recipe where egg whites are split into whipped and unwhipped portions. You may use whatever meringue method or recipe you are comfortable with.

Filling is adapted from Marina's blog post. I used decaf coffee (1.5 tsp) instead of espresso so it is kid friendly. I also added the spice into the ganache since my shells are not flavoured. I added some coarsely crushed biscoff crumbs into the middle of the filling as well.

Part 1: Video tutorial for piping macaron batter

https://www.instagram.com/reel/CkGVuVnAHoO/?igshid=NjZiMGI4OTY=

Part 2: Video tutorial for post-baking decoration and filling

https://www.instagram.com/reel/CkIesOtgGGY/?igshid=NjZiMGI4OTY=


Here's a peek at what other Fall creation I did!


with love,

Phay Shing