Pages

Sunday 26 December 2021

Tiger Choux Pastry in Macaron Teacup Class

Welcoming the Year of the Tiger with three genres of bakes--- choux pastry tiger in macaron teacups with chiffon cake mandarin oranges on the side! 


We decided to replace the fortune tiger choux pastry class with this instead as it will be a class involving two genres of bakes. For the first time, I will be teaching deco choux as well as creative macarons in a single class. It will be pretty intensive but value for money based on the content and hands-on experience you will be getting. Some parts will be prebaked for you due to the limited time we have in class (we can't accomodate too many rounds of baking) but you will have the hands-on experience of piping all the pieces of choux and macarons, and assembling/decorating all the teacups and tigers. The filling taught for this creation is a savoury one--- bakkwa diplomat cream, which complements the sweet macaron and choux au craquelin very well. 

The chiffon cake mandarin oranges won't be taught in class as I have detailed recipe and  video tutorial in the blog on how to shape and decorate the oranges. 

Please refer to this link for more details and to register soon as the class is in mid-January 2022 . 


With love, 

Phay Shing 

Saturday 25 December 2021

Dart Monkey Matcha Hojicha Macaron Carousel

"I would like a macaron carousel for my birthday" 

"Ok! Just let me know what character you want." 

That's why I made this dart monkey mini macaron carousel in my elder kid's favourite flavours --- hojicha and matcha! My elder kid is a gamer a Bloons is one of the games he plays. 


I used the swiss meringue method for making the macarons. 

Just to share photos of some of the piped batter and macaron shells... 

Piped batter of the large pieces on carousel frame

Piped batter of Dart monkeys and some darts

Carousel frame made from lightly matcha flavoured shells. 

Dart monkeys! 

The filling for macaron carousel has to be a firm one to prevent unwanted collapse during assembly and I am sharing the recipe in this post. You may replace some white chocolate with butter if you live in a colder climate. 

Matcha/ Hojicha chocolate buttercream

This is a small portion so feel free to upsize it. 

Ingredients:

55g white chocolate, finely chopped or use chips 

5g 100% dark chocolate couverture (may substitute with white chocolate. I use this to temper the sweetness of white chocolate) 

20g unsalted butter

3/4 tbs hojicha or matcha powder

1/4 tsp vanilla extract 

A pinch of salt

Steps:

1. Place everything into heatproof bowl and melt over hot water without the base of the bowl touching the water. Melt the chocolate and butter and stir to mix well. Do not overheat. Alternatively you may use microwave oven to melt in a few rounds at medium-low power in 10 second bursts. 

2. Wait for it to firm up at cool room temperature. Whip it up a little using spatula to lighten texture. 

3. Transfer into piping bag and fill the macaron shells. 


Here's another look at the carousel! 


Assembly of the structure is done using STIFF consistency royal icing.  I get some people report that their carousel frame collapse during assembly but I found out that it is either because icing isn't firm enough or they didnt wait till the icing has set fully before letting the central pillar take the weight of the roof. It is important to make sure that icing has set firm before letting central pillar take the full weight of the roof or removing external supports for assembly especially if you use a soft filling. Sometimes this requires an overnight wait. 

So glad that the birthday kid loved this! 


With lots of love, 

Phay Shing 


Monday 20 December 2021

Snowglobe Chiffon Cake


Presenting my latest experiment - a Snowglobe Cake that truly Snows!☃️❄ 

Finally succeeded after several attempts and trials (yay!!)πŸ˜›πŸ˜ This is the final prototype with a Hello Kitty Snowman! I have another prototype which I will post soon =) 

Can you guess how I made it snow?❄ All the different steps are important to make the "snow" fly. 

Here's the picture before the snow. You can see the globe is empty. 


See the snowing video here! 


And here's how I did it! 

Make a small hole in the cake and fill with snow powder or icing sugar behind the snowman (swipe to the last pic here). ➡️  Remember to sift it first. This is a really important step!

Cover back the globe. Insert a needle pump into the side of the cake into the hole full of snow powder. Remember to sanitise the needle first! 

Switch on the pump or blower and let it snow!πŸ₯°❄

Hope you liked it! 
Happy holidays and stay warm!!❤❤

With lots of love,
Susanne


Wednesday 15 December 2021

Chocolate Milo Coffee Log Cake

I am gearing up for log cake marathon bake in a few days time for my extended family and a friend who have been very kind to support our family all these years. But hubby made some Milo kosong with freshly brewed drip coffee and let me have a sip of it. It is a beverage you have to engage your sense of taste and smell and take your time to let the different layers of flavours and aroma to wash over you. The malt, coffee, cocoa flavour in a creamy tasting base is such a delightful experience! So delightful that I decided to make this the flavour of the log cakes instead of the originally planned chocolate flavour alone. 

Since this is a new flavour, I had to experiment so I made one log cake in advance. It is a little tricky not to let any one of the elements overpower the others so it is a careful balance. I used decaffeinated instant coffee granules instead of drip coffee so that it is a cake kids can eat too. It is also a little more diabetic friendly as I let the malt in Milo impart some sweetness and use some maltitol to replace caster sugar for making the sponge. There isn't any added sugar on my part for the cake filling and chocolate ganache. 

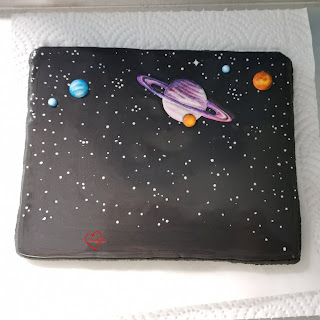
Presenting my chocolate milo coffee log cake! 

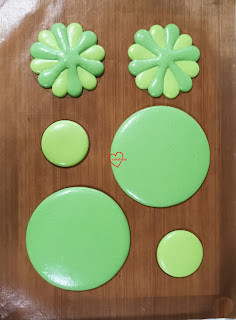
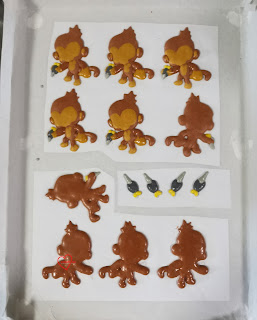
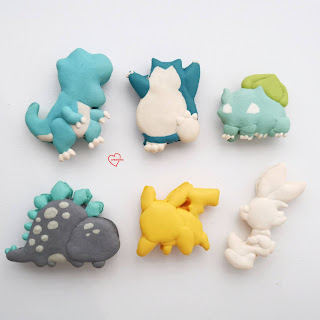
The gingerbread man macaron deco is from my macaron class prep! 

I immediately thought of using diplomat cream as the cake filling as I can bloom the cocoa in the milo and dissolve the coffee granules sufficiently in a custard base. It is more stable than dairy whipped cream in hot Singapore and lighter than buttercream. 

Milo coffee diplomat cream
Ingredients :
4tbs (28g) Milo Kosong powder(you may use regular Milo powder (not the 3-in-1 types), but it is sweeter than the kosong version which has no sugar added) 
2 egg yolks
200g + 25g milk
1 satchet (2g) instant coffee granules (I use decaffeinated coffee) 
20g cornflour 
A pinch of salt 
1 tsp vanilla extract 
15g unsalted butter
60g non-dairy whipping cream (this is already pre-sweetened. You may use dairy cream but do add sugar according to taste. Feel free to use more cream if you prefer it lighter and creamier. Adjust coffee and milo amount upwards if need be to compensate. )

Steps:
1. Heat 200g milk in a small saucepan until steaming hot but not boiling. 

2. In the meantime, in a heavy bowl or glass jug, whisk together egg yolks, coffee granules, Milo kosong powder, cornflour, salt and 25g of milk. Once the milk is hot, remove from heat and pour in a thin stream into the egg yolk mixture while whisking the egg yolk mixture continuously. Pour everything back into the saucepan. 

3. Place saucepan back on medium-low heat while whisking continuously. Once mixture thickens, remove from heat and continue whisking until smooth. Place back on heat and continue to cook until custard is able to hold a soft peak. 

4. Remove from heat and add vanilla and butter and whisk until smooth. 

5. Immediately press clingwrap on surface of pastry cream and refrigerate until firm, at least 1h or overnight. 

6. When sponge is baked and ready to assemble, whip the whipping cream until stiff peaks (be careful not to over whip if using dairy cream. I use non dairy for better stability in this bake as we are distributing to various households.) 

7. Take pastry cream out of fridge and briefly whip it to loosen texture. Fold in whipped cream to make diplomat cream. 

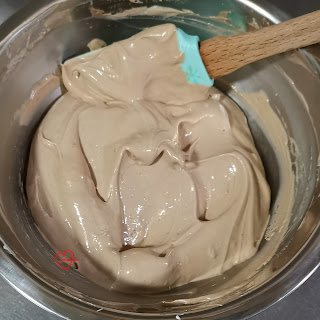
Smooth and creamy diplomat cream! 

Chocolate chiffon sponge
You may prepare this while the pastry cream is in the fridge to set. Do note that the chocolate flavour isn't very intense as I didn't want the chocolate flavour to overpower the malt in Milo. The cake is going to be coated with chocolate ganache anyway. 

Ingredients (makes one 10x12" sheet cake) :
Egg yolk batter
3 egg yolks
10g dutch processed cocoa powder
32g boiling hot water
35g cake flour
28g canola or vegetable oil
5g maltitol or caster sugar
1/2 tsp vanilla extract 
1/2 tsp kahlua coffee liqueur 
A pinch of salt
1/8 tsp baking soda

Meringue
3 egg whites
1/4 tsp cream of tartar 
40g caster sugar or maltitol (I used 30g maltitol and 10g caster sugar for better stability than just pure maltitol) 

Steps :
1. Preheat oven to 170C top and bottom heat or 160C with fan. Line baking tray with parchment paper or teflon sheet. 

2. Bloom cocoa powder by adding hot water to cocoa powder. Whisk together until cocoa is dissolved. Set aside to cool to room temperature. There is no need to cover the bowl to prevent evaporation. 

3. Prepare egg yolk batter. Whisk egg yolks and sugar together. Add oil and whisk until well combined. Add cocoa powder and water mixture and whisk until well combined. Add vanilla and coffee liqueur. Sift in cake flour, salt and baking soda. Whisk until no trace of flour is seen. 

4. Prepare meringue. In a clean metal bowl, beat egg whites with cream of tartar until firm peaks or just reach stiff peak while gradually adding in sugar once the egg whites are foamy. 

5. Quickly but gently fold meringue into egg yolk batter in 3 batches. Pour batter into prepared tray. Gently tap tray on table to release trapped air bubbles. 

6. Bake for 12-14 min or until skewer comes out clean. Immediately invert on fresh sheet of parchment and roll up to cool. Cooling the sponge in rolled up position prevents it from cracking when rolling later on. 

Dark chocolate ganache
Feel free to use more cream if you live in a cold climate. It is very warm here in Singapore so I make firmer ganaches in general. 

Ingredients:
120g dark chocolate couverture (I use 73.5% but it has sugar added so it does not taste bitter)
50g dairy whipping cream
15g unsalted butter
A pinch of salt
30g Milo coffee diplomat cream (optional) 
 
Steps:
1. Place all ingredients except diplomat cream in a heatproof bowl. Gently heat and stir over a pot of hot water without the water touching the base of the bowl. 

2. Set aside the ganache to firm up. About 30min to 1h in aircon room. Or several minutes in fridge. Whip it briefly to loosen texture. 

3. Fold in diplomat cream to the whipped ganache.

Assembly

Components/ tools:
9x6"cakeboard
Serrated knife 
Chocolate sponge
Dark chocolate ganache
Milo coffee diplomat cream
Any cake decorations
Small spatula
Fork
Piping bag (optional) 

Steps:
1. Unroll the cooled sponge cake. Spread a layer of diplomat cream. 

2. Carefully roll it up like a swiss roll. Refrigerate overnight or freeze for 1-2 hours. 

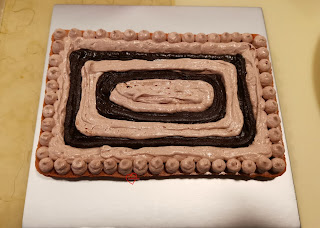
3. Slice the ends of the swiss roll off with serrated knife. Stick the central log onto cakeboard with a little ganache. Coat the whole log with ganache using a small spatula. Attach the cut off pieces on the top and side of the central log. Coat the pieces with more ganache. You don't have to be super neat about this! 

4. You may pipe more diplomat cream and ganache on the cut surfaces of the cake if you wish. Use a fork to carve out the bark pattern on the log. 


5. Attach any decorations as you wish! 


This cake can be kept refrigerated for a week or longer in the freezer. If freezing, thaw it a day or two earlier in the fridge before serving.


Update:

You may assemble the log cake as a stump cake if you don't have a rectangular cakeboard. Glad to have finished all in time! 


The rest are all in log form... 


With love, 

Phay Shing

Monday 13 December 2021

Double Chocolate Mint Reindeer Chiffon Cake


Cute Double Chocolate Mint Reindeer Chiffon Cake! πŸ¦ŒπŸŽ‚!! 

Cake is super yummy, try it! ❤ Made with @oki.singapore oil! 

Video tutorial here:


Double Choc Mint Chiffon Cake 
3 egg yolks
25g castor sugar
20g dark couverture chocolate (55%)
45g oki sunflower oil
56g water
20g cocoa powder
55g cake flour
½ tsp baking powder
Pinch of salt
6g mint extract
4 egg whites
55g castor sugar
¼ tsp cream of tartar 

1. Melt the dark chocolate using a bain-marie. 
2. Bloom the cocoa powder in 40g hot water. 
3. Whisk egg yolks with sugar. Add oil and whisk well. 
4. Add in the bloomed cocoa powder, reserved 16g water and mint extract. Whisk well. 
5. Stir in melted chocolate. 
6. Whisk in sifted cake flour, baking powder and salt till smooth. 
7. Whisk egg whites with cream of tartar till foamy, then add in castor sugar gradually and whisk till firm peaks. 
8. Fold the chocolate batter into the meringue in 3 parts. 
9. Bake at 140oC for 45 min. 
10. Allow to cool completely before unmolding. 
11. Melt 60g white chocolate using a bain-marie. Temper the chocolate by tabling. Pipe the tempered chocolate to make reindeer antlers. Paint with gold dust. 
12. Cut out shapes needed for decoration from colored chiffon sheet cakes. 
13. Assemble the reindeer‘s features and antlers. Enjoy!  

With lots of love,
Susanne


Saturday 11 December 2021

Gingerbread Man Macaron Class

This is the first time I am sharing a swiss meringue method class for character macarons using dark brown sugar and cinnamon to flavour and colour the macaron shells! Presenting my gingerbread man macarons! 


The filling is of course gingerbread spice flavoured and I have chosen white chocolate ganache as the base in hot Singapore, but I temper the sweetness with a little 100% dark chocolate and a fruity acidity from freeze-dried passionfruit powder. 

This class with Tottstore is already full that's why I didn't put up the ad here in the blog earlier. I thought this picture of the gingerbread man is pretty much kawaii and I had to share it!

I hope many of you are able to have a joyous Christmas despite Covid still going on with many restrictions still in place in many parts of the world. Stay safe and stay warm! 


With love, 

Phay Shing 

Tuesday 7 December 2021

Pokemon vs Dinosaurs Macaron Scene

This is one bake that took a lot of time and planning to create because of the many elements involved! An epic battle between Pokemon and dinosaurs in space! 


I had trouble taking photos of this because something tends to be obscured no matter which angle I take it from πŸ˜…. 

Here's a better view of the individual characters. 

T-rex and stegosaurus vs Snorlax, Bulbasaur, Pikachu and Scorbunny! 

I used the swiss meringue method for making the characters, landscape and backdrop. I flavoured and coloured the large macaron pieces with freeze-dried raspberry powder and cocoa powder. 

The cratered landscape is made by using silicone cupcake cases, and waiting for a sticky membrane to form before piping on more "bumps" on the surface and using toothpick to roughen up the surface. 


The batter looks more pinkish now but more brown later on because raspberry powder oxidises when exposed to air and during baking. 

Baked macaron shells for the landscape

The large backdrop is decorated using royal icing but I made the planets using royal icing transfers and painted in the details with edible marker and vodka wash. 

Preparing royal icing transfers for the planets. Dry this thoroughly before adding in the details. 

The backdrop is made by carefully placing the icing transfers onto wet black icing dotted with stars. Use flooding consistency for the royal icing work. 

A look at the undecorated character macaron shells. 

I actually made two full sets just in case of accidental "uglification"or butter fingers πŸ˜‚. 

The macarons are filled with raspberry swiss meringue buttercream with a little cocoa powder added (for a more brownish hue) , and dark chocolate ganache. I added some reduced raspberry puree (cooking puree over low heat until some water evaporates) into the smbc with ratio of 1:4, and added more freeze-dried raspberry powder. I didn't measure how much freeze-dried powder and cocoa powder went into the smbc but went according to taste and colour. 


I added some crunchy chocolate balls in the craters for some added difference in texture. 


Putting the backdrop and landscape together. 


This was an epic project for me as well! Thank God I managed it! 

With love, 

Phay Shing

Monday 6 December 2021

My Melody Winter Chiffon Cake


Hello December! Please keep yourself warmπŸ₯° 

Does she melt your heart?❤  

Just a simple My Melody chiffon cake, Christmas version. Hope you like it! 

With love, 

Susanne

Monday 29 November 2021

Sugar-Free Chocolate Peanut Tonkatsu Cakepops

This is the third year I am making a Tonkatsu bake for hubby's birthday. Previously, I made choux pastry and oatmeal cookies. This year, I decided to try a sugar-free dark chocolate peanut cakepop! 

Even the nose is made of sugar-free shortbread cookie! 

Tonkatsu always likes to pour sauce on himself to make him more palatable. 

Do note that although I used maltitol here, you may replace with regular icing sugar for the cookie nose and caster sugar for the cake and pastry cream. 

Shortbread cookie nose
Ingredients :
5g sugar (I use maltitol, you may use regular icing sugar) 
10g unsalted butter
15g plain flour 
A little strawberry emulco (may replacs with food colouring) 

Steps:
1. Mix butter and sugar together. 
2. Add sifted flour and form a dough. 
3. Add strawberry emulco a toothpick dip worth at a time until desired shade is reached. 
4. Shape into 5mm ovals and place on lined baking tray. 


5. Freeze tray while preheating oven to 150C.
6. Bake for 10-15 min. Note temperature and time may vary depending on oven. 

Chocolate cake sponge
Ingredients (makes one 7x7" square pan or 7.5"round pan) :
20g alkalized cocoa powder
36g boiling water
33g vegetable oil
22g egg yolks 
54g egg whites
1/4 tsp vanilla extract
1/4 tsp coffee kahlua liqueur (may replace with vanilla) 
45g cake flour/ plain flour or combi
83g sugar (I used maltitol but you maybuse regular caster sugar) 
1/2 + 1/8 tsp baking powder
1/4 + 1/12 tsp baking soda
1/8 tsp salt

Steps:
1. Place cocoa powder in mixing bowl. Pour boling hot water into bowl and whisk until a paste forms. Cover bowl with cling wrap and let the paste cool to room temprature. 

2. In the mean time, sift together flour, sugar, salt, baking powder and baking soda. Set aside. Preheat oven to 170C. Line baking tray with parchment paper. 

3. Add egg yolks and oil to the chocolate paste and use electric mixer to mix until well combined and buttercream-like in texture. 

4. Add in sifted flour mixture and use mixer to mix until well combined.

5. In a clean metal bowl, beat egg whites until frothy. There is no need to whip it up until meringue texture. Add to the batter, along with flavourings. Use electric mixer to mix well for 2 minutes. 

6. Bake for 25min or until skewer comes out clean. 

7. Cool completely before breaking it up into fine crumbs. 

Chocolate sponge adapted from Rose Levy Beranbaum's German chocolate cake recipe. The sponge alone may not be out of this world. But when paired with the pastry cream, it is! That's why this combo and variations of it is my default for chocolate cake requests. 

Sponge cake crumbs


Chocolate pastry cream
Ingredients:
1 egg yolk
125g milk
15g sugar (I used maltitol but you may use regular caster sugar, adjust amount according to taste) 
10g cornflour 
8g cocoa powder
1/4 tsp vanilla extract
1/4 tsp kahlua coffee liqueur 
A pinch of salt
8g unsalted butter
10g 100% dark chocolate couverture (you may use lower percentage but I am going for sugar-free, you may add more or omit according to taste) 
10g freeze-dried raspberry powder (optional, added for a little acidity) 
10-20g heavy cream (optional) 

Steps:
1. Heat milk and flavourings in a small saucepan until steaming but not boiling. 

2. In the mean time, whisk together egg yolk, cornflour, cocoa powder, raspberry powder(if using), sugar and salt together. 

3. Pour hot milk in a thin stream into egg yolk mixture, whisking the egg yolk mox continuously. Pour everything back into saucepan and cook over low heat, whisking continuously. Once mixture thickens, remove from heat and whisk continuously to smooth out. Put it back on heat and continue cooking for a couple of minutes more. 

4. Remove from heat and add butter and chocolate couverture. Add some heavy cream if you wish to lighten the texture further and increase water content of the pastry cream. Press cling wrap on surface of pastry cream and refrigerate for at least 1h.

Freshly made pastry cream! 


Tonkatsu Cakepops
Ingredients(makes about twelve to fifteen 25-30g cakepops) :
All the chocolate sponge crumbled
All the pastry cream
Some peanut butter (I use no sugar no salt added 100% peanut) 
Some ground peanut powder sifted through coarse sieve (to remove really large pieces) 
Shortbread noses
Chocolate sprinkles (for eyes) 

Steps:
1. Add pastry cream to crumbed cake to form a dough ball. Divide into balls of 25-30g each. 


2. Coat the ball of cake with a thin layer of peanut butter, and then roll it in a dish of sifted peanut flour. 

3. Shape the coated cakepop into Tonkatsu shape. Use toothpick to gouge out a depression where the nose is supposed to go. Pipe some peanut butter into the cavity amd stick on the nose. 


4. Do the same with the eyes, using chocolate ball sprinkles for the eyes. 

5. Shape the hands and feet using some peanut butter and powdered peanut mixed together. Gouge out a little peanut layer on the cakepop before using peanut butter to glue on the limbs. 

6. Keep refrigerated in airtight container. Best consumed within a week. 


A peek at what it looks like after a bite! 


With lots of love, 
Phay Shing


Sunday 28 November 2021

Chiffon Bear Entremet


Christmas bear or Christmas tree Entremet?🐻‍❄️πŸŽ„ 

Teaching the chiffon tree entremet at Howtocakeit in Dec! This bear is a variation of the tree entremet and has different layers: Choc mousse, raspberry jelly and feuilletine crunch. 

The creation and idea is a very special to me. Watch the slicing video here

Thank God the covid situation is finally getting better. Take care! 

Howtocakeit having a black friday sale at the moment. Do take the opportunity if you are interested to learn the entremet cake! 

With lots of love,
Susanne

Wednesday 24 November 2021

Peanut Butter Reindeer Choux Pastry

This was a rather last minute thing that I agreed to and I only did because I thought I can squeeze it in half a day to create! My schedule is really full towards end of the year as always. But I am glad that with some jiggling of my schedule, I can be part of Newmoon's Skippy Christmas Campaign!

Presenting my reindeer choux pastries with the reindeer made out of peanut butter diplomat cream! 


The cream is made with Skippy's smooth creamy peanut butter from a very convenient squeeze bottle! 

I was sent other Skippy products like the grape and strawberry swirl spreads as well! 

You may refer to this post for the choux pastry part. I didn't use frozen batter but just piped it fresh. To be honest, I just dug out a few frozen red craquelin dough cutouts I had in my freezer and used it while I was preparing some prebaked choux cases for a class. That's why the reindeer part only took me half a day to make, assemble and take photos. 

What I want to share in this post is the recipe for peanut butter diplomat cream. I added some cocoa powder to give it another dimension of flavour and a deeper brown but you can use less or omit it. I really love how smooth the cream is! Originally I wanted to do a peanut butter mousseline cream but thought that peanut butter is rather rich and heavy so diplomat cream verison would help to balance out the heaviness as it has whipping cream instead of butter added, and it did! My kids love it! Feel free to upsize to 2 or 3 egg yolks worth as I only made a tiny batch enough to fill maybe a dozen small pastries. 


Peanut butter diplomat cream

Ingredients:

1 egg yolk

100g+1tbs milk (omit the extra 1tbs if not using cocoa powder) 

5g cocoa powder (optional) 

10g cornflour 

15g sugar (use more if you prefer sweeter) 

1/4 tsp vanilla

70g Skippy's smooth peanut butter

50g whipping cream (you may use dairy or non-dairy. Be careful not to overwhip if using dairy. Use more if you prefer lighter texture. Add sugar if using dairy. ) 

Steps:

1. Heat 100g milk in small saucepan until steaming hot but not boiling. In the mean time, place peanut butter and vanilla in a mixing bowl. Put egg yolk, cornflour, sugar, cocoa powder and 1tbs of milk and whisk until well combined. 


2. When milk is hot, pour in a thin stream into egg yolk mixture while whisking the egg yolk mix continuously. Pour back into saucepan and continue whisking and cooking until it thickens. Be careful to keep the heat low so you don't get scrambled egg. 

3. Pour custard into peanut butter bowl and mix until smooth. Sieve the custard into the bowl if there are lumps. Press cling wrap onto surface of pastry cream. Refrigerate for at least 1h or overnight. 

4. Whip whipping cream until firm peak or stiff peak. Remove pastry cream from fridge. Briefly whip pastry cream to lighten texture. Fold whipped cream in. Transfer into piping bags to fill pastry cases. 

For the reindeer assembly, I just piped some chocolate antlers onto parchment paper and let it set for a while in the freezer. The eyes are Wilton eye sprinkles and the nose is a jumbo red heart sprinkle cut into circle using fondant cutter because I don't have red mini M&Ms or red round sprinkle on hand. If you don't want to buy the eye sprinkles (which I had on hand), you may pipe the eyes using melted chocolate too. A word of warning on using red sprinkles. Try to put it on soon before serving as it will bleed colour into the cream after a while. M&Ms may be better but will also bleed colour eventually. You can also cut out circles using red sour candy strip which is unlikely to have this issue but the red may not be as intense. 

The filling is delightful for peanut butter lovers! Very strong roasted peanut aroma, a good balance of sweet and savoury, and the cream is light. 


With love, 

Phay Shing

Sunday 21 November 2021

Matcha-Azuki Christmas Tree Bread


Christmas Tree Matcha bread with Red bean filling! Sharing a yummy idea for Christmas. What are you baking for Christmas?

Matcha-Azuki Christmas Tree Bread Recipe
240g bread flour (2 cups)
36g superfine sugar (3 tbsp)
150g milk/soy milk (2/3 cups)
1 ¼ tsp instant dry yeast (4g)
1/4 tsp salt (2g)
25g oil/ butter (dairy-free)

8g @Suncorefoods green matcha powder *dissolved in 2 tsp water
Pinch of yellow safflower and cocoa powder

Filling - 0.4 cup azuki sweetened bean paste (95g)


1. In a stand mixer, add all bread ingredients except for salt and oil/butter. Using a dough hook, mix on medium-low speed for 10 min, then add in salt and oil/butter. Knead for another 6-8 min till the dough is smooth. Check that the dough can stretch into a thin membrane without breaking (window pane test).

2. Pinch out two 15g dough for the yellow and brown dough and knead in yellow safflower and cocoa powder till combined (optional – you can use all green dough). To the rest of the dough, knead in matcha powder till even. Further divide each dough into 2 and shape into balls (you will need two pieces of dough to sandwich the filling). Cover and let them proof for 1 hr or until doubled in size.

3. Punch down the green matcha dough and roll out the dough into a large triangular Christmas tree shape on a piece of baking sheet. Do the same for the other matcha dough. Spread azuki red bean paste over one large triangle and cover with the second triangle. Use a knife to trim the edges.

4. Flatten the yellow and brown dough and sandwich azuki bean paste. Place onto the top and bottom of the large green triangle.

5. Cut 1-inch wide strips on each side of the triangular tree shape, leaving around a 1-inch wide column in the middle of the tree uncut. Starting at the bottom, take a strip of dough and twist, forming a spiral and pinch down the end. Repeat with all of the strips of dough.

6. Use a star cutter to cut a star shape from the yellow dough and a knife to trim the sides of the brown dough to form a tree trunk.

7. Allow the Christmas tree to proof till doubled in size (around 45 mins). Preheat oven to 180C. Reduce the temperature to 140C just before placing the tree bread into the oven. Bake for 20 min or until the buns are firm and sound hollow when tapped. Enjoy! =)

With love,
Susaanne

Fortune Tiger Bakkwa Choux Pastry Class

To welcome the year of the tiger in 2022, my first class for next year in mid Jan will be these savoury choux pastries in the form of very cheerful and welcoming tiger choux! 


I may be baking sweets most of the time but I am actually a more of a savoury food person so I am excited to be sharing something savoury for once! The filling is bakkwa diplomat cream made from bakkwa infused milk, and more chopped pieces of bakkwa! You may think it is weird but it is actually pretty pleasant to eat! It's like eating char siew polo bun but with a very light and crisp crust! 


Please click on this link for more details and to register for this class! 


With love, 

Phay Shing


Saturday 20 November 2021

Christmas Tree Entrement Class


Super excited about my new class! Christmas Tree Chiffon Entremet! This is my last class for the year.

Which is your favourite among the layers in the Entremet?
+ Mint and red velvet chiffon cake
+ Raspberry compote
+ Dark chocolate mousse
+ Toasted almond crunch
+ Dark chocolate ganache

Teaching this fun, delicious and multi-textured creation on Dec 11th, 8am GMT+8 (Dec 10th, 8pm EST) with Howtocakeit! I will be teaching live and there will also be lifetime access to the video tutorial, workbook and private FB group. Sign up link here =).

With love,
Susanne