Pages

Tuesday, 27 March 2018

'Our Favourite Characters' Cookies n Cream Macaron Playground

My friend's Bible study group was planning to have a combined birthday celebration for everyone with birthday that falls in the month of March. What better way to personalize the birthday bake for everyone than to create a playground where their favourite character is!

All macarons are filled with cookies n cream filling

Back view of the playground. You don't get to see the steps of the slide that well from the front.

Here's a short video of how the playground works!

This is the second time I am making a macaron playground. Checkout my cute overload version that I made in January over here.

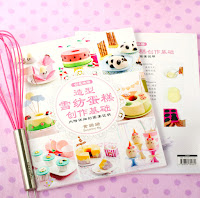
I used the reduced sugar recipe for the macaron shells here. Both regular and reduced sugar recipes can be found here. You may refer to my Creative Baking: Macarons book for a systematic presentation of the basics and complex shaped macarons. You may refer to my video tutorials for macaron basics and piping of complex shapes on the blog too.

Just to share some pictures of the process...

Piping the characters

Freshly baked shells

Decorating the shells with royal icing and edible marker.

You may find the recipe for cookies N cream filling that is suitable for outdoor display over here.

Filling the shells. I have a couple of extra macarons to fill that aren't included in the playground.

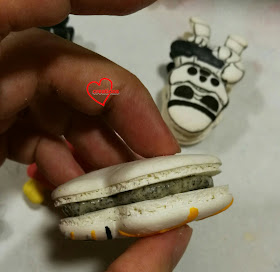
Checkout the awesome feet!

Thank God it was very well received with the kids eating up every single edible part!

With love,
Phay Shing

Sunday, 25 March 2018

Pooh Piglet Ufufy Chiffon Cakes


The sweetest moments are those you spend with the one you love! Who do you think of? =)

These Pooh and Piglet Ufyfy Chiffon cakes are similar to my previous Ufyfy Marie Cat chiffon cake for my daughter that I had shared, except these are smaller, baked using smaller bowl/pan instead of ball pan. The base recipe used is similar, for very light fluffy chiffon cake. I glued on the bowls and different parts using melted marshmallow.

For those familiar with my work, the techniques used are similar. I baked sheet cakes for the details and cut them out with some cutters. You may also refer to Deco Chiffon Cake Basics or previous books for more pictures of these techniques.

Hope they made you smile and think of your special someone or bestie!

With lots of love,
Susanne


Updates: Chinese edition launched in Malaysia, Kinokuniya at 15% discount! It's also available at Singapore Kinokuniya

This is the Chinese translation of the best selling Deco Chiffon Cake Basics, a step-by-step pictorial guide to make Deco Chiffon Cakes.


Friday, 23 March 2018

Earl Grey Custard Cross-Shaped Eclairs

Although as Christians we remember Jesus' death and resurrection daily, it's a more stark but yet wonderful reminder as Good Friday and Easter approaches. I made some cross shaped Éclairs as a simple reminder of what this Easter weekend is about :). The Éclairs are plain and chocolate Choux pastry cases, with Earl grey custard filling and topped with dark chocolate and Earl grey white chocolate.


Here's a close up view of the smooth Earl grey custard filling. Milk tea lovers, you will love this!
Crisp choux pastry case with smooth, rich and creamy Earl grey custard. Yums!

Instead of hot cross buns, why not make these treats to remind each other about how God loves us so much that He gave His only Son to pay the price of our rebellion ;)

Recipe for Earl Grey Custard
Ingredients:
200g milk
35g sugar
18g cornflour
2 egg yolks
2.25 tsp (5g) Earl Grey tea powder*
10g unsalted butter
1 tsp vanilla extract

* If you are unable to get Earl Grey tea powder, heat up 250g of milk until it starts to bubble. Remove from heat and steep 3-5 Earl Grey tea bags (adjust number of bags according to how strong you want the tea flavour) for 5 min. Squeeze the tea bags to extract as much tea flavour out. Weigh out 200g of milk tea for making custard.

Steps:
1. Sift together cornflour and Earl grey tea powder (if using) into a bowl. Add sugar and whisk together. Add egg yolks and whisk until a paste is formed. Set aside.

2. Heat milk with vanilla extract until it starts to bubble. Remove from heat and slowly pour into egg yolk mixture while stirring all the time.

3. Pour the mixture back into saucepan. Heat on medium low heat while whisking all the time. Keep an eye on the mixture as it will suddenly thicken. Once it thickens, remove from heat and continue whisking. This is to prevent the custard from becoming lumpy. Return to heat while whisking until desired consistency, like curd. Remove from heat now and then to whisk if necessary.

4. Add butter and mix well. Sieve the custard into a bowl. Press a cling wrap over the custard surface. Refrigerate until ready to fill the pastry. You may make this up to a few days ahead of time.

I made chocolate and Earl Grey custard at the same time actually. Stay tuned for another creative choux pastry in the future!

I have more or less settled down with a Choux pastry case recipe that I like. One that remains crisp for a long time and is puffy.

Choux pastry case recipe
Ingredients (makes about 18-20 crosses):
50g water
50g milk
50g unsalted butter
3/4 tsp salt
3/4 tsp sugar
60g bread flour
6g plain flour*
1 tsp cocoa powder, sifted
2 eggs (100g), one egg in each bowl lightly beaten**

* You may use all bread flour or replace more bread flour with plain flour depending on your preference. Plain flour gives it a more tender bite while bread flour helps the case to be crispier and structurally stronger

** Place both eggs in one bowl if you are making plain pastry case without cocoa powder.

Steps:
1. Sift together plain and bread flour into a bowl. Preheat oven to 180℃ and set oven rack to middle position

2. Place water, milk, sugar, salt and butter into a saucepan. Bring to a boil while stirring. Remove from heat and pour the flour in all at once. Mix well to make sure all the flour absorb the liquid.

3. Divide the dough into two equal portions (omit if you aren't using cocoa powder to colour half the cases dark brown). Add sifted cocoa powder to one portion and mix well with spatula.

4. Return each portion of the dough to cook over medium low heat for about 2 minutes. Remove from heat and continue to knead the dough with a spatula in a bowl to let it cool for a couple of minutes. This also helps gluten to form.

5. For each colour of batter, gradually add beaten egg and mix well after each addition. The batter is ready when it appears shiny and yet leaves a trough that doesn't collapse when you run a finger across the batter surface.

6. Transfer into piping bag fitted with a Wilton #12 (or larger) tip, preferably 2cm in diameter. Pipe the crosses by piping a long straight line, and then two dollops at each side of the line. Tap down any peaks with a wet finger to prevent it from burning in the oven.

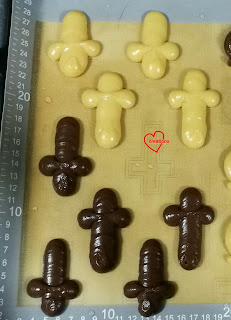
Piped crosses

7. You may sprinkle a little water on the baking mat around the piped pastry. This is to help the pastry rise more in the oven with the steam that it creates.

8. Bake for 30-40 min or until baked through. Turn off the oven and let it cool inside for 10 minutes before removing from oven. Pierce the sides with a toothpick to release any steam while the pastry cases are still warm. Cool completely on cooling rack.

Freshly baked shells

You may fill the shells by poking a couple of holes to insert a piping tip for filling with cream or slicing into half. I chose to slice the cases in half so the filling is like a sandwich. If you are not slicing the pastry case into half, please coat the cases with chocolate before filling with pastry cream.

I coated the shells with two types of chocolate --- dark chocolate and Earl Grey white chocolate. Do choose good quality chocolate for better taste. You may just coat with one type if you prefer.

I melted the chocolate with a little vegetable shortening to help it to flow more easily (especially white chocolate). Ratio is 50g of chocolate and 5g of shortening. I added about 1/2 tsp Earl Grey tea powder to melted white chocolate. Pipe the melted chocolate on and let it set.

Pipe the pastry cream onto the bottom half of the case as you like. Sandwich with the top pastry case.

Refrigerate until ready to serve but it's most delicious when the crisp cases are freshly filled with smooth, cold cream.

Feedback from my friend who shared it with her Bible study group was these were really very delicious. Do give it a try :)


With love,
Phay Shing

Thursday, 22 March 2018

Raspberry Rose Macarons (Mother's Day Special)

If you are new to making macarons and would like to learn how to make something sweet-looking but not too sweet tasting for Mother's Day, come and join me for a class at ToTT to learn how to make these dainty rose shaped macaron pops :)


I will share how you can use fresh raspberry juice to make the Italian meringue that is used to make the macaron shells, and how to pipe the rose shaped macarons. The filling for these roses is raspberry white chocolate ganache, which we will make in class as well.

The link for registration can be found here.

With love,
Phay Shing


Monday, 19 March 2018

Smooth, Single-Proofing Cute Mantou (adapted from 美姬老师)

Those of you who followed my baking journey right from the beginning will know that my first love in the Creative Baking arena is not chiffon cakes nor macarons, but steamed buns. I used to make it for my kids who had fun eating them.

This is an impromptu late night "bake" that came about because my hands were itching to try out a recipe and technique :)

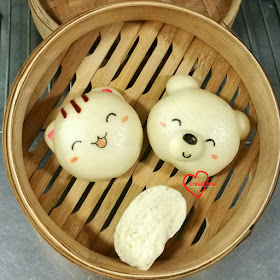
Cute bear and cat plain steamed milk buns!

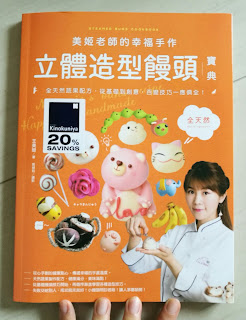
My family decided to go to Kinokuniya recently as the store was having a 20% discount on the books. This book caught my eye so I bought it.


Those of you who love cute steamed buns and are able to read traditional Chinese (unfortunately many great Chinese recipe books are not written in simplified Chinese), go grab a copy now! Highly recommended! It covers the basic techniques, the use of natural ingredients such as food powders, fresh fruit and vegetable puree to colour and flavour the buns, and have lots of wonderful project ideas from simple to challenging.

I was really intrigued by the recipe and technique as it is so different from what I had been doing in the past. Most bao or steamed bun recipes I find from the internet use low protein flour, a combination of yeast and baking powder as raising agent and require two rounds of proofing. I always used vegetable shortening as the fat in steamed buns as I found that the texture is softer than if I used vegetable oil. But teacher Meiji uses olive oil as the base oil in her recipes.

Her ingredient list for basic milk steamed bun recipe which I adapted from is like this:

Teacher Meiji's steamed milk bun recipe
Ingredients (makes about 8-9 plain buns):
155ml milk
3g (about 1tsp) instant yeast
30g caster sugar
300g plain flour (medium protein flour)
8ml olive oil

I found that the liquid component in her recipe is not enough for the plain flour I am using and the resulting dough is rather stiff and dry. Do adjust the flour and liquid quantities to suit your flour. I also used slightly less yeast as Singapore is really warm and I am not so fast in shaping.

This is my adapted recipe which is half the original for my late night trial "bake".

Adapted steamed milk bun recipe
Ingredients (makes about 4-5 plain buns):
85g cold milk (cold because Singapore is very warm and you don't want the yeast activity to speed up too fast)
1g (1/3 tsp) instant yeast
15g caster sugar
A pinch of salt
150g plain flour
5g coconut oil (or any other vegetable oil)
A bit of water for sprinkling and dabbing

Steps:
1. Combine milk, sugar, salt and instant yeast in a mixing bowl. Add flour and oil.

2. Use a wooden spoon or spatula to mix together the ingredients until no more liquid is seen and the flour mixture has the appearance of snowflake pieces.

3. Transfer the dough to work surface and knead for about 10-15 minutes, until the dough is smooth. You may use a stand mixer to do this but I personally prefer kneading by hand. Do use your body weight to knead and try not to tear the dough while kneading it so that you do not tear the gluten strands that are being formed.

4. Divide the dough to balls of 45-50g (for the heads) and some dough left for the ears and snout. Do keep any unworked dough covered to prevent it from drying out. Teacher Meiji uses thick plastic sheets (not cling wrap) to loosely cover the resting dough. Plastic bags for food that are sold at supermarkets are what she recommends.

5. Shape the dough into round balls for the head. Teacher Meiji did a very detailed step by step pictorial guide on how to do this. I didn't take photos of myself doing this part and it's best explained using pictures instead of words so I have put up pictures from her book here below (please read the book if you can!):


I hope I translate it well enough for those of you who can't read Chinese 😅. First roll each ball of dough into a long rope. Fold into thirds and roll into long rope again. Repeat this until all the trapped air bubbles has been expelled out.

Roll the rope like a snail and then press it flat.

Gather the dough around the sides of the flattened dough and press it into the center. The surrounding and bottom surfaces of the dough should appear smooth.

Turn the ball over with seam side down. Roll the ball of dough in circular motion with your hand cupping around it on the work surface. Add a few drops of water on work surface and continue to roll the dough on the surface to seal the seam.

Finally, place your hands, one on each side of the ball of dough and press the dough while moving your hands in opposite directions. This is to make the dough taller. Rationale that teacher mentions is, the dough will flatten out during proofing.

6. For the bear and cat heads, I place the shaped round or roughly circular dough onto pieces of parchment paper. I shape small pieces of dough into shape of the ears and snout. The pieces were stuck on by first brushing a bit of water on the surface and sticking the pieces together. I used to pinch the parts together or use a toothpick to press the joining parts together in the past so this is something new to me.

7. Place the shaped buns in steaming basket and use 40℃ steam to proof the dough. I know this is kind of hard to estimate. Teacher recommends placing 2 rice cups of water into electric cooker and turn the switch on for a minute to create this effect. Many of us may not have this available at home. I proofed using two methods. One, I used my electric steamer switched on for a minute. I placed a towel over the lid to prevent any water from dripping onto the steaming plate. Two, and probably a more traditional one, is to fill the wok as I normally would for steaming dishes and turn the heat on for about a minute or two and place my hand over the surface. Once I can feel some warm steam rising up. I turn off the heat, place the steaming basket with the wooden cover on into the wok. Cover the wok with the lid.  Once the dough has increased by 1.5x, the buns are ready for steaming. Teacher mentioned a very useful tip of measuring the bun size with a ruler before proofing so that you have a better gauge of how much is 1.5x bigger. It took me about 40 minutes of proofing to get to that size.

8. Steam for about 18 minutes. Turn off the heat and wait for 5 minutes before opening the cover of the wok or electric steamer.

9. Immediately transfer to cooling rack to cool completely. To store, individually wrap the buns in plastic and store in fridge or freezer. Resteam when you want to eat.

Freshly steamed bun

Close up view of the insides

I could do with some improvement for the technique but so glad to have learnt much :). Hubby gave a thumbs up for the taste and texture and said it tastes better than my previous recipes which tends to have a little yeasty smell. The texture is firmer than my softer buns that use low protein flour but not in an unpleasant way.

Teacher Meiji uses dough (or painted on  powders mixed in water to the dough before steaming) to include all detailed features. Since this is my first trial using her recipe, I decided to keep things simple and added the details using edible marker after the buns have cooled completely. Please store these in airtight container without anything touching the ink surface. Or the ink may smudge.

Feel free to wrap any filling of your choice inside if you don't like plain buns. Use 35g of dough and 15g of filling as suggested by teacher Meiji.

I stored a couple of buns at room temperature in an airtight container for one and a half days (no filling inside so it's ok to store at room temperature) and resteamed the buns for 10 minutes. To my pleasant surprise, the ink didn't run at all!

Such a cheery greeting for breakfast in the morning!

The insides remain fluffy and soft but firmer than if low protein flour was used. But it's still almost the same as freshly steamed. Just perhaps a teeny bit firmer.

Fluffy steamed bun!

I got the kids to taste test this time and they gave a thumbs up too!

Do give this recipe a try if you would like homemade steamed buns! This single proofing method is also much faster than my previous ones that require two rounds of proofing.

Update: some ladies have been very kind to alert me to teacher Meiji's Youtube video. Please watch it if you are able to understand Mandarin.

With love,
Phay Shing

Saturday, 17 March 2018

Sweet Molang-in-Cup Chiffon Cake


This is a very special cake for a very special friend, and I absolutely loved making every part of it! 💗 It was not only a meaningful cake for me to make, and also so so cute to make!

The idea was a pop-up Molang saying the baby is 1! Everything including the spoon is made from chiffon cake =). I’ve actually made another Molang cake before this, but not yet posted (oops, my backlogs!). For the base cup, I baked chiffon cake in a big ball pan. The Molang was from a smaller bowl, and the rest of the details were cut from cake pops or sheet cakes. Eg for the “love letter”, it was made by rolling a striped patterned roll cake. Thankful to God that it was well received! =))

Happy blessed birthday baby Love!

With lots of love,
Susanne


*Updates: Chinese edition now on book depository with free shipping worldwide


Thursday, 15 March 2018

Koala Black Sesame Custard Cream Puffs

And the journey for Creative Choux pastries continues! I actually have a backlog of Choux pastry posts that I can't wait to share but will release slowly over time. Checkout my Instagram account if you would like a sneak peek of what other creative choux pastry designs I have come up with. For now, let me share this koala black sesame custard cream puffs!

Black sesame Choux pastry case with black sesame white chocolate on top and smooth black sesame custard in the middle!

I love the close up view of the cross section!


I was still trying out different recipes for Choux cases until I found this one. I think I am going to stick with it! It is the puffiest and nicest in texture so far. Please refer to this excellent blog post on making Choux pastry (eclairs) and the various tips for techniques. I didn't follow the ingredients exactly but followed the technique pretty much closely.

Many thanks to Susanne for gifting me with a packet of black sesame powder that I could use!

Recipe for black sesame pastry cream
Ingredients:
400g milk
70g sugar
36g cornflour
30g black sesame powder (use more, up to 20g more if you prefer stronger black sesame flavour as mine is quite mild. )
4 egg yolks
20g unsalted butter
1 tsp vanilla bean paste/ extract

Steps:
1. Sift cornflour into a medium sized bowl and whisk in black sesame powder and sugar. Add in egg yolks and whisk until a paste forms. Set aside.

2. Heat milk with vanilla in a saucepan until it starts to bubble. Remove from heat and slowly pour into egg mixture while whisking constantly.

3. Pour mixture back into saucepan. Heat on medium low heat while whisking constantly. Once mixture starts to thicken, remove from heat and keep whisking until mixture is smooth. This is to prevent lumps from forming in the custard. Return the saucepan back to heat and keep whisking until custard has desired consistency of curd. Remove from heat and whisk as and when it is necessary and you see lumps starting to form.

4. Remove from heat. Add butter and mix well. Pour custard through a sieve into a bowl. Press a cling wrap over the surface to prevent skin from forming. Refrigerate until ready to fill the Choux cases. You may make this up to a few days ahead of time.

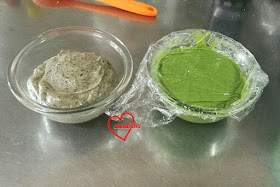
I made matcha custard as well!


Recipe for black sesame Choux pastry case
Ingredients (makes about 14 koalas):
75g water
75g milk
75g butter
5g sugar
5g salt
90g bread flour
10g plain flour
10g black sesame powder (omit for plain choux cases)
150g eggs (approximately 3, lightly beaten)

Note: you may replace all plain flour with bread flour, or some bread flour with plain flour. Plain flour gives the pastry a more tender bite whereas bread flour helps to give more strength to the structure and makes it more crispy

Steps:
1. Sift together plain and bread flour into a bowl. Preheat oven to 180℃ and set oven rack to middle position

2. Place water, milk, sugar, salt and butter into a saucepan. Bring to a boil while stirring. Remove from heat and pour the flour in all at once. Mix well to make sure all the flour absorb the liquid.

3. Return the dough to cook over medium low heat for about 2 minutes. Remove from heat and continue to knead the dough with a spatula in a bowl to let it cool for a couple of minutes.

4. Gradually add beaten egg and mix well after each addition. The batter is ready when it appears shiny and yet leaves a trough that doesn't collapse when you run a finger across the batter surface.

5. Transfer into piping bag fitted with a Wilton #12 (or larger) tip. Pipe a circle for the head, and then two dollops at each side of the circle for the ears. Tap down any peaks with a wet finger to prevent it from burning in the oven.

I was working on another Matcha Choux at the same time so stay tuned!

6. Bake at 180℃ for 20 min. Reduce temperature to 160℃ and bake for another 20 min. Turn off the heat and let it cool for 10 min in the oven. You may sprinkle a little water around the piped batter before baking to help the pastry to rise more in the oven. Pierce the side with toothpick to release any steam. Cool completely on cooling rack. Note that baking temperature and time is dependent on individual ovens. Extend baking time if need be to thoroughly dry out the cases.

Freshly baked Choux case


Recipe for black sesame white chocolate
Ingredients:
160g white compound chocolate chips
10g vegetable shortening
10g black sesame powder
1/8 tsp salt

Steps:
1. Place chocolate and shortening in microwave safe bowl. Heat for 20sec on medium power. Stir with spatula. Repeat until melted.

2. Add black sesame and salt and mix well.

3. Transfer to piping bag and pipe on the Choux cases. Decorate as you wish with melted dark chocolate for the eyes and nose, and pink coloured white chocolate for rosy cheeks.

To fill the Choux cases, make a hole at the side or bottom such that a piping tip can fit into the hole. Fill piping bag fitted with piping tip with pastry cream. Fill the cases. Be careful not to overfill or the cream may burst out of the case, but fill enough so that it's yummy. Best to fill the cases just before consumption. Store any filled pastry into the fridge and finish eating the next day.

With love,
Phay Shing
Monday, 12 March 2018

Sun, Earth and Moon 3D Macaron Models

Have you ever done school projects whereby you had to make the solar system model or Sun, moon and Earth model? I was given such a project but using macarons to do so 😂

Sun, Earth and Moon models filled with vanilla white chocolate rice crispies!

This is not just a static display but all three can rotate on the stand!

Pardon the poor lighting as it was raining. It would help to have sturdier 10cm cakeboards too 😅

I have done a number of bakes involving the use of cake pop moulds to make hemispherical shells. But this is the first time I am making a full sphere by joining two hemispheres together.

I used the regular recipe for the macaron shells here. Both regular and reduced sugar recipes can be found here. You may refer to my Creative Baking: Macarons book for a systematic presentation of the basics and complex shaped macarons. You may refer to my video tutorials for macaron basics and piping of complex shapes on the blog too. You may wonder which part of the model requires piping of complex shapes on flat surfaces. Let me reveal a little secret on the hidden mechanics of the frame. You need to pipe donut shaped macarons for the frame/stand of the models. I have made a few macaron structures with moving parts so I am able to reveal a bit more.

Showing off the feet and interior of donut shaped macaron shells. No hollows and beautiful, even feet all around!

One thing I learned about this bake is that not all silicone cake pop moulds are made the same. The blue cake pop moulds I have below are not as good for the purpose of baking macaron shells as they remain stuck for a long time and require much longer time in the oven for drying out. The dark red moulds however were very easy to use. Spacing between the rounds was wider and the macaron shells just detached themselves from the silicone mould while cooling down out of the oven.

Piping hemispherical shells.


Remember to thoroughly bake through the shells before removing them from the mould or you will risk breaking the shells while unmoulding.

Freshly baked shells, decorated with edible paint.

I made the edible paint by dissolving gel food colouring in vodka, use crushed paper towel to soak up some paint and dab on the surface of the shells.

The Earth was a lot trickier. I had to assemble the whole thing before adding on the continents using royal icing. Icing on a spherical surface is tricky but thank God I managed it. Freehand too without using marker to trace out the continents!


I borrowed my kids' inflatable globe as my reference

Recipe for rice crispies white chocolate filling

Some consideration has to be made about the filling as it will be really heavy to fill the whole sphere with regular ganache or buttercream. I opted for a rice crispies base with chocolate as the binder. I would personally use dark chocolate as it is less sweet but the requester wanted vanilla white chocolate. Feel free to increase the ratio of chocolate to rice crispies cereal as you see fit. I used fairly little white chocolate to prevent the whole thing from becoming too sweet, so the rice crispies are not bound too tightly.

Ingredients:
60g rice crispies cereal
60g compound white chocolate chips
30g vegetable shortening/ unsalted butter
1tsp vanilla bean paste
1/8 tsp salt
10g golden syrup or honey

Steps:
1. Combine white chocolate, golden syrup, shortening and salt in a microwave safe bowl. Melt in 20 sec bursts at medium power. Stir with spatula. Repeat until completely melted.

2. Add vanilla bean paste and mix well.

3. Pour rice crispies into chocolate mixture and mix until well coated.

Fill the shells by carefully spooning mixture into each hemisphere. Quickly put two hemispheres together and gently press them together. Leave the chocolate to set at cool room temperature.

I hope this post inspires you to see that there's endless possibilities when it comes to making macaron structures :)

With love,
Phay Shing
Sunday, 11 March 2018

George and Dinosaur (Peppa pig) Chiffon Cake


Peppa pig was one of my earlier experiments with cartoon chiffon cakes 4 years back for my sister-in-law. I made a few different versions later, both small and big, 2D and 3D, for close friends and family. I haven't made it for a long time so it is nice to revisit it though I am a bit rusty. I had to rebake the cake one time =p... see I also have failed bakes! This is my first attempt at a front facing Peppa pig version; the rest were side facing.

I made it for my dear church friend's godson who loves Peppa pig, George and the dinosaur. Thank God it was well-received though not an easy bake for me! School holiday is coming so less time to blog for me.. It's going to be a busy week!

Wish everyone a wonderful, fruitful week ahead! <3

With lots of love,
Susanne


Friday, 9 March 2018

Pandan Gula Melaka Chiffon Cake 'Ondeh Ondeh'


I have been dreaming about oozing chiffon cake "ondeh ondeh" for some time, ever since my previous Nyonya Kueh Chiffon Cake with chiffon "ondeh ondeh". It's not easy though, I had many countless failed experiments with exploded "ondeh ondeh" before I finally arrived at a model that can sort of work. Basically Gula melaka is heavy so it sinks to the bottom easily, so most of it usually comes out of the cake. There is an optimum amount and type that you can "encapsulate" to succeed.

This recipe was specially commissioned by and designed for LG Neochef last year in October 2017. I gave several demos on this chiffon cake "ondeh ondeh" cake pops with the LG Neochef then. It's super yummy and reviews for this Gula melaka chiffon "ondeh ondeh" cake pop were very good!

Currently the detailed printed recipe of this chiffon cake "ondeh ondeh" comes free with every purchase of the LG Neochef. LG was so generous that they allowed me to share on the blog now too! I'm happy more people can get to try this yummy recipe =).

Pandan Gula Melaka Chiffon “Ondeh Ondeh” (makes 12)
(by Susanne Ng, written for LG Neochef)

14g egg yolk (1 egg yolk)
26g gula melaka (in cubes)
14g coconut milk
1-2 pandan leaves, knotted
2g pandan juice
1g vanilla extract
15g coconut/vegetable oil
20g cake flour, sifted
Tiny pinch of salt
1/4 tsp pandan paste
20g grated gula melaka

60g egg whites (around 1.5 egg whites)
8g castor sugar
1/4 tsp cream of tartar (optional)

1. Cut 26g gula melaka into cubes. Dissolve the gula melaka in coconut milk (with pandan leaves to make more fragrant) to make the gula melaka syrup. Leave to cool. Makes around 40g gula melaka syrup.

2. Preheat oven, or LG Neochef microwave convection oven to 140 degrees celsius.

3. Whisk egg yolk with oil till well mixed.

4. Add in the gula melaka syrup, pandan juice, vanilla extract and pandan paste, whisk till well combined.

5. Whisk in sifted cake flour (with pinch of salt). Mix well and ensure no lumps are formed.

6. Using an electric mixer, whisk egg whites with cream of tartar till frothy, in a grease-free and dry bowl.

7. Add in castor sugar gradually and whip till firm peaks form, i.e. peaks point upwards but not totally stiff.

8. Spoon gula melaka batter into cake pop molds. Leave a well, and then add a sprinkle (coffee stirrer size) of grated gula melaka into the well. Cover with more batter.

9. Bake at 140 degrees celsius for 28 min, or until skewer inserted into cake pop come out clean.
*I actually had some "controls" cake pops without filling to check for doneness as those with fillings will be wet.

10. Leave cake pops to cool on wire rack.

11. When cake pops are fully cool, unmould from the cake pop mould by flipping the mould over.

12. Roll in desiccated coconut (or freshly grated coconut steamed with some salt).


As I shared earlier, it is not easy to encapsulate the filling, I actually made a table of the amount and type to be encapsulated lol. For this experiment, those on the left 1st column had the most fillings, and subsequent columns had decreasing fillings, with "controls" - no filling- on the most right. Here's sharing what happens when you are too generous with fillings =p. Still (or even more) yummy of course! I had also tried liquid version (which didn't work), as well as gula melaka in cubes and grated. Oh and one last important point! Do not knock the batter in the cake pop molds to release air bubbles after you have added the fillings, they will sink and explode too =p. Finally, if you like even more fillings than the cake batter can handle, you can inject some gula melaka syrup using a piping tip or syringe, there will already be a "hole" in the middle of the cake from the gula melaka that was baked and melted.


With lots of love,
Susanne


Thursday, 8 March 2018

Rilakkuma Custard Cream Puffs

I made these Rilakkuma custard cream puffs along with my turtle Matcha cream puffs :)


I am posting this after I have tried another recipe for the Choux pastry case which I prefer as it's puffier. But I will still share the recipe I used here, which is still good. The pastry cream recipe will be one I am sticking with as it's smooth, yummy and I get to use up my excess egg yolks from making macarons or chiffon cakes. Both pastry cream and Choux pastry case recipes are adapted from Little Miss Bento.

Recipe for pastry cream (custard)
Ingredients:
200ml milk
35g caster sugar
18g cornflour, sifted
2 egg yolks
1/2 tsp vanilla extract (optional)
10g softened unsalted butter

Steps:
1. Whisk together egg yolks, cornflour and sygar in a bowl. Set aside.

2. Heat milk in saucepan until boiling. Remove and pour into egg yolk mixture in a slow and steady stream while whisking the egg yolk mixture continuously.

3. Pour the mixture back into saucepan and heat over medium-low heat while stirring continuously. Keep an eye on the mixture as it will start to thicken suddenly. Take it off the heat to continue stirring if necessary to prevent the custard from becoming lumpy, then put it back on the heat again. Keep heating and stirring until consistency is like smooth curd.

4. Remove from heat and stir in butter and vanilla. Transfer into another bowl and place a cling wrap over the surface, touching the custard. This is to prevent a skin from forming. Refrigerate until ready to fill the Choux pastry cases.

I made Matcha and plain pastry cream. I love the smoothness of the cream!

Recipe for Choux pastry cases

Similar to the recipe I used previously but this one has more butter, salt and sugar.

Ingredients (makes about 15 Rilakkuma heads):
75g water
50g milk
62g unsalted butter
1/2 tsp salt
1/2 tsp sugar
35g bread flour*
40g plain flour*
2 eggs, lightly beaten (may not use all)

* You may use either bread or plain flour only. Bread flour makes the pastry more crispy and stronger in structure but plain flour gives it a more delicate bite.

Steps:
1. Preheat oven to 180℃. Prepare the Choux pastry case. Place water, milk, salt and sugar in saucepan. Bring to a boil while stirring constantly. Once it reaches a roiling boil, pour mixture into the flour.

2. Use wooden spoon or spatula to mix well until a ball of dough forms. Return to saucepan and continue to stir over low heat for 2-3 minutes to cook the dough. Do not brown the dough. Remove from heat and let it cool for about 10 minutes.

3. Add egg a little at a time and mix well with each addition. Towards the end, test the consistency. It should fall off the spatula slowly and leave a streak that doesn't collapse on itself in the batter.

4. Transfer batter into piping bag with a hole cut at the end. Pipe circles according to the template drawn. Pipe the head, legs and tail. Use a finger wet with water to tap down any peaks, especially the small piped parts.

I used my macaron template for piping the rilakkuma heads

5. Bake at 180℃ for 20 min followed by 160℃ for another 20min. Turn off the oven and leave it in there for another 10 min. Do not open the oven door during baking as it may cause the pastry to deflate.

6. Use a knife or toothpick to pierce the side of the Choux cases while hot to release any steam.

Cool completely before decorating with melted compound chocolate. I melted the chocolate with a little vegetable shortening.

You may store baked cases in airtight container until you are ready to fill and serve. Undecorated cases can be toasted to make them crispy again. But if you have already added chocolate decoration, please don't reheat the cases.

Fill piping bag that has been fitted with a small piping tip with pastry cream. Make sure the hole at the side of the cases is large enough to insert the piping tip in before filling with pastry cream.

Best served immediately if possible. The contrast in texture between the crisp shell and cold, smooth pastry cream is the best when the cases have not turned soggy yet. You may store filled Choux pastries overnight in the fridge.

With love,
Phay Shing

Monday, 5 March 2018

Paw Patrol Chocolate Cake with Vanilla Swiss Meringue Buttercream & Strawberries

My friend requested for a Paw Patrol themed cake along with some cookies. Here's the chocolate chiffon cake with vanilla Swiss meringue buttercream and fresh strawberries, topped with macaron cake toppers!


I didn't just make one set of Chase, Marshall, Rubble, Skye and Rocky. I made three!


Some of the piped shells!

I was experimenting with replacing some water with lemon juice for the Italian meringue since my experiment with raspberry juice worked. It's something I won't try again as it changed the nature of the sugar syrup and made the batter seem significantly more hygroscopic. It took a long time for the shells to dry 😂. I noticed that the sugar syrup seemed runnier than usual even though I boiled the syrup to 118℃. The acidity from the lemon juice prevents sugar crystals from forming in the syrup to the extent that it seems to change its viscosity. I experimented twice actually, with the first batch ending up in the bin. In the first round, I replaced half the water with lemon juice. The second time, I only replaced 5g (1tsp) of water with lemon juice and it was better but still caused problems.

And so...I won't recommend using lemon juice in making Italian meringue. So please refer to the recipe here. You may refer to my Creative Baking: Macarons book for a systematic presentation of the basics and complex shaped macarons. You may refer to my video tutorials for macaron basics and piping of complex shapes on the blog too.

Freshly baked shells!

Decorating the shells also took quite a bit of patience and perseverance to see it to the end!

I used royal icing and edible black marker to add in the details.

I filled the macarons with filling that can allow for storage at cool room temperature for a week instead of fridge storage. This is because I used edible marker for quite a lot of the fine details and am afraid that condensation from refrigeration will cause the ink to smudge.

I filled the cake toppers with a mixture of dark chocolate, vegetable shortening, salt and vanilla bean paste 

I filled the loose pieces with homemade salted caramel in the middle and a ring of white chocolate or dark chocolate on the outside.

I used the same recipe for the chocolate chiffon cake as here to make two 9.5" cakes, except that I used the cooked dough method over here to bring out the chocolatey goodness from cocoa powder.

Freshly baked chocolate cakes!

Filling the middle with vanilla Swiss meringue buttercream and fresh strawberries.

I baked some green and blue thin sheets of chiffon cake to decorate the cake.


If you ever make macaron cake toppers for a fairly naked chiffon cake, remember to pack the macarons and cake separately as the moisture from the cake will cause the macarons to turn soggy.

Thank God that the birthday boy was really happy with his birthday cake :)

With love,
Phay Shing