Thursday, 31 October 2019

Pistachio and Dark Chocolate Salted Caramel Dinosaur Macarons (new filling recipe!)

I had a request for quite a large quantity of dinosaur macarons and I got the chance to try out a new flavour! Pistachio! I will share the recipe for this in the blog post.

Whimsical looking! 

I used the Swiss meringue method to make these dinosaurs and the recipe can be found in this post. I must admit it was a little tricky to get the shade of colour close to the reference. Here's a photo of the piped batter before baking.


Freshly baked shells! 

I used edible marker to add in the details like eyes, mouth, claws, spots and stripes. I used peach coloured lustre dust to brush on the rosy cheeks.


I filled the triceratops and stegosaurus with dark chocolate ganache and salted caramel. I filled the brontosaurus and Tyrannosaurus with pistachio white chocolate ganache. I am not familiar with working with nut based filling from scratch so it was a good learning experience for me. You may think that after baking for about six years I would know that nuts have to be roasted before you use them, otherwise the nutty flavour and aroma will not be strong. Well I only realised my mistake after making the filling because I was following a recipe that didn't make any mention about roasting or that roasted nuts were used 🤣. So yes please roast the nuts first! I adapted the recipe from here. My version contains a higher percentage of pistachios and is a lot less sweet because I substitute a substantial amount of white chocolate with cocoa butter.

Recipe for pistachio white chocolate ganache
Ingredients:
100g shelled raw pistachios (unsalted)
180g heavy cream
1 tsp Sea salt
100g cocoa butter chips or shavings
130g white chocolate, finely chopped

Steps:
1. Line a baking tray with parchment paper and spread out the pistachios in a single layer on the tray. Bake in preheated oven at 180°C for about 8 min, keeping an eye on the browning. The nuts should be ready when you can smell the nutty aroma.

2. Transfer roasted pistachios into a saucepan with heavy cream. Heat on medium heat until the cream just starts to bubble at the sides.

3. Remove saucepan from heat and blend the mixture until a thick paste forms.

4. Transfer the paste into a heatproof bowl and add salt, cocoa butter and white chocolate. Set it over a saucepan with freshly boiled water and mix with a spatula until all the white chocolate and cocoa butter are melted and incorporated.

5. Press a cling wrap on the surface of the ganache and refrigerate for 1 h or until firm but not rock hard. You may fill the macarons with this ganache as it is or you may whip it up with a spatula for a lighter texture.

Filling the shells! 

Packing these took quite some time too because there are so many!


Here's a picture of the dinosaurs at the party 😊


With love,
Phay Shing
Read More »

Tuesday, 29 October 2019

Flying Longevity Noodles Chiffon Cake


Flying Longevity Noodles Chiffon Cake (长寿面线), complete with abalone, red eggs, vegetables, prawns and chicken drumstick!🍜🍗🥬 I tried to pattern the porcelain bowl and mimic how a cracked boiled red egg would look like on the inside 😛. Basically I imagined the red dye seeping into the cracks and making red lines on the boiled eggs hehe.

Here are also my first attempts on abalone and bak choy (小白菜) 😅. It was really fun and a lot of love went into the cake! Which is your favorite ingredient?? 

This cake is in the same spirit as my previous Flying Ramen Chiffon Cake! I did a poll on my instagram and 60% like ramen more than longevity noodles hehe! You can read the previous post for more details! 

Anyway its a Chinese tradition to eat 长寿面线 during our birthdays, so it is a special treat. I remember fondly those days growing up eating the chicken soup, white vermicelli and red eggs on that special day! I think it is to wish the birthday person longevity and good health.

Hope this post warms your heart and gives you blessing or brings back memories! =)

With lots of love,
Susanne


Read More »

Thursday, 24 October 2019

Rainbow Unicorn Macaron Carousel on Chocolate Drip Cake

September was a month of chocolate drip cake and this was the third one I made in a month because it is really delicious! This is a special birthday bake because it's a combined birthday celebration for two girls who love unicorns and rainbows!


I used the Swiss meringue method to make the macarons as there are many colours involved. I must admit that it was really time consuming to pipe the unicorns. But the effort is quite worth it! The template for the pink carousel frame can be found in my Creative Baking: Macaron Basics book. You may use Italian method for making these macarons too as it also produces the same smooth finishing as Swiss method.

Just to share some photos of the process of putting together the carousel.

Freshly baked macaron shells

I painted the number 8 and unicorn horns using gold lustre dust dissolved in a little vodka. I filled in the eyes and hooves with edible markers


I filled the unicorns and the outer ring of the carousel frame filling with strawberry white chocolate. I filled the middle of the carousel frame with dark chocolate ganache (didn't take photo of it).

Filling with strawberry white chocolate


Completed carousel! 

Ever since I discovered that I can incorporate some cocoa butter into macaron filings that are white chocolate based, I have been adding it to make a firm filling while at the same time making it less sweet. Here's the revised strawberry white chocolate filling recipe that is firm enough for structures like macaron carousel.

Strawberry white chocolate recipe
Ingredients:
70g white chocolate, finely chopped or use chips
10g cocoa butter
20g vegetable shortening
1/8tsp salt
1.5 tsp strawberry emulco

Steps:
1. Place chocolate, cocoa butter and shortening in a microwave safe bowl and heat at medium-low power for 20sec and mix well. Repeat until mixture is smooth and melted. Be careful not to overheat. Alternatively, you may use double boiling method over a pot of freshly boiled water (but off the heat).

2. Add salt and mix well. Add strawberry psste/emulco half a tsp at a time and mix well with each addition.

3. Leave the mixture to firm up on the counter top until toothpaste consistency, about 20-40min. Transfer into piping bag to fill the shells.

I made a platform out of jumbo straws as dowels and a small cakeboard as the stand to place the carousel on top. The carousel is heavy enough that it's not advisable to place it directly on the cake.

I used Royal icing to pipe the names too! 

I hope this combination of unicorns, rainbow and delectable chocolate puts a smile on your face as it did to mine 😊.

With love,
Phay Shing
Read More »

Wednesday, 23 October 2019

'We Bare Bears' Rainbow Faultline Chiffon Cake


Always wanted to try a faultline cake.. Better late than never!

Here's my Rainbow🌈 Faultline chiffon cake, complete with the cutest We Bare Bears! 

Can you guess how this is done? Most normal faultline cakes are done by creaming an extra layer on the top and bottom. They are really beautiful!

But for my chiffon version, I baked 2 cakes, one plain and one rainbow and sandwiched the rainbow between two parts of the plain cake. I needed the height as well, as more faultline cakes are tall.

I love We Bare Bears! Check out my previous works here and with the We bare bear tag.

Hope you liked it too! =)

With lots of love,
Susanne


More loving chiffon cake creations here:

Read More »

Friday, 18 October 2019

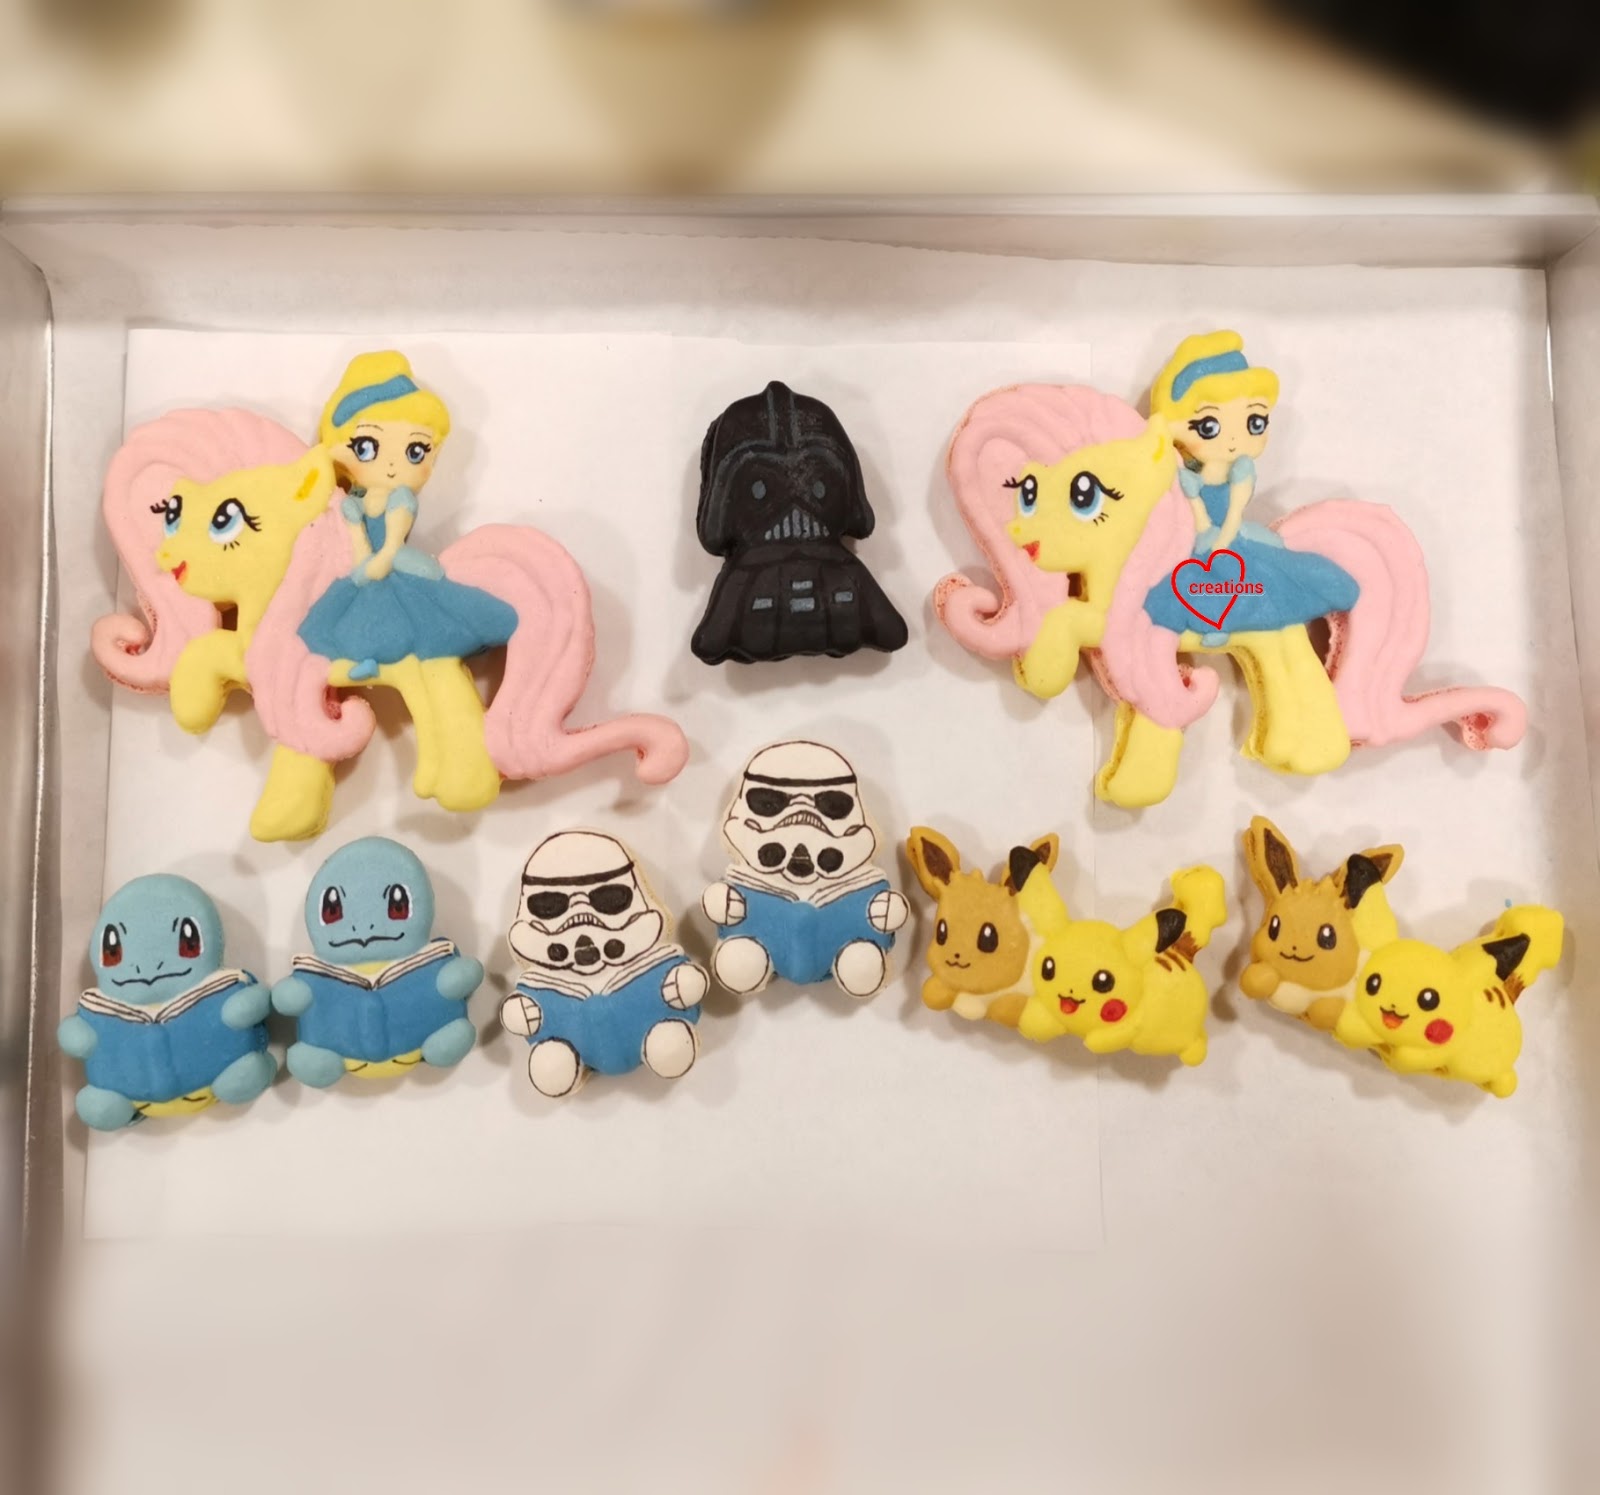
Cinderella on Fluttershy Chocolate Drip Cake

This was made for a little girl who is a fan of both Cinderella and My Little Pony!

Cinderella riding Fluttershy on top of a dark chocolate drip cake! 

I had to come up with my own template for this creation as you can't find this from the Internet. Only one giant cake topper was needed for the cake but for complex characters such as this, I usually make at least one extra in case of damage due to butter fingers. I used the Swiss method recipe to make this as I was working on another bake concurrently. Swiss and Italian methods are great when you have to work with many colours and complex shapes as the meringue takes. Longer time to break down. I just haven't revisited the Italian method for some time because I am lazy to make the syrup 🤣.

Piped batter

Decorating the shells with a mix of  Royal icing and edible markers. You can see the rest of the characters I was working on as well. 

Since the giant macaron is a cake topper for a chocolate cake, I filled it with dark chocolate ganache.


I used this recipe to make the chocolate cake here but did things slightly differently. I cut the sponge into 6" diameter and used a 1:1  ratio of dark chocolate : cream for the drip. I added a little charcoal powder to deepen the drip colour a little and added about 1-2 tsp of light corn syrup as well to give the drip a higher shine. I frosted the sides with whipped dark chocolate ganache and omitted the whipped salted caramel ganache.

I love the look of this cake! *bling bling*

Just some tip about macaron cake topper on such a cake. Do use a long wooden skewer to make holes in the cake where the cakepop sticks on the cake topper are supposed to go. Carefully insert the cake topper by handling the cakepop sticks. DO NOT press on the macaron itself to insert the topper as you may accidentally damage it. I pack the cake topper and cake separately as moisture released from the cake may turn the macarons soggy.

With love,
Phay Shing

Read More »

Thursday, 17 October 2019

Pusheen in Fall Chiffon Cake


Another Pusheen creation which I made exactly a year earlier! =) Now that it is fall, I remembered this cake. My Pusheen wearing a scarf, holding a toadstool. Those who know me know that Pusheen has a very very special place in my heart! I have had many Pusheen bakes, just search the tag =).

Hope you like this too!

With lots of love,
Susanne


Read More »

Friday, 11 October 2019

Rilakkuma, Korilakkuma and Kiiroitori Cookies n Cream Choux Pastries

I have been getting a lot of macaron requests but few choux pastry requests. I am not sure if it's because people don't really like choux pastry or they don't know that there's so much potential for creativity. And so, I decided to take one day out of my schedule to work on something to showcase what choux pastry can be like 😊. Presenting my full body version of Rilakkuma, Korilakkuma and Kiiroitori choux au craquelin filled with cookies n cream filling!


Pardon me for the lack of pictures as I was really hoping not to take too much time for this impromptu project but I am glad to share my experience.

You may refer to this post for detailed recipe of the choux pastry case. I always use craquelin for the main body of pastry cases as it controls the expansion of the pastry in the oven. But for small parts like ears and limbs, this is not necessary. One little trick I use to make it possible for a range of Deco Choux pastry designs is to get the batter to be as close as possible to the same colour as the craquelin you make. Do keep in mind that there will be some level of browning after baking so aim to go for a brighter, more neon shade that you would actually like when you add colouring to craquelin and batter.

This is the template I made for making the ears, limbs, beak and wings. I have detailed tips in my Deco Choux Pastries book on how you can assemble it on the main body with perfect fit.

Tenplate for ears, limbs, wings and beak. I made extras just in case 


Matching the colours of the batter and the craquelin may be a little tricky at first but with practice you get better at it.

Craquelin on top of piped batter 

I decorated the baked cases with royal icing and some bits of black candy melts..

By the time I was done with decorating the pastry cases, it was around 4 plus in the afternoon and I wanted to catch the sunlight for photography. So instead of making my usual lightened pastry cream which would take a good hour or so including chilling the pastry cream before lightening it up with whipped cream, I decided to go for a filling that can be whipped up in a matter of 5 minutes.

I have some frozen whipped topping left in my freezer so I just defrost it a little using the microwave oven and then whipped it up to stiff peaks. Added some crushed oreo cookies (I bought those without cream from Redman) and viola! I have an instant cookies and cream filling! Not exactly the best tasting since full dairy cream tastes way better than non dairy whipping cream but non dairy cream beats dairy hands down in terms of stability in hot Singapore. What I would recommend if you have the time and ingredients, is to use a mix of dairy and non dairy cream for the best compromise of stability and taste. Use double cream if you are able to as the higher the fat content, the more stable your whipped cream will be.

Non-dairy cookies n cream filling 
Ingredients:
90g whip topping*
30-45g crushed oreo cookies without filling

Steps:
1. Use and electric mixer to whip whip topping until stiff peaks.

2. Add crushed oreo cookies in a few batches to whipped cream and fold in using a spatula

3. Transfer into piping bag and fill the pastry cases just before consumption

*you may replace half with full dairy whipping cream with at least 35% fat.

My kids had fun eating this!

With love,
Phay Shing
Read More »

Thursday, 10 October 2019

Pikachu on Pokeball Chiffon Cake


Pika Pika! Have you caught Pikachu?

This is a cake I made for a friend, very similar to the one I made for my mum 3 years back, which was featured on Today online. How time flies and Pokemon go is still so popular!

Exam period for now.. Add oil everyone!

With lots of love,
Susanne


Read More »

Saturday, 5 October 2019

Reindeer Macaron Carousel Masterclass

So I am finally brave enough to conduct a macaron class for macaron carousel! I thought I would begin with Christmas themed carousel for my very first masterclass. Presenting my version of reindeer carousel!


This is an intensive course that spans over two days. You may ask why can't we finish it in a day? Technically speaking you can, but I want to focus on techniques for a whole lot of things in the areas of techniques for different methods of making macaron shells, different post-baking decorative techniques and two types of filling. You can read all about the content covered, along with the registration link over here.

With love,
Phay Shing
Read More »

Tuesday, 1 October 2019

Dark Muscovado Blondies with Salted Caramel Chips (50% less sugar)

Children's Day is just around the corner and I have been busy with a number of things. But this will be the last Children's Day that my elder kid is celebrating (how time flies!) so I am making it a point to squeeze in time to make something for my kids to share with their classmates and friends. What can a mama come up with that can be done in a single day (bake, pack and wash up) for approximately 80 kids that will likely be a hit for majority of kids? And bear in mind, doing this on top of cooking and housework and making sure hubby has my attention too.


I could have gone back to making fresh cream scones like I did for three consecutive years but then I remembered a baking experiment that hubby did a few months ago. He isn't a baker but had the urge to bake something simple and yummy to snack on so he made some blondies. I remember reaching for them when I was hungry because they are irresistible. If you don't know what Blondies are, they are similar to Brownies except that it's the non chocolate version.

Another reason why I settled on Blondies is because it is non chocolatey (some kids can't take chocolate or don't like chocolate, like my younger kid) and nuts are an optional item in it (nut allergy concerns for some kids) . It is strong in flavour and I make it a point to make it not too sweet as well. The original recipe that hubby adapted from contained double the amount of sugar that we used. You may refer to this blog post for the original recipe that I adapted from.

Due to the significant reduction in sugar, I baked the blondies in a smaller pan than what was recommended in the original recipe. I also baked the blondies in three 7x7" baking trays in three rounds of baking to produce 81 5x5cm squares of goodness. Some math is involved in determining exactly how many pans, rounds of baking and ingredients I need, which was why I set my planning for this bake as a math question for my younger kid to help me out.

This recipe is very much scalable and you can increase it based on number of eggs. A 1 egg portion yields 9 blondies for a 7x7" baking tray.

Recipe for blondies
Ingredients (makes nine 5-5.5cm blondies) :
110g dark muscovado sugar (or any brown sugar but the richer the sugar flavour, the more flavour your baked goods will have)
112g unsalted butter, melted
1 egg, lightly beaten
1 tsp vanilla extract
1/4 tsp caramel essence (optional but adds to the fragrance and flavour)
128g plain flour (use cake flour if you prefer a more tender bite)
1/2 tsp baking powder
1/8 tsp baking soda
1/8 tsp salt
30-50g salted caramel chips *

* you may replace with butterscotch chips, chocolate chips, peanut butter chips, walnuts, pecans, or a combination of the above according to your preference.

Steps:
1. Preheat oven to 175°C, set oven rack to middle position. Line the baking tray with parchment paper at the base and sides.

2. Whisk together sugar, salt and melted butter.

3. Add egg, vanilla extract and caramel essence. Whisk until a thick homogenous mixture is formed.

4. Sift together flour, baking powder and baking soda. Fold into wet mixture in a few additions using a spatula until just combined.

5. Fold in salted caramel chips or other goodies of your choice.

6. Pour into prepared tray and bake for 20-30min or until skewer comes out clean. Cool completely on cooling rack before slicing.

I needed to weigh out each portion to bake since I bake three 7x7" trays at a time in my oven. 

I trimmed off the sides of the freshly baked blondie before slicing into 5-5.5cm slices

My elder kid couldn't resist helping me with the mixing of ingredients because "Ma, that looks fun".... Compared to studying for the last paper for his exams 😂.

And because it is Children's day, I decided to add some colour to the bake by using a glaze and rainbow sprinkles. Here is the recipe for the glaze. You may scale up or down easily. Original recipe that is shared on multiple websites use water but you may use milk or in my case, I used some lemon juice. I also added caramel essence to it. This glaze hardens and dries pretty quickly when exposed to air. You can add as little or as much glaze as you like, or omit it all together. I just drizzled a little glaze on the sliced blondies and scattered rainbow sprinkles on top before letting it air dry for about 20 min.

Recipe for sugar glaze
Ingredients:
1 cup confectioners sugar (icing sugar with some cornstarch/cornflour already added)
1 tbs light corn syrup
1 tbs water
1 tbs lemon juice
1 tsp vanilla extract
1/2 tsp caramel essence

Steps:
Combine all of the above together and whisk until sugar is completely dissolved. Cover mixing bowl with cling wrap if not using it immediately. Stir again just before use.

Store baked goods in airtight condition at cool room temperature for a few days. You may freeze it for longer storage and toast it before serving.

Blessed Children's Day to all the kids!

With lots of love,
Phay Shing
Read More »

Sunday, 29 September 2019

Burger and Ice Cream Chiffon Cake Pops


Burger and Ice Cream Chiffon Cake Pops, which is your favorite? <3

Just sharing a cute and simple treat I made for a children's party, since Children's day is coming!

The burgers are more fluffy versions of the Cheeseburger chiffon cake pops I made previously, and the ice cream pops are mini 'cornetto' versions of the Ice cream pops I shared in Creative baking: Chiffon Cakes. Hope you like them!

Burger cake pops
Burger buns – chocolate chiffon cake
Beef patty – dark chocolate chiffon cake
Cheese – vanilla chiffon cake
Lettuce – pandan chiffon cake

Ice cream cake pops
Ice cream - vanilla chiffon cake
Cone - chocolate chiffon cake

The buns are baked in round silicone cake pop moulds. The beef patty, cheese and lettuce are cut from layer chiffon cake using round, square and leaf cutters respectively.

Cheeseburger chiffon pops (makes approximately 9)
3 egg yolks
20g castor sugar
39g corn/vegetable oil
40g milk
5g vanilla extract
60g cake flour
Cocoa powder (dark)
Pandan paste
Yellow food coloring (PME natural coloring)

Meringue:
4 egg whites
45g castor sugar
1/4 tsp cream of tartar

1. Preheat oven to 140°C.

2. Beat egg yolks with sugar with whisk till pale yellow before stirring in oil, water and vanilla extract.

3. Add in sieved flour and whisk till no trace of flour found.

4. Scoop out 6 tsp batter into 3 bowls each. To the first bowl, add 1 tsp dark cocoa powder (for beef patty). To the second bowl, add 1/4 tsp pandan paste (for lettuce). To the third bowl, add a drop of yellow food colouring (PME natural yellow coloring) (for the cheese). To the rest, add 1 tsp cocoa powder (for the bun). Mix well.

5. Meringue: Beat the egg whites with ¼ tsp cream of tartar till stiff peak, mixing in caster sugar in 2 additions.

6. Scoop over 12 tbsp meringue into each of the 3 bowls and gently fold in respectively. Fold in the rest of the meringue into the light cocoa batter in 3 additions.

7. Scoop the light cocoa batter into a cake pop mould (fill 18 round molds for 9 cake pop burgers). Bake at 140°C for 20-25 min, or until skewer inserted into centre comes out clean.

8. Pour the dark brown batter into a baking-paper lined 6-inch tray and bake at 140°C for 20 min. Do likewise for the pandan and yellow batter.

9. Leave the cake pop mold to cool on a wire rack once out of the oven and unmould by popping the pops out when cool.

10. Flip over the layer cakes onto a new baking paper and leave to cool covered by another sheet.

11. To assemble, cut out circles from the dark brown cake for the beef patty corresponding to the size of the ‘buns’ (cake pops). Cut out squares from the yellow cake for the cheese. Cut out ‘leaves’ from the pandan cake for the lettuce using a leaf cutter. Assemble just like how you would make a burger, using melted marshmallows to glue the parts together.


Ice cream chiffon cake pops (makes approximately 15)
Same recipe is used as above, however, batter is only divided into 2. Leave the first batter plain, for the ice cream. To the other half, add 1 tsp charcoal powder.

Bake the plain batter in cake pops molds as above at 140°C for 20-25 min and cocoa batter in paper cones (from SKP) and 140°C for 20-25 min. 

Assemble by sticking the parts together with melted marshmallows or inserting a cake pop stick through.


Hope they make you smile too! They were a big hit with the kids! =)


With lots of love! Happy Children's Day in advance!
Susanne


More loving chiffon cake creations here:


Read More »

Thursday, 26 September 2019

Matcha Azuki Bean Mini Cakes

If you are a fan of Matcha and Azuki beans in dessert, you will love this cake --- alternating layers of light matcha chiffon sponge and refreshing Matcha pudding with whole azuki beans!


I will be teaching how to make these mini cakes at Redman. I decided to use Sakura flowers and whole azuki beans for a simple and elegant decoration.

Please click on this link for more details and to register.

With love,
Phay Shing
Read More »

Wednesday, 25 September 2019

Duggee Chiffon Cake


Hey Duggee!!

Who will like a big Duggee Hug from me!! 🥰

Posting another of my backlogs.. I actually didn't know about the lovable dog Duggee, till my friend shared.

For this Duggee, I used dark pearl chocolate chiffon cake recipe, instead of the usual chocolate chiffon cake recipe. I liked it so much, I will share it below. It can be used in a normal 15-cm tube pan or ball pan. Hope you will like it!


Dark Pearl Chocolate Chiffon Cake (15-cm ball or tube pan)
2 egg yolks
8g castor sugar
26g vegetable/corn oil
29g milk
4g vanilla extract
40g cake flour
Pinch of chocolate emulco
15g dark chocolate
Pinch of baking powder

3 egg whites
35g castor sugar
¼ tsp cream of tartar

1. Preheat oven to 140°C. Prepare one 15-cm tube pan or ball pan.

2. Prepare egg yolk batter: Whisk egg yolk with sugar using hand whisk. Add in oil, water and vanilla extract and mix well at each step. Whisk in sifted cake flour and mix till no lumps.

3. Melt the dark chocolate (using microwave or double boiler). To the chocolate batter, add chocolate emulco and melted chocolate. Mix well.

4. Prepare meringue: In a grease-free, dry metal bowl, using electric mixer, whisk egg whites with cream of tartar till frothy. Add in castor sugar for meringue gradually and whisk at high speed till firm peaks form.

5. Spoon or pour the chocolate batter into the tube pan, leaving at least 2-cm from the brim.

6. Bake the tube pans at 140°C for 1 hr, or until a skewer inserted into the centre of cake comes out clean.

7. Leave the tube or ball pans (must invert) to cool completely on a wire rack, before unmoulding by hand.


Have a blessed week ahead! 💕

With lots of love,
Susanne

Read More »

Monday, 23 September 2019

Alpaca Cookies n Cream and Matcha Macarons

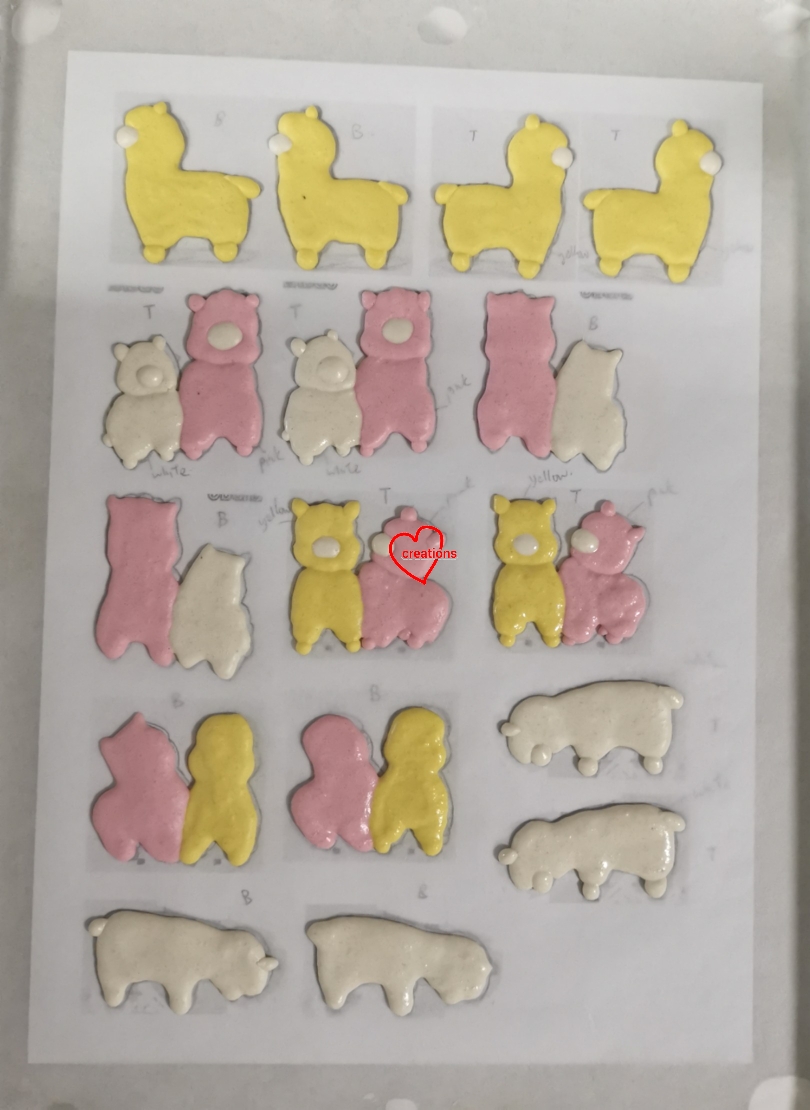
When given freedom to design a centerpiece with the theme "alpacas", this was what I came up with, along with a bunch of loose pieces of alpaca macarons 😊.

Whimsical land! 

I used the Swiss meringue method to make these but reduced sugar in the meringue since Audrey (my friend who shared the recipe) mentioned it works just as well. You may refer to this post for the detailed recipe. I reduced the castor sugar from 85g to 75g. Remember not to overbeat the meringue but beat it firm enough until it is able to form a firm peak (peak with a curled hook) when beater is slowly raised.

I love the mesmerising look of a well beaten meringue! 

Just to share some photos of piped batter...

Loose pieces of alpacas

Pieces of alpacas that go on the structure. I made an extra set just in case. 

I decorated the macaron shells with edible black marker and pink royal icing.

I have been including cocoa butter in my white chocolate based ganache nowadays since it works just as well and it makes the ganache less sweet too! I will share the recipe for the fillings here. Feel free to scale it up if you wish to make a bigger portion.

Matcha whipped white chocolate ganache
Ingredients:
45g white chocolate chips or finely chopped
10g cocoa butter shavings
10g unsalted butter
15g heavy cream
2 tsp Matcha powder, sifted
1/4 tsp vanilla bean paste
1/8 tsp salt

Steps:
1. Place white chocolate, cocoa butter, butter and cream in microwave safe bowl. Heat on medium-low power for 10 sec and mix well with spatula. Repeat heating and mixing until mixture is smooth. If there are stubborn pieces of chocolate or cocoa butter that refuse to melt, sieve them out. Be careful not to overheat. Press the chocolate/cocoa butter against sides of bowl during mixing to help them melt more evenly.

2. Add salt and vanilla and mix well. Add matcha powder in a few additions and mix well after each addition.

3. Chill in freezer for 1-2 min and mix well with spatula. Repeat chilling and beating until texture is light, smooth and creamy.


Cookies n cream Swiss meringue buttercream
Ingredients:
35g egg whites (about 1 egg)
22g castor sugar
1/8 tsp salt
60g unsalted butter, slightly softened but cool
1/2 tsp vanilla bean paste
32g oreo cookies without cream, crushed

Steps :
1. Place egg whites, castor sugar and salt in a clean metal mixing bowl. Set the bowl over a simmering pot of water without the water touching the base of bowl. Whisk continuously while monitoring the temperature of the egg whites wihh a candy thermometer. Keep whisking until temperature reaches 71.1°C.

2. Remove mixing bowl from heat and beat on medium high speed with electric mixer until cool to room temperature. The meringue should be able to form stiff peaks.

3. Gradually add butter and beat well with electric mixer fter each addition until fully incorporated.

4. Add vanilla and mix well. Fold in crushed oreo cookies.


I filled the "hill" pieces with the matcha filling on outer ring and Oreo filling in the middle.

Filling the "hill" 

I filled the alpacas with Oreo filling.

Filling the alpacas 

Store assembled macarons in fridge in airtight condition for at least 24h before eating. Let the macarons sit at room temperature for 15 min before opening the airtight container to prevent condensation from forming on the shells.

I glued the alpacas on the hill and created the grass using Royal icing. The flowers on the hill are store bought sugar flowers.

I hope this whimsical bake puts a smile on your face as it did mine 😊.

With love,
Phay Shing
Read More »

Monday, 16 September 2019

MSW Durian Chiffon Cake


Sorry for the delay in posting! I was away in Malaysia last week due to school holidays. Anyway, here to share a MSW Durian creation I made sometime back, inspired by a Mao Shan Wang Durian we had hehe =p. You can check out my previous post Durian Cottony Chiffon Cake I made for my dad 3 years back! =) I am still fine-tuning the recipe for this new version.

Hope you like it!

With lots of love,
Susanne


Read More »

Matcha Azuki Bean T-Rex Choux Pastry (class + giveaway!)

When I first made dinosaur themed choux pastries, I was thinking to myself I should conduct a class on how to make them, particularly the chubby T Rex!


I decided to make a more naturally coloured version this time, show casing Matcha and Azuki bean flavours. If you are interested in learning how to make these cute dinos, please click on this link for more details and to register for the class.

This is also the first time we are doing a giveaway of a very useful baking item together with the class! I requested for this as I find that it makes a huge difference to use perforated baking mats when baking choux pastries. It helps to retain the shape of the piped batter much better than if you piped and baked on parchment paper or silicone mat as the little holes in the mesh helps to anchor the pastry as it rises in the oven during baking. For small pastry parts or plain round choux it doesn't really matter which surface you pipe on but for the "main body" of non-standard shapes or eclairs, it does. You will get to experience the use of the perforated baking mat in class and bring home a brand new one after the class! Perforated mats are also great for baking tarts, cookies and breads so it's not just for choux pastries!

With love,
Phay Shing
Read More »

Tuesday, 10 September 2019

Reading Room Raspberry & Dark Chocolate Macarons

As far as whimsical bakes are concerned, I think this is one of my most whimsical ones. Presenting a reading room scene made out of macarons! Even the armchairs, lampshade and floor rug are made out of macarons!


Darth Vader is finding someone else's reading material interesting 🤣. 

You can guess what are some of the birthday man's favourite characters and what's his favourite hobby. I had fun coming up with this creation!

I used the Swiss meringue method to make the macarons as there are many colours involved and I needed a more stable meringue. You may refer to this post for the detailed recipe. Just to share some photos of the process...

Piping the characters

I made the armchairs using raspberry flavoured macaron shells and filling by adding freeze dried raspberry powder. 

You may refer to this post for the raspberry filling recipe. I replaced some white chocolate with cocoa butter to make the filling even less sweet. I made Royal icing that is close to the colour of the macaron shells to join the individual macaron pieces together.

Filling the characters with raspberry white chocolate ganache. I decorated the characters using edible markers and paint made by dissolving gel food colouring in vodka. 

Filling the base macaron with dark chocolate ganache and raspberry ganache. This is the largest circle base I have made so far, which is about 15cm. My macaron carousels have 13cm circles as the base. 

You my refer to this post for the recipe for dark chocolate ganache.


I hope this creation brought a smile to your face as it did mine 😊.

With love,
Phay Shing

Read More »